Introduction
Google Authenticator is a popular two-factor authentication app that provides an additional layer of security to your online accounts. By generating unique codes that refresh every few seconds, it ensures that only you can access your accounts, even if someone knows your password.
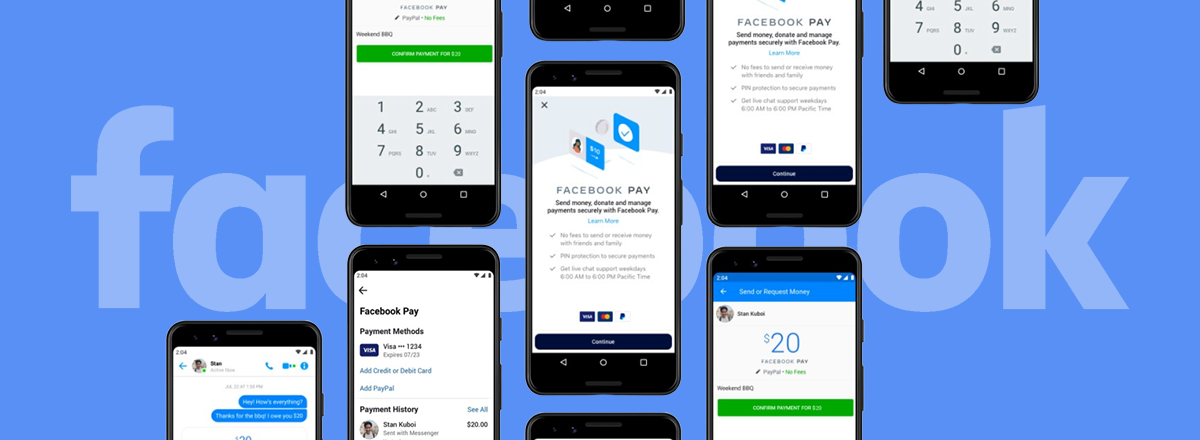
In this article, we will guide you on how to add Facebook to Google Authenticator. By doing so, you can enhance the security of your Facebook account and protect your personal information from unauthorized access.
With the increasing number of cyber threats and data breaches, it is crucial to take proactive measures to safeguard your online accounts. While Facebook already offers a range of security features, enabling two-factor authentication with Google Authenticator adds an extra level of protection.
By using Google Authenticator as your preferred authentication method, you add an additional layer of security to your Facebook account. This means that when you or someone else tries to log in to your account, a unique code will be required in addition to your password. Without this code, unauthorized users won’t be able to gain access.
This article will provide you with a step-by-step guide on how to set up and enable two-factor authentication for your Facebook account using Google Authenticator. By the end of this guide, you will have strengthened the security of your Facebook account and enhanced your overall online safety.
What is Google Authenticator?
Google Authenticator is a free app developed by Google that adds an extra layer of security to your online accounts. It works on both Android and iOS devices and provides a simple and convenient way to implement two-factor authentication.
Two-factor authentication (2FA) is a security feature that adds an additional step to the login process. In addition to entering your password, you will also need to provide a unique code generated by the Google Authenticator app. This code changes every 30 seconds, ensuring that even if someone manages to obtain your password, they won’t be able to access your account without the current verification code.
The Google Authenticator app uses a time-based one-time password (TOTP) algorithm to generate these verification codes. This algorithm creates a unique six-digit code based on a secret key shared between your device and the service you’re trying to log in to.
What sets Google Authenticator apart from other authentication apps is its simplicity and reliability. Once you set it up for an account, you can easily retrieve codes even when you don’t have an internet connection. This is especially useful when you’re traveling and don’t have access to mobile data or Wi-Fi.
In addition, Google Authenticator can be used with multiple online accounts, including email services, social media platforms, cryptocurrency exchanges, and more. This means you can manage all your two-factor authentication codes in one place, making it convenient and secure.
It’s important to note that while Google Authenticator is a highly recommended option for two-factor authentication, it’s always a good idea to have a backup method in case you lose your phone or face any issues with the app. Most services, including Facebook, allow you to set up multiple verification methods, such as recovery codes or hardware security keys, as alternatives to Google Authenticator.
Why Add Facebook to Google Authenticator?
Adding Facebook to Google Authenticator is a smart decision to enhance the security of your Facebook account. Here are a few reasons why you should consider enabling two-factor authentication for Facebook using Google Authenticator:
- Prevents unauthorized access: By enabling two-factor authentication, you add an extra layer of security to your Facebook account. Even if someone manages to obtain your password, they won’t be able to access your account without the verification code generated by Google Authenticator.
- Protects your personal information: With the increasing prevalence of online threats and data breaches, it’s crucial to protect your personal information. Enabling two-factor authentication adds an additional barrier to prevent unauthorized individuals from accessing your account and sensitive information.
- Enhances online safety: Cyberattacks, such as phishing attempts and credential theft, are constantly evolving. By using Google Authenticator for two-factor authentication, you significantly reduce the risk of falling victim to these attacks. The dynamic verification codes generated by the app provide an extra level of protection.
- Improves password security: Many people tend to reuse passwords across multiple accounts, which can be risky. By using two-factor authentication, even if your password gets compromised on another platform, your Facebook account remains secure.
- Eases account recovery: In case you ever forget your Facebook password or get locked out of your account, having two-factor authentication enabled with Google Authenticator can make the account recovery process smoother and more secure. You can easily regain access by providing the verification code generated by the app.
Note: Enabling two-factor authentication for Facebook is just one step towards better account security. It’s important to practice other security measures such as using strong, unique passwords, regularly updating your device’s operating system and security software, and being cautious of phishing attempts.
Step-by-Step Guide
Follow the steps below to add Facebook to Google Authenticator for enhanced account security:
- Step 1: Download and install the Google Authenticator app from the App Store (iOS) or Google Play Store (Android) on your mobile device.
- Step 2: Open the Facebook app on your device and go to the Settings menu.
- Step 3: Select “Security and Login” from the Settings menu.
- Step 4: Under “Two-Factor Authentication,” click on “Use two-factor authentication.”
- Step 5: Select “Authentication App” as your preferred method for two-factor authentication.
- Step 6: Open the Google Authenticator app on your device and click on the “+” icon to add a new account.
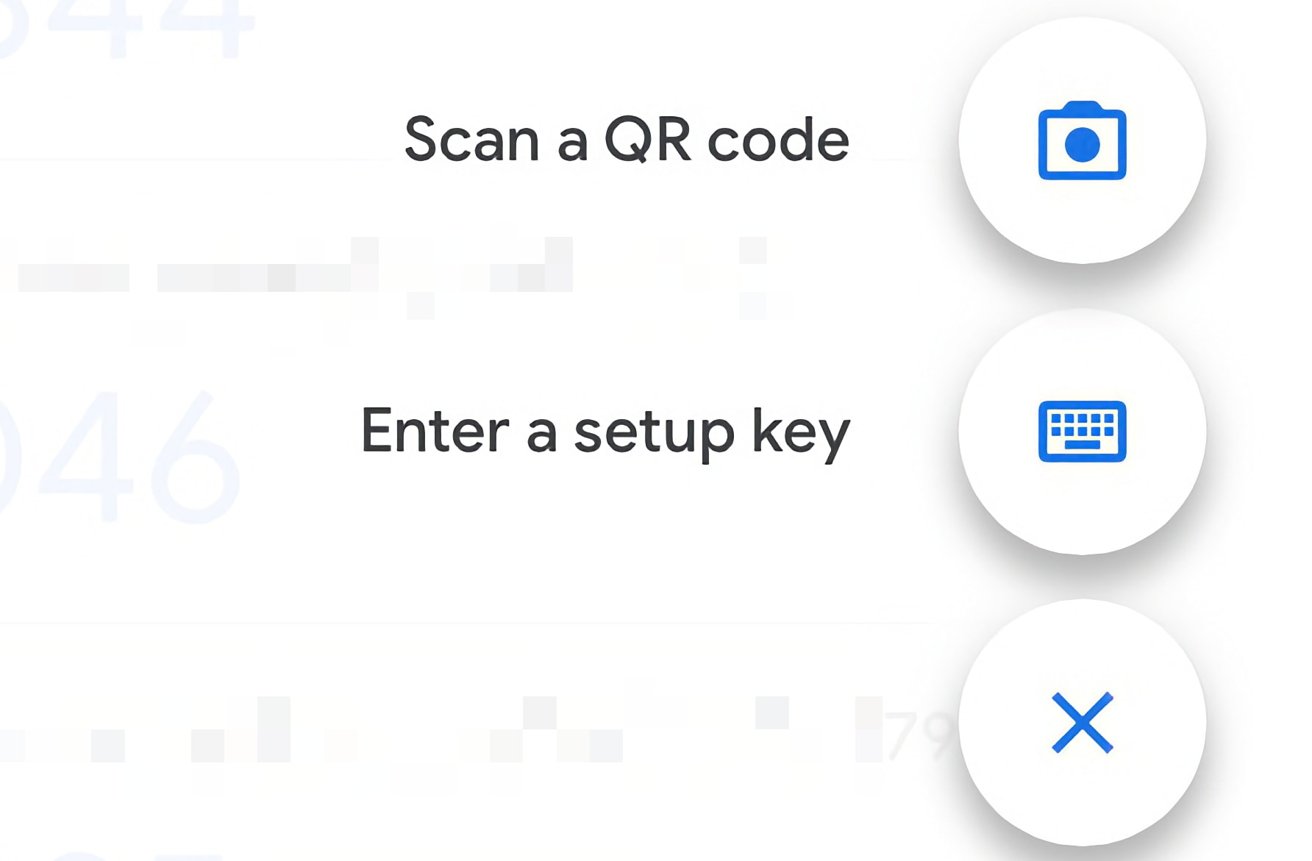
- Step 7: Choose “Scan barcode” or “Enter a setup key” option in the Google Authenticator app.
- Step 8: If you choose to scan the barcode, point your device’s camera at the QR code provided by Facebook. If you opt for the setup key, manually enter the key provided by Facebook.
- Step 9: Confirm the setup by entering the verification code generated by Google Authenticator into the designated field in the Facebook app.
- Step 10 (Optional): Enable App Passwords in the Facebook app if you use third-party apps (like gaming consoles or third-party email clients) that require access to your Facebook account. This will generate unique passwords for those apps.
By following these steps, you will successfully add Facebook to Google Authenticator and enable two-factor authentication for your Facebook account. From now on, whenever you log in to Facebook, you will need to provide the current verification code generated by the Google Authenticator app in addition to your password.
Remember to keep your mobile device secure and back up your two-factor authentication codes in case you lose your device or need to set up Google Authenticator on a new device. Additionally, make sure to keep your Google Authenticator app up to date to benefit from the latest security features and improvements.
Step 1: Download and Install the Google Authenticator App
The first step to adding Facebook to Google Authenticator is to download and install the Google Authenticator app on your mobile device. Follow the instructions below:
For Android:
- Open the Google Play Store on your Android device.
- Search for “Google Authenticator” in the search bar.
- Select the official Google Authenticator app from the search results.
- Tap the “Install” button to begin the installation.
- Once the app is installed, tap the “Open” button to launch Google Authenticator.
For iOS:
- Open the App Store on your iOS device.
- Search for “Google Authenticator” in the search bar.
- Select the official Google Authenticator app from the search results.
- Tap the “Get” button, and then tap “Install” to begin the installation.
- Once the app is installed, tap the app icon on your home screen to launch Google Authenticator.
After you have successfully installed the Google Authenticator app, you are ready to proceed to the next step.
Note: It is recommended to download the Google Authenticator app from the official app stores (Google Play Store for Android and App Store for iOS) to ensure that you are installing the official and updated version of the app.
By completing this step, you have successfully downloaded and installed the Google Authenticator app on your mobile device. This app will be used to generate the unique verification codes that you will need to add Facebook to Google Authenticator and enable two-factor authentication for your Facebook account.
Step 2: Open the Facebook App and Go to Settings
Once you have downloaded and installed the Google Authenticator app, the next step is to open the Facebook app on your mobile device and navigate to the Settings menu. Follow the instructions below:
- Launch the Facebook app on your device by tapping on the Facebook icon.
- On the main screen, look for the three horizontal lines or the “More” tab at the bottom right corner of the screen. Tap on it to open the Facebook menu.
- Scroll down the menu and find the “Settings & Privacy” section. Tap on it to expand the options.
- Select “Settings” from the expanded options, which will open the Facebook Settings menu.
After completing this step, you will be in the Facebook Settings menu, ready to proceed to the next step.
Note: The steps may slightly vary depending on the version of the Facebook app and the operating system you’re using. However, the general process remains the same – look for the Settings menu within the Facebook app.
By following this step, you have successfully opened the Facebook app on your mobile device and navigated to the Settings menu. In the next step, we will proceed to the “Security and Login” section, where you will find the options to enable two-factor authentication for your Facebook account.
Step 3: Select “Security and Login”
After accessing the Facebook Settings menu, the next step is to find and select the “Security and Login” option. Follow the instructions below:
- In the Facebook Settings menu, scroll down until you see the “Security and Login” section. Tap on it to expand the options.
- Within the “Security and Login” section, you will find various security settings and options to protect your Facebook account.
- Tap on “Security and Login” to access the detailed settings for your account’s security features.
Once you have completed this step, you will be in the “Security and Login” section of the Facebook app, where you can access and manage various security settings to protect your Facebook account.
Note: Depending on the version of the Facebook app and the device you’re using, the location of the “Security and Login” section may vary slightly. However, it is usually listed under the “Settings” menu and easily accessible.
By following this step, you have successfully selected the “Security and Login” option within the Facebook app. In the next step, we will explore how to enable two-factor authentication for your Facebook account using Google Authenticator.
Step 4: Click on “Use Two-Factor Authentication”
Once you have accessed the “Security and Login” section in the Facebook app, the next step is to enable two-factor authentication for your account. Follow the instructions below:
- In the “Security and Login” section, scroll down until you find the “Two-Factor Authentication” option. Tap on it to continue.
- On the next screen, you will see various options for two-factor authentication. Look for the “Use two-factor authentication” option and tap on it.
By clicking on “Use two-factor authentication”, you are activating this security feature for your Facebook account.
Note: Facebook offers multiple two-factor authentication methods, including SMS text message codes, security keys, and authentication apps. In this guide, we are specifically focusing on using Google Authenticator as the preferred authentication app.
Enabling two-factor authentication adds an extra layer of security to your Facebook account, ensuring that only you can access it, even if someone has your password. By doing this, you significantly reduce the risk of unauthorized access to your account and protect your personal information from potential threats.
By completing this step, you have successfully clicked on “Use two-factor authentication” within the Facebook app. In the next step, we will explore how to specifically choose the “Authentication App” method using Google Authenticator for your two-factor authentication setup.
Step 5: Choose “Authentication App” as Your Preferred Method
After enabling two-factor authentication for your Facebook account, the next step is to choose “Authentication App” as your preferred method. Follow the instructions below:
- In the “Two-Factor Authentication” section, scroll down to find the list of available authentication methods.
- Look for the “Authentication App” option and tap on it to select it as your preferred method.
By choosing “Authentication App,” you are opting to use Google Authenticator as the app that will generate the verification codes for your Facebook account.
Facebook offers various authentication methods, including text messages, security keys, and authentication apps. However, using an authenticator app, such as Google Authenticator, provides a more secure and reliable option for generating verification codes.
Note: Before proceeding to the next steps, make sure you have already downloaded and installed the Google Authenticator app on your mobile device as mentioned earlier.
In this step, you have successfully selected “Authentication App” as your preferred method for two-factor authentication in Facebook. The next steps will guide you through the process of setting up Google Authenticator with your Facebook account.
Step 6: Open Google Authenticator App and Click on the “+” Icon
With “Authentication App” selected as your preferred method for two-factor authentication in Facebook, the next step is to open the Google Authenticator app on your mobile device. Follow the instructions below:
- Locate the Google Authenticator app on your mobile device and tap to open it.
- Once the app is open, you will see a list of accounts (if any) that you have already added to Google Authenticator.
- To add your Facebook account, click on the “+” or “Add” icon, usually located in the top-right corner of the app interface. This will start the process of adding a new account to Google Authenticator.
By clicking on the “+” icon, you are initiating the process of adding your Facebook account to Google Authenticator, allowing it to generate verification codes for your Facebook login.
Note: If you have already set up other accounts in Google Authenticator, such as email or other social media accounts, you will see them listed. Adding your Facebook account as a new entry helps keep your authentication codes organized and easily accessible.
By completing this step, you have successfully opened the Google Authenticator app on your mobile device and clicked on the “+” icon. In the next step, we will explore how to scan the barcode or enter the setup key provided by Facebook to add your Facebook account to Google Authenticator.
Step 7: Select “Scan Barcode” or “Enter a Setup Key”
After opening the Google Authenticator app, the next step is to choose between scanning a barcode or entering a setup key to add your Facebook account. Follow the instructions below:
- Once you have clicked on the “+” icon in Google Authenticator, you will be presented with two options: “Scan barcode” or “Enter a setup key.”
- If you choose to scan the barcode, tap on the “Scan barcode” option. This will activate your device’s camera.
- If you prefer to enter the setup key manually, tap on the “Enter a setup key” option.
If you select “Scan barcode,” the Google Authenticator app will use your device’s camera to scan the barcode provided by Facebook. If you choose “Enter a setup key,” you will manually enter the setup key provided by Facebook.
Note: The setup key is a unique and alphanumeric code provided by Facebook during the two-factor authentication setup process. This key ensures the correct linkage between your Facebook account and the Google Authenticator app.
By completing this step, you have successfully selected either “Scan barcode” or “Enter a setup key” in the Google Authenticator app. In the next step, we will explore the process for scanning the barcode or entering the setup key to link your Facebook account to Google Authenticator.
Step 8: Scan the Barcode or Manually Enter the Setup Key Provided by Facebook
Upon selecting “Scan barcode” or “Enter a setup key” in the Google Authenticator app, the next step is to link your Facebook account by scanning the barcode or manually entering the setup key. Follow the instructions below:
- If you chose “Scan barcode,” hold your mobile device steady and align the camera with the barcode displayed on the Facebook screen. The Google Authenticator app will automatically detect and scan the barcode.
- If you selected “Enter a setup key,” manually enter the alphanumeric setup key provided by Facebook into the designated field in the Google Authenticator app.
By scanning the barcode or entering the setup key, you are establishing a secure connection between your Facebook account and the Google Authenticator app.
Note: The barcode or setup key provided by Facebook is unique to your account and should not be shared with anyone. This information is used to synchronize your Facebook account with Google Authenticator, ensuring that it generates the correct verification codes for your login.
After successfully scanning the barcode or entering the setup key, the Google Authenticator app will automatically add your Facebook account to its list of accounts. From now on, it will generate time-based verification codes specifically for your Facebook login.
By completing this step, you have successfully linked your Facebook account to the Google Authenticator app by scanning the barcode or entering the setup key provided by Facebook. In the next step, we will explore how to confirm the setup by entering a verification code from Google Authenticator.
Step 9: Confirm the Setup by Entering the Code from Google Authenticator
After linking your Facebook account to the Google Authenticator app, the next step is to confirm the setup by entering a verification code generated by Google Authenticator. Follow the instructions below:
- In the Facebook app, you will be prompted to enter a verification code to confirm the setup. This code is generated by the Google Authenticator app.
- Open the Google Authenticator app on your mobile device.
- Locate the entry for your Facebook account in the Google Authenticator app.
- Within the entry for your Facebook account, you will see a six-digit verification code that refreshes every 30 seconds.
- Enter the current verification code displayed in the Google Authenticator app into the designated field in the Facebook app.
By entering the verification code from the Google Authenticator app, you are confirming the setup of two-factor authentication for your Facebook account.
Note: The verification code generated by the Google Authenticator app is time-based and changes every 30 seconds. Make sure to enter the current code displayed in the app at the moment you are prompted for it in the Facebook app.
Upon successful entry of the verification code, Facebook will recognize the code as valid and enable two-factor authentication for your account using Google Authenticator. You can now enjoy the added security and protection of two-factor authentication for your Facebook login.
By completing this step, you have successfully confirmed the setup of two-factor authentication for your Facebook account by entering the verification code from the Google Authenticator app. In the next step, we will explore an optional step for enabling App Passwords in Facebook.
Step 10: Enable App Passwords (Optional)
In addition to enabling two-factor authentication using Google Authenticator, Facebook offers an optional feature called “App Passwords.” App Passwords allow you to generate unique passwords specifically for third-party apps that require access to your Facebook account. Follow the instructions below if you wish to enable this feature:
- In the Facebook app, go to the “Settings & Privacy” menu and select “Settings.”
- Scroll down to the “Security” section and tap on it to expand the options.
- Look for the “App Passwords” option and tap on it.
- Enter your Facebook account password when prompted.
- Tap on the “Generate App Password” button.
- A unique app password will be generated for each app you want to connect to your Facebook account.
- Copy the generated app password and use it when configuring the third-party app that requires access to your Facebook account.
Enabling App Passwords provides an extra layer of security by using unique passwords for third-party apps, ensuring that your Facebook credentials remain secure.
Note: Not all apps require an App Password. Most modern apps support logging in with two-factor authentication directly from the main Facebook login screen.
If you don’t use any third-party apps that require access to your Facebook account, you can skip this step. However, if you utilize apps like gaming consoles, email clients, or other services that need to interact with your Facebook account, enabling App Passwords is beneficial.
By completing this step, you have successfully enabled App Passwords on your Facebook account, providing an additional layer of security for third-party app access. Congratulations! You have completed the setup process for adding Facebook to Google Authenticator and enhancing the security of your Facebook account.
Conclusion
Adding Facebook to Google Authenticator is a simple yet effective way to enhance the security of your Facebook account. By enabling two-factor authentication, you add an extra layer of protection, ensuring that only you can access your account. Through the use of the Google Authenticator app, you generate unique verification codes that are required alongside your password during the login process.
In this step-by-step guide, we have walked you through the process of adding Facebook to Google Authenticator. From downloading and installing the Google Authenticator app to confirming the setup by entering the verification code, each step is designed to help you secure your Facebook account.
By activating two-factor authentication, you significantly reduce the risk of unauthorized access to your account and enhance your overall online safety. It provides an additional barrier against cyber threats such as phishing attempts, and it protects your personal information and sensitive data from being compromised.
Remember, effective security measures are not limited to just enabling two-factor authentication. It is essential to practice other security measures, like using strong and unique passwords, regularly updating your device’s software, and being aware of potential phishing attacks.
By following this guide, you have taken a proactive step towards protecting your Facebook account. Stay vigilant, keep your Google Authenticator app updated, and make sure to keep your mobile device secure. With these precautions in place, you can enjoy a safer and more secure online experience.
Congratulations on securing your Facebook account with two-factor authentication using Google Authenticator! Your commitment to securing your online presence is commendable, and you can now enjoy the peace of mind that comes with knowing your account is better protected.