Introduction
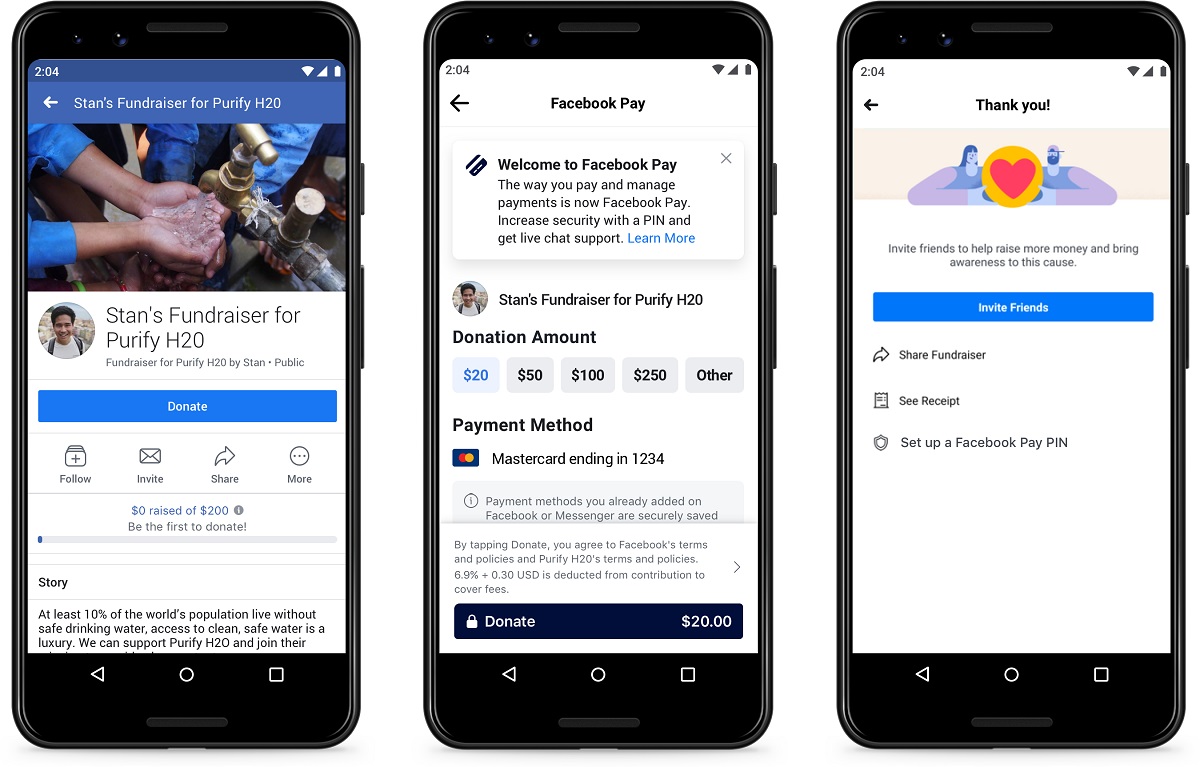
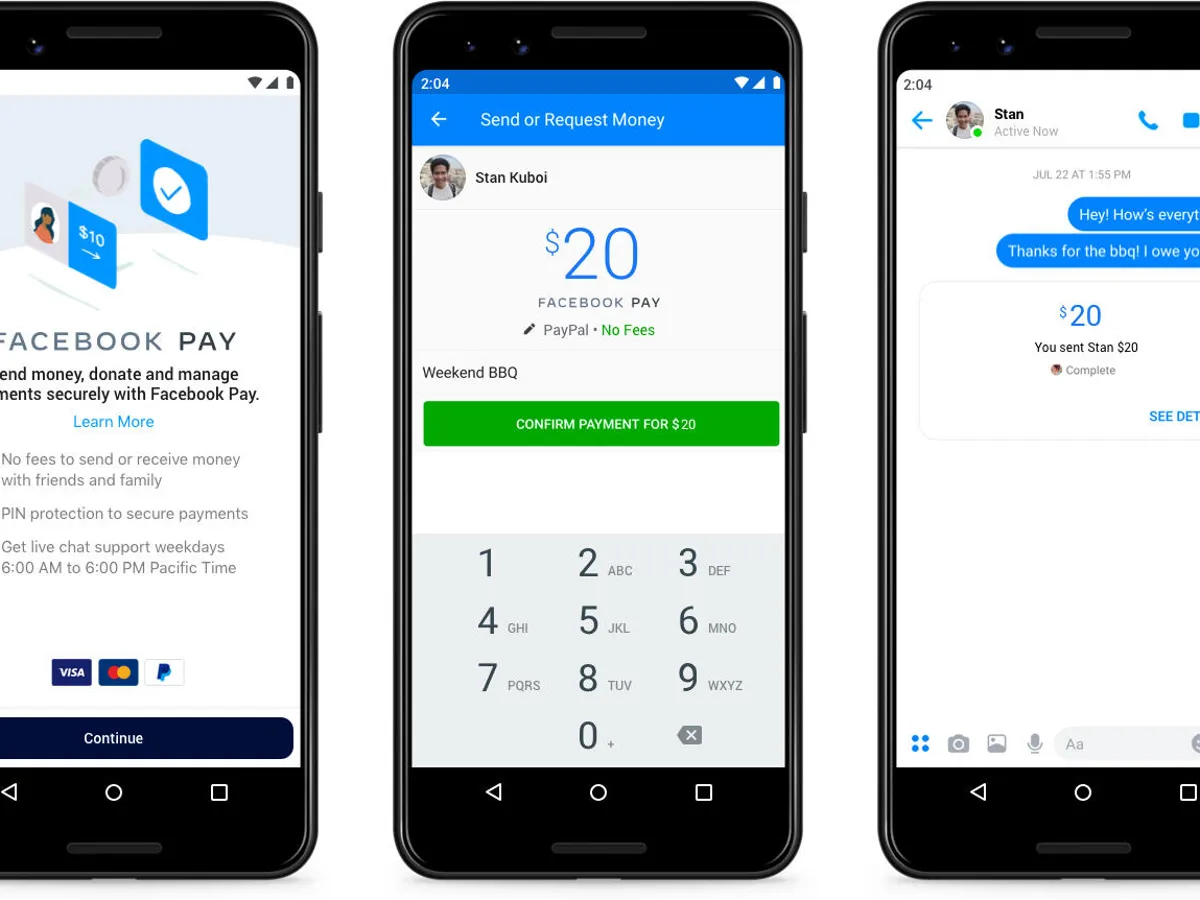
Facebook Pay is a convenient feature that allows you to make payments on the Facebook platform. By linking your debit card to Facebook Pay, you can easily make purchases, send money to friends, and even donate to causes directly from within the Facebook app. In this guide, we will walk you through the step-by-step process of adding your debit card to Facebook Pay, so you can start enjoying a seamless payment experience on Facebook.
Adding your debit card to Facebook Pay offers numerous benefits. It provides a secure and convenient way to make payments without having to enter your card information every time you want to make a purchase. Plus, with Facebook Pay, you can easily keep track of your payment history and manage your payment methods within the app. Whether you want to buy products from the Facebook Marketplace, send money to friends, or make donations to your favorite charities, having your debit card linked to Facebook Pay makes these transactions quick and effortless.
Don’t worry, adding your debit card to Facebook Pay is a simple and straightforward process. By following the steps outlined in this guide, you’ll be able to link your debit card to your Facebook account in no time. So, let’s dive in and get started with adding your debit card to Facebook Pay!
Step 1: Open the Facebook app
To begin the process of adding your debit card to Facebook Pay, you’ll need to open the Facebook app on your mobile device. If you haven’t already done so, ensure that you have the latest version of the Facebook app installed on your device.
Once you have the app open, log in to your Facebook account using your credentials. Make sure you are using a secure internet connection to protect your personal information while accessing the app.
Upon successfully logging in, you’ll be directed to your Facebook News Feed, where you can see updates from your friends, family, and the pages you follow. The app’s interface may vary slightly depending on the operating system of your device, but the steps for adding your debit card to Facebook Pay remain the same.
If you’re having trouble finding the Facebook app on your device, you can search for the app icon on your home screen or in the app drawer. If you don’t have the app installed on your device, you can download it for free from the Apple App Store or Google Play Store, depending on whether you’re using an iOS or Android device.
Once you have the Facebook app open and you’re logged in to your account, you’re ready to move on to the next step of linking your debit card to Facebook Pay. Continue following this guide for a seamless and hassle-free process.
Step 2: Go to Settings & Privacy
After opening the Facebook app and logging in to your account, the next step to add your debit card to Facebook Pay is to navigate to the Settings & Privacy section.
To do this, locate the menu icon in the top-right corner of the app. It appears as three horizontal lines stacked on top of each other. Tap on this menu icon to expand the navigation menu.
Once the navigation menu is open, scroll down until you find the “Settings & Privacy” option. Tap on it to access the various settings and privacy options for your Facebook account.
Within the Settings & Privacy menu, you’ll find a range of options that allow you to customize your Facebook experience and control your privacy settings. These options are designed to give you greater control over how your information is shared and who can see your personal details.
Locate and tap on the “Settings” option to proceed to the next step of adding your debit card to Facebook Pay. This will open the Settings menu, where you can customize your account preferences and manage various aspects of your Facebook profile.
Now that you’re in the Settings menu, you’re one step closer to successfully linking your debit card to Facebook Pay. Stay tuned for the next step in the process, which will guide you through the necessary actions to enable Facebook Pay on your account.
Step 3: Select Facebook Pay
Once you’re in the Settings menu of the Facebook app, the next step in adding your debit card to Facebook Pay is to locate and select the “Facebook Pay” option. This will take you to the section where you can manage your payment methods and make transactions.
Scroll down through the list of settings until you find the “Facebook Pay” option. It may be located under the “Payment Settings” or “Payments” section of the menu, depending on the version of the Facebook app you’re using.
Tapping on the “Facebook Pay” option will open a new page dedicated to managing your payment methods and settings. Here, you can view your existing payment methods, add new ones, and make changes to your preferred payment options.
If you’ve previously set up Facebook Pay, you’ll see your current payment methods displayed on this page. This includes any linked credit or debit cards, as well as any saved payment information you may have.
If you haven’t set up Facebook Pay yet or want to add a new payment method, continue to the next step to learn how to add your debit card and enjoy the convenience of making payments within the Facebook app.
Now that you’ve selected the “Facebook Pay” option in the Settings menu, you’re ready to move on to the next step of adding your debit card to Facebook Pay. Follow the remaining steps in this guide to complete the process successfully.
Step 4: Tap on Add Payment Method
Once you’re in the Facebook Pay section of the Settings menu, the next step to add your debit card is to tap on the “Add Payment Method” option. This will initiate the process of linking your debit card to your Facebook account.
Scroll down the Facebook Pay page until you find the “Add Payment Method” option. It is usually located under the list of your existing payment methods. Tap on it to proceed.
By selecting the “Add Payment Method” option, you’ll be taken to a new page where you can enter your card information and set it up as your preferred payment method within Facebook Pay.
At this point, you should have your debit card details readily available. Make sure you have the card number, expiration date, and security code (CVV) handy before proceeding. It’s essential to enter this information accurately to avoid any issues with adding your card.
Once you’re ready, tap on the “Add Payment Method” option to proceed to the next step, where you’ll be prompted to enter your debit card details.
Now that you’ve tapped on “Add Payment Method,” you’re one step closer to successfully linking your debit card to Facebook Pay. Stay tuned for the next step, which will guide you through the process of entering your debit card details accurately.
Step 5: Choose Debit Card
After tapping on the “Add Payment Method” option, you’ll be presented with a list of available payment methods. In this step, you need to choose the “Debit Card” option to link your debit card to Facebook Pay.
On the page where you’re prompted to add your payment method details, you may see a range of options, including credit cards, PayPal, and other payment providers. However, since you want to link your debit card, make sure to select the “Debit Card” option specifically.
Tapping on the “Debit Card” option will redirect you to a form where you can enter the necessary details to link your debit card successfully. The page will prompt you to enter your card number, expiration date, CVV (security code), and possibly the card’s billing address.
It’s crucial to double-check that you’re selecting the correct option and entering the correct card details to avoid any issues or errors in the linking process.
Once you’ve chosen the “Debit Card” option and are confident in the accuracy of your card details, proceed to the next step, where you’ll enter your debit card information into the designated fields.
Now that you’ve selected the “Debit Card” option, you’re ready to move forward in linking your debit card to Facebook Pay. Continue following this guide to successfully complete the process.
Step 6: Enter Card Details
After choosing the “Debit Card” option, you’ll be prompted to enter your card details accurately. This step is crucial in ensuring a seamless and secure integration of your debit card with Facebook Pay.
The form will require you to enter the card number, expiration date, CVV (security code), and potentially the billing address associated with your debit card. These details are necessary for Facebook to authenticate your card and ensure secure transactions.
Take your time to carefully enter the information requested. Double-check the card number to ensure its accuracy, ensuring there are no typos or missing digits. Then, enter the correct expiration date and CVV found on the back of your card. Lastly, if prompted, enter the billing address that matches the one associated with your debit card.
It’s important to note that Facebook takes your security seriously and uses industry-standard encryption protocols to protect your card details. This ensures that your information remains confidential and secure during the linking process.
Once you’ve entered all the required card details correctly, proceed to the next step, where you’ll be prompted to verify your card.
Now that you’ve successfully entered your debit card details, you’re one step closer to linking your card to Facebook Pay. Stay tuned for the next step, which will guide you through the card verification process.
Step 7: Verify Your Card
After entering your debit card details, the next step is to verify your card to ensure its authenticity and integrity within the Facebook Pay system.
Upon submitting your card information, Facebook will initiate the verification process. This process varies depending on your card provider and the security measures they have in place. Typically, the verification process involves a small temporary charge made to your debit card.
It’s important to note that the temporary charge is not a fee or a transaction; it is simply used to verify the validity of your card. The amount charged is usually minimal and is refunded back to your account once the verification is complete.
To complete the card verification process, you may need to check your bank statement or online banking platform to locate the temporary charge. Once you’ve identified the charge, note the exact amount and return to the Facebook app.
In the Facebook app, navigate back to the Facebook Pay section within the Settings menu. Locate the option to verify your card and follow the prompts provided. You may be asked to enter the amount of the temporary charge or verify it in another way.
By successfully verifying your debit card, you ensure that it is securely linked to your Facebook Pay account, allowing you to make seamless transactions and payments on the platform.
Once you’ve completed the card verification process, you’re ready for the next step, where you can set up additional security measures for your Facebook Pay account.
Now that your debit card is verified, you’re getting closer to fully utilizing Facebook Pay. Stay tuned for the next step, where we’ll guide you through setting up essential security measures.
Step 8: Set Up Security
Ensuring the security of your debit card and Facebook Pay transactions is paramount. In this step, we’ll guide you through setting up essential security measures to protect your card information and prevent unauthorized access to your account.
Within the Facebook Pay section of the Settings menu, look for the option to set up security settings or enable additional security measures. This may include features such as enabling two-factor authentication, setting a strong password, or adding a biometric lock.
Enabling two-factor authentication adds an extra layer of security to your Facebook account by requiring a secondary verification code in addition to your password. This code is sent to your registered mobile number or email address, ensuring that only you can access your account.
Setting a strong and unique password for your Facebook account is crucial in preventing unauthorized access. Make sure to create a password that combines both uppercase and lowercase letters, numbers, and special characters. Avoid using common words or easily guessable information.
If your device supports biometric authentication, such as fingerprint or facial recognition, consider enabling it for added security. This ensures that only you can unlock and access your Facebook Pay account.
These security measures not only protect your debit card information but also safeguard your overall Facebook account from potential threats and intrusions.
Once you’ve set up the necessary security measures, your Facebook Pay account will be well-protected and ready for secure transactions.
Now that you’ve taken the necessary steps to enhance the security of your Facebook Pay account, you’re almost to the final step. Let’s move on to the next section, where you can confirm and save your debit card details.
Step 9: Confirm and Save
In this final step, it’s time to confirm and save your debit card details within the Facebook Pay section of the Settings menu. This will complete the process of adding your debit card to Facebook Pay, allowing you to make seamless and secure transactions on the platform.
Before saving your card details, take a moment to review the information you’ve entered. Make sure that the card number, expiration date, and other details are accurate and up to date. This ensures that your transactions will be processed without any issues.
If everything looks correct, locate the option to confirm and save your card details within the Facebook Pay section. This may be labeled as “Save,” “Confirm,” or a similar designation.
Tap on the appropriate option, and Facebook will save your debit card details securely. From this point forward, you’ll be able to use your debit card to make payments, send money to friends, and engage in other financial transactions on the platform.
It’s important to note that once your debit card is linked to Facebook Pay, you may need to authenticate your identity for certain transactions or if any suspicious activity is detected. This is an additional security measure to protect your account and ensure secure transactions.
With your debit card details confirmed and saved, you’re ready to enjoy the convenience and ease of making payments through Facebook Pay. Whether you’re purchasing products from the Facebook Marketplace, sending money to friends, or contributing to charitable causes, your debit card is now seamlessly integrated into the Facebook platform.
Congratulations! You have successfully added your debit card to Facebook Pay. Now you can enjoy the convenience of making secure transactions and payments right from within the Facebook app.
Conclusion
Adding your debit card to Facebook Pay opens up a world of convenience and seamless transactions within the Facebook app. By following the step-by-step process outlined in this guide, you can easily link your debit card to Facebook Pay and enjoy the benefits of hassle-free payments.
Throughout this guide, we’ve walked you through each step, from opening the Facebook app to confirming and saving your card details. We’ve also emphasized the importance of security measures, such as enabling two-factor authentication and setting up a strong password, to protect your debit card information and account.
Now that your debit card is successfully linked to Facebook Pay, you can make payments, send money to friends, and support causes of your choice without the need to re-enter your card details every time. The integration of your debit card enhances your Facebook experience by providing a secure and convenient payment method.
Remember to keep your debit card information up to date and be vigilant about any suspicious activity. If you encounter any issues or have questions regarding your card’s integration with Facebook Pay, consult the Facebook Help Center or contact their support team for assistance.
We hope this guide has been helpful in guiding you through the process of adding your debit card to Facebook Pay. Enjoy the seamless payment experience and make the most of the features that Facebook Pay has to offer!


