Introduction
Adding a hard disk drive to your Windows 8 computer can greatly expand your storage capacity and give you more room for your files, programs, and media. Whether you’re a professional needing extra space for your work or a casual user looking to store more photos and videos, the process of adding a new hard drive is relatively straightforward.
In this guide, we will walk you through the steps to add a hard disk drive to your Windows 8 computer. We will cover everything from opening your computer case to connecting the necessary cables and initializing the new hard drive in the operating system.
Before we begin, it’s important to note that working inside your computer case requires some basic knowledge of computer hardware and can void your warranty if not done correctly. If you’re not comfortable working with hardware, we recommend seeking the assistance of a professional.
Now, let’s dive into the step-by-step process of adding a hard disk drive to your Windows 8 computer!
Step 1: Turn off your computer
The first step in adding a hard disk drive to your Windows 8 computer is to fully power it down. This ensures that you can safely work on the internal components without the risk of electrical shock or damage to the hardware.
To turn off your computer, click on the “Start” button in the bottom left corner of the screen, then select the “Power” option. From the drop-down menu, choose “Shut down” and wait for the system to completely turn off. Alternatively, you can press and hold the power button on your computer until it powers down.
It’s important to note that simply putting your computer into sleep or hibernate mode is not sufficient. You need to perform a full shutdown to ensure that all power to the internal components is completely cut off.
Once your computer is powered off, you can proceed to the next step of adding a hard disk drive to your Windows 8 computer.
Step 2: Open your computer case
Now that your computer is powered off, it’s time to open the computer case to gain access to the internal components. The method of opening your computer case can vary depending on the make and model, but most desktop computers have a side panel that can be removed.
Start by locating the screws or latches that secure the side panel of your computer case. These are usually located on the back or side of the case. Use a screwdriver or your hands to remove the screws or release the latches, and gently slide the side panel away from the case.
Some computer cases may have a latch or button on the top or front that releases the side panel. In this case, simply press the latch or button and the panel should pop open.
Be sure to take caution and handle the side panel with care, as it can be sharp or heavy. Set the side panel aside in a safe place where it won’t get damaged.
Now that your computer case is open, you can proceed to the next step of adding a hard disk drive to your Windows 8 computer.
Step 3: Locate the available hard drive bays
With your computer case open, it’s time to locate the available hard drive bays where you can install your new hard disk drive. These bays are designed to securely hold and connect the hard drive to the motherboard and power supply.
The hard drive bays are typically located in the front or bottom portion of the computer case, near the existing hard drives or optical drives. They are usually metal brackets or trays with screw holes to hold the hard drive in place.
Take a moment to visually inspect your computer case and identify the available hard drive bays. They are often marked with numbers or labels, such as “HDD1” or “HDD2”. If you’re unsure, refer to your computer’s manual or the manufacturer’s website for specific instructions on locating the hard drive bays.
It’s important to note that if all the hard drive bays are already occupied, you may need to remove one of the existing drives to make room for the new one. Ensure that you have a backup of any important data on the drive you plan to remove, as it will no longer be accessible once you install the new drive.
Once you have identified the available hard drive bay, you can proceed to the next step of adding a hard disk drive to your Windows 8 computer.
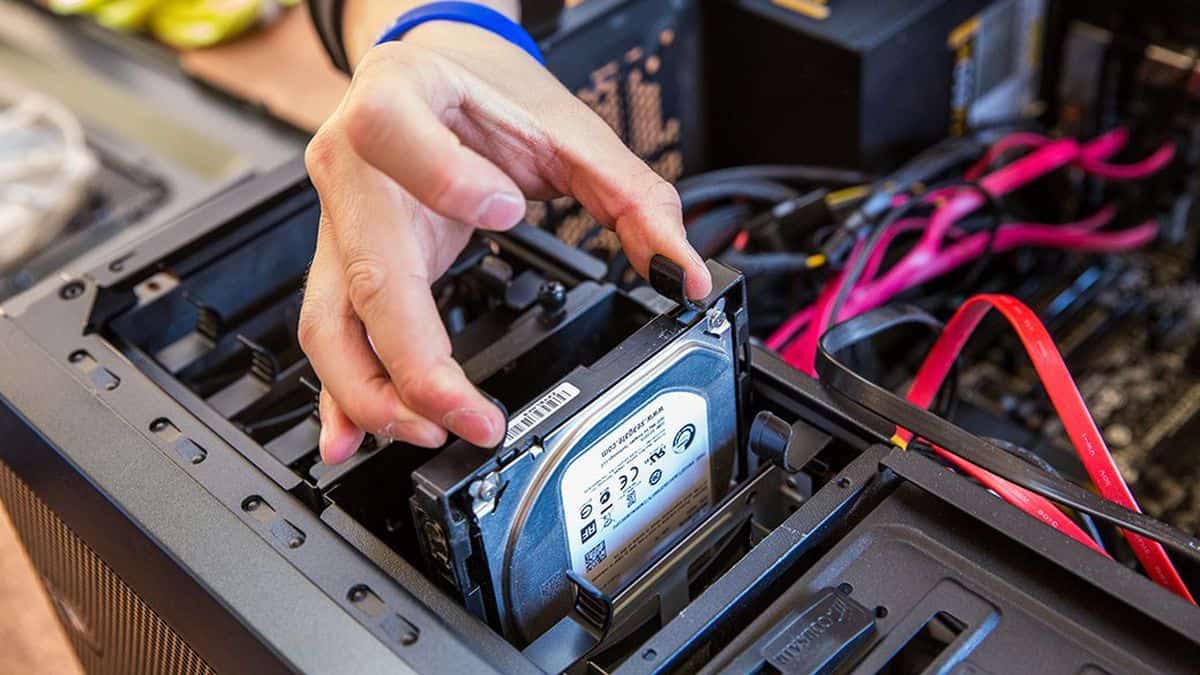
Step 4: Mount the hard drive into the bay
Now that you have located the available hard drive bay, it’s time to mount your new hard disk drive into the bay. Mounting the hard drive properly ensures that it is securely held in place within the computer case.
Start by carefully inserting the hard drive into the bay, aligning it with the screw holes or mounting brackets. The connectors of the hard drive should be facing towards the back of the computer case.
Once the hard drive is properly aligned, use screws or mounting brackets to secure it in place. Depending on your computer case, you may need to use screws to secure the hard drive directly to the bay or use mounting brackets that attach to the sides of the hard drive.
Tighten the screws or secure the brackets just enough to hold the hard drive in place, but be careful not to overtighten as it may damage the hard drive or the computer case.
It’s important to ensure that the hard drive is securely mounted and does not have any excessive movement. This will prevent any vibrations or impacts from affecting the performance of the hard drive or causing damage.
Once the hard drive is properly mounted in the bay, you can proceed to the next step of adding a hard disk drive to your Windows 8 computer.
Step 5: Connect the power cable to the hard drive
Now that you have successfully mounted the hard drive in the bay, it’s time to connect the power cable to supply electricity to the drive. The power cable provides the necessary power for the hard drive to operate.
Start by locating the power cable coming from the power supply unit (PSU) of your computer. The power cable will have a connector with multiple pins, usually labeled as “SATA power connector” or “Molex connector”.
Next, locate the power connector on the hard drive. This connector is usually located on the back or side of the hard drive and matches the shape and size of the power cable connector.
Align the power cable connector with the power connector on the hard drive and gently push them together until they are securely connected. Ensure that the connectors are properly aligned and firmly connected to avoid any power supply issues.
It’s important to note that modern hard drives commonly use SATA power connectors. However, older systems or certain hard drive models might require using Molex connectors instead. Make sure you are using the appropriate power cable connector for your specific hard drive.
Once the power cable is connected to the hard drive, you can proceed to the next step of adding a hard disk drive to your Windows 8 computer.
Step 6: Connect the SATA data cable to the hard drive and motherboard
After connecting the power cable, the next step is to connect the SATA data cable to both the hard drive and the motherboard. The SATA data cable allows for data transfer between the hard drive and the computer’s motherboard.
Start by locating the SATA data cable. This is a thin, flat cable with a small connector on each end. One end of the cable connects to the SATA port on the motherboard, and the other end connects to the SATA port on the hard drive.
First, locate the SATA port on the hard drive. It is usually labeled as “SATA” and has a small L-shaped connector. Align the SATA data cable connector with the SATA port on the hard drive and gently push them together until they are securely connected.
Next, locate the SATA port on the motherboard. The motherboard will have multiple SATA ports labeled as “SATA 1”, “SATA 2”, and so on. Choose an available SATA port and align the connector on the other end of the SATA data cable with the port on the motherboard. Connect the two by gently pushing them together.
It’s important to note that the SATA data cable can only be inserted in one direction, so make sure it is properly aligned before attempting to connect it. Avoid applying excessive force when connecting the SATA data cable to avoid damaging the connectors or the ports.
Once the SATA data cable is connected to both the hard drive and the motherboard, you can proceed to the next step of adding a hard disk drive to your Windows 8 computer.
Step 7: Close the computer case
Now that all the necessary connections are made, it’s time to close the computer case to ensure the internal components are properly protected. Closing the case also helps maintain proper airflow and prevents dust and debris from entering the system.
Start by carefully aligning the side panel of the computer case with the open slot. Ensure that the panel is properly aligned with the case and slides in smoothly without any resistance.
Once the side panel is aligned, use the screws or latches that were removed earlier to secure the panel back onto the case. Be sure to tighten the screws or latch the panel securely.
Take a moment to double-check that the panel is securely attached and that there are no gaps or loose areas. This will help ensure that the internal components are properly protected.
If your computer case has any additional panels or covers, such as a front panel or top cover, make sure to secure those as well using the appropriate screws or latches.
Once the computer case is closed and all panels are securely in place, you can proceed to the next step of adding a hard disk drive to your Windows 8 computer.
Step 8: Turn on your computer
With the computer case closed and all connections made, it’s time to power on your Windows 8 computer. Turning on the computer will allow the system to recognize the new hard drive and make it accessible for use.
To turn on your computer, locate the power button on the front or top panel of the computer case. Press the power button and wait for the computer to boot up. Depending on your computer’s configuration, it may take a few moments for the operating system to load.
Once your computer is powered up, Windows 8 will automatically detect the new hard drive that you have installed. You can verify this by going to “This PC” or “My Computer” and checking if the new hard drive is listed among the available drives.
If the hard drive is not detected, you may need to go into the BIOS settings and ensure that the SATA port to which the hard drive is connected is enabled. Consult your computer’s manual or the manufacturer’s website for specific instructions on accessing the BIOS settings.
Once your computer has successfully booted up and detected the new hard drive, you are now ready to initialize and format the drive in Windows 8. This will prepare the hard drive for use and allow you to start saving and accessing files on it.
Congratulations! You have successfully turned on your computer and completed the process of adding a hard disk drive to your Windows 8 system. Now you can enjoy the expanded storage space and the improved performance it brings to your computer.
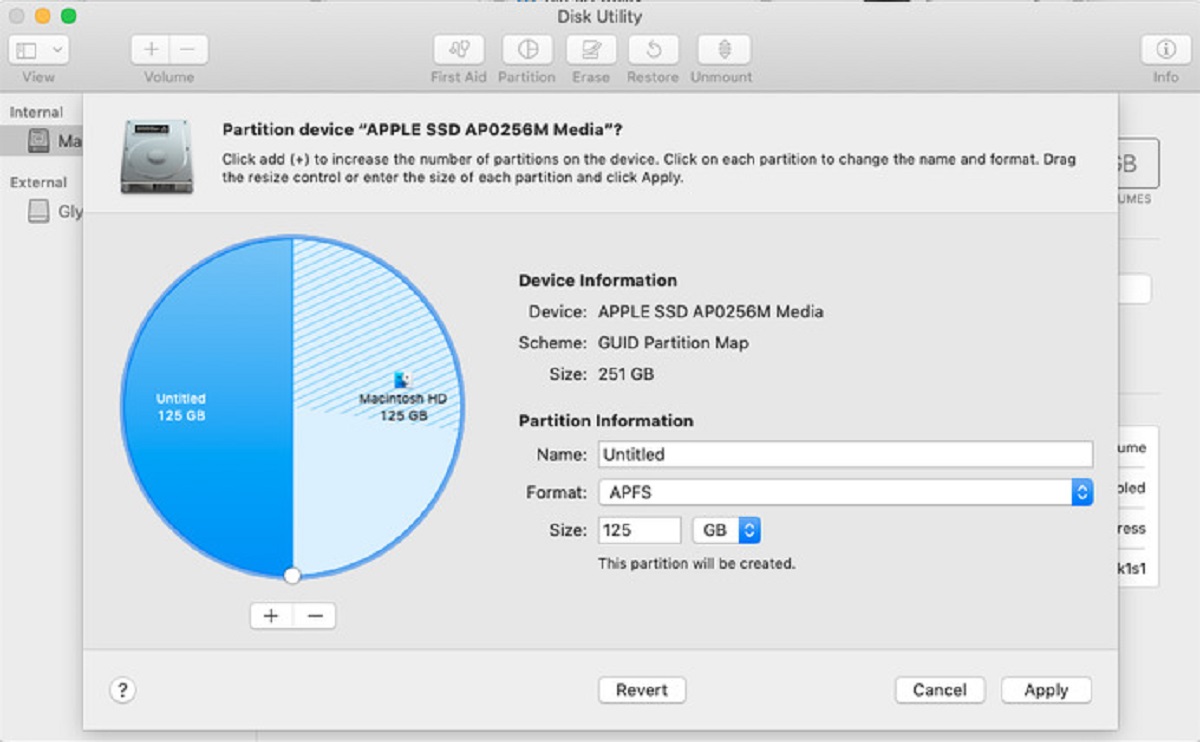
Step 9: Initialize and format the new hard drive in Windows 8
Once your Windows 8 computer recognizes the new hard drive, the next step is to initialize and format the drive to make it usable. Initializing and formatting the drive prepares it for storing files and ensures compatibility with the operating system.
To initialize and format the new hard drive, follow these steps:
- Open the “Control Panel” in Windows 8. You can access it by searching for “Control Panel” in the Start menu.
- In the Control Panel, select “Administrative Tools” and then click on “Computer Management”.
- In the Computer Management window, click on “Disk Management” under the “Storage” section.
- A list of all the available drives will be displayed. Locate your new hard drive in the list. It should appear as “Unallocated” or “Not Initialized”.
- Right-click on the new hard drive and select the “Initialize Disk” option. Choose the partition style, such as MBR (Master Boot Record) or GPT (GUID Partition Table), and click “OK”.
- Once the disk is initialized, right-click on the unallocated space and select “New Simple Volume”. Follow the on-screen instructions to specify the volume size, assign a drive letter, and choose the file system (NTFS is recommended for Windows 8).
- Complete the wizard by formatting the new volume with the selected settings.
- Once the formatting process is complete, your new hard drive is now ready to use in Windows 8.
It’s important to note that formatting the new hard drive will erase any existing data on it, so ensure that you have made a backup of any important files before proceeding with the formatting process.
Congratulations! You have successfully initialized and formatted the new hard drive in Windows 8. You can now start using it to store and access your files, expanding your storage capacity and enhancing your computing experience.
Conclusion
Adding a hard disk drive to your Windows 8 computer can greatly enhance your storage capacity and provide you with the ability to store more files, programs, and media. By following the step-by-step guide outlined in this article, you have successfully learned how to add a new hard drive to your Windows 8 computer.
Throughout the process, we covered important steps such as turning off your computer, opening the computer case, locating the available hard drive bays, mounting the hard drive, connecting the power and data cables, closing the computer case, and turning on the computer. We also discussed the crucial step of initializing and formatting the new hard drive in Windows 8 to make it usable.
Remember, it’s essential to exercise caution and ensure proper handling of the internal components while working inside the computer case. If you’re unsure or uncomfortable, it’s always recommended to seek assistance from a professional.
By successfully adding a hard disk drive to your Windows 8 computer, you have expanded your storage capabilities and can now enjoy increased capacity for your files, programs, and media. Whether you’re a professional needing extra space for work or a casual user looking for more room to store photos and videos, the process outlined in this article allows you to easily upgrade your system.
Now that you have completed the process, take full advantage of your new hard drive by organizing your files, backing up important data, and enjoying the additional storage space it provides. With proper maintenance and care, your new hard drive will serve you well for years to come.
Thank you for following this guide on how to add a hard disk drive to your Windows 8 computer. Happy computing!