Introduction
Welcome to this guide on how to access the registry on an external hard drive. The Windows registry is a critical component of the operating system that contains important configuration settings for applications, hardware, and system preferences. Being able to access and modify the registry can be useful for troubleshooting issues, making system changes, or recovering data.
However, accessing the registry on an external hard drive requires a few extra steps compared to working with the local registry. In this guide, we will walk you through the process of accessing the registry on an external hard drive, allowing you to view and modify the registry settings even when the external drive is connected to a different computer.
Before we dive into the steps, it is important to note that modifying the registry can have serious consequences if not done correctly. It can potentially render your system unstable or even unusable. Therefore, it is crucial to exercise caution and follow the instructions carefully.
In the following sections, we will explain the steps required to access the registry on an external hard drive. We will provide detailed instructions on how to download and install a registry editor, open the registry editor, load the registry hive from the external hard drive, navigate and modify the registry, as well as unload the registry hive when finished.
By the end of this guide, you will have a good understanding of how to access and modify the registry on an external hard drive, enabling you to make necessary changes or retrieve important data. So, let’s get started!
Understanding the Registry
Before delving into the process of accessing the registry on an external hard drive, it’s crucial to have a basic understanding of what the registry is and how it functions. The Windows registry is a central database that stores configuration settings and options for the operating system, hardware, applications, and user preferences.
Think of the registry as a repository of information that Windows uses to keep track of various settings. It contains keys, subkeys, and values that define how components of the system should behave. These components can range from system settings and user preferences to installed software and hardware configurations.
The registry is hierarchical in structure, organized similarly to a file system. It is divided into five main sections, known as hives: HKEY_CLASSES_ROOT, HKEY_CURRENT_USER, HKEY_LOCAL_MACHINE, HKEY_USERS, and HKEY_CURRENT_CONFIG. Each hive contains numerous keys, which are further divided into subkeys and values.
The registry holds a wealth of information that controls the behavior of the Windows operating system and installed software. Modifying the registry can allow you to tweak system settings, enable or disable certain features, apply custom configurations, or resolve specific issues.
When it comes to accessing the registry on an external hard drive, you may encounter scenarios where you need to recover data from a computer that cannot be started or access the registry of a different computer altogether. In such cases, having the ability to open and modify the registry on an external hard drive can be invaluable.
By accessing the registry on an external hard drive, you can retrieve important configuration settings, recover lost data, or make changes to the registry without directly booting into the system that the external drive is connected to. This can be particularly useful for troubleshooting purposes, system recovery, or forensic analysis.
Now that we have a better understanding of what the registry is and why accessing it on an external hard drive can be beneficial, let’s proceed to the next section where we will discuss the precautions and warnings associated with working with the registry on external media.
Precautions and Warnings
When working with the registry, whether it is on a local drive or an external hard drive, it is crucial to exercise caution and follow some important precautions. Modifying the registry without careful consideration or knowledge can lead to system instability or even render your computer inoperable.
Here are some precautions and warnings to keep in mind before accessing the registry on an external hard drive:
- Backup your data: Before making any changes to the registry, it is highly recommended to back up your data. This ensures that you have a copy of important files in case something goes wrong during the registry modification process.
- Make a system restore point: Creating a system restore point allows you to revert back to a previous state if any issues arise from registry changes. This serves as a safety net, allowing you to undo any modifications and restore the system to a working state.
- Ensure proper permissions: When accessing the registry on an external hard drive, make sure that you have the necessary permissions to modify the registry. Without the proper permissions, you may encounter errors or be unable to make changes.
- Be cautious with registry modifications: Modifying the registry should only be done if you have a clear understanding of what you’re doing. Make sure to research and validate any changes before applying them. Incorrect modifications can result in system instability, data loss, or other unforeseen consequences.
- Keep a backup copy of the registry: It is recommended to keep a backup copy of the registry before making any modifications. This allows you to revert back to the original state if needed.
- Do not delete or modify important keys: Certain registry keys are crucial for the functioning of the operating system and installed software. Deleting or modifying these keys can have severe consequences. Exercise caution and avoid making unnecessary changes without proper knowledge.
Following these precautions and warnings will help minimize the risks associated with working with the registry on an external hard drive. It is important to approach registry modifications with care and take the necessary steps to safeguard your system and data.
Now that we understand the precautions and warnings, let’s proceed with the process of connecting the external hard drive and preparing for registry access in the next section.
Connect the External Hard Drive
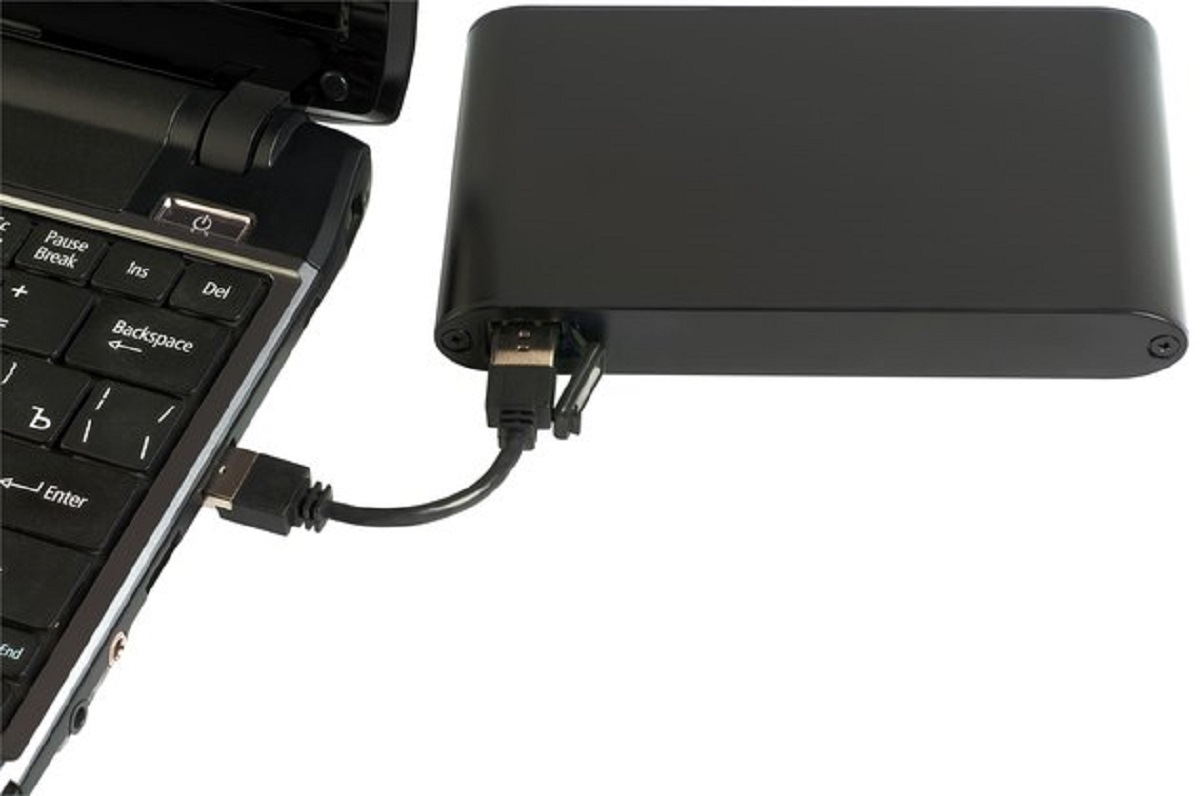
Before you can access the registry on an external hard drive, it is essential to connect the drive to your computer. Follow these steps to connect the external hard drive:
- Power off your computer: Before connecting or disconnecting any external devices, it’s best to power off your computer. This ensures a safe connection and prevents any potential data loss or damage.
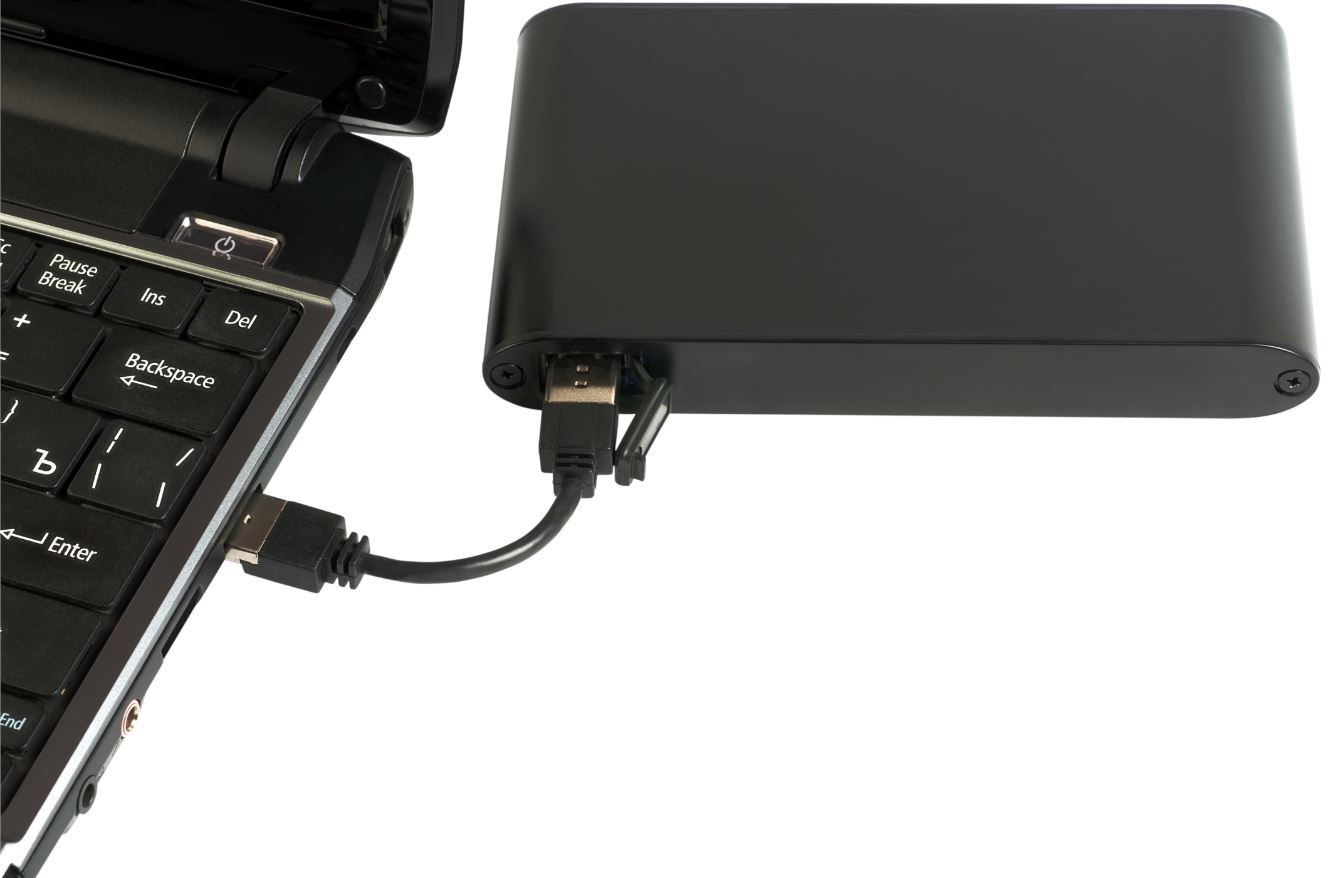
- Locate the appropriate ports: Identify the type of connection your external hard drive requires. It could be a USB, Thunderbolt, eSATA, or Firewire port. Locate the corresponding port on your computer where you will connect the external hard drive.
- Connect the cable: Take the appropriate cable that came with your external hard drive and connect one end into the external hard drive itself. Then, insert the other end into the matching port on your computer. Make sure the connections are secure.
- Power on the external hard drive: If your external hard drive has a power supply, ensure it is properly connected and powered on. Some drives draw power from the computer directly, in which case powering on the computer will also power on the external hard drive.
- Wait for the drive to be recognized: After connecting the external hard drive, give your computer a few moments to recognize the drive. You may receive a notification or see the drive appear in the file explorer or the computer’s device list.
- Confirm drive connectivity: To ensure the external hard drive is connected and accessible, open the file explorer and navigate to “This PC” or “My Computer.” Look for the external hard drive listed among the available drives. This confirms successful connectivity.
Once the external hard drive is successfully connected and recognized by your computer, you are ready to proceed with downloading and installing a registry editor, as we will cover in the next section.
Step 1: Download and Install a Registry Editor
To access the registry on an external hard drive, you will need a registry editor software installed on your computer. Follow these steps to download and install a registry editor:
- Research and choose a registry editor: There are several registry editor options available, both free and paid. Do some research and choose the one that best suits your needs. Some popular registry editors include RegEditX, Registrar Registry Manager, and Wise Registry Cleaner.
- Visit the official website: Once you have decided on a registry editor, go to the official website of the software. Look for a reliable source to ensure you download the correct and most up-to-date version.
- Locate the download link: On the website, locate the download link for the registry editor software. It is usually prominently displayed on the homepage or under a “Downloads” section. Click on the download link to start the download process.
- Choose the appropriate version: Depending on your computer’s operating system, you may need to choose between 32-bit or 64-bit versions of the registry editor software. Make sure to download the version that is compatible with your system.
- Initiate the download: Click on the download link and wait for the software to be downloaded to your computer. The download speed will vary depending on your internet connection.
- Run the installer: Locate the downloaded file on your computer and double-click on it to run the installer. Follow the on-screen instructions to proceed with the installation process.
- Complete installation: Once the installation is complete, you may be prompted to restart your computer. Follow any additional instructions provided by the registry editor software.
- Confirm successful installation: After the installation is complete, launch the registry editor to confirm that it is working correctly. Familiarize yourself with the interface and layout of the software.
Now that you have successfully downloaded and installed a registry editor on your computer, you are ready to move on to the next step: opening the registry editor, as we will discuss in the following section.
Step 2: Open the Registry Editor
Now that you have installed a registry editor on your computer, it’s time to open the software and prepare to access the registry on the external hard drive. Follow these steps to open the registry editor:
- Locate the shortcut: Look for the shortcut icon of the registry editor software on your desktop or in the Start menu. It is usually represented by the software’s logo or name.
- Double-click the shortcut: Double-click on the shortcut to launch the registry editor. Alternatively, you can also right-click on the shortcut and select “Open” from the context menu.
- Grant administrative access: Depending on your computer’s security settings, you may be prompted to grant administrative access or enter your administrator password. Provide the necessary credentials to proceed.
- Explore the interface: Once the registry editor is open, take a moment to familiarize yourself with the interface. The menu bar, toolbar, and various sections of the software allow you to navigate and interact with the registry.
- Prepare for external drive access: Before accessing the registry on the external hard drive, ensure that the drive is connected to your computer. Refer back to the previous section if you need a reminder on how to connect the external hard drive.
- Proceed to the next section: With the registry editor open and the external hard drive connected, you are now ready to move on to the next step: loading the registry hive from the external hard drive.
Opening the registry editor is the crucial first step in gaining access to the registry on the external hard drive. Take some time to explore the interface and become familiar with the features and functionalities of the registry editor software.
In the upcoming section, we will discuss the steps required to load the registry hive from the external hard drive, allowing you to view and modify the registry settings. So, let’s proceed to the next step!
Step 3: Load the Registry Hive from the External Hard Drive
With the registry editor open and the external hard drive connected to your computer, it’s time to load the registry hive from the external hard drive. The registry hive contains the configuration settings and preferences stored on the external drive. Follow these steps to load the registry hive:
- Click on “File” or the equivalent: In the menu bar of the registry editor software, locate the “File” option or its equivalent. Click on it to reveal a dropdown menu with various options.
- Select “Load Hive” or similar: From the dropdown menu, look for an option such as “Load Hive” or “Import Registry” to load the registry hive from the external hard drive. Click on this option to proceed.
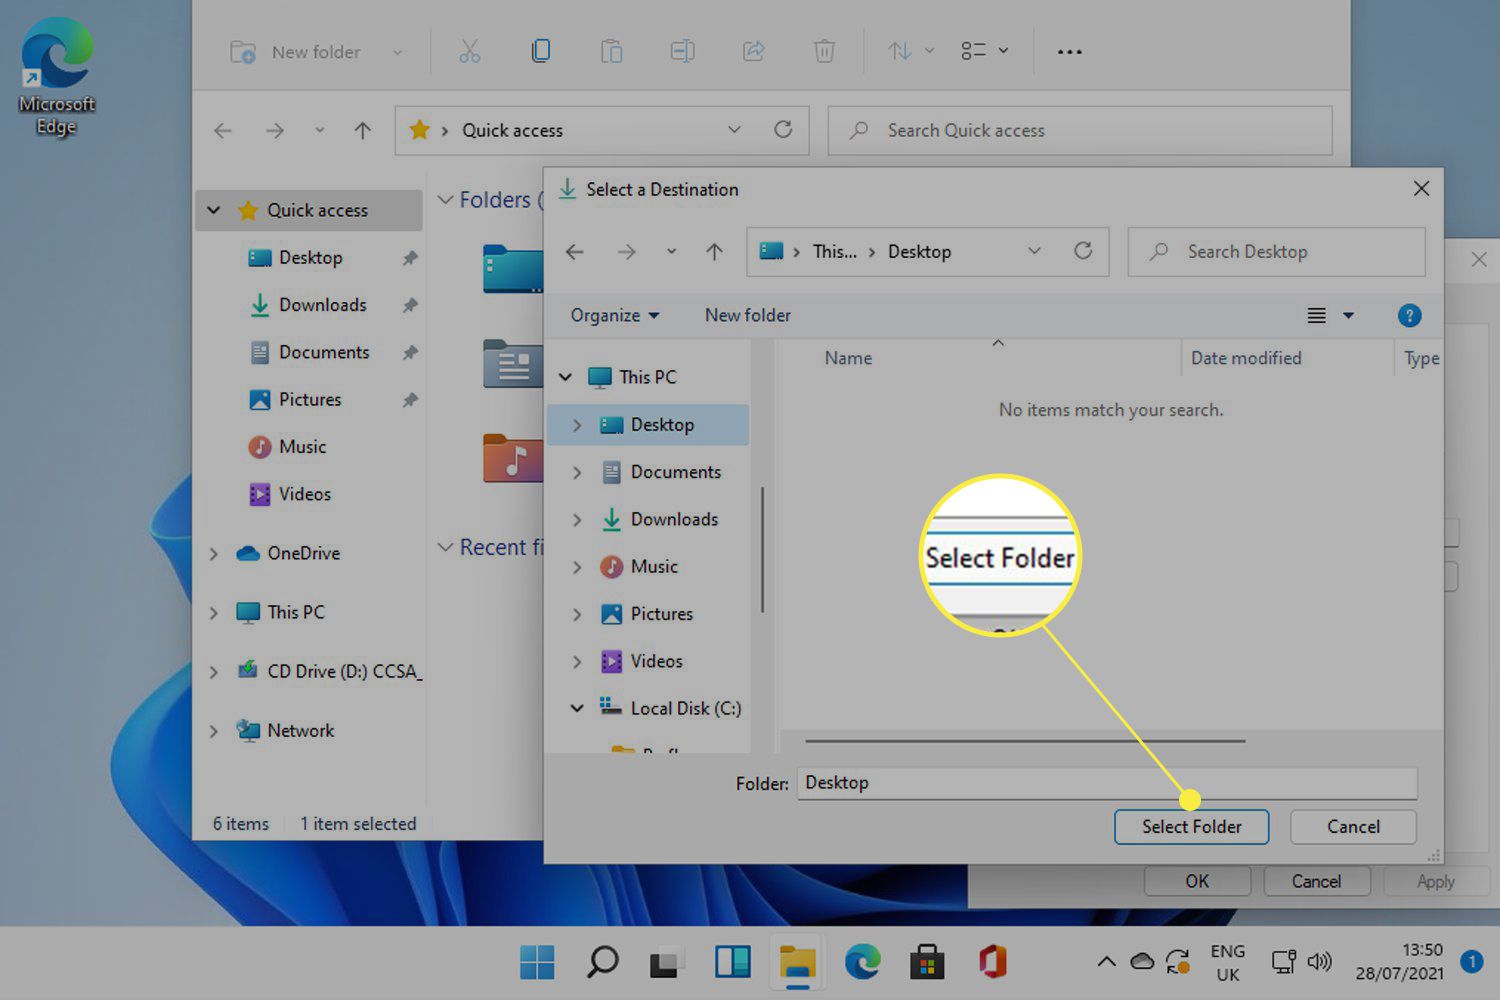
- Navigate to the external hard drive: A window will appear prompting you to navigate to the external hard drive. Browse through your computer’s file explorer to locate the external drive. It is typically listed under “This PC” or “My Computer” with its corresponding drive letter.
- Select the appropriate hive file: Within the external hard drive, locate the registry hive file that you wish to load. The hive file usually has a “.hiv” or “.reg” extension. Select the file and click on “Open” or the equivalent to load the hive into the registry editor.
- Enter a temporary key name: The registry editor will prompt you to enter a temporary key name for the loaded hive. Provide a descriptive name that will help you recognize the specific hive later if needed. Click on “OK” to proceed.
- Wait for the hive to load: The registry editor will take a moment to load the registry hive from the external hard drive. The loading process may vary depending on the size of the hive and the speed of your computer.
- Confirm successful hive load: Once the hive is loaded, you will see the temporary key name you provided in the registry editor’s interface. This indicates that the registry hive from the external hard drive has been successfully loaded.
With the registry hive successfully loaded into the registry editor, you can now proceed to the next step: navigating and modifying the registry settings. This will allow you to make necessary changes or retrieve important data from the external hard drive’s registry.
In the upcoming section, we will discuss the steps required to navigate and modify the registry. So, let’s move on to the next step!
Step 4: Navigate and Modify the Registry
Now that you have successfully loaded the registry hive from the external hard drive into the registry editor, you can begin navigating and modifying the registry settings. Follow these steps to navigate and make modifications in the registry:
- Explore the registry structure: In the registry editor’s interface, you will see the loaded hive represented by the temporary key name you provided during the previous step. Expand the hive to reveal its keys, subkeys, and values. Take some time to explore the structure of the registry.
- Navigate to the desired key: Using the hierarchy of keys and subkeys, navigate to the specific registry key that you want to modify. Double-click on a key to expand or collapse it, revealing its subkeys and values.
- Modify registry values: To modify a registry value, right-click on the value and select “Modify” from the context menu. A window will appear where you can enter the new value or modify the existing value. Make the necessary changes and click on “OK” to save the modifications.
- Create or delete keys and subkeys: If needed, you can create new keys or subkeys by right-clicking on the parent key and selecting “New Key” from the context menu. Similarly, you can delete keys or subkeys by right-clicking on them and selecting “Delete” from the context menu.
- Make cautious modifications: Remember, modifying the registry can have significant impacts on your system. Ensure that you understand the implications of your changes and proceed with caution. It’s always a good idea to create a backup of the registry before making any modifications.
- Save your modifications: As you make changes in the registry editor, the modifications are applied in real-time. There is no specific “Save” button. However, it’s important to remember that saving a backup of the registry before making any modifications is highly recommended.
By following these steps, you can effectively navigate through the loaded registry hive, make modifications to registry keys and values, and customize the settings stored in the external hard drive’s registry.
Once you have finished navigating and making the necessary modifications, it’s important to unload the registry hive properly, which we will discuss in the next step.
Step 5: Unload the Registry Hive
After you have completed the necessary modifications in the registry editor for the external hard drive’s registry, it’s important to properly unload the registry hive to ensure the changes are saved and the external drive can be safely disconnected. Follow these steps to unload the registry hive:
- Click on “File” or the equivalent: In the registry editor’s menu bar, locate the “File” option or its equivalent. Click on it to reveal a dropdown menu.
- Select “Unload Hive” or similar: From the dropdown menu, look for an option such as “Unload Hive” or “Export Registry” to unload the loaded registry hive from the external hard drive. Click on this option to proceed.
- Confirm hive unloading: A prompt will appear, asking for confirmation to unload the registry hive. Make sure you have saved any modifications you made as they will be lost after unloading the hive. Click on “Yes” or the equivalent to proceed.
- Wait for the hive to unload: The registry editor will take a moment to unload the hive from the registry. This process may vary depending on the size of the hive and the speed of your computer.
- Verify successful unloading: Once the hive is successfully unloaded, the temporary key name you provided during the loading process will disappear from the registry editor’s interface. This indicates that the registry hive has been unloaded.
- Close the registry editor: With the registry hive successfully unloaded, you can now proceed to close the registry editor software. Click on the “X” button or select “Exit” from the menu to close the application.
- Safely disconnect the external hard drive: After closing the registry editor, it is safe to disconnect the external hard drive from your computer. Follow the appropriate procedure based on your operating system to remove the drive safely.
By properly unloading the registry hive, you ensure that any changes you made are saved and the external hard drive can be safely disconnected without any data loss or corruption.
With this final step completed, you have successfully accessed, navigated, modified, and unloaded the registry on the external hard drive. You can now proceed with further troubleshooting, data recovery, or any other necessary action related to the external drive’s registry.
Conclusion
Congratulations! You have now learned how to access and modify the registry on an external hard drive. By following the steps in this guide, you gained the ability to view, navigate, and make changes to the registry settings stored on the external drive. This can be useful for troubleshooting issues, recovering data, or making system modifications.
However, it’s important to remember that working with the registry requires caution and careful consideration. Modifying the registry incorrectly can have serious consequences and potentially cause system instability. Always back up your data, create a system restore point, and ensure you have the necessary permissions before making any changes.
Throughout this guide, you learned how to connect the external hard drive, download and install a registry editor, open the registry editor, load the registry hive from the external hard drive, navigate and modify the registry, and unload the registry hive properly. These steps provide you with the foundation to access and work with the registry on an external hard drive effectively.
Remember to make cautious modifications, create backups, and always verify the changes you make. It’s also essential to understand the structure of the registry and the implications of the modifications you are making.
Now that you have the knowledge and steps to access the registry on an external hard drive, you can confidently troubleshoot issues, recover important data, or make necessary system changes. Use this newfound skill responsibly and always exercise caution when working with critical system components like the registry.
We hope this guide has been insightful and helpful to you. Happy registry editing!