Introduction
Welcome to this guide on how to zoom out on a Mac! Whether you need to view a whole webpage, fit more content on your screen, or simply zoom out for a better visual experience, we’ve got you covered. In this article, we will explore four different methods to help you zoom out on your Mac, allowing you to customize your display settings to suit your preferences.
Having the ability to zoom out can be particularly helpful when working on tasks that require viewing multiple windows or when dealing with intricate designs or detailed documents. Fortunately, Mac offers several user-friendly ways to adjust the zoom level, either using your trackpad or mouse, keyboard shortcuts, the menu bar, or by tweaking display settings.
Whether you’re a new Mac user or simply looking to refresh your knowledge, this guide will walk you through each method step-by-step, ensuring you can easily zoom out and optimize your screen display.
So, let’s get started and learn how to zoom out on a Mac!
Method 1: Using the Trackpad or Mouse
One of the easiest and most intuitive ways to zoom out on a Mac is by using the trackpad or mouse. This method is particularly useful if you prefer using gestures or if your Mac is equipped with a trackpad.
Here’s how you can zoom out using your trackpad:
- Pinch-to-Zoom: Place two fingers on your trackpad and pinch them together. This motion will shrink the content on your screen, effectively zooming out.
- Swipe-to-Zoom: With two fingers on the trackpad, swipe them away from each other horizontally. This action will zoom out, giving you a broader view of the content on your screen.
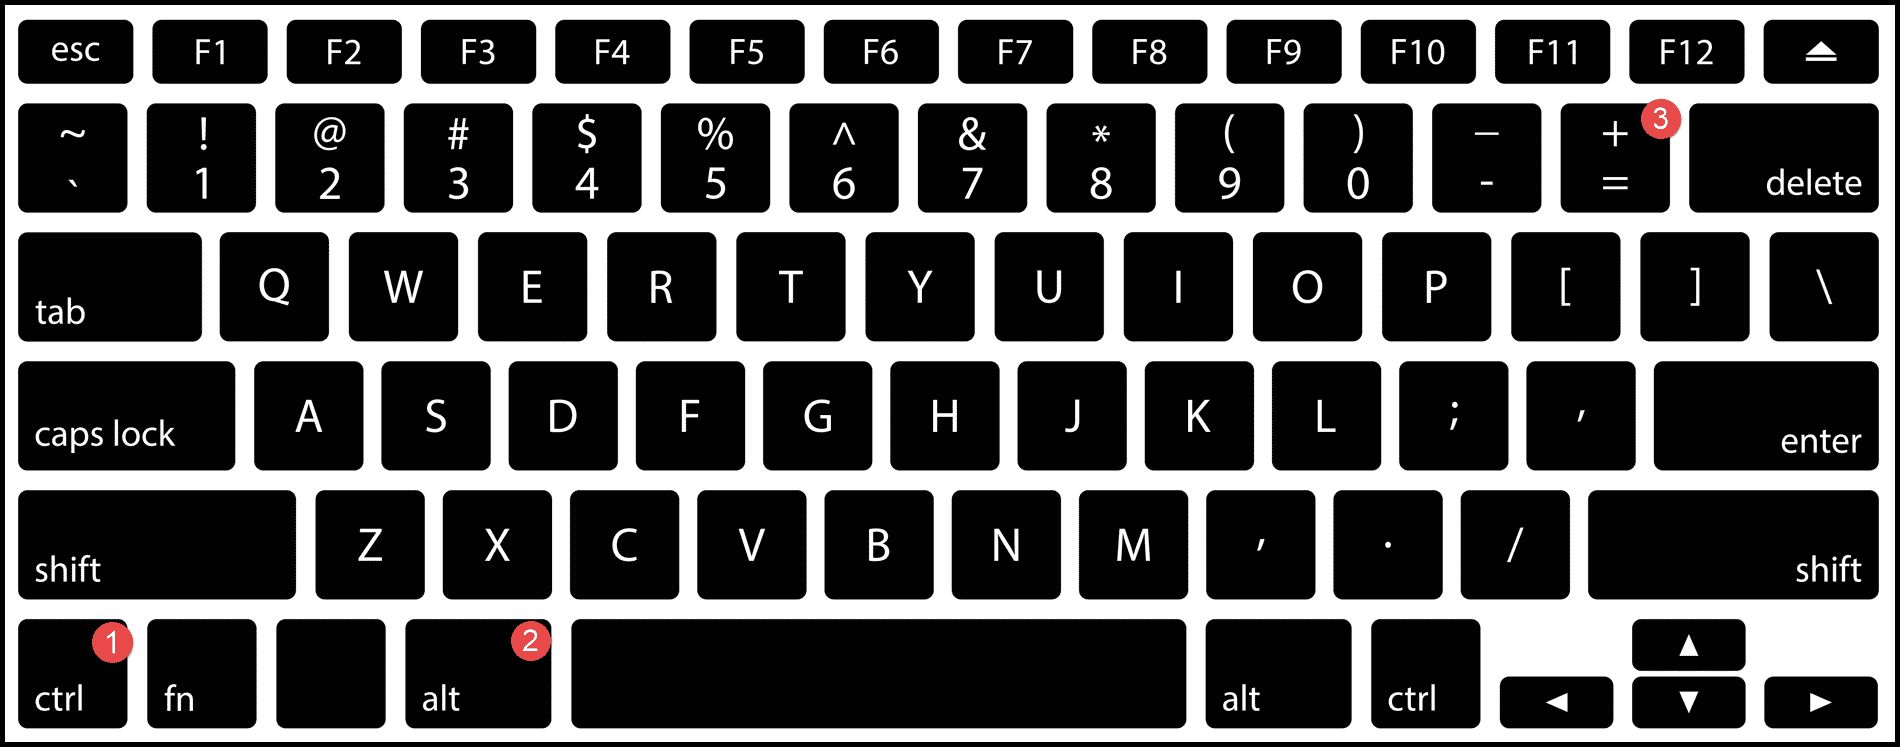
- Scroll-to-Zoom: Hold down the Control (Ctrl) key on your keyboard and scroll upwards on the trackpad. This gesture will zoom out, reducing the size of the content displayed.
If you are using an external mouse with a scroll wheel, you can also zoom out by scrolling while holding down the Control (Ctrl) key. This allows you to easily adjust the zoom level without the need for a trackpad.
Remember, the specific gestures and settings may vary depending on the version of macOS you are using and the trackpad or mouse you have. So, be sure to check your system preferences to customize your trackpad or mouse settings accordingly.
With these simple gestures, you can quickly and effortlessly zoom out on your Mac, giving you a wider perspective and better control over your screen display.
Method 2: Using the Keyboard
If you prefer using keyboard shortcuts or if you don’t have a trackpad or mouse with zoom capabilities, don’t worry! Mac provides keyboard shortcuts that allow you to zoom out and adjust the display easily.
Follow these steps to zoom out using your keyboard:
- Zoom Shortcut: Press the Command (⌘) key and the Minus (-) key simultaneously. Each time you press this combination, your screen will zoom out, giving you a wider view of the content.
- Zoom Options: Press the Command (⌘) key and the Option (⌥) key simultaneously. While holding down these keys, use the arrow keys to select the desired zoom option from the Zoom Options dialog that appears. This allows you to choose between Full Keyboard Access and Picture-in-Picture Zoom.
By utilizing these keyboard shortcuts, you can easily control the zoom level without the need for external devices. It provides a convenient and efficient way to navigate and view content on your Mac.
Keep in mind that these keyboard shortcuts may vary depending on the macOS version you are using. If the above shortcuts don’t work, you can check your system preferences or the Accessibility settings to customize and enable the zoom options on your Mac.
Now that you’ve learned how to zoom out using the keyboard, you can effortlessly enhance your viewing experience and tailor your display settings to suit your needs.
Method 3: Using the Menu Bar
Another way to zoom out on a Mac is by utilizing the options available in the Menu Bar. This method provides a straightforward and accessible approach to adjusting the zoom level without the need for gestures or keyboard shortcuts.
Here’s how you can zoom out using the Menu Bar:
- Click on the Apple Menu: Locate the Apple menu icon () on the top-left corner of your screen and click on it to open the drop-down menu.
- Select “System Preferences”: From the drop-down menu, find and click on the “System Preferences” option. This will open a new window with various settings for your Mac.
- Access “Display”: In the System Preferences window, locate and click on the “Displays” icon. This will open a new window dedicated to display settings.
- Adjust Zoom Level: Within the Displays window, navigate to the “Display” tab. Here, you will find a slider labeled “Brightness.” Drag the slider to the left to decrease the zoom level and effectively zoom out.
As you adjust the zoom level using the slider, the content on your screen will automatically adjust to reflect the changes. This allows you to find the perfect zoom level that suits your needs and enhances your viewing experience.
Additionally, the Displays window provides other display-related settings that you can explore and customize, such as screen resolution, color calibration, and more. Take the time to explore these options and find the configuration that best meets your preferences.
By utilizing the options available in the Menu Bar and the Display settings, you can easily zoom out on your Mac, ensuring a comfortable and personalized viewing experience.
Method 4: Adjusting Display Settings
If the previous methods don’t suit your needs or if you want more control over your display settings, adjusting the display settings on your Mac can provide a customized zoom level and overall viewing experience.
Here’s how you can adjust the display settings to zoom out:
- Open System Preferences: Click on the Apple menu () on the top-left corner of your screen and select “System Preferences” from the drop-down menu.
- Select “Displays”: Within the System Preferences window, locate and click on the “Displays” icon. This will open a new window dedicated to display settings.
- Navigate to “Display”: Within the Displays window, choose the “Display” tab. Here, you can find various options to adjust your display settings.
- Modify Resolution: By changing the resolution, you can effectively zoom out and fit more content on your screen. Select a lower resolution from the available options to decrease the zoom level and see more of the content displayed.
- Customize Scaling: In the Displays window, you can also find options to customize the scaling of the content on your screen. Adjusting the scaling settings can help you zoom out and get a broader view of the displayed content.
Experiment with different resolutions and scaling options to find the balance that suits your preferences and provides the desired zoom level. Keep in mind that adjusting these settings may affect the visual quality and clarity, so choose the settings that offer the best compromise between zoom level and overall display quality.
Remember, the available display settings may vary depending on your Mac model, macOS version, and external display, if applicable. So, explore the options and settings available to you to fully harness the potential of your Mac’s display capabilities.
By adjusting the display settings, you can effectively zoom out and tailor the visual experience on your Mac, allowing you to view more content and improve your productivity and enjoyment.
Conclusion
Congratulations! You have now learned four different methods to zoom out on a Mac. Whether you prefer using gestures on your trackpad, keyboard shortcuts, the menu bar, or adjusting display settings, you have the tools to customize your zoom level and enhance your viewing experience.
Remember, using the trackpad or mouse allows you to pinch-to-zoom, swipe-to-zoom, or scroll-to-zoom, giving you intuitive control over the zoom level. If you prefer using the keyboard, the zoom shortcut and zoom options offer efficient ways to adjust the display. And for those who prefer a more visual approach, the menu bar provides easy access to the display settings where you can fine-tune the zoom level. Lastly, adjusting the display settings allows for a more personalized zoom experience.
Take the time to experiment with these methods and find the one that works best for you. Each method offers its own advantages and flexibility, allowing you to easily adapt your screen display to your specific needs and preferences.
Whether you need to zoom out to view more content on a webpage, fit multiple windows on your screen, or simply enhance your visual experience, these methods will help you achieve that effortlessly. By being able to zoom out on your Mac, you can optimize your productivity, improve your multitasking abilities, and enjoy a more comfortable browsing and working environment.
Now that you’ve acquired these skills, go ahead and put them into practice. Choose the method that suits you best and start enjoying the benefits of zooming out on your Mac today!