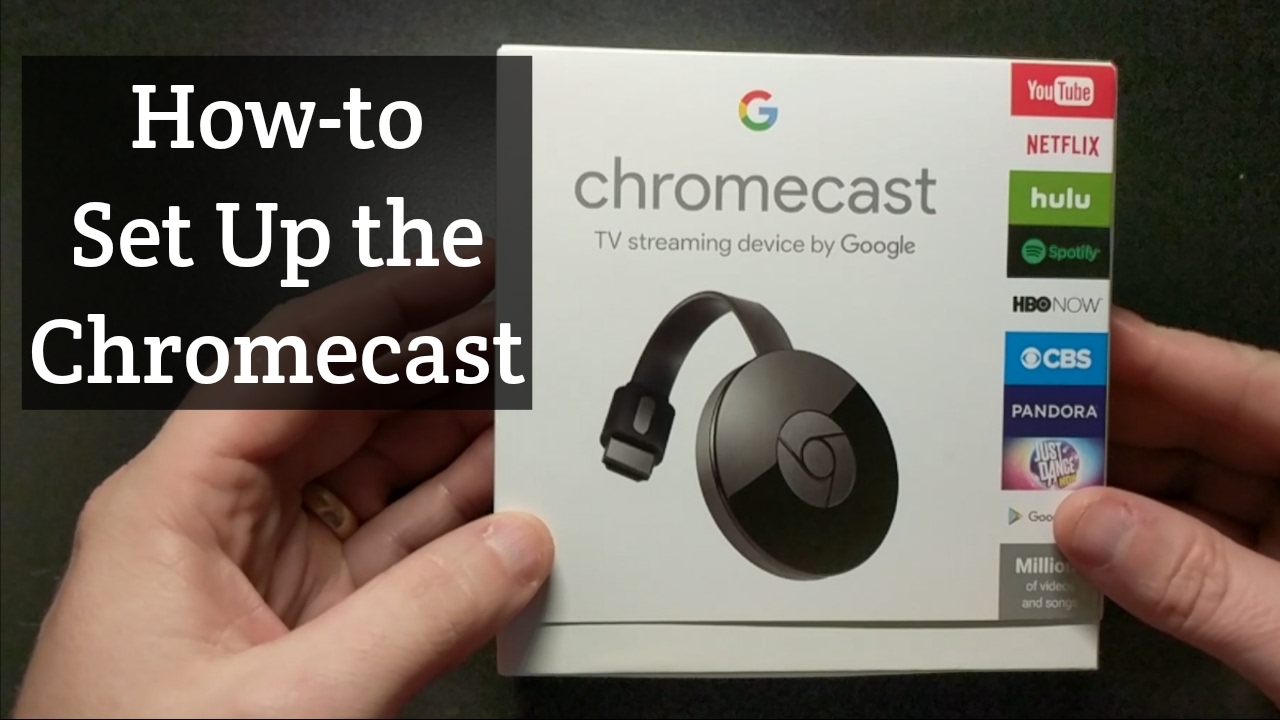
Introduction
Welcome to the world of Google Chromecast, a powerful device that allows you to easily stream your favorite content from your mobile devices or computer directly to your TV. This tiny, yet versatile, device has revolutionized the way we consume media by providing a seamless and user-friendly experience.
With Chromecast, you can enjoy your favorite movies, TV shows, music, and even games on the big screen, all controlled from the convenience of your handheld device. Whether you want to binge-watch the latest Netflix series or share photos and videos with friends and family, Chromecast makes it incredibly easy and enjoyable.
In this guide, we will take you through the process of setting up Google Chromecast, connecting it to your TV and Wi-Fi network, installing the necessary app, and casting content to your TV. We will also explore some additional features and settings that will enhance your Chromecast experience.
Please note that this guide assumes you already have a Google Chromecast device and a compatible TV. If you don’t have a Chromecast yet, you can easily purchase one online or at your local electronics store. Let’s dive in and unlock the full potential of your Chromecast!
Setting up Google Chromecast
Setting up your Google Chromecast is a quick and straightforward process. Before you begin, make sure you have the following items ready: your Google Chromecast device, a compatible TV with an HDMI port, a Wi-Fi network, and a mobile device or computer with the Google Home app installed.
To start, plug your Google Chromecast into an available HDMI port on your TV. If your TV’s HDMI ports are not easily accessible, you can use the HDMI extender cable that comes with the Chromecast to make it easier to connect. Once plugged in, your Chromecast is powered through either a USB port on your TV or an AC power adapter.
Next, use your TV’s remote control to switch the input source to the HDMI port that your Chromecast is connected to. You will see the Chromecast welcome screen on your TV, indicating that it is ready to be set up.
Now, take your mobile device or computer and ensure that it is connected to the same Wi-Fi network that you want to connect your Chromecast to. It’s important to note that your Chromecast and the device you’re using for setup must be on the same network.
If you haven’t already, download and install the Google Home app from either the App Store (for iOS devices) or Google Play Store (for Android devices). Alternatively, if you’re using a computer, you can set up Chromecast through the Google Chrome browser by visiting the Chromecast setup website.
Once the app is installed, open it and sign in to your Google account. The app will automatically search for any Chromecast devices connected to the same Wi-Fi network. When your Chromecast appears, tap on it to continue the setup process.
Follow the on-screen instructions to complete the setup, including choosing a name for your Chromecast and connecting it to your Wi-Fi network. Once the setup is complete, your Chromecast is ready to cast content from your mobile device or computer to your TV.
Now that you’ve successfully set up your Google Chromecast, you can start enjoying your favorite content on the big screen. In the next section, we will explore how to cast content to your TV using Chromecast.
Connecting Chromecast to your TV
Connecting your Chromecast to your TV is a simple process that requires just a few easy steps. Before you begin, ensure that you have a compatible TV with an HDMI port and that your Chromecast device is properly connected to a power source.
Start by locating an available HDMI port on your TV. Most modern TVs have multiple HDMI ports, so choose one that is convenient and easily accessible. Take your Chromecast device and insert it into the HDMI port, ensuring a secure connection.
If the HDMI ports on your TV are difficult to reach, you can use the HDMI extender cable included with your Chromecast. Simply plug the Chromecast into the female end of the extender cable and then connect the male end of the cable to the HDMI port on your TV.
Once you have connected the Chromecast to the HDMI port, locate the USB port on your TV. This USB port will be used to power your Chromecast. You have two options for powering your Chromecast: you can either use the USB port on your TV or connect the Chromecast to an electrical outlet using the AC power adapter included with the device.
If you choose to power your Chromecast through the USB port on your TV, make sure that your TV is turned on and receiving power. The USB port on your TV may have different power capabilities, so if you encounter any issues, try using the AC power adapter instead.
Now that you have connected your Chromecast to your TV and powered it on, use your TV’s remote control to switch the input source to the HDMI port that your Chromecast is connected to. You should see the Chromecast welcome screen on your TV, indicating that it is ready to be set up.
With the physical connections complete, you are now ready to proceed with the setup process. In the next section, we will explore how to connect your Chromecast to your Wi-Fi network using the Google Home app.
Connecting Chromecast to your Wi-Fi
To enjoy the full capabilities of Google Chromecast, you need to connect it to your Wi-Fi network. The process is simple and only requires a few steps. Before you begin, make sure your Chromecast is properly connected to your TV and powered on.
First, ensure that your mobile device or computer is connected to the same Wi-Fi network to which you want to connect your Chromecast. This is crucial because Chromecast can only be set up and used on the same network as your casting device.
Next, open the Google Home app on your mobile device or computer. If you haven’t already, sign in to your Google account. The Google Home app will automatically search for any Chromecast devices that are connected to the same Wi-Fi network.
When your Chromecast appears in the app, tap on it to initiate the setup process. Follow the on-screen instructions, which will guide you through connecting your Chromecast to your Wi-Fi network.
During the setup process, you may be prompted to enter your Wi-Fi network name (SSID) and password. Make sure you have this information handy before you begin. If you have a dual-band router, you may also be given the option to choose between the 2.4 GHz and 5 GHz Wi-Fi networks. Select the network that you prefer or that provides the best performance for your setup.
Once you have entered your Wi-Fi network credentials, the Google Home app will attempt to connect your Chromecast to your Wi-Fi network. This process may take a few minutes, so be patient. If the connection is successful, you will see a confirmation message on your device’s screen.
It’s important to note that if you ever need to change the Wi-Fi network that your Chromecast is connected to, you can do so through the Google Home app. Simply go to the Chromecast settings in the app and select the “Wi-Fi” option. From there, you can choose a new Wi-Fi network and follow the prompts to complete the setup process.
Congratulations! Your Chromecast is now connected to your Wi-Fi network. In the next section, we will explore how to install the Google Home app, which is essential for setting up and managing your Chromecast.
Installing the Google Home App
To get the most out of your Google Chromecast, you’ll need to install the Google Home app on your mobile device or computer. The app is available for both iOS and Android devices, and it allows you to set up and manage your Chromecast with ease. In this section, we’ll walk you through the process of installing the Google Home app.
If you’re using an iOS device, such as an iPhone or iPad, you can download the Google Home app from the App Store. Open the App Store on your device and search for “Google Home.” Once you find the app, tap the “Get” or “Install” button to begin the installation process. If prompted, enter your Apple ID password to confirm the installation.
For Android devices, you can find the Google Home app on the Google Play Store. Open the Play Store app, search for “Google Home,” and select the app from the search results. Tap the “Install” button to begin the installation. After a few moments, the app will be installed on your device.
If you prefer to use a computer to manage your Chromecast, you can set up and control it through the Google Chrome browser. Simply open Chrome and visit the Chromecast setup website. From there, you can download the Google Home app for Chrome and install it as an extension.
Once the Google Home app is installed on your device, open it and sign in with your Google account. Make sure you are signed in with the same account that you used to set up your Chromecast initially. This will ensure that you can discover and control your Chromecast devices.
With the Google Home app installed and logged in, you are now ready to continue setting up your Chromecast. In the next section, we will guide you through the process of connecting your Chromecast to the Google Home app and completing the setup.
Setting up Chromecast with the Google Home App
Now that you have installed the Google Home app on your mobile device or computer, you can proceed to set up your Chromecast. The Google Home app provides a user-friendly interface that allows you to connect and manage your Chromecast effortlessly. In this section, we will walk you through the process of setting up Chromecast with the Google Home app.
Launch the Google Home app on your device and sign in with your Google account. Make sure you are using the same account that you used to set up your Chromecast device. Once you have signed in, the app will automatically detect any available Chromecast devices on your Wi-Fi network.
If the app does not automatically detect your Chromecast, tap on the “Add” or “+” button in the top corner of the app. Select “Set up a new device” and follow the on-screen prompts to connect your Chromecast. Make sure that both your mobile device or computer and the Chromecast are connected to the same Wi-Fi network before proceeding.
During the setup process, the Google Home app will guide you through several steps, including choosing a name for your Chromecast and connecting it to your Wi-Fi network. Ensure that you have entered the correct Wi-Fi network name (SSID) and password when prompted.
Once the connection is successfully established, you will see a confirmation message on your device’s screen, indicating that your Chromecast is now set up and ready to use. You can customize the name of your Chromecast in the Google Home app or leave it as the default name.
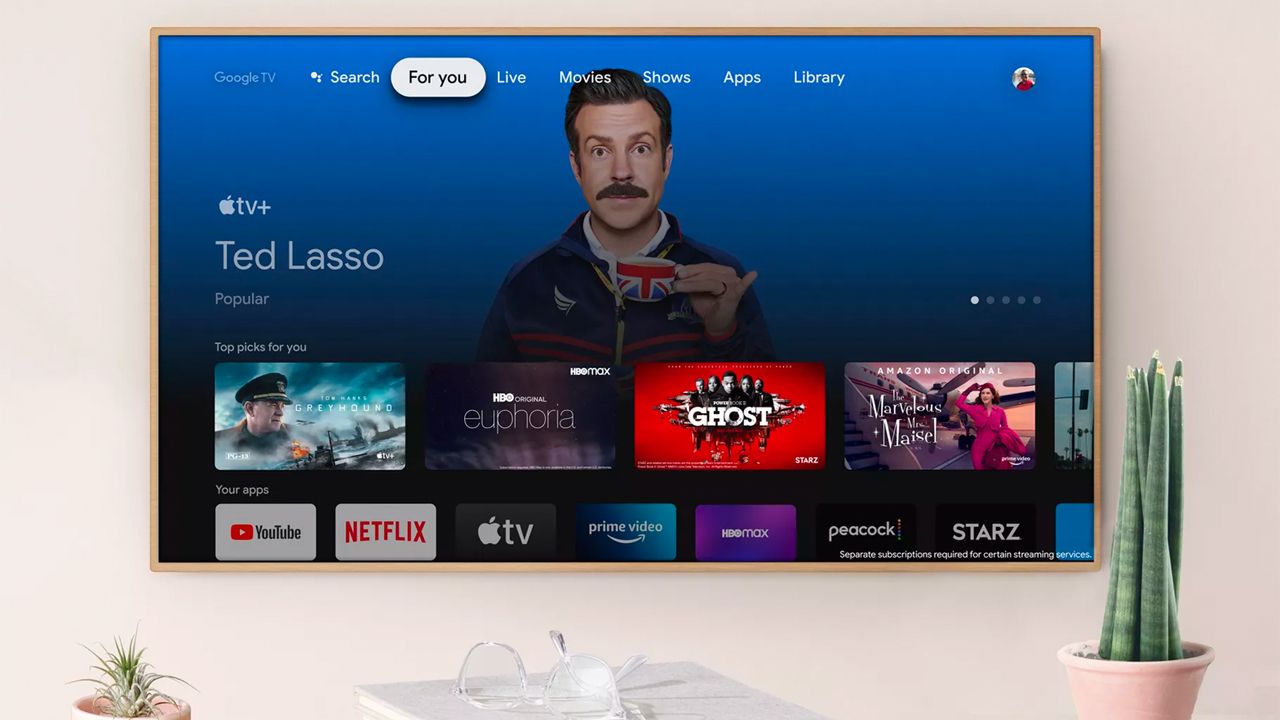
Additionally, the Google Home app allows you to personalize your Chromecast experience by selecting a backdrop for your TV screen. From the app menu, navigate to the “Backdrop” section and choose from a collection of stunning images or even use your own Google Photos library as the backdrop.
Now that your Chromecast is set up with the Google Home app, you’re ready to start casting your favorite content to your TV. Whether it’s streaming movies, listening to music, or sharing photos, the Google Home app provides a convenient and intuitive interface for controlling your Chromecast.
In the upcoming sections, we’ll explore how to cast content from both mobile devices and computers, as well as how to use Chromecast with supported apps. Stay tuned to unleash the full potential of your Chromecast!
Casting Content to Your TV Using Chromecast
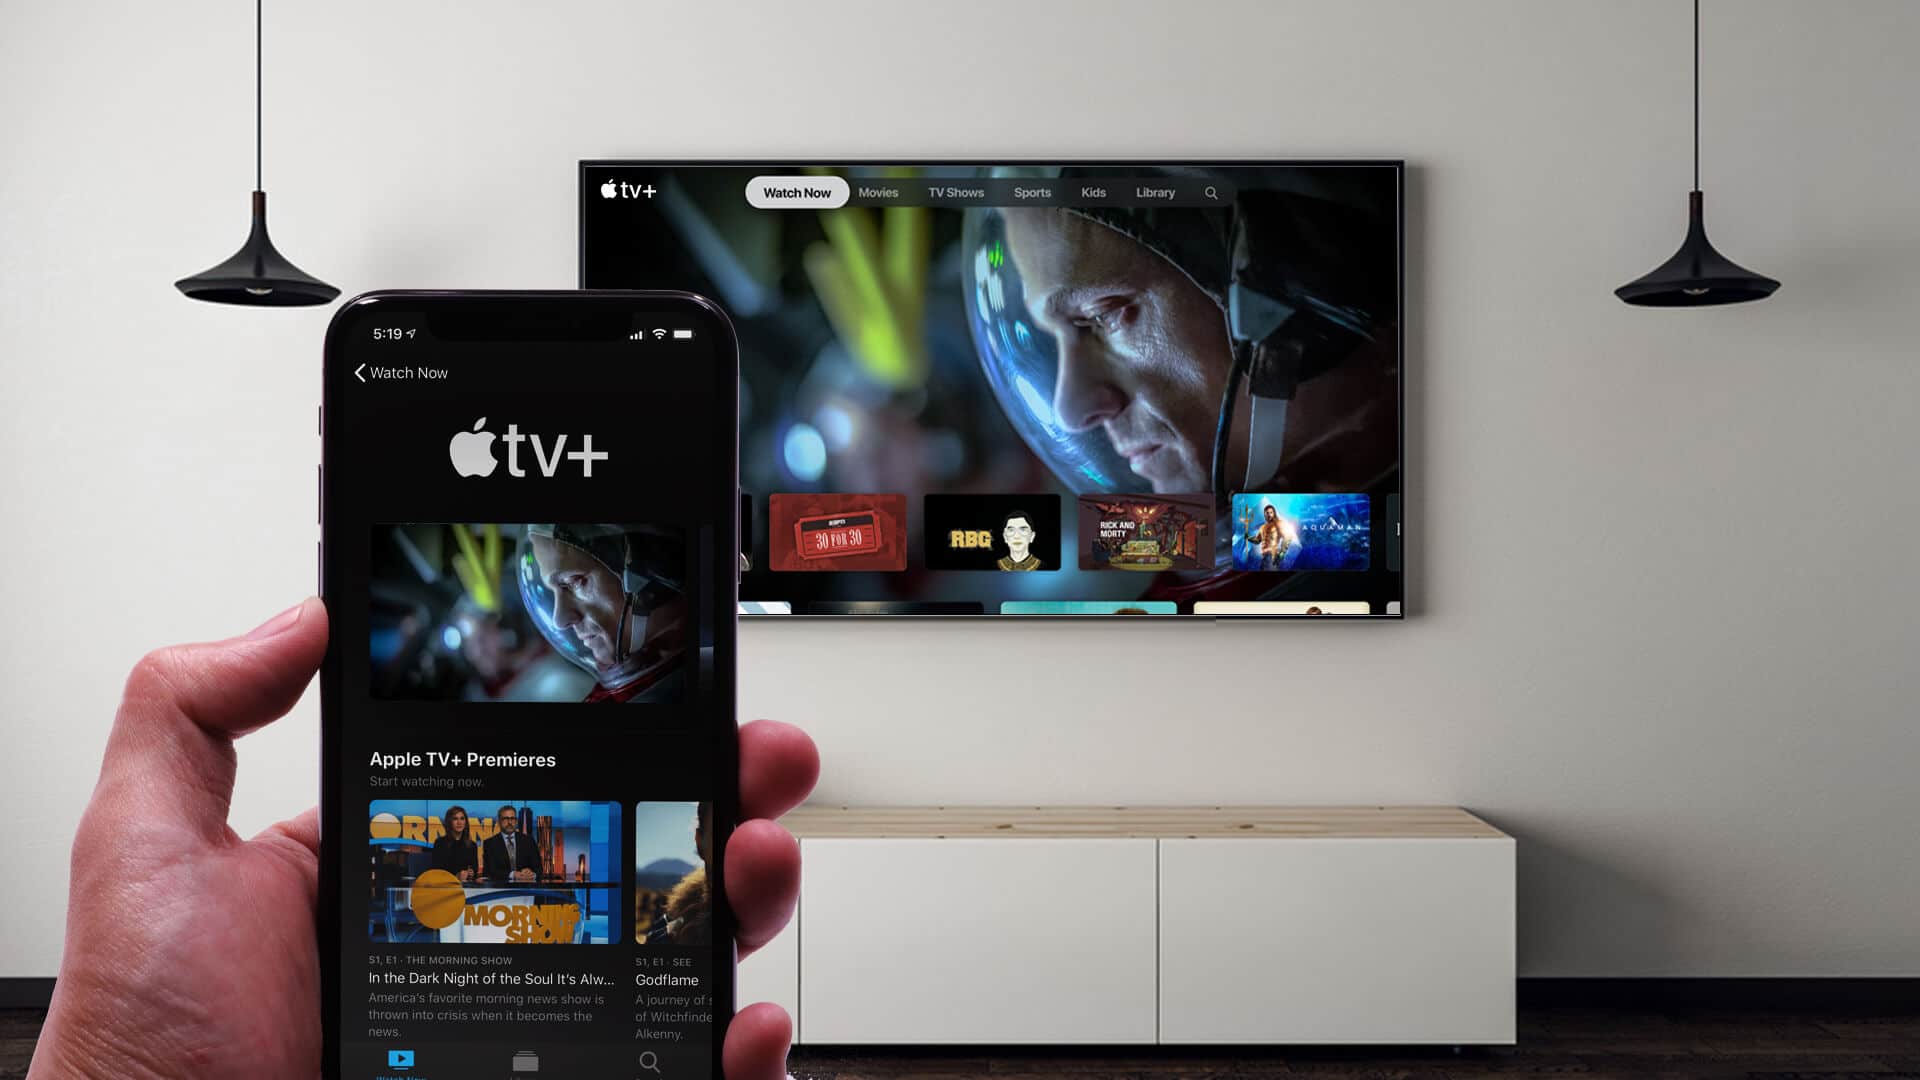
One of the key features of Google Chromecast is the ability to cast content from your mobile device or computer to your TV. Whether it’s streaming a movie from your favorite app or sharing a photo slideshow with friends and family, casting allows you to enjoy your content on the big screen. In this section, we’ll explore how to cast content using Chromecast.
To cast content to your TV, make sure that your mobile device or computer is connected to the same Wi-Fi network as your Chromecast. Launch the app or website that you want to cast from on your device. Look for the Cast icon, which looks like a rectangle with a Wi-Fi signal symbol in the bottom left or right corner. Tap or click on this icon to initiate the casting process.
The Cast icon will present you with a list of available devices. Select your Chromecast from the list, and the content will start playing on your TV. The beauty of casting is that once you’ve started playing the content, you can continue using your device for other tasks or even turn off the screen without interrupting the playback.
If you’re casting from a mobile device, you can also use your device as a remote control to pause, play, adjust the volume, or skip to the next content. This allows for a seamless and interactive viewing experience on your TV.
It’s worth noting that you can cast a wide range of content using Chromecast. You can cast videos, music, podcasts, and even games. Many popular video streaming services, such as Netflix, YouTube, and Hulu, have built-in casting support, making it easy to enjoy your favorite shows and movies on the big screen.
If you’re casting from a computer, simply look for the Cast icon in the Chrome browser or in compatible desktop apps. Click on the icon, choose your Chromecast from the list, and the content will start playing on your TV.
Furthermore, many apps have a Cast button built into their interface, making it even easier to cast content directly from within the app. Look for the Cast icon in your favorite apps to take advantage of this convenient feature.
That’s it! You’re now ready to cast content to your TV using Chromecast. In the next sections, we’ll explore how to use Chromecast with supported apps and how to manage Chromecast settings to customize your casting experience.
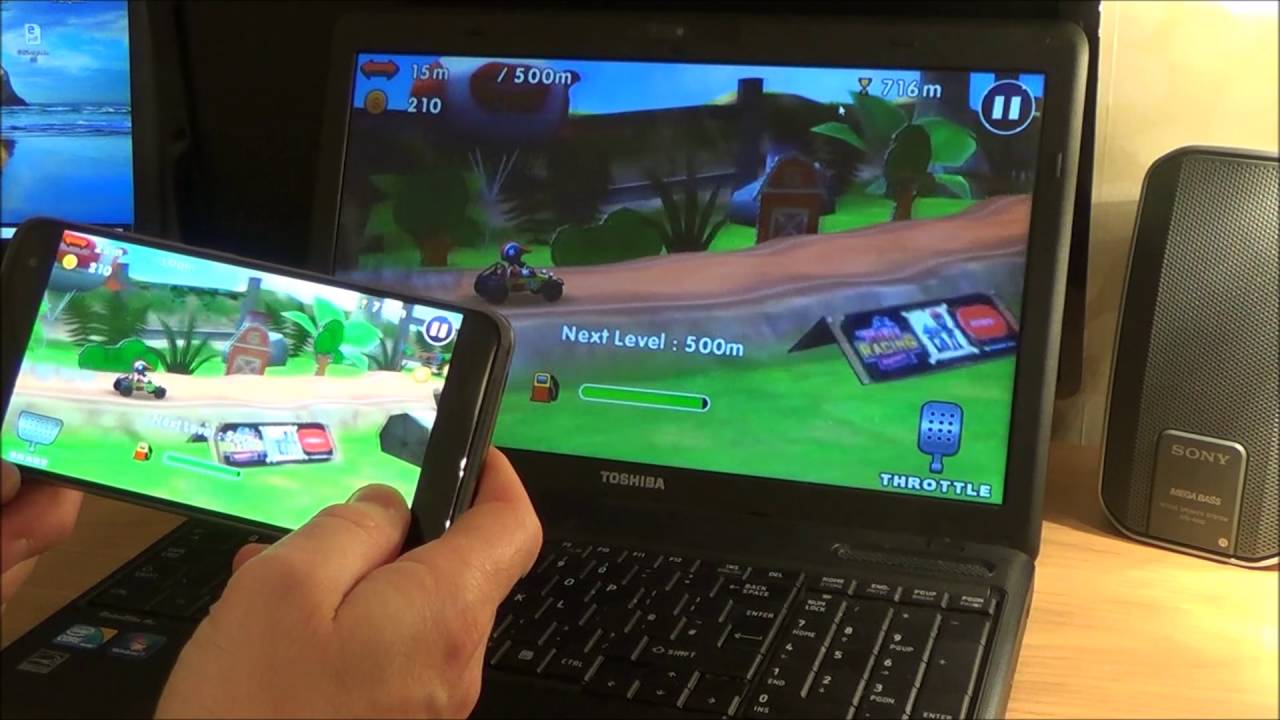
Casting from a Mobile Device
Casting from a mobile device to your TV using Chromecast is a seamless and straightforward process. Whether you want to stream a movie, show off your photos, or listen to music, casting from your mobile device allows you to enjoy your content on the big screen. In this section, we’ll explore how to cast from a mobile device using Chromecast.
First, make sure that your mobile device is connected to the same Wi-Fi network as your Chromecast. Launch the app that you want to cast from, such as Netflix, YouTube, or Spotify. Look for the Cast icon, which is usually located in the playback controls or in the app’s settings menu.
Tap on the Cast icon, and you’ll see a list of available devices. Select your Chromecast from the list, and the content will start casting to your TV. You can now sit back and enjoy your favorite movies, TV shows, music, and more on the big screen.
Once the content is casting, you can use your mobile device as a remote control. This means that you can play, pause, adjust the volume, or even seek through the content using your device. It provides a convenient way to control playback without needing to interact directly with the TV.
Additionally, some apps offer enhanced casting features. For example, in the YouTube app, you can queue up videos to create a personalized playlist or even create a shared viewing experience by allowing others to add videos to the queue.
It’s important to note that you can continue using your mobile device for other tasks while the content is casting. You can browse the internet, reply to messages, or even lock your device without interrupting the playback on your TV.
Casting from a mobile device offers flexibility and convenience, allowing you to enjoy your content on the big screen while still having control at your fingertips. Whether you’re entertaining guests, hosting a movie night, or simply indulging in a personal media experience, casting from your mobile device with Chromecast enhances your viewing pleasure.
In the next section, we’ll explore how to cast content from a computer to your TV using Chromecast, providing even more versatility in your streaming options.
Casting from a Computer
Casting from a computer to your TV using Google Chromecast is a great way to enjoy content on a larger screen. Whether you want to watch videos, browse the web, or share a presentation, casting from your computer offers a convenient and immersive experience. In this section, we’ll explore how to cast from a computer using Chromecast.
Start by ensuring that your computer is connected to the same Wi-Fi network as your Chromecast. Open a supported web browser, such as Google Chrome, and look for the Cast icon. It is usually located in the top right corner of the browser window, near the address bar.
Click on the Cast icon, and a drop-down menu will appear. Select your Chromecast device from the list of available devices. The browser tab or window will then be mirrored on your TV, allowing you to view the content on the big screen.
To cast specific content, such as videos or music, open the supported website or media player in your browser. Play the desired content, and then click on the Cast icon. Choose your Chromecast from the list, and the content will start streaming on your TV.
Casting from a computer also allows you to multitask while enjoying the content on your TV. You can continue using your computer for other tasks, such as checking emails or browsing the internet, without interrupting the casting. Your TV will display the content, while your computer remains free for your personal use.
Additionally, some websites and online platforms have built-in features that make casting even more convenient. For example, YouTube allows you to create playlists and queue up videos to watch on your TV. Other streaming platforms like Netflix and Hulu also offer casting support directly from their website.
It’s important to note that casting from a computer provides more flexibility and control over the content you want to watch or share on your TV. Whether you’re presenting slides for a meeting, watching a movie with friends, or simply enjoying online videos, casting from your computer with Chromecast enhances the viewing experience.
In the next section, we’ll explore how to use Chromecast with supported apps, providing even more options for casting content and expanding your entertainment horizons.
Using Chromecast with Supported Apps
One of the greatest advantages of Google Chromecast is its compatibility with a wide range of supported apps. These apps have built-in casting functionality, allowing you to seamlessly stream and control content on your TV. In this section, we’ll explore how to use Chromecast with supported apps to enhance your entertainment experience.
To get started, ensure that your Chromecast is set up and connected to your Wi-Fi network. Install the supported app on your mobile device or computer and sign in to your account if required. Look for the Cast icon within the app, usually located in the playback controls or settings menu.
When you’re ready to cast, tap or click on the Cast icon. A list of available devices, including your Chromecast, will appear. Select your Chromecast, and the content will start playing on your TV. You can then use your mobile device or computer as a remote control to pause, play, adjust the volume, or even switch to the next content.
Many popular streaming services, such as Netflix, YouTube, Hulu, Disney+, Spotify, and more, have built-in casting support. This means you can easily cast your favorite movies, TV shows, music, and podcasts directly from their respective apps to your TV. You’ll have access to a vast library of content, providing endless entertainment possibilities.
With supported apps, you can also take advantage of additional features and personalized recommendations tailored to your preferences. For example, you can create playlists, save your favorite shows, access exclusive content, or even control multiple Chromecast devices throughout your home.
In addition to video and music streaming apps, Chromecast is also compatible with various other apps, such as photo-sharing apps and games. You can effortlessly cast photos and videos from your device’s gallery to showcase your memories on the big screen or immerse yourself in interactive gaming experiences with friends and family.
To discover more supported apps, you can explore the Chromecast-compatible section in app stores or visit the Google Chromecast website for a comprehensive list. From entertainment and sports to news and education, there’s an app for every interest and preference that can elevate your Chromecast experience.
Using Chromecast with supported apps gives you endless entertainment possibilities and expands the capabilities of your TV. So, take advantage of the wide range of apps available and discover a whole new level of immersive and enjoyable media consumption with Chromecast.
In the next section, we’ll delve into managing the settings of your Chromecast, allowing you to customize your casting experience and troubleshoot common issues if necessary.
Managing Chromecast Settings
Managing the settings of your Chromecast allows you to personalize your casting experience, customize various features, and troubleshoot any issues that may arise. In this section, we’ll explore how to access and manage Chromecast settings to enhance your overall casting experience.
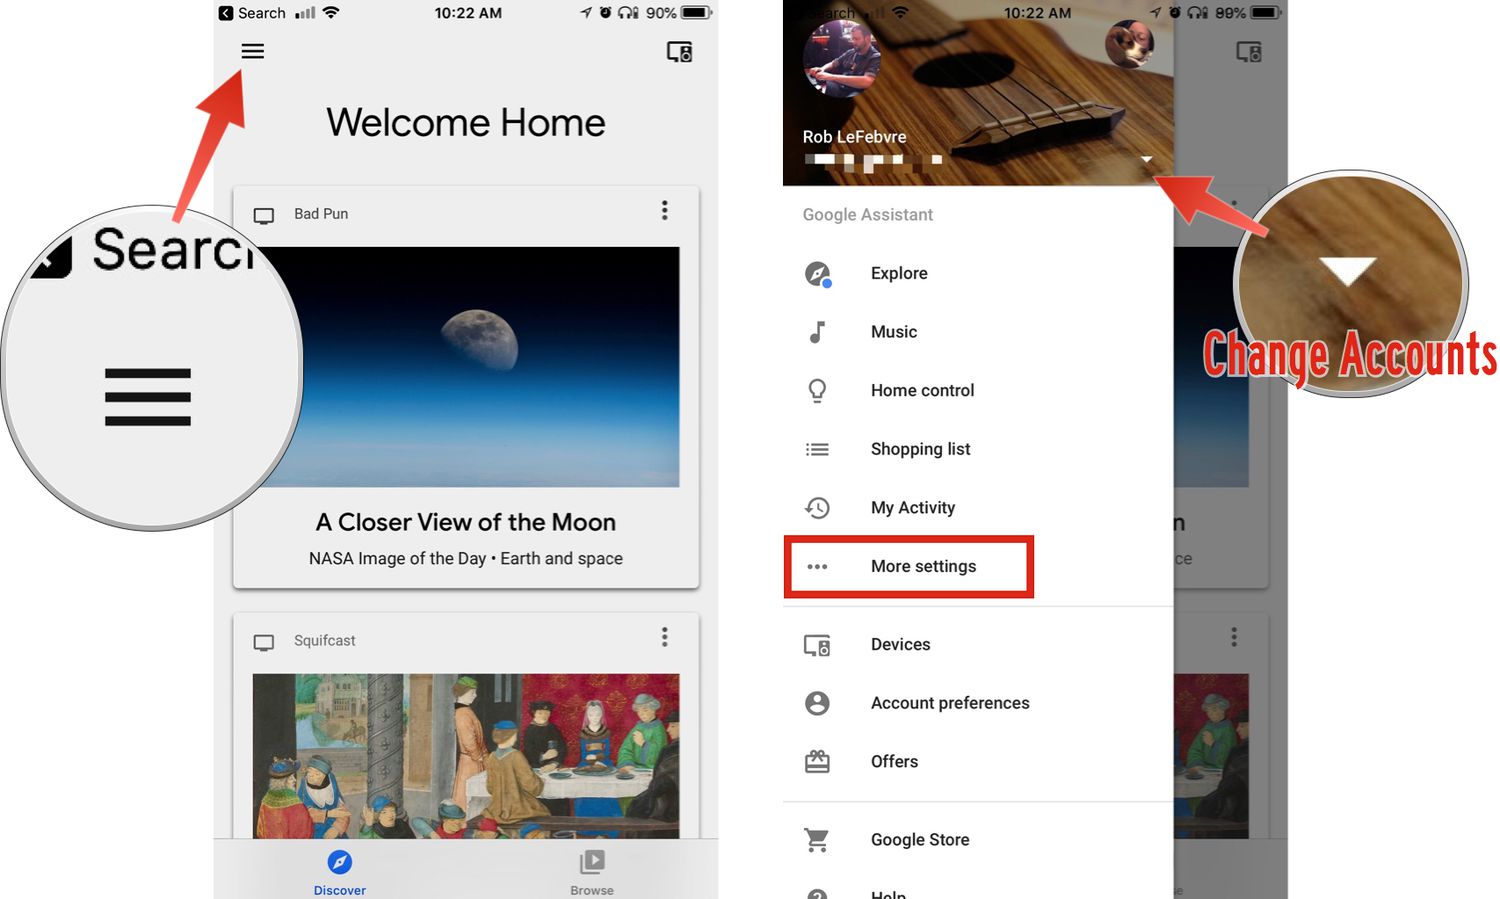
To access the Chromecast settings, open the Google Home app on your mobile device or computer, and ensure you are connected to the same Wi-Fi network as your Chromecast. Tap on the Chromecast device you want to manage, and then tap on the gear or settings icon.
Within the settings menu, you’ll find a range of options to customize your Chromecast. Here are a few key settings you can explore:
- Wi-Fi Network: If you need to change the Wi-Fi network your Chromecast is connected to, you can do so by selecting the “Wi-Fi” option. Follow the prompts to connect your Chromecast to a new Wi-Fi network.
- Backdrop: The Backdrop setting allows you to customize the screen that is displayed when your Chromecast is idle. You can select from a collection of images, artwork, or even set your Google Photos library as the backdrop.
- Audio and Video Settings: Adjust the audio and video settings to match your preferences. You can choose the video resolution, enable or disable subtitles, and adjust the volume level for your Chromecast.
- Guest Mode: Guest Mode allows guests in your home to cast to your Chromecast without needing to connect to your Wi-Fi network. You can enable or disable this feature based on your preferences.
In addition to these settings, you’ll also find options to manage your connected apps, enable preview features, and more. Feel free to explore the settings menu to discover additional customization options available for your Chromecast device.
If you encounter any issues with your Chromecast, such as connectivity problems or audio/video synchronization, the settings menu also offers troubleshooting options. You can find troubleshooting help by selecting the “Help & Feedback” or “Device Support” option. Follow the provided instructions to address common issues or seek further assistance if required.
Keep in mind that your mobile device or computer also has its own settings that may affect your Chromecast experience. Ensure that notifications and Do Not Disturb settings are configured appropriately to avoid interruptions during casting.
By managing the settings of your Chromecast, you can optimize your casting experience, personalize your TV screen, and resolve common issues that may arise. Take some time to explore the available options and tailor your Chromecast settings to suit your preferences and needs.
In the following section, we’ll delve into the process of changing the Wi-Fi network for your Chromecast, providing you with flexibility and convenience in your casting setup.
Changing Wi-Fi Network for Chromecast
There may be occasions when you need to change the Wi-Fi network that your Chromecast is connected to. Whether you’ve moved to a new home or upgraded your Wi-Fi network, changing the network for your Chromecast is a straightforward process. In this section, we’ll guide you through the steps to change the Wi-Fi network for your Chromecast.
To begin, make sure your Chromecast is powered on and connected to your TV. Open the Google Home app on your mobile device or computer and ensure that it is connected to the same Wi-Fi network as your Chromecast.
In the Google Home app, tap on the Chromecast device you want to manage and navigate to the settings menu. Look for the Wi-Fi option and select it. You will be prompted to select a new Wi-Fi network for your Chromecast.
Follow the on-screen prompts to connect your Chromecast to the new Wi-Fi network. You may be required to enter the Wi-Fi network name (SSID) and password. Ensure that you enter the correct network details to successfully connect your Chromecast to the new network.
Keep in mind that during the Wi-Fi network change process, your Chromecast device may disconnect from the app temporarily. However, it should automatically reconnect once the new Wi-Fi network is successfully configured.
Once the connection is established, your Chromecast will now be connected to the new Wi-Fi network. You can verify this by checking the connected Wi-Fi network on your mobile device or computer.
It’s worth mentioning that when changing the Wi-Fi network for your Chromecast, it will also change the network for any other devices using that Chromecast. Therefore, ensure that all devices connected to your Chromecast are updated with the new Wi-Fi network details.
Changing the Wi-Fi network for your Chromecast is a simple process that allows you to adapt to new network configurations without any hassle. Whether you’re upgrading your home network or need to connect your Chromecast in a different location, this feature provides flexibility and convenience in managing your casting setup.
In the next section, we’ll explore how to customize the backdrop settings on your Chromecast, allowing you to personalize the visuals displayed on your TV screen when it’s idle.
Customizing Backdrop Settings
The backdrop feature of Google Chromecast allows you to personalize the visuals displayed on your TV screen when your Chromecast is idle. With a range of options to choose from, you can turn your TV into a digital art display or showcase your own personal photos. In this section, we’ll explore how to customize the backdrop settings on your Chromecast.
To access the backdrop settings, open the Google Home app on your mobile device or computer. Make sure you are connected to the same Wi-Fi network as your Chromecast. Tap on the Chromecast device you want to manage, and then navigate to the settings menu. Look for the “Backdrop” option and select it.
Within the backdrop settings, you’ll find various customization options. Let’s explore a few key options you can customize:
- Artwork: You can choose to display beautiful works of art from renowned museums and artists as the backdrop on your TV screen. Select the “Art Gallery” option to access a curated collection of artwork. You can also enable fun facts about the artwork to be displayed.
- Display nature and satellite images: If you prefer a more scenic view, you can select the “Earth and Space” option. This displays stunning photos of landscapes, satellite imagery, and even views of our planet from space.
- Google Photos: If you want to personalize your backdrop further, you can connect your Google Photos library to your Chromecast. This allows you to display your own photos and memories on the TV screen when your Chromecast is idle. Simply select the “Google Photos” option and follow the prompts to connect your account.
- Weather: You can also choose to display the current weather information as the backdrop, keeping you informed of the local conditions at a glance.
Once you have customized your backdrop settings, simply exit the settings menu, and your Chromecast will begin displaying the selected visuals when it is not in use. The backdrop feature adds a personal touch to your TV, transforming it into a dynamic and visually appealing display.
By customizing the backdrop settings, you can tailor the visuals on your TV screen to match your preferences and create a more immersive and personalized ambiance in your living space. Whether you’re a fan of art, nature, or cherish your own photos, the backdrop feature gives you the freedom to showcase what resonates with you.
In the next section, we’ll explore some common troubleshooting steps to help you resolve any issues you may encounter with your Chromecast.
Troubleshooting Common Issues with Chromecast
While Google Chromecast provides a seamless casting experience, you may occasionally encounter common issues that can be easily resolved with a few troubleshooting steps. In this section, we’ll explore some common issues you may come across with your Chromecast and provide troubleshooting solutions to help you get back to enjoying your favorite content.
1. Chromecast not connecting to Wi-Fi: If your Chromecast is not connecting to your Wi-Fi network, ensure that your mobile device or computer and Chromecast are connected to the same Wi-Fi network. Additionally, check your network settings and ensure that there are no Wi-Fi connectivity issues with your router. You may also consider restarting your Chromecast and router to establish a fresh connection.
2. Chromecast not being detected by the Google Home app: If the Google Home app is not detecting your Chromecast, ensure that both your mobile device or computer and Chromecast are connected to the same Wi-Fi network. Restarting the app and Chromecast, as well as checking for any available app updates, can also help resolve this issue.
3. Choppy or buffering playback: If you experience choppy or buffering playback when casting, check your Wi-Fi network connectivity and ensure that it has a strong and stable connection. You can also try moving your Chromecast and router closer together to improve the signal strength. Lowering the video quality or restarting your Chromecast and casting device may also help resolve playback issues.
4. No audio or out-of-sync audio: If you are experiencing audio issues, ensure that the volume on both your TV and casting device is not muted or set too low. Check if the audio output settings on your casting device are correctly configured. If the audio and video are out of sync, try restarting the casting process or reconnecting your casting device to your Chromecast.
5. Chromecast not turning on or not displaying anything on the TV: If your Chromecast is not turning on or not displaying anything on the TV, make sure that it is properly connected to a power source and that the HDMI cable is securely plugged into both the Chromecast and the TV. Try using a different HDMI port on your TV or using the HDMI extender cable included with your Chromecast. Restarting your Chromecast and checking for any available firmware updates can also help resolve this issue.
If you encounter any other issues with your Chromecast, you can visit the Google Chromecast Help Center for more specific troubleshooting steps and solutions. Additionally, the Google Home app provides options for feedback and support, allowing you to reach out to the Chromecast support team if necessary.
By following these troubleshooting steps and solutions, you can resolve common issues with your Chromecast and ensure a smooth and enjoyable casting experience. Remember to keep your Chromecast and casting devices updated with the latest firmware and app versions to take advantage of any bug fixes and performance improvements that Google provides.
In the next section, we’ll wrap up our guide and summarize the key points covered in using and troubleshooting your Chromecast.
Conclusion
Google Chromecast is a powerful device that allows you to effortlessly stream your favorite content from your mobile devices or computer directly to your TV. Whether you want to watch movies, shows, listen to music, or share photos, Chromecast provides a seamless and convenient casting experience. In this guide, we covered the essential steps to set up and use Chromecast, including connecting it to your TV and Wi-Fi network, installing the Google Home app, and casting content from various devices using supported apps. We also explored how to personalize your Chromecast experience by customizing backdrop settings and managing Chromecast settings. Additionally, we provided troubleshooting tips to help you resolve common issues you may encounter along the way.
With Chromecast, you have the ability to transform your TV into a powerful entertainment hub, bringing countless hours of enjoyment and immersive experiences. Whether you’re streaming your favorite shows, playing music, or sharing memories with loved ones, Chromecast offers a user-friendly and versatile way to enhance your media consumption.
As technology evolves and new features and functionalities are introduced, it’s always beneficial to stay updated with the latest firmware and app versions for the best performance and compatibility. Stay connected to the Google Chromecast community, explore new supported apps, and take advantage of the ever-growing capabilities of Chromecast.
Now that you have a solid understanding of how to set up, use, and troubleshoot your Chromecast, it’s time to unleash its full potential. Enjoy casting your favorite content, customizing your backdrop, and exploring new entertainment possibilities with Chromecast. Happy casting!