Introduction
An external hard drive is a versatile and practical device that allows you to store and access large amounts of data outside of your computer’s internal storage. Whether you need additional space for files, want to back up important documents, or simply want a portable storage solution, an external hard drive can be a valuable asset.
In this article, we will guide you through the process of using an external hard drive effectively. From connecting the drive to your computer to transferring and managing files, we will cover all the essential steps to ensure a seamless user experience. By the end of this article, you will have a clear understanding of how to utilize an external hard drive to meet your storage needs.
Before we dive into the details, it’s important to note that the specifics of using an external hard drive may vary depending on the operating system and model of the drive. We will provide general instructions that should apply to most devices, but always refer to the manufacturer’s instructions for any specific information related to your particular device.
So, without further ado, let’s get started on our journey to unlock the full potential of your external hard drive!
Connecting the External Hard Drive
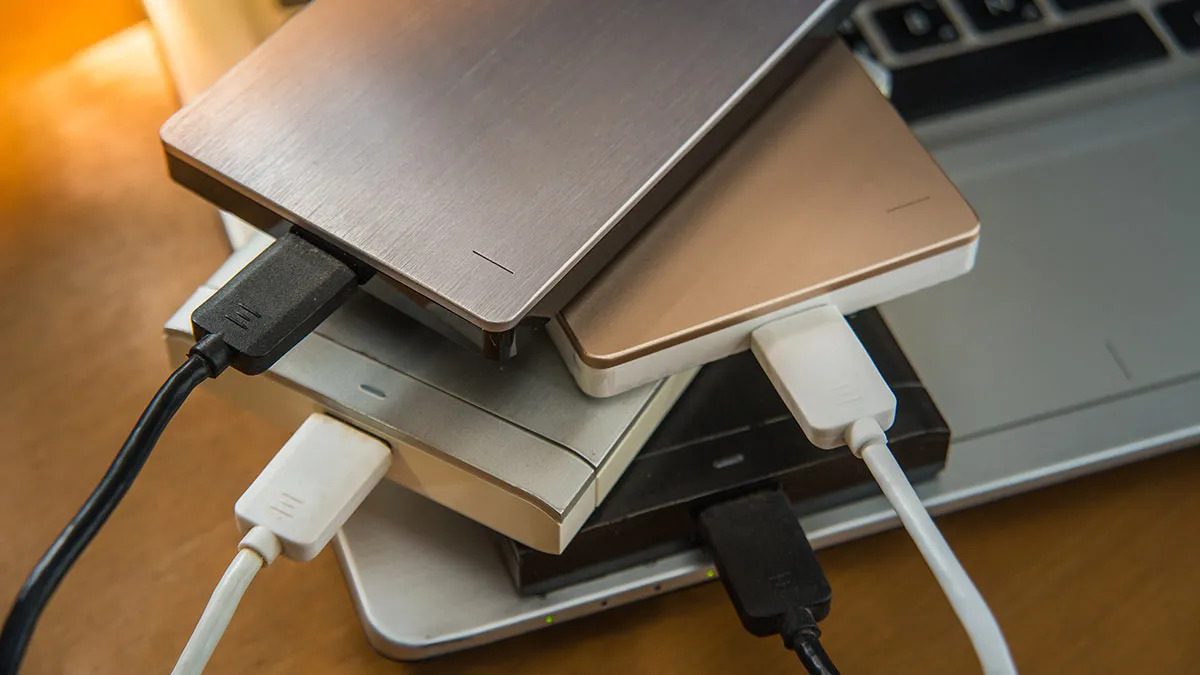
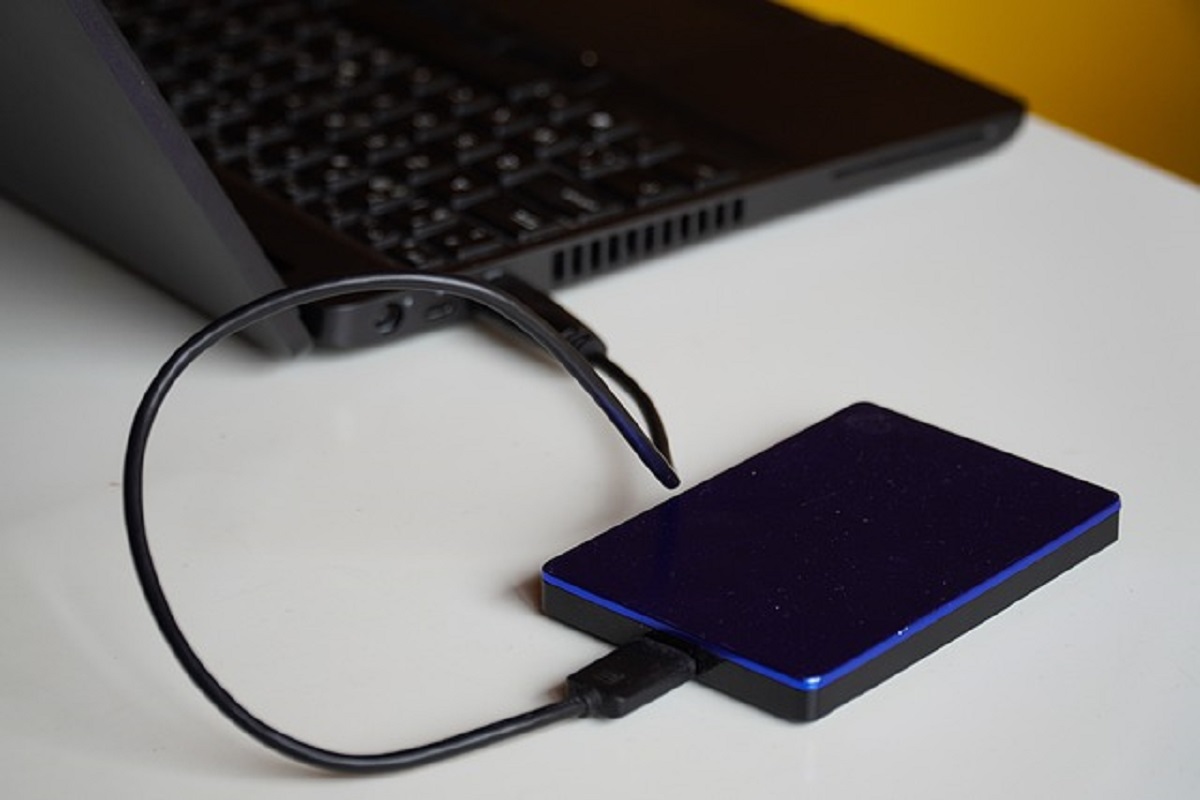
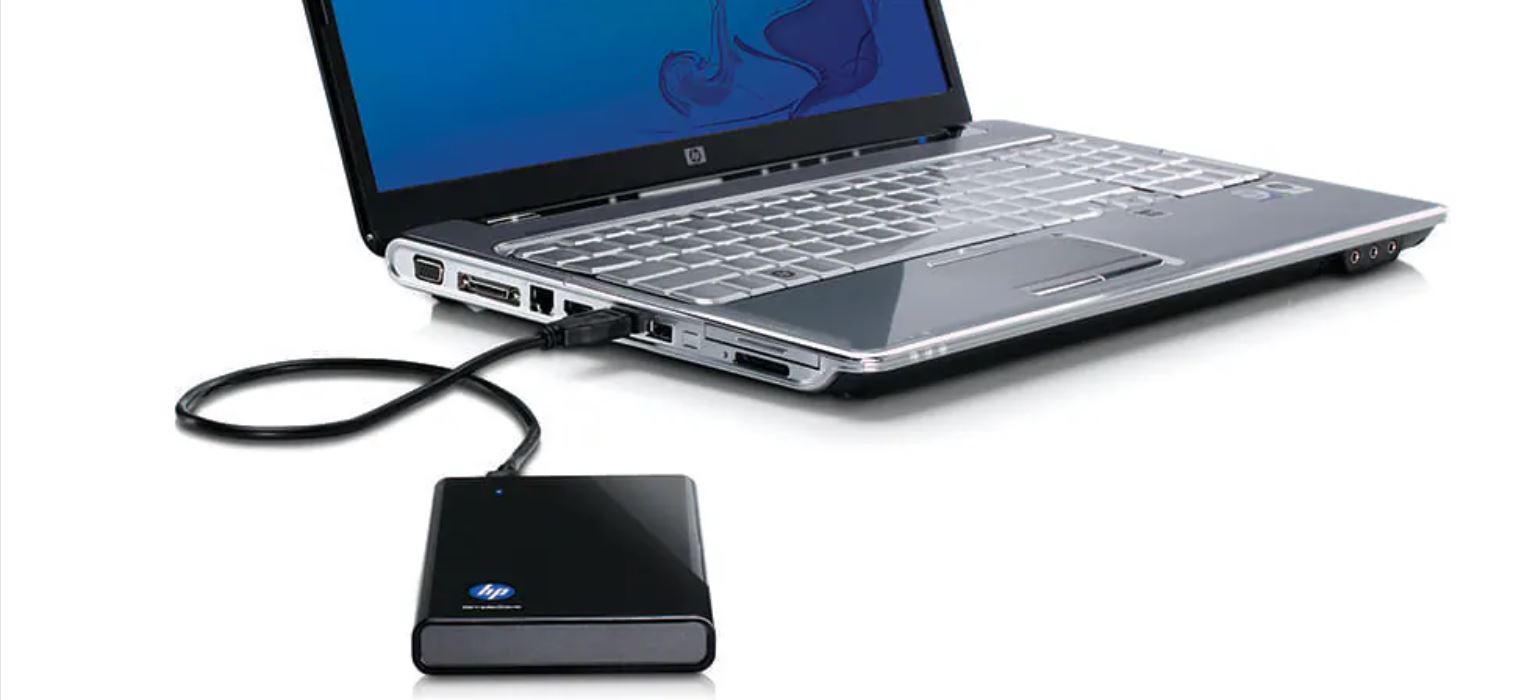
Before you can start using your external hard drive, you need to connect it to your computer. The process may vary slightly depending on the type of connection your external hard drive supports. Here are the general steps:
- Check the cables: Make sure you have the appropriate cables to connect your external hard drive to your computer. Common connection types include USB, Thunderbolt, and eSATA. Refer to the user manual or the manufacturer’s website for the specific cable required.
- Connect the power adapter (if applicable): Some external hard drives require external power to function properly. If your drive has a separate power adapter, plug it into an electrical outlet.
- Connect the cable to your computer: Plug one end of the cable into the external hard drive, and the other end into an available port on your computer. For USB connections, use a USB port (typically located on the sides or back of your computer). For Thunderbolt or eSATA connections, refer to the specific ports on your computer.
- Power on the external hard drive: If your external hard drive has a power button or switch, press it to turn on the drive. Some drives automatically power on when connected to the computer.
- Wait for the computer to detect the drive: Once you’ve connected the external hard drive and powered it on, your computer should detect it automatically. Depending on your operating system, you may see a notification or a new drive icon appear in the file explorer.
- Ensure proper recognition: After the drive is detected, verify that it appears correctly in your computer’s file explorer or disk management tool. If the drive is not recognized, you may need to update your computer’s drivers or try a different USB port or cable.
Once you’ve successfully connected your external hard drive to your computer, you’re ready to move on to the next step: formatting the drive to ensure compatibility and optimal performance.
Formatting the External Hard Drive
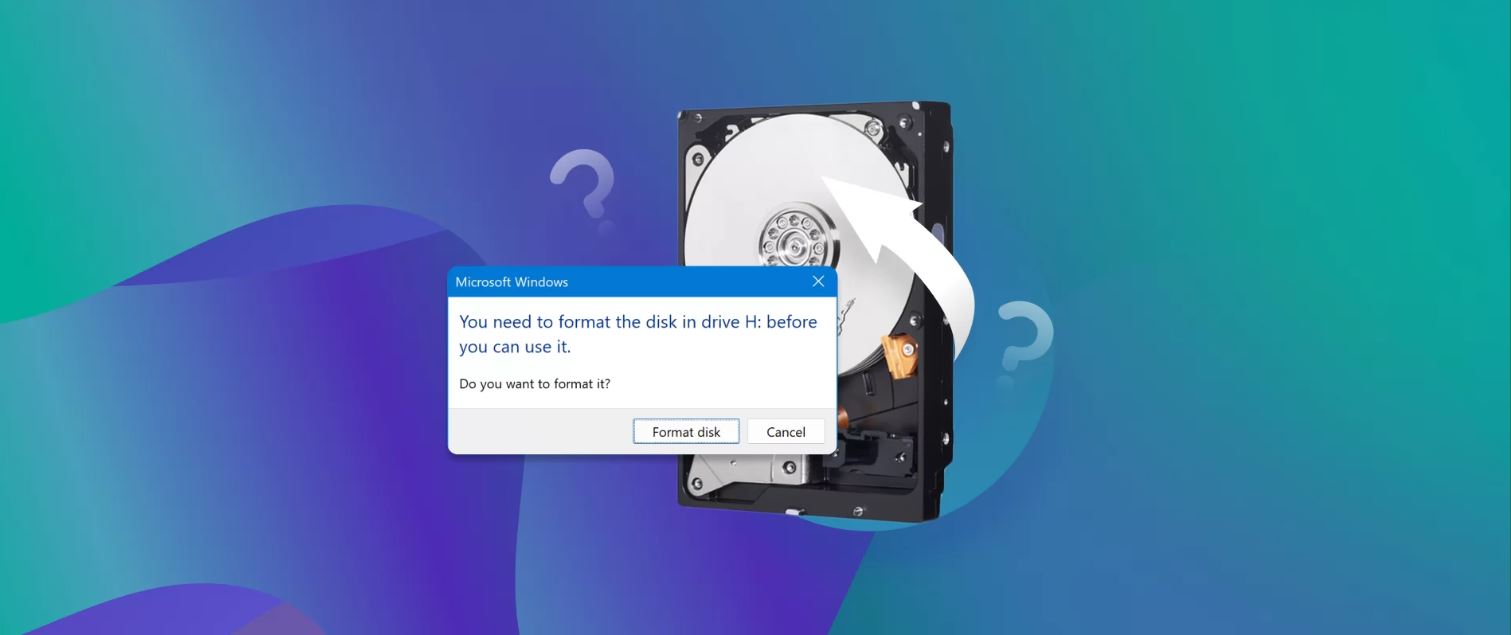
Formatting your external hard drive is an important step to ensure compatibility with your computer’s operating system and optimize its performance. It is important to note that formatting erases all data on the drive, so make sure to back up any important files before proceeding. Here’s how you can format your external hard drive:
- Open the file explorer: Go to your computer’s file explorer by clicking on the corresponding icon in the taskbar (Windows) or the dock (macOS). This will allow you to view and manage files and drives on your computer.
- Locate the external hard drive: Look for the drive icon representing your external hard drive in the file explorer. It may be labeled with the drive’s name or assigned a default name by the operating system.
- Right-click on the drive: Once you’ve located the external hard drive, right-click on its icon to open a contextual menu. Select the “Format…” or “Erase…” option from the menu. This will open the formatting tool for your operating system.
- Select a file system: In the formatting tool, you will be prompted to select a file system for the external hard drive. The most commonly used file systems are NTFS (for Windows) and exFAT (for cross-platform compatibility). Choose the file system that best suits your needs.
- Assign a volume label (optional): You can choose to assign a name or label to your external hard drive. This label will help you identify the drive easily. Enter the desired name in the designated field in the formatting tool.
- Confirm the formatting: Before proceeding with the formatting process, double-check your settings to ensure they are correct. Formatting will erase all data on the drive, so it is essential to back up any important files beforehand.
- Initiate the formatting: Once you have reviewed your settings, click on the “Format” or “Erase” button to initiate the formatting process. The time required for formatting will depend on the size and speed of your external hard drive.
- Wait for the formatting to complete: During the formatting process, your computer will erase the existing data on the external hard drive and configure it according to the selected file system. Do not interrupt the process or disconnect the drive until the formatting is complete.
After the formatting process is finished, your external hard drive will be ready for use. You can start transferring files to it or use it as a backup solution for your important data.
Transferring Files to the External Hard Drive
Now that you have successfully connected and formatted your external hard drive, it’s time to start transferring files onto it. This process allows you to free up space on your computer’s internal storage and create a backup of your important files. Here’s how you can transfer files to your external hard drive:
- Open the file explorer: Launch your computer’s file explorer by clicking on its icon in the taskbar (Windows) or the dock (macOS). This will allow you to navigate and manage your files and folders.
- Locate the files you want to transfer: Navigate to the location of the files or folders on your computer that you want to transfer to the external hard drive. You can access files from your desktop, documents folders, or any other storage location on your computer.
- Select the files: Click on the files or folders you want to transfer to the external hard drive. To select multiple files or folders, hold down the Ctrl key (Windows) or Cmd key (macOS) while clicking on each item.
- Copy the files: Right-click on the selected files or folders and choose the “Copy” option from the contextual menu. Alternatively, you can use the keyboard shortcut Ctrl+C (Windows) or Cmd+C (macOS) to copy the files.
- Navigate to the external hard drive: In the file explorer, navigate to the location of your external hard drive. You can usually find it as a separate drive listed under “This PC” (Windows) or “Devices” (macOS).
- Paste the files: Right-click on an empty area in the external hard drive’s location and select “Paste” from the contextual menu. Alternatively, you can use the keyboard shortcut Ctrl+V (Windows) or Cmd+V (macOS) to paste the files.
- Monitor the file transfer progress: Depending on the size and number of files you are transferring, it may take some time for the process to complete. During the transfer, you can see a progress bar or indicator that shows the status of the file transfer.
- Verify the file transfer: After the files have been successfully copied to the external hard drive, you can double-check to make sure they are present and accessible. Open the external hard drive’s location in the file explorer and navigate to the folders or files you transferred to ensure they are intact.
By following these steps, you can easily transfer files from your computer to the external hard drive. Remember to safely eject the drive after you have completed the transfer to avoid data corruption or loss.
Safely Ejecting the External Hard Drive
Before you physically disconnect your external hard drive from your computer, it is crucial to follow the proper procedure to avoid data loss or damage. Safely ejecting the drive ensures that all pending read-write operations are completed and that the drive is ready to be disconnected. Here’s how you can safely eject your external hard drive:
- Check for file transfer completion: Before ejecting the external hard drive, ensure that any ongoing file transfers or operations involving the drive have completed. Look out for any progress bars or indicators that indicate pending file actions.
- Save and close all opened files: If you have any files or folders from the external hard drive open on your computer, save and close them before proceeding. This ensures that all changes are written to the drive and prevents any potential data loss.
- Locate the external hard drive icon: In the file explorer, locate the icon or listing that represents your external hard drive. On Windows, it is typically located in the “This PC” section, while on macOS, it may be found under “Devices” or on the desktop.
- Right-click on the drive: Right-click on the external hard drive’s icon or listing to open a contextual menu. From the options available, select the “Eject,” “Safely Remove,” or “Disconnect” option. This action signals the operating system to prepare the drive for removal.
- Wait for the confirmation message: The operating system will display a confirmation message indicating that it is safe to disconnect the external hard drive. Do not remove the drive until you receive this confirmation message.
- Physically disconnect the drive: Once you have received the confirmation message, you can safely disconnect the external hard drive from your computer. Gently remove the cable from the computer’s port and unplug the power (if applicable) from the external hard drive.
- Store the drive securely: After disconnecting the external hard drive, store it in a safe and dry place to protect it from any potential physical damage or exposure to moisture or extreme temperatures.
Following these steps will ensure that you safely eject your external hard drive and protect your data from potential corruption or loss. It is important to note that abruptly disconnecting the drive without following the proper ejection procedure can lead to data loss or damage to the drive’s file system.
Using the External Hard Drive as a Backup
An external hard drive can serve as an excellent backup solution to protect your important files and data from accidental loss or system failures. By regularly backing up your files, you can ensure that you have a copy of your data in case of any unforeseen circumstances. Here’s how you can effectively use your external hard drive as a backup:
- Choose a backup software: Consider using a reliable backup software that offers features such as automatic backups, scheduled backups, and incremental backups. There are several options available, both free and paid, that can simplify the backup process.
- Install and set up the backup software: Download and install the backup software of your choice on your computer. Follow the software’s instructions to set up the backup parameters. Select the external hard drive as the destination for your backups.
- Select files and folders to back up: In the backup software, choose the files and folders you want to include in your backup. You can select specific files or opt for a comprehensive backup strategy that includes your entire system.
- Configure backup settings: Customize the backup settings according to your preferences. You can set the backup frequency, choose whether to compress or encrypt your backups, and specify any additional options offered by the software.
- Initiate the backup: Start the backup process either manually or according to the scheduled intervals you have set. The software will begin transferring your selected files to the external hard drive, creating a copy of your data for safekeeping.
- Monitor the backup progress: Keep an eye on the backup software’s progress indicators to ensure that the backup is running smoothly. If any errors or issues occur, the software will usually alert you and provide troubleshooting recommendations.
- Regularly update and maintain backups: It is crucial to update your backups on a regular basis to ensure that your latest files and changes are included. Consider establishing a backup schedule that aligns with your needs and the frequency of your file modifications.
- Test the backup integrity: Periodically test the integrity of your backups by restoring a few files or folders to your computer. This will help ensure that your backups are accessible and functional when you need to recover your data.
- Keep your external hard drive safe and secure: Store your external hard drive in a secure location away from potential hazards such as extreme temperatures, moisture, and physical damage. Consider keeping a duplicate backup off-site for added protection.
By following these steps and implementing a regular backup routine, you can rely on your external hard drive to safeguard your valuable files and provide peace of mind in the event of data loss or system failures.
Managing and Organizing Files on the External Hard Drive
Efficiently managing and organizing your files on the external hard drive is essential for easy accessibility and a streamlined workflow. By implementing effective organizational strategies, you can keep your files organized and locate them quickly whenever needed. Here are some tips for managing and organizing files on your external hard drive:
- Create a folder structure: Start by creating a hierarchical folder structure on your external hard drive. Organize folders based on broad categories and create subfolders within each category to further segment your files.
- Use descriptive and consistent naming conventions: Name your files using clear and descriptive labels to make it easier to identify their contents. Consistency in naming conventions helps maintain uniformity and simplifies future searches.
- Utilize subfolders: Create subfolders within each category to further categorize and organize your files. This allows for even more specific organization and streamlines file management.
- Sort files by date or type: Depending on your needs, consider sorting your files by date modified or by file type. This can be helpful for quickly locating the most recent files or files of a particular format.
- Implement a consistent filing system: Establish a system for organizing files based on project names, client names, or any other relevant criteria. This ensures a consistent and easily understandable organization structure.
- Use descriptive metadata: If your operating system supports file metadata, such as tags or labels, utilize them to add additional descriptive information to your files. This can make searching and sorting files even more convenient.
- Regularly review and declutter: Periodically review your files and folders on the external hard drive and delete any unnecessary or outdated files. This helps to keep your storage space tidy and avoids clutter.
- Back up your organized files: Make sure to back up your organized files on the external hard drive regularly. Consider creating duplicate copies using additional storage devices or cloud storage services for added data security.
- Implement a consistent file backup schedule: Establish a routine for backing up your files from the external hard drive onto other storage devices or cloud services. This ensures that your data is protected in case of any hardware failures or accidents.
- Document your organization structure: Keep a record of your folder structure and any specific organization methods you use. This will help you maintain consistency and easily navigate your files, especially if you need to share the drive with others or use it on different devices.
By following these tips and implementing effective file management and organization practices, you can maximize the usability and efficiency of your external hard drive, saving time and ensuring easy access to your files.
Troubleshooting Common Issues with External Hard Drives
While external hard drives are generally reliable, there may be times when you encounter technical issues or errors. It’s important to be aware of common problems and their potential solutions to ensure smooth operation and data integrity. Here are some troubleshooting tips for common issues with external hard drives:
- Ensure proper connections: If your external hard drive is not being recognized or is not working correctly, check the connections. Ensure that the cables are securely plugged into both the drive and the computer. Try using a different cable or port to eliminate any connection issues.
- Update drivers and firmware: Outdated drivers or firmware can sometimes cause compatibility issues. Visit the manufacturer’s website and download the latest drivers or firmware updates for your external hard drive model. Install them following the provided instructions.
- Check for power issues: If your external hard drive requires external power, ensure that it is properly connected to a power source. Check if the power adapter is functional, and try plugging it into a different outlet. Faulty power sources can cause the drive not to power on or function properly.
- Run disk error checks: If you encounter disk errors or file system issues, use the disk error checking utility provided by your operating system. On Windows, you can right-click on the drive, go to Properties, and select the “Check” or “Scan” option under the Tools tab. On macOS, use the Disk Utility to run First Aid on the external hard drive.
- Check for drive formatting compatibility: If you are using the external hard drive with different operating systems, ensure that it is formatted in a file system compatible with all of them. Consider using exFAT for cross-platform compatibility or using specific file systems that are compatible with both Windows and macOS, such as NTFS with third-party software.
- Scan for malware or viruses: Malware or viruses can affect the performance and functionality of your external hard drive. Use a reliable antivirus software to scan both your computer and the external hard drive for any potential threats. Take appropriate actions to remove the detected malware.
- Check for overheating: Overheating can cause an external hard drive to malfunction or become unstable. Make sure the drive is adequately ventilated and not placed on surfaces that can obstruct airflow. If necessary, consider using cooling pads or other cooling solutions to mitigate heat-related issues.
- Perform data recovery: In case of accidental file deletion or data loss, there are data recovery software tools available that can help recover lost files from your external hard drive. Follow the instructions provided by the software and avoid using the drive further until the recovery process is complete.
- Contact technical support: If you have tried troubleshooting steps and are still experiencing issues with your external hard drive, consider contacting the manufacturer’s technical support for further assistance. They can provide specific guidance or recommend possible solutions.
By following these troubleshooting tips, you can overcome common issues with external hard drives and restore their functionality. Remember to always handle your external hard drive with care and keep regular backups of your important files to minimize the risk of data loss.
Conclusion
Using an external hard drive can significantly expand your storage capacity, provide data backup, and facilitate efficient file management. In this article, we have covered the essential steps for effectively utilizing an external hard drive.
We started by discussing the process of connecting the external hard drive to your computer, followed by formatting it to ensure compatibility and optimal performance. We then explored how to transfer files to the external hard drive, emphasizing the importance of safely ejecting the device to prevent data loss or corruption.
We also delved into the benefits of using an external hard drive as a backup solution, highlighting the significance of implementing a reliable backup software and maintaining a consistent backup schedule. Furthermore, we provided useful tips on managing and organizing files to enhance accessibility and streamline workflow.
Lastly, we touched upon common troubleshooting techniques to address potential issues that may arise with external hard drives, such as connection problems, drive formatting, and power-related issues.
Remember, while the instructions provided in this article are generally applicable, it is always recommended to refer to the specific documentation or support provided by the manufacturer of your external hard drive for device-specific instructions.
By following these guidelines, you can make the most of your external hard drive, ensuring its optimal performance and maximizing its potential for storage, backup, and efficient file management.