Introduction
Welcome to the digital age, where capturing moments has become a part of our daily lives. Whether you want to share that hilarious meme, document an important conversation, or capture a stunning image, taking screenshots on your Android phone is a simple yet indispensable function.
Screenshots are not just for sharing funny or noteworthy content; they also serve a practical purpose. They can be used to capture important information, like a confirmation page after making an online purchase or saving a conversation thread for future reference. Screenshots can even be helpful in troubleshooting technical issues by providing visual evidence of the problem.
Android, being one of the most popular mobile operating systems in the world, offers several methods to take screenshots, making it easy to capture that screenshot-worthy moment at any time.
In this article, we will explore the various methods available to take screenshots on your Android phone. Whether you have a Samsung, Google Pixel, OnePlus, or any other Android device, we’ve got you covered.
From using the hardware buttons to employing gestures or even utilizing third-party apps – we’ll show you the different ways to capture and save those precious moments. Better yet, we’ll provide you with some tips and tricks on how to take the best screenshots possible, ensuring you never miss that perfect shot again.
So, grab your Android phone, and let’s dive into the world of capturing screenshots.
Explaining the Importance of Taking Screenshots on Your Android Phone
Taking screenshots on your Android phone may seem like a simple and mundane task, but it holds significant importance in your digital life. Here are a few reasons why capturing screenshots on your Android device can be incredibly valuable:
1. Sharing Memorable Moments: Screenshots allow you to capture and preserve memorable moments from your favorite apps, games, or social media platforms. Whether it’s a hilarious conversation, a stunning image, or a beautifully designed interface, screenshots let you share these moments with friends and family.
2. Save Important Information: Screenshots come in handy when you need to save vital information that you may need in the future. From flight itineraries and hotel reservations to important emails and online receipts, capturing a screenshot ensures that you have a readily accessible record of the information.
3. Provide Visual Evidence: Screenshots are a powerful tool when it comes to providing visual evidence. If you encounter a software bug, experience a glitch, or face any technical issues, capturing a screenshot can assist you in explaining the problem to tech support or developers more effectively.
4. Remember Useful Tips and Tricks: Screenshots are a helpful way to retain useful tips, tricks, or tutorials. Whether you stumble upon a helpful online guide, a how-to video, or a step-by-step tutorial, capturing a screenshot allows you to reference the information later when you need a quick reminder.
5. Document Conversations: Screenshots serve as a useful tool for documenting important conversations. Whether it’s for work-related discussions, legal matters, or sentimental conversations, capturing a screenshot can help you preserve important dialogues and refer back to them whenever necessary.
6. Collaborate and Troubleshoot: Screenshots are invaluable when it comes to collaboration and troubleshooting. Whether you’re working on a project with your team or troubleshooting an issue with technical support, screenshots serve as a visual aid, providing a clearer understanding of the problem at hand.
7. Personal Organization: Screenshots can assist in personal organization, acting as a visual reminder or reference point. From saving inspiring quotes, recipes, or design ideas to creating digital vision boards, screenshots help you keep track of the things that inspire and motivate you.
By understanding the importance of taking screenshots on your Android phone, you can make the most out of this valuable feature and utilize it to enhance your digital experience, improve communication, and keep important information at your fingertips.
Different Methods to Take Screenshots on Android
Android smartphones offer various methods for capturing screenshots, ensuring that you can easily capture and save important moments or information with just a few taps. Let’s explore some of the different methods available:
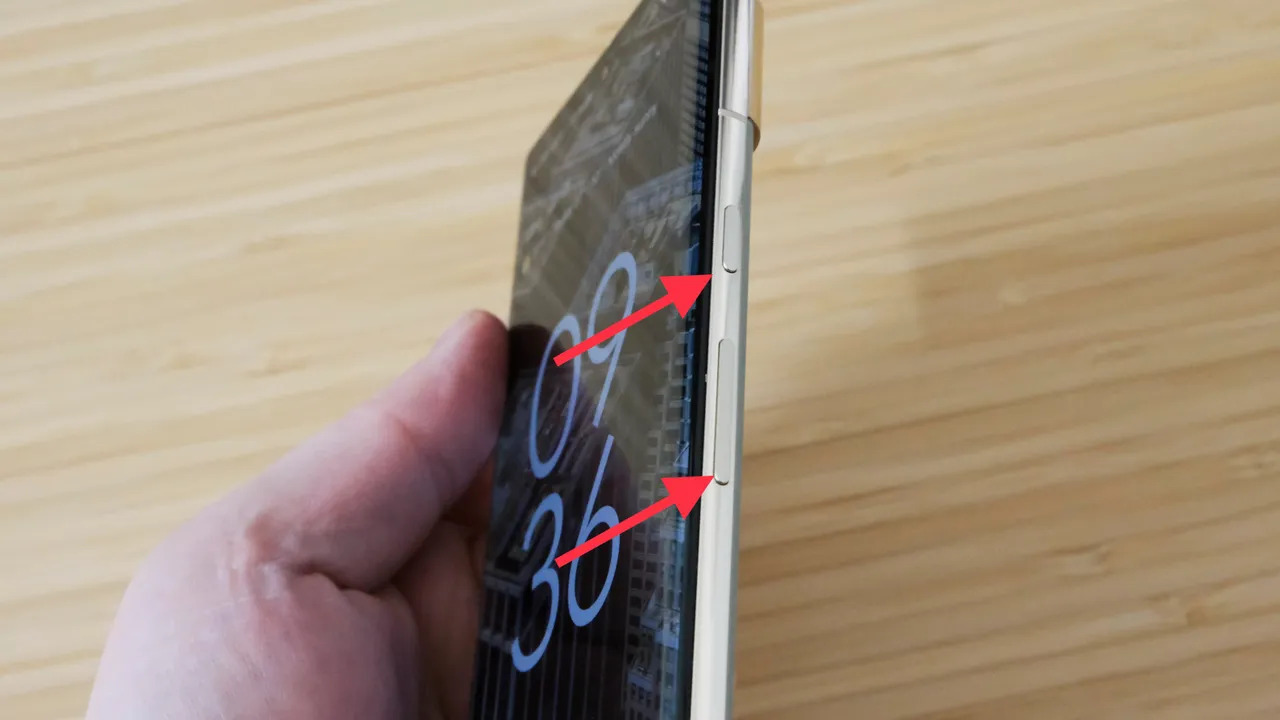
1. Using the Hardware Buttons: The most common method to take a screenshot on Android is by using the hardware buttons. Simply press and hold the volume down button and the power button simultaneously for a few seconds. You will see a notification or hear a shutter sound indicating that the screenshot has been captured.
2. Using the Notification Panel: Many Android devices provide a convenient shortcut in the notification panel to capture screenshots. Swipe down from the top of your screen to access the notification panel, locate the screenshot icon, and tap on it. Your device will take an instant screenshot of the current screen.
3. Using Palm Swipe Gesture: Some Android devices offer a unique feature called “Palm Swipe Gesture” for taking screenshots. Enable this feature in your phone’s settings, and then swipe your hand across the screen from left to right or vice versa. This gesture will capture a screenshot that can be found in your device’s gallery.
4. Using Assistive Touch or Floating Button: Certain Android devices or custom launchers provide a floating button or assistive touch feature that includes a screenshot option. Enabling this feature adds a floating button to your screen, making it easy to take screenshots with just a tap.
5. Using Third-Party Apps: If your Android device doesn’t have built-in screenshot options or if you want more advanced features, you can explore third-party apps available in the Google Play Store. Many screenshot apps offer additional features like editing, capturing long screenshots, or even recording screen videos.
It’s essential to note that the availability and access to these methods may vary depending on your specific Android device and operating system version. Therefore, it’s always a good idea to check your phone’s user manual or perform a quick online search to find the precise instructions for capturing screenshots using your device.
By familiarizing yourself with these different methods, you can choose the one that works best for you and ensure that you never miss capturing those important moments or information on your Android phone.
Method 1: Using the Hardware Buttons
One of the most common and straightforward methods to capture a screenshot on your Android phone is by utilizing the hardware buttons. This method works across various Android devices and is relatively easy to use. Here’s a step-by-step guide:
Step 1: Navigate to the screen or content that you want to capture in the screenshot.
Step 2: Locate the physical volume down button and the power button on your device. The position of these buttons may vary depending on the make and model of your phone.
Step 3: Simultaneously press and hold the volume down button and the power button at the same time. Hold them for a few seconds until you see a visual indication, such as a flash on the screen or a shutter sound, confirming that the screenshot has been taken.
Step 4: You can now access the captured screenshot from your phone’s notification panel or by going to your device’s default gallery app.
It’s important to note that the exact button combination and procedure might differ slightly based on the device you are using. For instance, some devices may require you to press and hold the power button first and then quickly press the volume down button, while others may use the volume up button instead of the volume down button.
Additionally, you may find variations in how screenshots are saved or accessed depending on your device’s manufacturer or Android version. Some devices may save screenshots in a dedicated “Screenshots” album within the gallery app, while others may save them in the “Pictures” or “Photos” folder.
If you’re unsure about the specific button combination or location where the screenshots are saved on your device, refer to your phone’s user manual or do a quick online search for your particular device model and Android version.
By mastering this simple method of using hardware buttons, you can effortlessly capture and save screenshots of important moments, conversations, or information on your Android phone.
Method 2: Using the Notification Panel
Another convenient method to capture screenshots on your Android phone is by using the notification panel. This method allows you to quickly access the screenshot option with just a few swipes. Here’s how you can take a screenshot using the notification panel:
Step 1: Navigate to the screen or content that you want to capture in the screenshot.
Step 2: Swipe down from the top of your screen to open the notification panel.
Step 3: Look for the “Screenshot” option or an icon resembling a square with a pencil or pen tip, which indicates the screenshot functionality.
Step 4: Tap on the “Screenshot” option or the corresponding icon. You will see a visual indication, such as a flash on the screen or a shutter sound, confirming that the screenshot has been taken.
Step 5: You can now access the captured screenshot from your phone’s notification panel or by going to your device’s default gallery app.
It’s important to note that the appearance and location of the screenshot option in the notification panel may vary depending on your device’s manufacturer or Android version. Some devices may provide a dedicated “Screenshot” toggle that appears alongside other quick settings options, while others may require you to swipe left or right within the notification panel to find the screenshot option.
Additionally, if your device offers additional screenshot-related options, such as capturing a scrolling or long screenshot, you may find them within the expanded view of the notification or as additional icons in the notification panel. These options can be useful for capturing entire webpage contents or lengthy conversations that require scrolling.
If you’re uncertain about the specific location or appearance of the screenshot option in your device’s notification panel, refer to your phone’s user manual or do a quick online search for your particular device model and Android version to get precise instructions.
By utilizing the screenshot feature in the notification panel, you can conveniently capture and save screenshots of important information, images, or conversations on your Android phone without having to use any physical buttons.
Method 3: Using Palm Swipe Gesture
Some Android devices offer a unique feature called “Palm Swipe Gesture” that allows you to capture screenshots by simply swiping your hand across the screen. This method provides a hands-free way to take screenshots, making it convenient and efficient. Here’s how you can use the palm swipe gesture:
Step 1: Open your device’s settings and navigate to the “Advanced Features” or “Gestures” section. The exact location of this setting may vary depending on your device’s manufacturer and Android version.
Step 2: Look for the “Palm Swipe to Capture” or similar option and ensure that it is toggled on or enabled.
Step 3: Navigate to the screen or content that you want to capture in the screenshot.
Step 4: Extend your hand and place it vertically on either side of the screen, ensuring that your palm touches the screen.
Step 5: Now, swipe your entire hand horizontally across the screen in either direction, from left to right or right to left.
Step 6: You will see a visual indication, such as a flash on the screen or a shutter sound, confirming that the screenshot has been captured.
Step 7: You can access the captured screenshot from your device’s notification panel or by going to your device’s default gallery app.
It’s worth noting that the availability of the palm swipe gesture feature may vary depending on your device’s manufacturer and Android version. Some devices may have this feature enabled by default, while others may require you to enable it manually in the settings.
Additionally, if you’re experiencing difficulty in capturing screenshots using the palm swipe gesture, make sure you’re performing the swipe motion swiftly and smoothly. In some cases, a gentle touch is sufficient, while others may require a more assertive swipe.
If you’re unsure about whether your device supports the palm swipe gesture feature or need specific instructions for your particular device, refer to your phone’s user manual or perform a quick online search to find the precise details.
By using the palm swipe gesture method, you can capture screenshots on your Android phone effortlessly, without the need for physical buttons or navigating through the notifications panel.
Method 4: Using Assistive Touch or Floating Button
Some Android devices or custom launchers offer an Assistive Touch or Floating Button feature that includes a screenshot option. This method provides a convenient and accessible way to capture screenshots without relying on physical buttons or gestures. Here’s how you can use the Assistive Touch or Floating Button method:
Step 1: Open your device’s settings and navigate to the “Accessibility” or “Advanced Features” section, depending on your device.
Step 2: Look for the “Assistive Touch” or “Floating Button” option and ensure that it is toggled on or enabled.
Step 3: A floating button or a transparent icon will appear on your screen. You can drag it to a convenient location on the screen.
Step 4: Tap the floating button to open the Assistive Touch menu, which usually includes a screenshot option represented by a camera icon or something similar.
Step 5: Once the menu is open, tap on the screenshot option to capture the screenshot.
Step 6: You will see a visual indication, such as a flash on the screen or a shutter sound, confirming that the screenshot has been taken.
Step 7: You can access the captured screenshot from your phone’s notification panel or by going to your device’s default gallery app.
The availability of the Assistive Touch or Floating Button feature may depend on your device’s manufacturer or the custom launcher you are using. Some devices have this feature built-in, while others may require you to install a separate app that provides this functionality.
If your device does not have the Assistive Touch or Floating Button feature or if you prefer more advanced screenshot options, you can also explore third-party apps available in the Google Play Store. Many of these apps offer additional features like scrolling screenshots, image editing, and easy sharing options.
Remember to refer to your phone’s user manual or do a quick online search for precise instructions on enabling and using the Assistive Touch or Floating Button feature on your specific device.
By utilizing the Assistive Touch or Floating Button method, you can easily capture screenshots on your Android phone using a convenient floating button, providing you with quick access to the screenshot functionality without the need for physical buttons or gestures.
Method 5: Using Third-Party Apps
If your Android device doesn’t have built-in screenshot options or if you’re looking for more advanced features, using third-party apps can be a great alternative. These apps offer a range of functionalities, such as customizable screenshot settings, advanced editing tools, and even the ability to capture scrolling or long screenshots. Here’s how you can take advantage of third-party apps for capturing screenshots:
Step 1: Open the Google Play Store on your Android device and search for “screenshot apps.”
Step 2: Browse through the available apps and read the reviews and descriptions to find one that suits your needs.
Step 3: Once you’ve selected an app, tap on the “Install” button to download and install it on your device.
Step 4: Launch the app and familiarize yourself with its interface and features.
Step 5: Depending on the app, you may need to adjust the settings to customize the screenshot behavior, such as choosing the file format, selecting the save location, or enabling additional features like image editing or capturing scrolling screenshots.
Step 6: Navigate to the screen or content that you want to capture in the screenshot.
Step 7: Open the third-party app and use the designated button, gesture, or method specified by the app to capture the screenshot.
Step 8: Once the screenshot is captured, the app will typically provide options to edit, save, or share the screenshot.
Using third-party apps for capturing screenshots gives you access to additional features and customization options beyond what is available in the built-in screenshot methods of your device. These apps often provide useful tools like annotation, cropping, blurring, or adding text to your screenshots, allowing you to enhance and personalize them.
Popular third-party screenshot apps include SnagIt, Screenshot Easy, and Screen Master, among others. Keep in mind that while many of these apps are free to download and use, some may offer premium features that require a one-time purchase or a subscription for full access.
When selecting a third-party app, it’s important to check the user reviews, app ratings, and ensure that the app has a good reputation for performance and reliability. Additionally, always prioritize the security and privacy of your device by downloading apps from reputable developers and verifying app permissions before installation.
By utilizing third-party apps for capturing screenshots, you can access a wide range of features and customization options that go beyond the built-in screenshot capabilities of your Android device.
Tips for Taking Screenshots Effectively
While capturing screenshots on your Android phone is relatively straightforward, there are some tips and tricks you can follow to ensure that your screenshots turn out perfectly. Here are some tips for taking screenshots effectively:
1. Clean your screen: Before taking a screenshot, make sure to clean your phone’s screen. Fingerprints, smudges, or dust particles can affect the clarity of the captured image.
2. Frame your content: Take a moment to frame the content or screen you want to capture within the screenshot. Ensure that all the desired elements are visible and properly aligned within the frame.
3. Use natural lighting: Whenever possible, try to capture screenshots in well-lit environments or natural lighting. This helps in capturing vibrant and accurate colors, improving the overall quality of the screenshot.
4. Disable notifications: To avoid distractions or unwanted elements in your screenshots, consider temporarily disabling notifications. This helps keep your captured image clean and focused on the content you want to showcase.
5. Capture the right moment: For dynamic or time-sensitive content, timing is everything. Be prepared to capture the screenshot at the right moment, whether it’s a live event, a funny video, or an engaging conversation.
6. Experiment with different methods: Try utilizing the various methods mentioned earlier in this article to capture screenshots. Experimenting with different methods helps you find the one that works best for you and your device.
7. Take advantage of editing tools: After capturing a screenshot, consider using built-in or third-party editing tools to enhance the captured image. You can crop, annotate, add text, or adjust the brightness and contrast to make the screenshot more visually appealing or informative.
8. Organize and label your screenshots: To easily access and find your screenshots when needed, create folders or albums in your gallery app and label them accordingly. This helps maintain organization and makes it easier to locate specific screenshots in the future.
9. Share and backup your screenshots: Once you’ve captured and edited your screenshots, share them with others or back them up to a cloud storage service. This ensures that your screenshots are easily accessible and protected in case of device loss or damage.
10. Stay within legal and ethical boundaries: Ensure that you respect copyright laws, permissions, and privacy of others when taking and sharing screenshots. Avoid capturing or sharing sensitive or confidential information without proper authorization.
By following these tips, you can enhance your screenshot-taking skills and ensure that your captured images are clear, visually appealing, and serve their purpose in effectively conveying information, documenting moments, or sharing content with others.
Conclusion
Capturing screenshots on your Android phone is a valuable and versatile feature that allows you to save and share important moments, information, and content easily. Whether you’re using the hardware buttons, the notification panel, palm swipe gestures, assistive touch, or third-party apps, there are various methods available to suit your preferences and needs.
By taking advantage of these screenshot capabilities, you can save important information, share memorable moments, provide visual evidence, collaborate effectively, and enhance personal organization. Screenshots are a powerful tool in our digital age, helping us capture and preserve valuable moments, conversations, and visual content.
When capturing screenshots, don’t forget to clean your screen, frame your content, use natural lighting, and disable notifications to ensure your screenshots are clear, well-framed, and distraction-free. Experiment with different methods to find one that works best for you, and consider utilizing editing tools to enhance your screenshots before sharing or saving them.
Remember to respect copyright laws, permissions, and privacy when taking and sharing screenshots. Ensure that you do not capture or share sensitive or confidential information without appropriate authorization.
With these tips and tricks in mind, you can make the most of the screenshot capabilities on your Android phone and elevate your digital experience. Capture, save, and share those important moments and information effectively with the power of screenshots at your fingertips.


