Introduction
Welcome to our comprehensive guide on how to replace the battery on your Samsung tablet. Over time, the battery on your device may start to lose its capacity and require replacement. A worn-out battery can result in decreased performance, shorter battery life, and even unexpected shutdowns. By following the steps in this guide, you’ll be able to replace the battery on your Samsung tablet and ensure that it continues to provide reliable power.
Having a functional battery is essential for enjoying a smooth and uninterrupted experience while using your tablet. Whether you’re a student relying on your tablet for educational purposes, a professional using it for work, or simply an avid user for entertainment and browsing, a properly functioning battery is crucial. Not only will replacing the battery improve your device’s performance, but it will also extend its lifespan and prevent the need for frequent charging or inconvenience caused by power issues.
Before we dive into the steps, it’s important to note that while this guide focuses specifically on Samsung tablets, the general process of replacing a battery may vary slightly depending on the model and brand. It’s crucial to ensure you have the correct tools and follow the manufacturer’s instructions specific to your tablet model to avoid any damage.
Now, let’s move on to the tools that you’ll need and the step-by-step process of replacing the battery on your Samsung tablet.
Tools Required
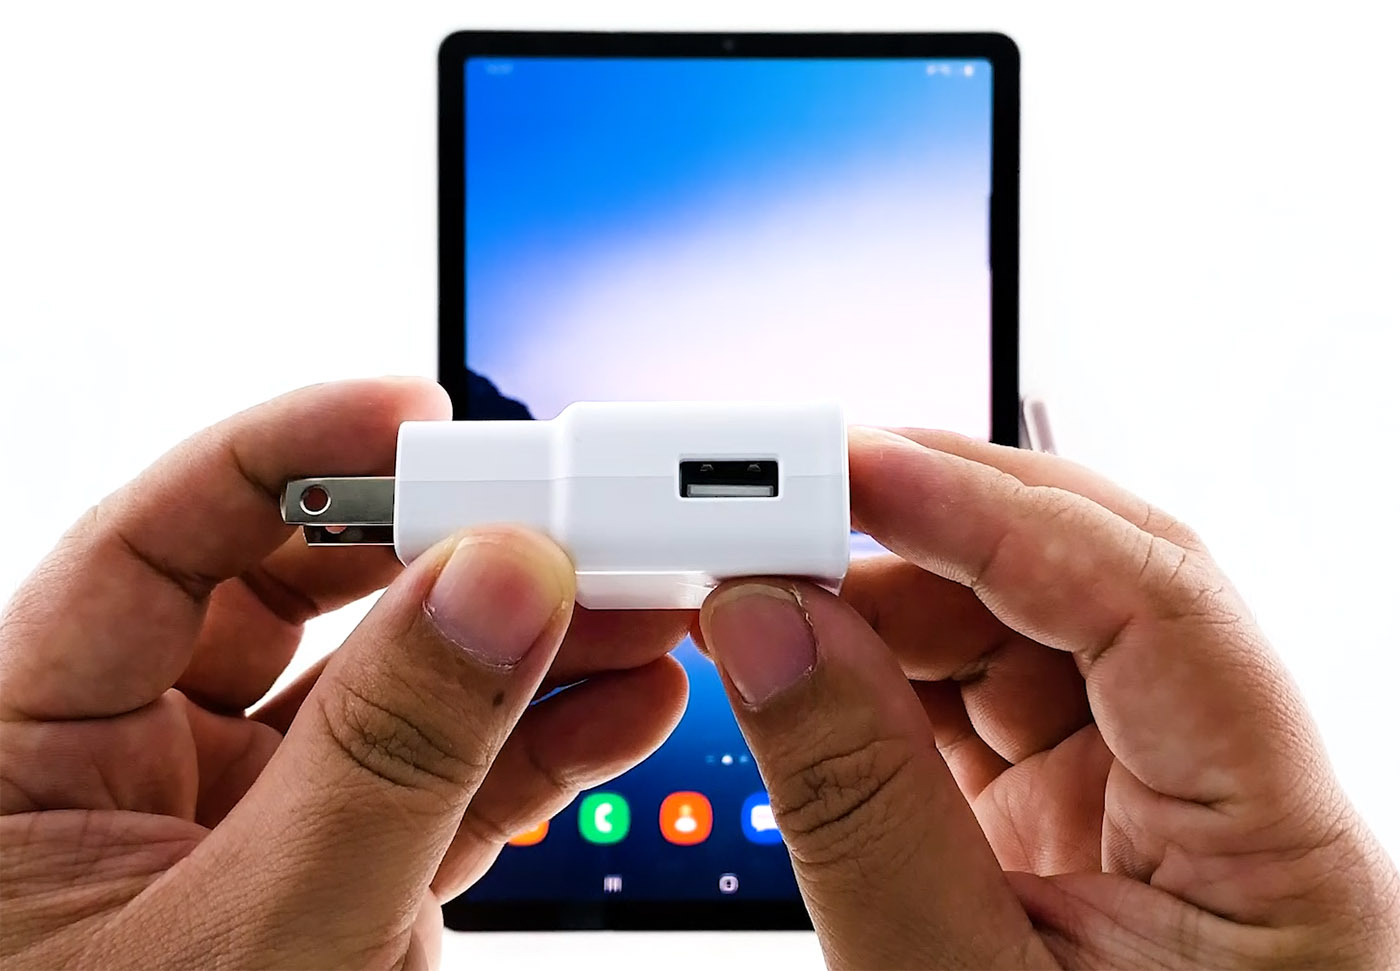
Before you begin the battery replacement process, it’s important to gather the necessary tools. Having the right tools on hand will make the process more efficient and minimize the risk of damaging your tablet. Here are the tools you’ll need:
- Small Phillips-head screwdriver: This tool is necessary for removing screws that secure the back cover of your tablet.
- Plastic opening tool: A non-conductive and anti-static plastic opening tool will help you safely pry open the back cover without scratching or damaging the tablet’s surface.
- Tweezers: Tweezers will be handy for manipulating small components, such as cables or connectors, during the battery replacement process.
- Replacement battery: Obtain a genuine replacement battery that is compatible with your Samsung tablet model. It’s crucial to purchase a high-quality, reliable battery to ensure optimal performance.
- Adhesive strips or double-sided tape: To securely attach the new battery in place, you may need adhesive strips or double-sided tape. Check the instructions specific to your tablet model to determine the appropriate adhesive method.
- Antistatic wrist strap and mat (optional): While not mandatory, an antistatic wrist strap and mat can help prevent static electricity from damaging sensitive components during the battery replacement process.
By having these tools readily available, you’ll be well-equipped to undertake the battery replacement process smoothly and efficiently. Now that you have the necessary tools, let’s move on to the step-by-step instructions for replacing the battery on your Samsung tablet.
Step 1: Powering off the Tablet
The first step in replacing the battery on your Samsung tablet is to power off the device. This ensures your safety and prevents any potential damage to the tablet or yourself during the battery replacement process. Follow the instructions below to power off your tablet:
- Press and hold the power button located on the side or top of your tablet.
- A menu will appear on the screen with options such as Power off, Restart, or Airplane mode.
- Select the “Power off” option by tapping on it.
- Wait for a few seconds until the tablet completely shuts down.
Once your tablet is powered off, you can proceed to the next step of removing the back cover. It’s important to ensure that the tablet is completely powered off before proceeding to avoid any potential electrical hazards or damage to the internal components.
Note: If your tablet’s battery is critically low and it shuts down before you can power it off using the above method, plug it into a power source and let it charge for a few minutes. Once it has enough charge, power it off following the same steps outlined above.
Now that your tablet is powered off, you’re ready to move on to the next step of removing the back cover. Remember to exercise caution and follow the instructions carefully to avoid any accidental damage to your tablet.
Step 2: Removing the Back Cover
Once your tablet is powered off, the next step in replacing the battery is to remove the back cover. The back cover of Samsung tablets is usually secured with screws and may require some gentle prying to detach it. Follow the step-by-step instructions below to remove the back cover:
- With the tablet facing up, locate the screws that secure the back cover. These screws are typically located along the edges or corners of the tablet’s back panel.
- Using a small Phillips-head screwdriver, carefully remove the screws by turning them counterclockwise. Keep the screws in a safe place to avoid losing them.
- Once all the screws are removed, take a plastic opening tool and insert it into the small gap between the back cover and the tablet’s frame. Gently pry the tool to separate the back cover from the frame.
- Work your way around the tablet, sliding the opening tool along the edges and applying gentle pressure to release any clips or adhesive holding the back cover in place.
- Continue prying and sliding the tool until the back cover is fully detached. Be careful not to apply excessive force to avoid damaging the cover or the tablet’s internal components.
- Once the back cover is loose, gently lift it off the tablet to expose the internal components.
As you remove the back cover, you may encounter some resistance due to adhesive or clips holding it in place. Take your time and ensure that all screws are removed before attempting to pry the cover off. If you encounter excessive resistance, double-check for any screws that may still be in place.
With the back cover successfully removed, you’re now ready to proceed to the next step of disconnecting the battery cable.
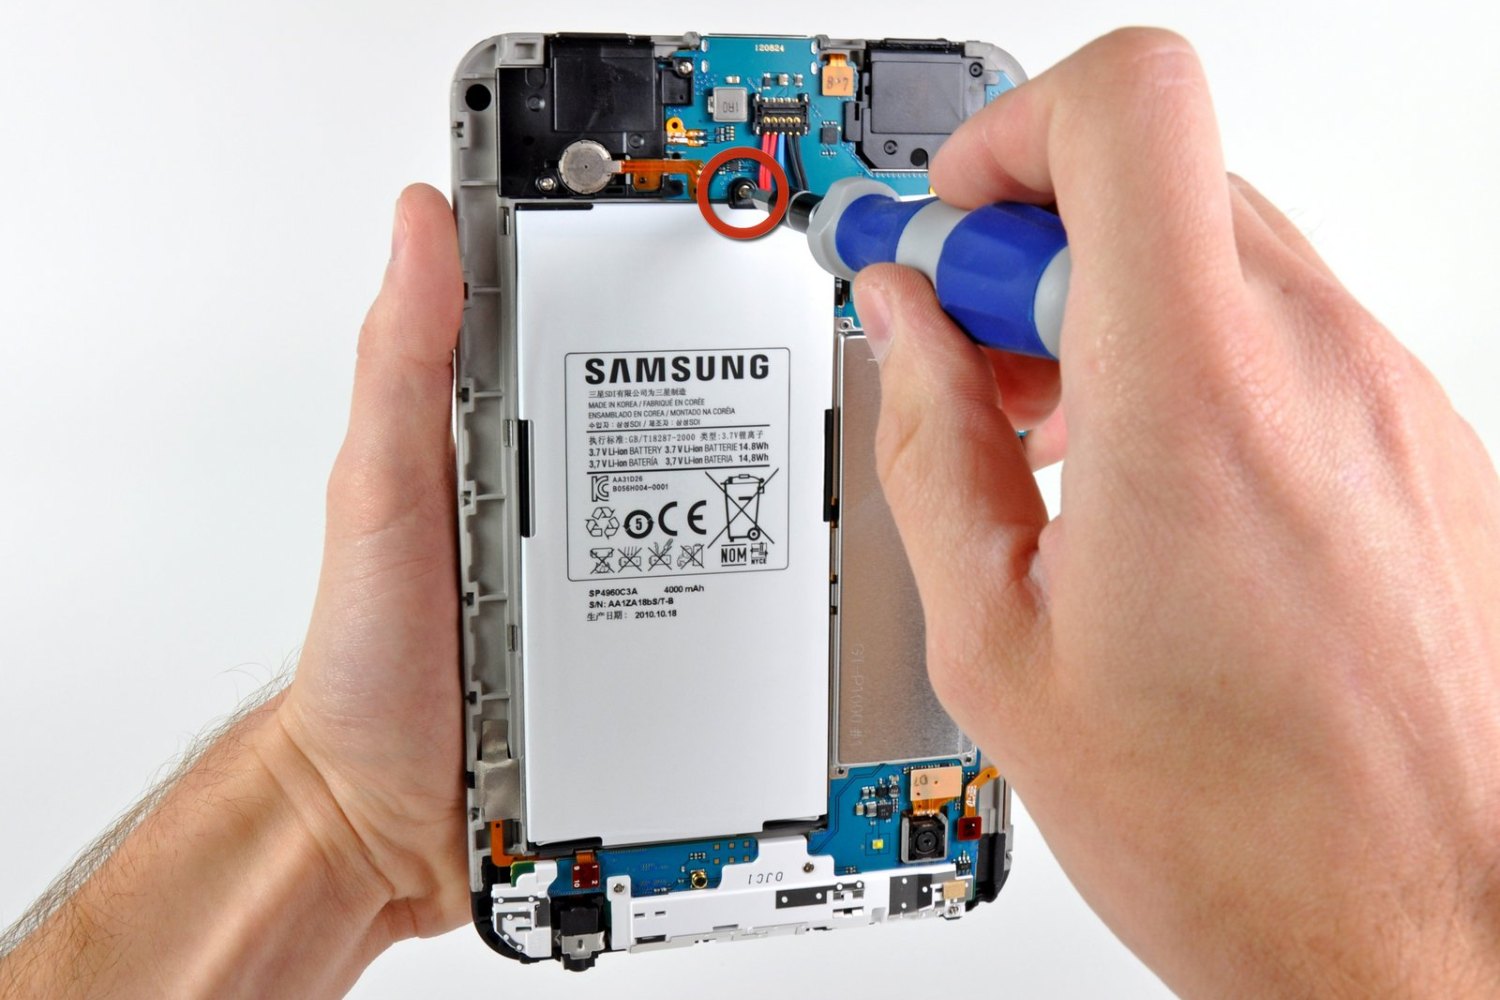
Step 3: Disconnecting the Battery Cable
After removing the back cover, the next step in replacing the battery on your Samsung tablet is to disconnect the battery cable. This ensures that there is no power running through the device while you work on replacing the battery. Follow the step-by-step instructions below to disconnect the battery cable:
- Locate the battery connector, which is a small plug where the battery cable connects to the tablet’s motherboard. It is usually located near the center of the device.
- Using a pair of tweezers or your fingers, carefully grip the connector and gently pull it away from the socket on the motherboard. Make sure to hold onto the connector and not the cable itself to avoid damaging the cable or the connector.
- Apply even pressure while pulling the connector, making sure not to twist or bend it excessively. The connector should come out smoothly without forcing or tugging too hard.
- Once the battery cable connector is disconnected, set it aside in a safe place where it won’t get misplaced or damaged during the battery replacement process.
It’s important to handle the battery cable connector with care to avoid any damage to the delicate pins or connectors inside. Take your time and ensure that you disconnect the cable properly to prevent any accidental damage. If you encounter any resistance while pulling out the connector, check for any latch or lock mechanism that may need to be released before disconnecting.
With the battery cable successfully disconnected, you’re now ready to remove the old battery and proceed to the next step of the battery replacement process.
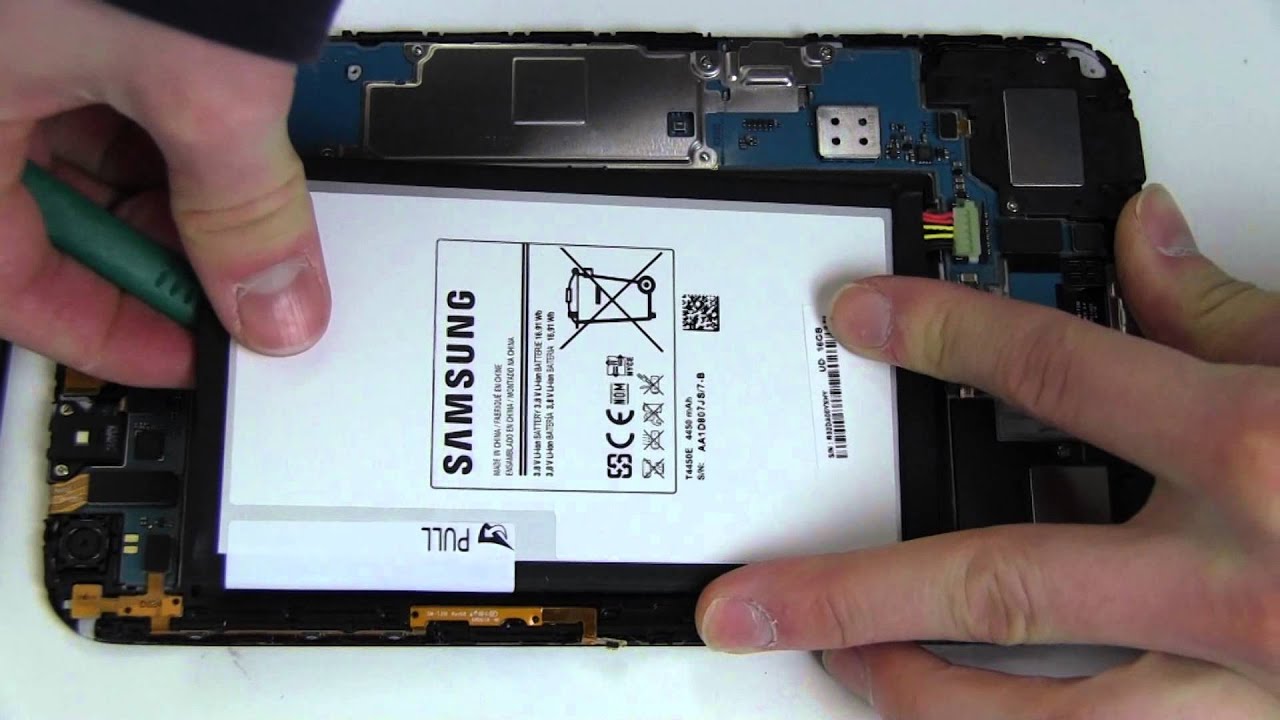
Step 4: Removing the Old Battery
With the battery cable disconnected, it’s time to remove the old battery from your Samsung tablet. Removing the old battery requires careful handling to ensure the safety of both the battery and the tablet. Follow the step-by-step instructions below to remove the old battery:
- Take a close look at the battery and locate any adhesive strips or tabs that may be securing it in place. These can typically be found on the edges or corners of the battery.
- Slowly and gently peel back the adhesive strips or tabs, taking care not to bend or puncture the battery. If adhesive strips are not present, the battery may be held in place by double-sided tape.
- Using a plastic opening tool or your fingers, lift the battery from one edge. Be cautious and exert gentle pressure to avoid bending or damaging the battery.
- If the battery is securely glued down and does not come off easily, you can use a plastic heating tool or a hairdryer to apply gentle heat to the edges of the battery. This will soften the adhesive and make it easier to remove.
- Continue lifting the battery until it is completely free from the tablet. Take care not to strain any cables or connectors that may be attached to the battery.
- Once the old battery is removed, place it aside in a safe location away from any heat or moisture. You can dispose of the old battery in accordance with local regulations for battery recycling.
It’s crucial to handle the old battery with care, as it contains chemicals and can pose a safety risk if mishandled. Dispose of the old battery responsibly and follow your local regulations for battery recycling or disposal.
With the old battery successfully removed, you can now proceed to the next step of installing the new battery in your Samsung tablet.
Step 5: Installing the New Battery
Now that the old battery has been removed, it’s time to install the new battery in your Samsung tablet. Follow the step-by-step instructions below to properly install the new battery:
- Take the new battery and confirm that it is the correct model for your Samsung tablet. Ensure that it matches the specifications and connectors of the old battery.
- Hold the new battery by its edges and align it correctly with the battery compartment in the tablet. Ensure that any cables or connectors on the battery properly align with their respective sockets on the motherboard.
- Gently press down on the battery to secure it in place. If using adhesive strips or double-sided tape, make sure they are properly aligned and firmly attach the battery to the tablet’s frame.
- Apply even pressure to the entire surface of the battery to ensure it is properly adhered and secured. Take care not to exert too much pressure that could potentially damage the battery.
- If there are any adhesive strips or tabs provided with the new battery, remove the protective backing and press them firmly onto the edges or corners of the battery.
- Double-check that the battery is securely installed and properly aligned. Ensure that there are no loose connections or cables that may interfere with the battery’s performance.
It’s crucial to handle the new battery with care and ensure proper alignment and connection. If the battery is not installed correctly, it may not function optimally or could potentially cause damage to the tablet.
With the new battery successfully installed, you’re now ready to proceed to the next step of reconnecting the battery cable.
Step 6: Reconnecting the Battery Cable
After installing the new battery, the next step in replacing the battery on your Samsung tablet is to reconnect the battery cable. This ensures that the battery is properly connected to the tablet’s motherboard and can provide power to the device. Follow the step-by-step instructions below to reconnect the battery cable:
- Locate the battery cable connector on the tablet’s motherboard. It should be in close proximity to where you disconnected it earlier.
- Take the battery cable connector and align it with the corresponding socket on the motherboard.
- Gently push the connector into the socket, ensuring that it is inserted fully and snugly. You may need to apply slight pressure until it clicks into place.
- Once the connector is securely inserted, double-check that it is properly aligned and seated in the socket.
It’s important to handle the battery cable connector with care to avoid any damage to the delicate pins or connectors inside. Take your time and ensure that you reconnect the cable properly to ensure a secure and reliable connection.
With the battery cable successfully reconnected, you can now proceed to the next step of replacing the back cover of your Samsung tablet.
Step 7: Replacing the Back Cover
With the battery cable securely connected, it’s time to replace the back cover of your Samsung tablet. The back cover helps protect the internal components and gives a finished look to your device. Follow the step-by-step instructions below to successfully replace the back cover:
- Line up the back cover with the tablet, ensuring that all the edges and corners align correctly.
- Gently press the back cover onto the tablet, starting from one edge and working your way around the device.
- Apply light pressure and ensure that the back cover snaps or clicks into place. The cover should fit flush against the tablet’s frame.
- If your tablet’s back cover is secured with screws, insert them into their respective holes and tighten them gently using a small Phillips-head screwdriver. Ensure that the screws are not over-tightened.
Take care not to force the back cover into place as it could damage the device or the cover itself. The cover should fit snugly without any gaps or wobbling. If you encounter any resistance or difficulty aligning the cover, double-check the positioning of the cover and ensure that all screws are properly tightened.
With the back cover successfully replaced, your Samsung tablet is now ready for the final step: powering it on.
Step 8: Powering on the Tablet
After completing the battery replacement and securing the back cover, the final step is to power on your Samsung tablet. Follow the step-by-step instructions below to successfully power on your device:
- Ensure that the tablet is in a location where it can safely and comfortably be used.
- Press and hold the power button located on the side or top of the tablet.
- The tablet will boot up, and you will see the manufacturer’s logo or the device’s splash screen.
- Continue holding the power button until the tablet fully boots up, which may take a few moments.
- Once the tablet is powered on, you will be prompted to set up or unlock the device as necessary.
During the initial boot-up process, the tablet may run some self-diagnostic checks or updates. Allow the device a few minutes to complete these tasks before proceeding with the setup or normal usage.
After powering on, take a moment to ensure that everything is functioning as expected. Check the battery icon to ensure it is displaying the appropriate charge level. If you notice any abnormalities or issues, double-check the battery connection and make sure it is securely attached.
Congratulations! You have successfully replaced the battery and powered on your Samsung tablet. Enjoy your improved battery life and the enhanced performance that comes with a new and reliable power source.
Conclusion
Replacing the battery on your Samsung tablet is a straightforward process that can greatly enhance the device’s performance and battery life. By following the step-by-step instructions provided in this guide, you can successfully replace the battery and ensure a reliable power source for your tablet.
We began by emphasizing the importance of having the necessary tools on hand, including a small Phillips-head screwdriver, plastic opening tool, tweezers, replacement battery, adhesive strips or double-sided tape, and optional antistatic wrist strap and mat for added protection. Having these tools readily available will make the battery replacement process smoother and more efficient.
Throughout the steps, we highlighted the importance of careful handling and attention to detail. From powering off the tablet to disconnecting the battery cable, removing the old battery, installing the new battery, reconnecting the battery cable, and replacing the back cover, every step requires precision and caution to avoid accidental damage.
Once the new battery is properly installed and the back cover securely in place, the final step is to power on the tablet. After powering on, ensure that everything is functioning as expected and enjoy the improved battery life and performance of your Samsung tablet.
Remember, while this guide provides a general overview of the battery replacement process for Samsung tablets, it’s essential to refer to the specific instructions and recommendations provided by Samsung or consult a professional if needed. Following all safety guidelines and manufacturer instructions will help ensure a successful battery replacement and prevent any damage to the tablet or yourself.
We hope this guide has been informative and helpful in guiding you through the process of replacing the battery on your Samsung tablet. With a new battery in place, you can continue to enjoy your tablet for many more hours of productivity, entertainment, and seamless browsing.