Introduction
Welcome to the world of increased online security with Google Authenticator! In today’s digital age, it is vital to protect our personal information and online accounts from unauthorized access. Google Authenticator is a popular two-factor authentication (2FA) app that adds an extra layer of security to your Google account and other online services.
With Google Authenticator, you no longer solely rely on a username and password for login. Instead, you have an additional verification step with a time-based, six-digit code generated by the app. This code is unique to your account and changes every 30 seconds, making it extremely difficult for hackers to gain unauthorized access.
While Google Authenticator provides enhanced security, it is possible to lose access to the app. This can be a frustrating experience, as it may prevent you from logging into your Google account or accessing other services that rely on 2FA. However, fear not! In this article, we will explore the various reasons why you might lose access to Google Authenticator and provide step-by-step instructions on how to recover and regain control of your account.
So, whether you accidentally deleted the app, lost your device, or encountered any other issues, rest assured that we will guide you through the process of getting your Google Authenticator back up and running. Let’s dive in!
What is Google Authenticator?
Before we delve into the recovery methods, let’s first understand what Google Authenticator is and how it works. Google Authenticator is a free app developed by Google that provides an added layer of security to your online accounts. It does this by implementing two-factor authentication (2FA), also known as multi-factor authentication (MFA).
In traditional login methods, you only need a username and password to access your accounts. This reliance on a single factor for authentication leaves your accounts vulnerable to security breaches, as passwords can be easily compromised or hacked. That’s where Google Authenticator comes in.
When you set up Google Authenticator for an account, such as your Google account or other websites that support 2FA, it generates unique time-based codes that are tied to your specific account. These codes are only valid for a short period, typically 30 seconds, and are used as a second factor to verify your identity.
To use Google Authenticator, you need to download the app onto your mobile device, such as a smartphone or tablet. Once installed, you will need to sync the app with your account by scanning a QR code or entering a secret key provided by the service you wish to enable 2FA for.
Once synced, the app will generate a new six-digit verification code every 30 seconds. When you attempt to log in to your account, you will be prompted to enter this code along with your username and password. By entering the correct code, you prove that you have physical possession of the device where the Google Authenticator app is installed, adding an extra layer of security to your account.
Google Authenticator works offline, and the codes are generated locally on your device. This means that even if your phone has no internet connection, you can still log in to your accounts as long as the codes are correctly generated by the app.
With its simplicity and effectiveness, Google Authenticator has become a widely adopted method for securing online accounts. However, there are instances where you may lose access to the app or encounter issues with its functionality. In the next sections, we will explore the various reasons for such occurrences and provide solutions to regain access to Google Authenticator.
Reasons for losing Google Authenticator
While Google Authenticator is a reliable and secure method for protecting your online accounts, there are several scenarios where you may lose access to the app. Understanding these reasons will help you identify the cause of your lost access and choose the appropriate recovery method. Here are some common reasons for losing Google Authenticator:
- Phone or device loss: If you misplaced or lost your phone, or if it got stolen, you might no longer have access to the Google Authenticator app. This can be especially challenging if you did not take any backup measures.
- Accidental app deletion: It is not unheard of to accidentally delete the Google Authenticator app while clearing up space on your device. If you have not made any backups, this can result in a loss of access to your accounts.
- Device reset or factory reset: Performing a device reset or factory reset without backing up your Google Authenticator data can lead to the loss of your account credentials. This is because the app data, including the account details and generated verification codes, is tied to the specific device.
- App malfunction or update issues: In some cases, the Google Authenticator app may experience technical glitches or compatibility problems after an update. This can prevent the app from functioning properly and result in the loss of access to your accounts.
- Forgetting or losing backup keys: When setting up Google Authenticator, you are often provided with backup codes or keys. These codes or keys serve as a safety net for accessing your accounts in case you lose access to the app. However, if you forget or misplace these backup codes, it can pose a challenge in recovering your Google Authenticator.
These are just a few of the common reasons for losing Google Authenticator. Understanding the cause behind your lost access is crucial for selecting the appropriate recovery method. In the following sections, we will explore various methods to recover Google Authenticator based on the specific situation you are facing.
Steps to recover Google Authenticator
Losing access to Google Authenticator can be a stressful experience, but don’t worry, there are several methods you can use to recover your account. The right method for you will depend on the specific situation you are facing. Let’s explore the steps to recover Google Authenticator:
- Method #1: Restore from a Backup Key: If you made a backup of your Google Authenticator app when setting it up, you can use the backup key to restore your accounts. This involves scanning the QR code or manually entering the backup key into a new instance of the Google Authenticator app on your new device.
- Method #2: Contact Google Support: If you are unable to recover your Google Authenticator using the backup key, you can reach out to Google Support for assistance. They have a specific process in place to help users regain access to their accounts. Visit the Google Account Help Center and follow the steps provided.
- Method #3: Recover through a Trusted Device: If you have previously designated a trusted device during the setup process, you can use it to recover your Google Authenticator. By signing in to your Google account on the trusted device, you can disable or reset the Google Authenticator settings and set it up again on your new device.
- Method #4: Resetting Google Authenticator: If all else fails, you may need to reset your Google Authenticator. This involves disabling the two-factor authentication on your account and setting it up again from scratch. This method should only be used as a last resort, as it may result in temporary loss of access to your accounts.
It is important to note that the process of recovering Google Authenticator may vary depending on the specific service or platform you are using. It is always recommended to check the official support documentation or contact the service provider for detailed instructions tailored to their platform.
Remember, losing access to Google Authenticator can be frustrating, but by following the appropriate recovery method and taking necessary precautions, you can regain control of your accounts and strengthen their security. Let’s proceed to the next sections, where we will provide step-by-step instructions for each recovery method.
Method #1: Restore from a Backup Key
If you have previously made a backup of your Google Authenticator app, recovering your accounts becomes relatively straightforward. Here’s a step-by-step guide on how to restore your Google Authenticator using a backup key:
- On your new device, download and install the Google Authenticator app from the respective app store.
- Open the Google Authenticator app on your new device.
- If prompted, choose the option to set up an account manually or scan a QR code.
- Instead of scanning a QR code, select the option to enter a provided key manually.
- Retrieve the backup key that you previously saved or written down.
- Enter the backup key into the Google Authenticator app on your new device.
- Verify the entered key, and the app will generate the same verification codes as your previous device.
- Once the codes are generated, you can use them to log in to your accounts and complete the recovery process.
It is important to note that backup keys are typically provided during the initial setup of Google Authenticator for each account. If you did not make a backup of your keys, this method may not be applicable to your situation.
Remember to store your backup keys in a secure location, such as a password manager or a physical safe, to ensure that you can access them when needed. It is also a good practice to periodically update your backup keys as you add new accounts to Google Authenticator.
Now that you know the steps to restore Google Authenticator using a backup key, you can move on to the next section to explore another recovery method.
Method #2: Contact Google Support
If you are unable to recover your Google Authenticator using the backup key method, the next step is to reach out to Google Support for assistance. Here’s how you can contact Google and seek their help in recovering your account:
- Visit the Google Account Help Center website.
- Click on the “Contact us” or “Get help” option to access the support options available.
- Choose the most suitable support method for your situation, such as chat, email, or phone support. Note that phone support may not be available in all regions.
- Provide the necessary details, including your account information and a detailed explanation of the problem you are facing with Google Authenticator.
- Follow the instructions provided by the support representative to verify your identity and initiate the recovery process.
- Be prepared to answer security questions and provide any additional information that can help verify your ownership of the account.
- Wait for a response from the Google Support team. They will guide you through the recovery process or provide further instructions, if necessary.
Google Support is well-equipped to handle account recovery requests and can assist you in regaining access to your Google Authenticator. Be patient during the process, as it may take some time to receive a response from the support team.
It’s important to note that you may need to provide additional information or follow specific steps outlined by the support representative, as each case can be unique. Following their instructions diligently will increase your chances of successfully recovering your account.
Now that you know the steps to contact Google Support, you can explore the next recovery method in the following section.
Method #3: Recover through a Trusted Device
If you have designated a trusted device during the initial setup of Google Authenticator, you can use it to recover your account. Here’s a step-by-step guide on how to recover Google Authenticator through a trusted device:
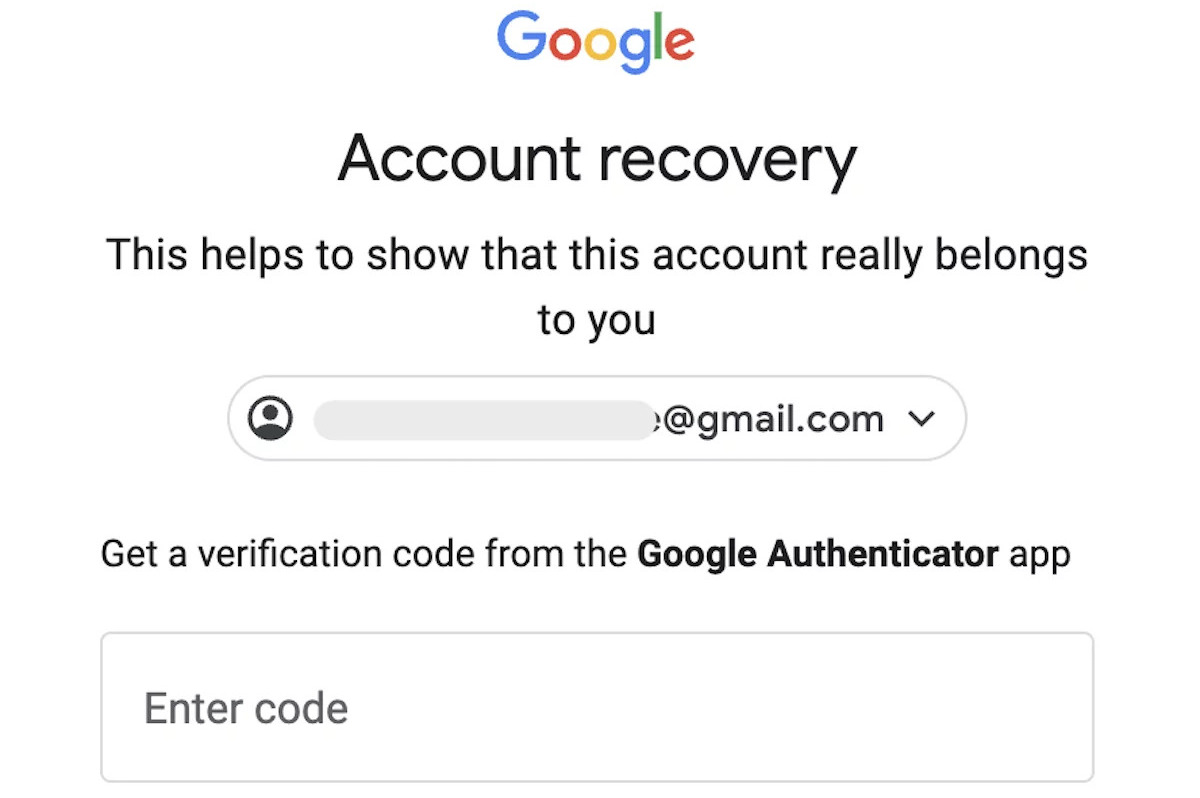
- On your trusted device, open a web browser and navigate to the Google Account recovery page.
- Enter your Google account email address or phone number associated with the account that has Google Authenticator enabled.
- If prompted, enter your password or follow any additional authentication methods required to access your account.
- Once you have successfully logged in, navigate to the Security settings or Account settings (the exact location may vary depending on the interface).
- Locate the section related to 2FA or Google Authenticator settings.
- Find the option to manage or disable Google Authenticator for your account.
- Follow the instructions provided to disable Google Authenticator on your account.
- After disabling Google Authenticator, set up the app again on your new device by scanning the QR code or entering the secret key provided by the service.
- Once the setup is complete, the Google Authenticator app will generate new verification codes that can be used to log in to your accounts.
Recovering Google Authenticator through a trusted device ensures that you still have access to a verified account that can help you disable and reconfigure the app on your new device without requiring additional verification steps.
If you did not designate a trusted device previously, or if you no longer have access to the designated device, you may need to explore alternative recovery methods mentioned earlier.
Now that you know the steps to recover Google Authenticator through a trusted device, you’re ready to explore the final recovery method in the next section.
Method #4: Resetting Google Authenticator
If all other recovery methods have failed or are not applicable to your situation, you may need to consider resetting Google Authenticator. This method should only be used as a last resort, as it may result in temporary loss of access to your accounts. Here’s how to reset Google Authenticator:
- Start by accessing your Google account on a device with internet connectivity.
- Navigate to the Security settings or Account settings section.
- Find the option to manage or disable two-factor authentication (2FA) for your Google account.
- Follow the instructions to disable 2FA on your account. This will also disable Google Authenticator for your account and remove the association between the app and your account.
- Once 2FA is disabled, you can re-enable it by following the instructions provided in the same settings section.
- During the re-enabling process, you will be prompted to set up Google Authenticator again. Follow the instructions to scan the QR code or enter the secret key provided by the service you wish to enable 2FA for.
- After setting up Google Authenticator, the app will generate new verification codes that you can use to log in to your accounts.
Resetting Google Authenticator should only be used as a last resort, as it can result in temporary loss of access to your accounts and may require additional verification steps to regain access. Therefore, it is crucial to carefully consider if this method is truly necessary before proceeding.
It is also recommended to ensure you have a backup of your accounts and recovery codes for other services that rely on Google Authenticator, as resetting the app may affect their 2FA settings as well.
Remember, resetting Google Authenticator should only be done when all other recovery methods have been exhausted, and you have no other options available to regain access to your accounts.
Now that you are familiar with the steps to reset Google Authenticator, you can choose the most suitable recovery method based on your specific situation.
Conclusion
In conclusion, losing access to Google Authenticator can be a frustrating experience, but with the right recovery methods, you can regain control of your accounts and enhance their security. Throughout this article, we explored four different methods to recover Google Authenticator:
- Restoring from a backup key: If you have previously made a backup of your Google Authenticator app, you can use the backup key to restore your accounts.
- Contacting Google Support: When other recovery methods fail, reaching out to Google Support can provide assistance tailored to your specific situation.
- Recovering through a trusted device: If you have designated a trusted device, you can use it to recover your Google Authenticator and set it up on a new device.
- Resetting Google Authenticator: As a last resort, you can reset Google Authenticator, which involves disabling and re-enabling two-factor authentication.
Remember to take preventative measures to avoid losing access to Google Authenticator in the first place. These include backing up your app and storing backup keys securely, as well as designating trusted devices whenever possible.
If you find yourself in a situation where you cannot access your Google Authenticator, assess the cause of the issue and choose the appropriate recovery method accordingly. It’s important to exercise patience and follow the instructions provided by Google or the specific service provider to ensure a successful recovery.
By utilizing the recovery methods outlined in this article, you’ll be well-equipped to overcome any obstacles in regaining access to your Google Authenticator and reinforcing the security of your online accounts.