Introduction
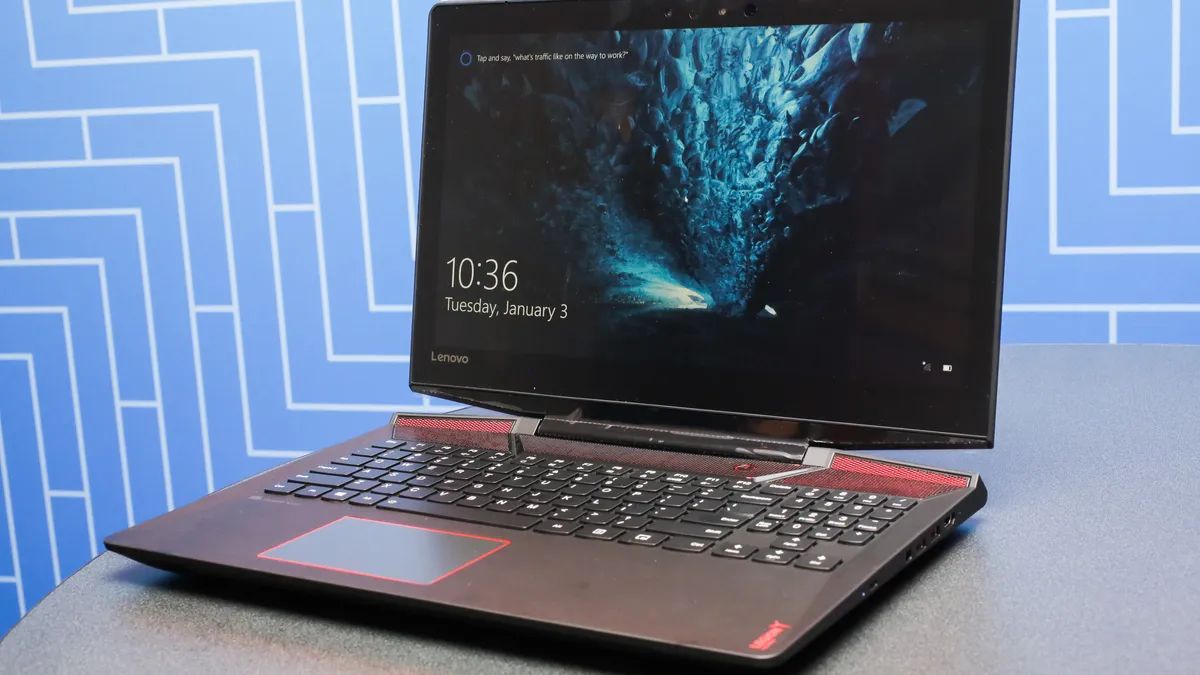
Gaming laptops are a great investment for gamers who want the power and portability to play their favorite games on the go. However, like any electronic device, gaming laptops require regular maintenance to ensure optimal performance and longevity. One crucial aspect of laptop maintenance is keeping it clean and free from dust, debris, and grime that can accumulate over time.
Regular cleaning not only helps to keep your gaming laptop looking sleek and pristine, but it also ensures that the internal components stay cool and function optimally. Over time, dust buildup can clog cooling vents and fans, leading to overheating, which in turn can cause performance issues and potential damage to your laptop.
But how do you clean out your gaming laptop effectively and safely? In this guide, we will provide you with a step-by-step process to help you clean your laptop and keep it running smoothly. From gathering the necessary tools to reassembling your laptop, we will cover everything you need to know to give your gaming laptop a thorough cleaning.
Before we begin, it’s worth noting that cleaning your gaming laptop might void its warranty. If your laptop is still under warranty and you’re unsure about cleaning it yourself, it’s best to consult the manufacturer or a professional technician to avoid any potential issues.
Now, let’s delve into the step-by-step process of cleaning out your gaming laptop and ensuring it remains in optimal condition for your gaming adventures!
Step 1: Gather the Necessary Tools
Before you begin cleaning your gaming laptop, it’s essential to gather the necessary tools to ensure a thorough and efficient cleaning process. Here are the tools you’ll need:
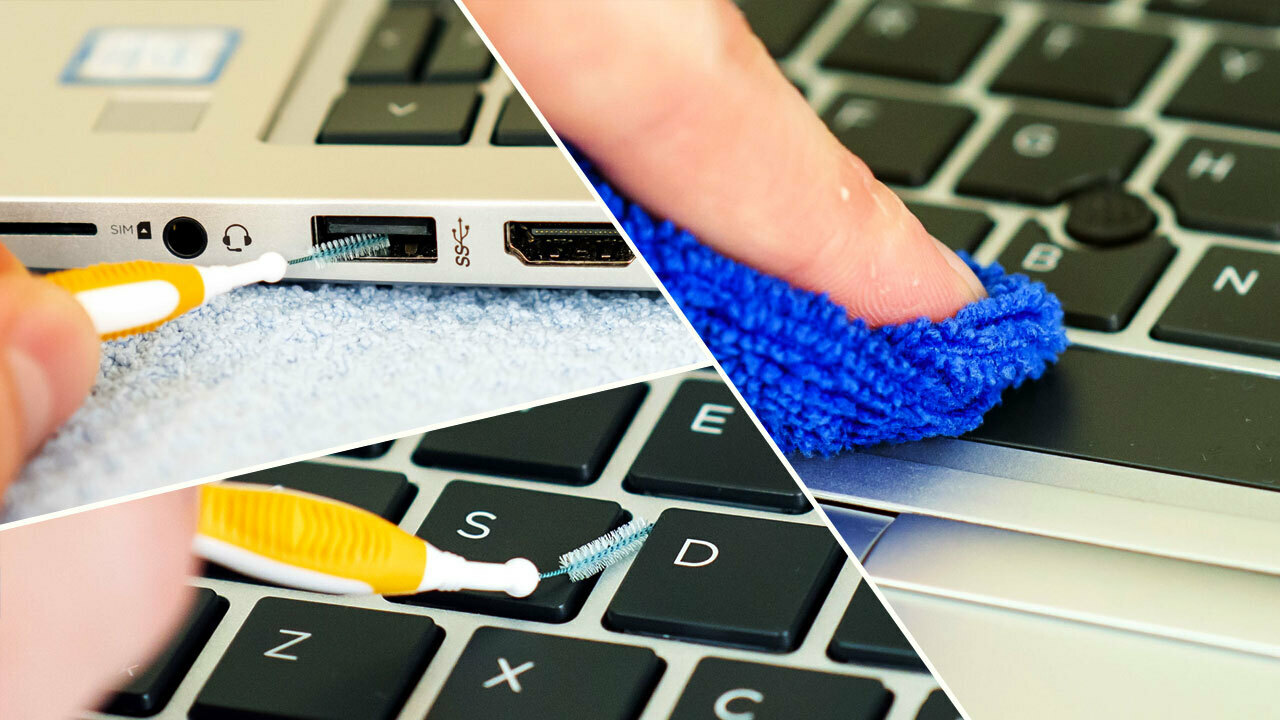
- Cotton swabs or soft-bristle brush: These will be used to clean hard-to-reach areas, such as the corners of your keyboard, ports, and other small crevices.
- Microfiber cloth: This lint-free cloth is ideal for wiping down the exterior of your laptop without leaving scratches or residue.
- Isopropyl alcohol: A solution of isopropyl alcohol and distilled water can be used to clean the keyboard, touchpad, and exterior surfaces. Make sure to use a concentration of at least 70% isopropyl alcohol.
- Canned air or an air blower: This tool is crucial for blowing away dust and debris from the keyboard, vents, and cooling fans. It helps to prevent dust buildup and maintain optimal airflow.
- Screwdriver (if required): Some gaming laptops may require you to remove specific screws to access the internal components. Make sure you have the appropriate screwdriver on hand if needed.
Once you have gathered all the necessary tools, you’ll be well-prepared to embark on the cleaning process and ensure that your gaming laptop receives the attention it needs to continue running at its best.
Step 2: Shut Down and Unplug Your Laptop
Before you proceed with cleaning your gaming laptop, it’s crucial to shut it down properly and unplug it from any power source. This step is necessary to ensure your safety and prevent any potential damage to the laptop’s internal components.
To shut down your laptop, follow these steps:
- Save your work: Save any open documents or files and close all running programs.
- Click on the Start menu: In the bottom left corner of your screen, you’ll find the Start menu icon. Click on it to expand the menu.
- Click on “Power”: From the expanded Start menu, click on the “Power” icon. This will open a sub-menu with different options.
- Select “Shut down”: In the sub-menu, select the “Shut down” option. Your laptop will then undergo the shut-down process and turn off completely.
Once your laptop is shut down, it’s important to unplug it from any power source. This includes both the power adapter and any other peripheral devices that may be connected to it, such as external hard drives or USB devices. Unplugging your laptop ensures that there is no residual power running through it and minimizes the risk of electrostatic discharge during the cleaning process.
With your gaming laptop shut down and unplugged, you are now ready to move on to the next steps of the cleaning process. Make sure to handle your laptop with care and avoid applying excessive pressure or harsh cleaning solutions to prevent any damage to the delicate components.
Step 3: Prepare a Clean Work Space
Creating a clean and organized work environment will help facilitate the cleaning process and ensure that you have everything you need within reach. Here are some steps to prepare a clean work space for cleaning your gaming laptop:
- Clean and clear the area: Start by clearing off a table or desk where you can comfortably work on your laptop. Remove any unnecessary items to create a clutter-free space.
- Use a soft surface: Place a clean, soft cloth or mat on the work surface. This will provide a cushioned and non-slip base for your laptop as you clean it.
- Gather cleaning supplies: Have all the necessary cleaning tools and solutions, as mentioned in the previous step, readily available on your work surface. This will save you time and make the cleaning process more efficient.
- Ensure good lighting: Adequate lighting is essential to see any dust or dirt that might be present on your laptop. Position a desk lamp or work under natural light if possible to ensure optimal visibility.
- Keep a small container: Have a small container or tray nearby to hold any screws or small parts that you may need to remove from your laptop during the cleaning process. This will prevent them from getting lost or misplaced.
By preparing a clean work space, you set yourself up for success and make the cleaning process more efficient and organized. Having all the necessary tools and a clutter-free environment will ensure that you can focus solely on cleaning your gaming laptop and achieve the best results.
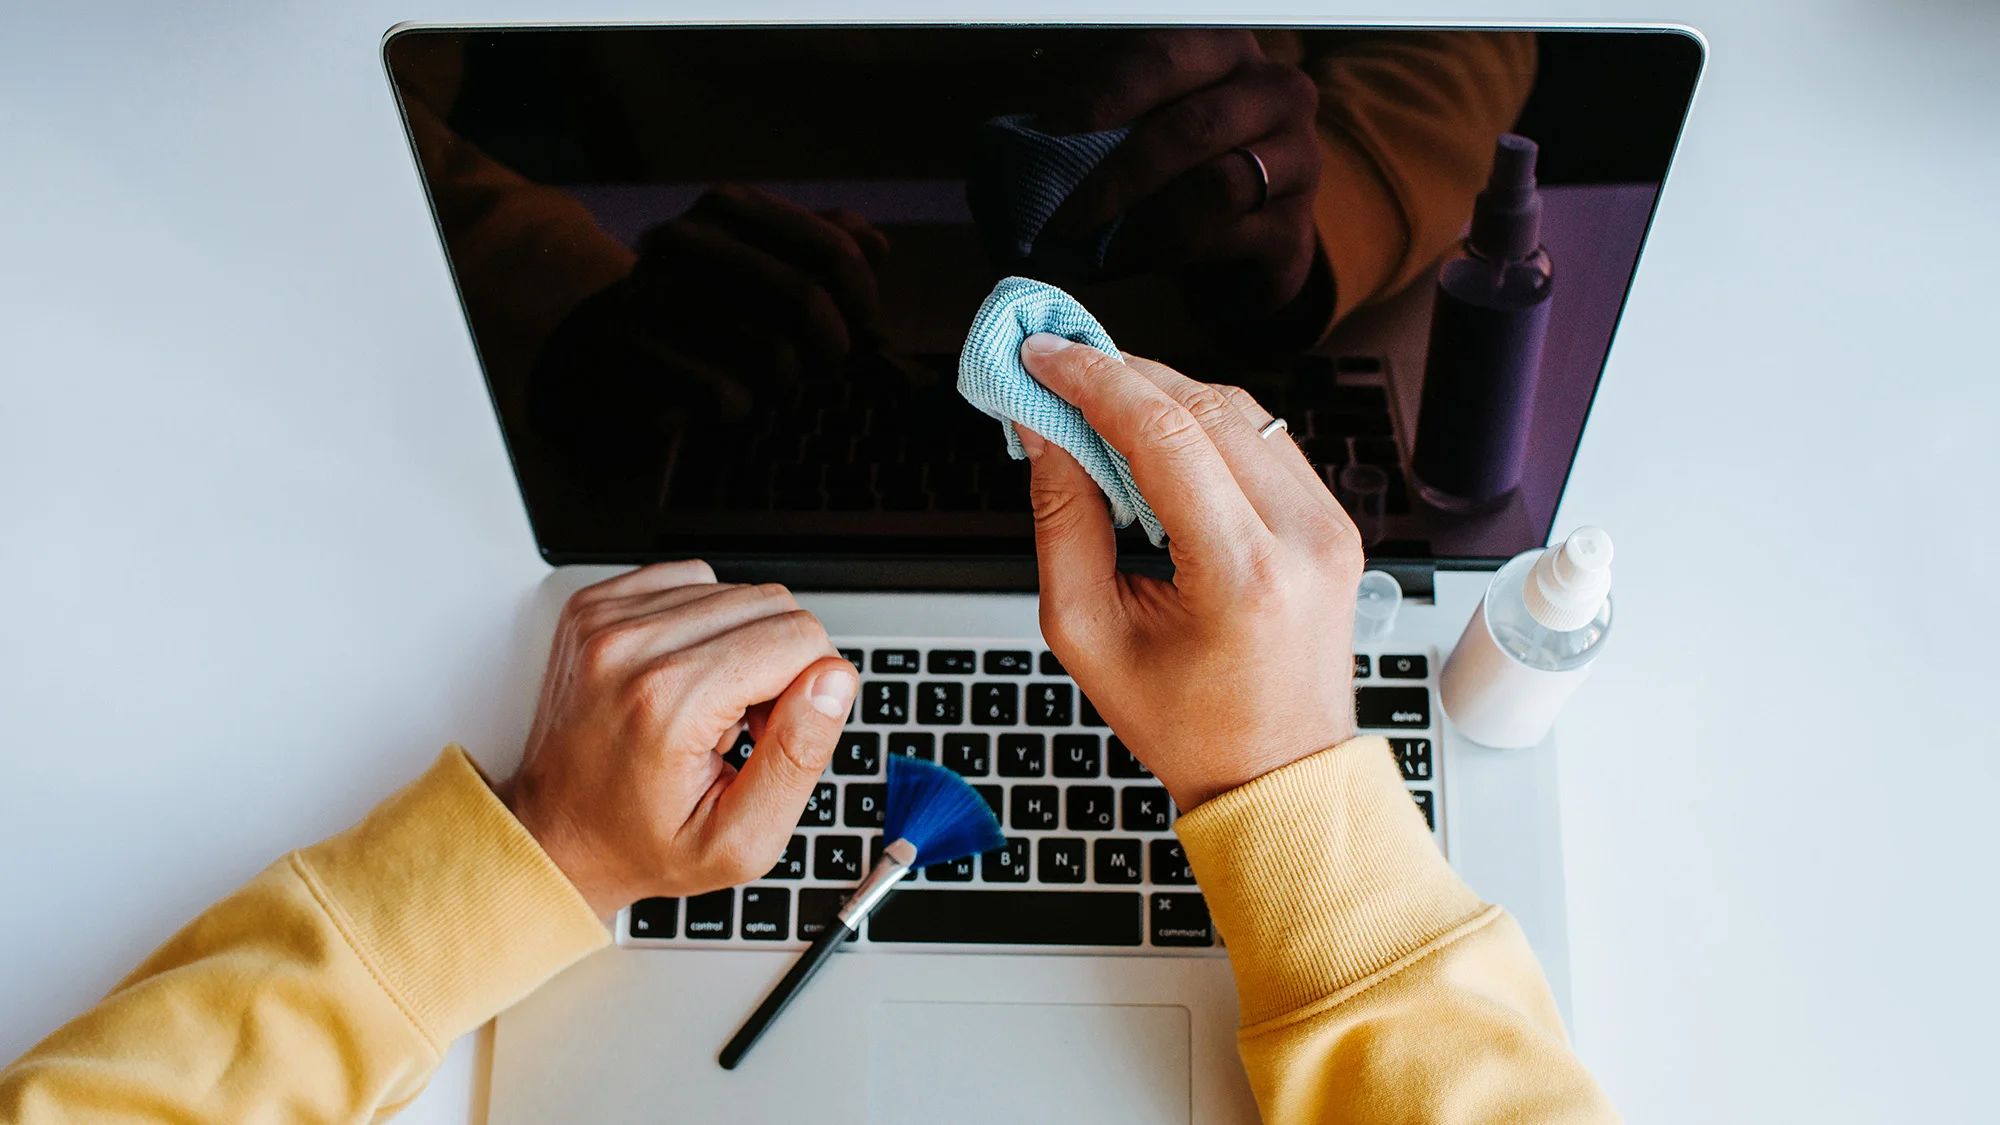
Step 4: Dust the Exterior of Your Laptop
The exterior of your gaming laptop is prone to collect dust, fingerprints, and smudges over time. Cleaning the exterior not only improves its appearance but also helps prevent the accumulation of debris that can affect the performance of your laptop. Follow these steps to dust the exterior of your laptop:
- Power down and unplug your laptop: Before cleaning the exterior, make sure your laptop is powered off and unplugged to avoid any electrical hazards.
- Use a soft cloth: Start by using a clean and dry microfiber cloth to gently wipe down the surfaces of your laptop. This will remove any surface dust and fingerprints without scratching the surface.
- Pay attention to the screen edges and bezel: Use a cotton swab or a soft-bristle brush to clean the edges and bezel around the screen. These areas can accumulate dust, which can be gently brushed away or wiped with the cloth.
- Clean the ports and connectors: Dust and debris can collect in the ports and connectors of your laptop. Use compressed air or a small brush to remove any visible dust or lint from these areas.
- Inspect for stubborn dirt or stains: If there are any stubborn dirt or stains on your laptop’s exterior, you can dampen a microfiber cloth with a diluted solution of isopropyl alcohol and gently wipe the affected area. Make sure to wring out the cloth thoroughly and avoid applying excessive moisture to prevent any damage.
- Allow the laptop to dry: After cleaning, allow your laptop to air dry for a few minutes before proceeding to the next step.
Dusting the exterior of your gaming laptop not only keeps it looking clean and presentable, but it also removes dirt that could potentially find its way into the internal components. Taking the time to clean the exterior is an essential step in maintaining the overall cleanliness and performance of your laptop.
Step 5: Remove the Laptop Battery
When cleaning your gaming laptop, removing the battery is an important step to ensure your safety and protect the internal components from any potential harm. Follow these steps to safely remove the battery:
- Ensure your laptop is powered off and unplugged: Before attempting to remove the battery, make sure your laptop is completely powered off and unplugged from any power source. This eliminates any potential risk of electrical shock.
- Locate the battery release mechanism: Look for the battery release mechanism on your laptop. It is typically located on the bottom side or back of the laptop. Consult your laptop’s user manual or the manufacturer’s website if you are unsure about the specific location.
- Engage the battery release mechanism: Once you’ve located the battery release mechanism, carefully engage it as per the manufacturer’s instructions. This may involve sliding or pressing a latch or using a small tool to unlock the battery.
- Gently remove the battery: With the battery release mechanism engaged, gently slide or lift the battery out of its compartment. Be cautious not to apply excessive force or damage any delicate connectors or components.
- Place the battery in a safe location: Set the removed battery aside in a safe and dry location away from any liquids or sources of heat.
Removing the battery allows you to clean the laptop’s internal components more effectively and reduces the risk of accidentally damaging them during the cleaning process. However, not all gaming laptops have removable batteries. If your laptop’s battery is non-removable, you can skip this step and proceed with the rest of the cleaning process.
Remember to handle the battery with care and store it properly until you are ready to reinstall it. When it comes time to reassemble your laptop, make sure the battery is securely placed back into its compartment and properly connected.
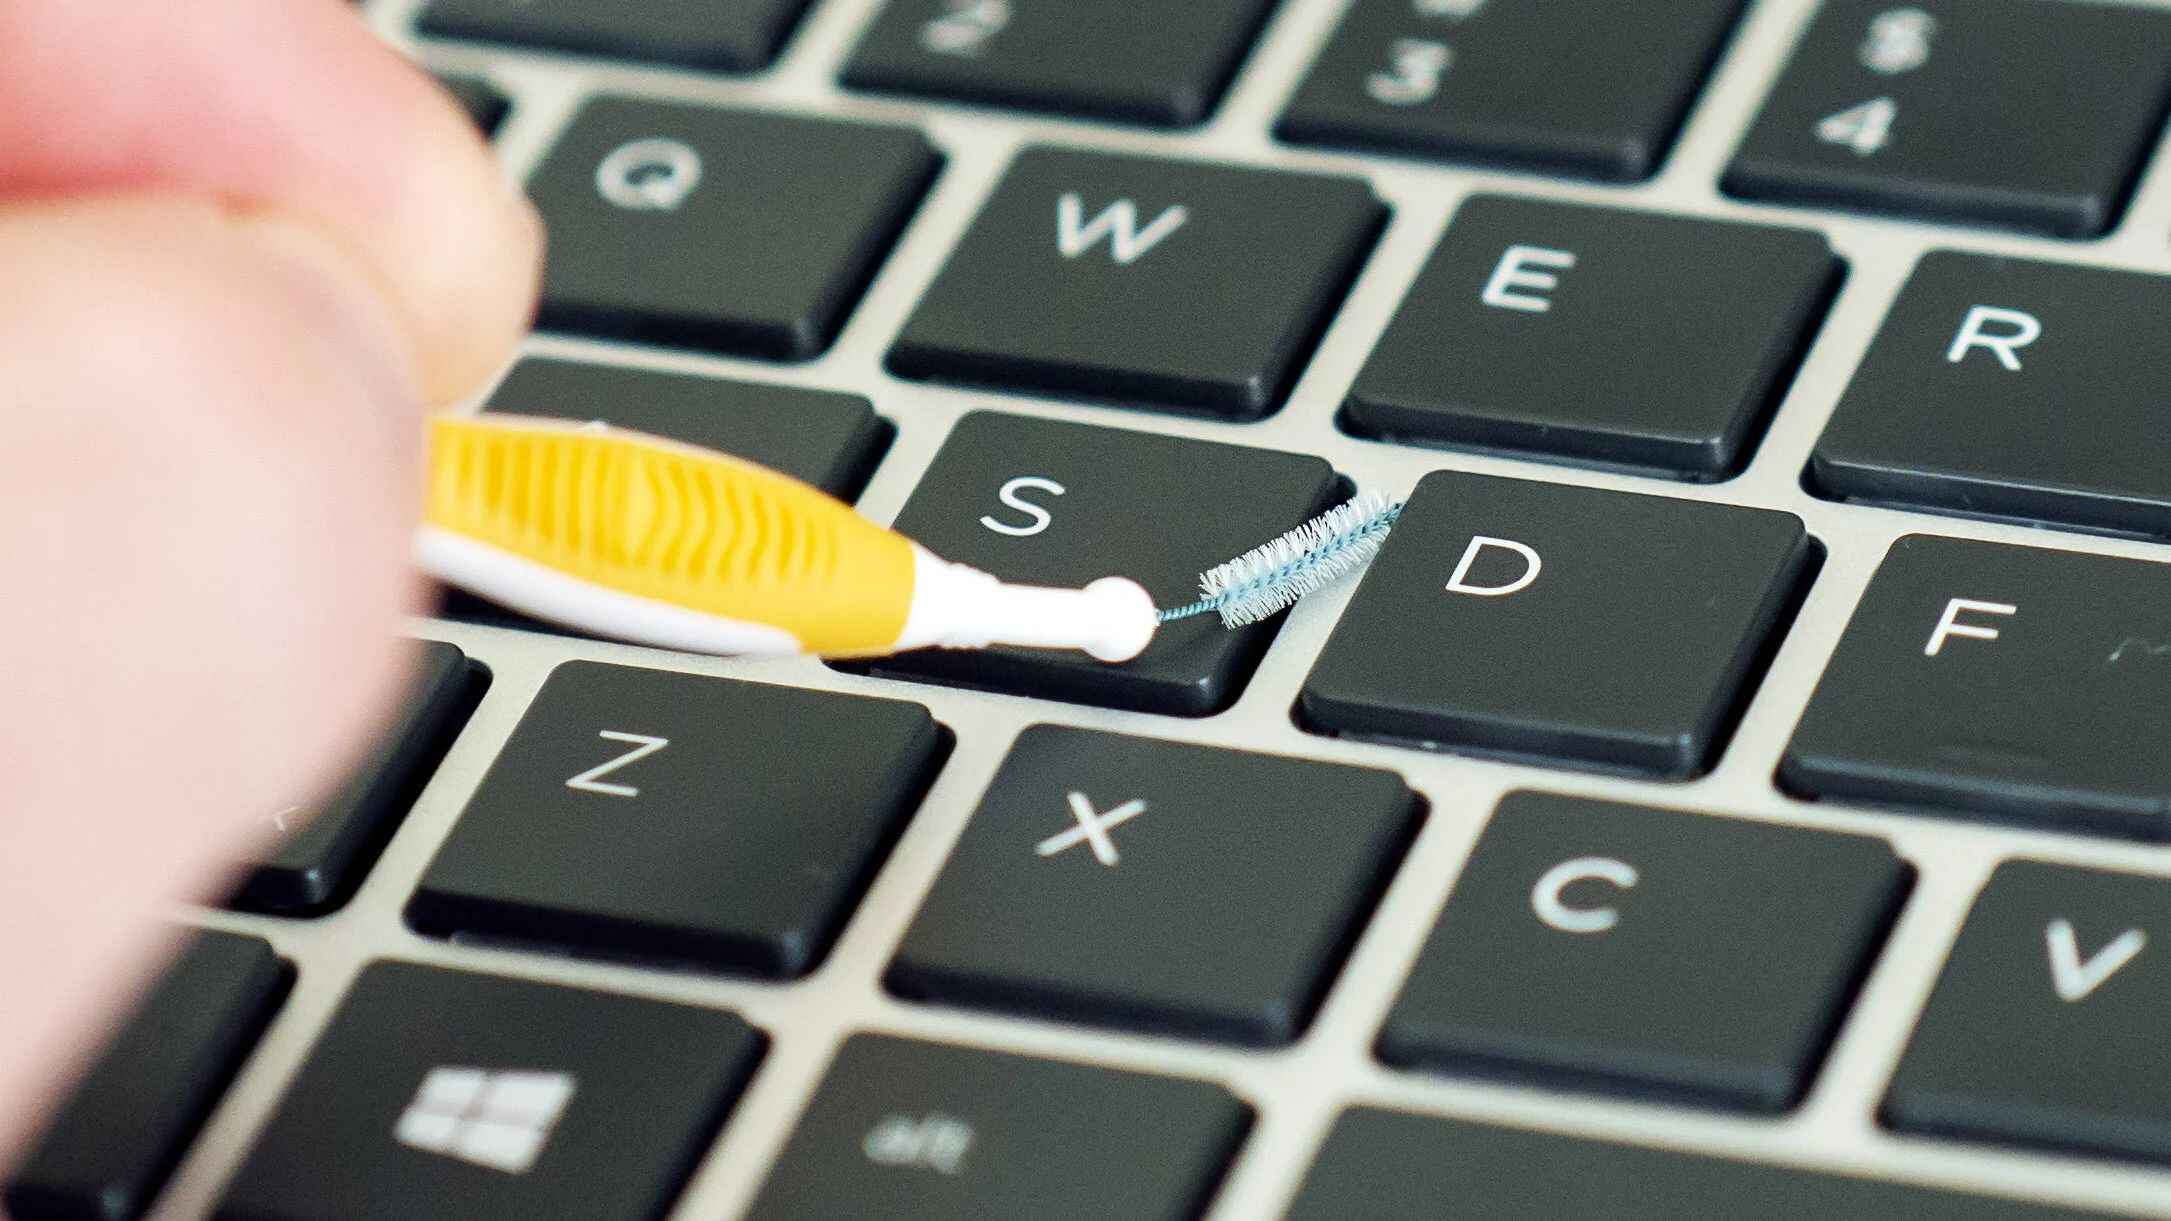
Step 6: Clean the Keyboard and Touchpad
The keyboard and touchpad of your gaming laptop are two areas that accumulate a lot of dirt, crumbs, and oils from your fingertips. Cleaning these components regularly is essential to maintain their functionality and ensure a comfortable typing and gaming experience. Follow these steps to clean the keyboard and touchpad:
- Shake out loose debris: Start by gently turning your laptop upside down and give it a few gentle shakes to dislodge any loose debris or crumbs that may be trapped in the keyboard.
- Use a compressed air can or air blower: Using a can of compressed air or an air blower, blow air between the keys to remove any remaining debris. This helps dislodge dust and crumbs that are difficult to reach with other cleaning tools.
- Wipe the keys with a damp cloth: Dampen a microfiber cloth or cotton pad with a diluted solution of isopropyl alcohol and gently wipe the keys. This helps remove oils, fingerprints, and grime that may have accumulated on the surface of the keys.
- Pay attention to sticky keys: If you come across sticky or stubborn keys, use a cotton swab dampened with the alcohol solution to clean around the affected key. Gently press the key up and clean underneath it to ensure proper functionality.
- Clean the touchpad: Use a microfiber cloth slightly dampened with the alcohol solution to clean the touchpad. Gently wipe it in circular motions to remove any stains or smudges.
- Dry the keyboard and touchpad: After cleaning, allow the keyboard and touchpad to air dry completely before using your laptop again.
Cleaning the keyboard and touchpad helps maintain their responsiveness and prevents the buildup of dirt that can hinder their functionality. Regular cleaning also enhances the overall hygiene of your gaming laptop, ensuring a comfortable and enjoyable user experience.
Step 7: Clean the Screen
The screen of your gaming laptop is the primary interface through which you experience your games and other content. Over time, it can become smudged, dusty, and filled with fingerprints, affecting the visual clarity. Cleaning the screen regularly is essential to ensure optimal viewing and gaming experience. Follow these steps to clean the screen of your gaming laptop:
- Power off your laptop: Before cleaning the screen, make sure your laptop is powered off and unplugged to avoid any potential electrical hazards.
- Use a microfiber cloth: Start by using a clean, soft microfiber cloth to gently wipe the screen. Microfiber cloths are ideal for cleaning screens as they are lint-free and do not scratch the surface.
- Avoid using excessive pressure: Apply light pressure while wiping the screen to avoid damaging the delicate display. Do not press too hard or use abrasive materials as they can scratch the surface.
- Focus on smudges and fingerprints: If there are stubborn smudges or fingerprints on the screen, dampen a corner of the microfiber cloth with distilled water or a screen-cleaning solution specifically designed for electronics. Gently wipe the affected areas in a circular motion.
- Avoid using harsh chemicals: Avoid using harsh household cleaners, alcohol-based solutions, or ammonia-based cleaners, as they can damage the screen’s protective coating.
- Dry the screen: After cleaning, use a dry section of the microfiber cloth to gently dry the screen. Ensure that no moisture is left behind.
- Hold the screen at an angle: To inspect the screen for any remaining dust or smudges, hold it at an angle to the light. This will help reveal any missed spots that require further cleaning.
Cleaning the screen of your gaming laptop not only improves its appearance but also enhances the visual quality and your overall gaming experience. Regular maintenance and keeping the screen free from dust, smudges, and fingerprints will ensure you can enjoy your games with crystal-clear clarity.
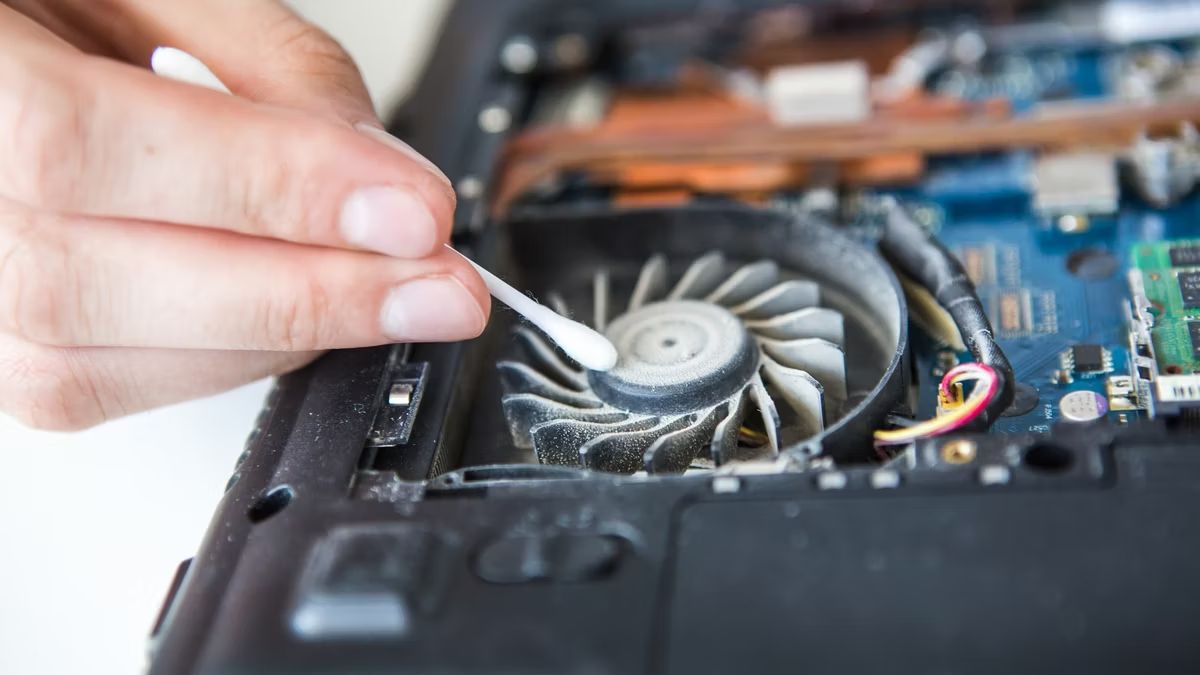
Step 8: Dust the Vents and Cooling Fans
The vents and cooling fans in your gaming laptop play a crucial role in dissipating heat and keeping the internal components cool. Over time, dust and debris can accumulate in these areas, obstructing airflow and causing your laptop to overheat. Cleaning the vents and cooling fans is essential to maintain optimal performance and prevent hardware issues. Follow these steps to dust the vents and cooling fans:
- Power down and unplug your laptop: Before cleaning the vents and cooling fans, make sure your laptop is powered off and unplugged to ensure your safety.
- Locate the vents and cooling fans: Identify the vent locations on the sides, back, or bottom of your laptop. These are the areas where the cooling fans are typically located.
- Use compressed air or an air blower: With a can of compressed air or an air blower, blow air into the vents to dislodge any dust and debris. Start from one side and move across to cover all the vents. Pay close attention to any visible dust buildup.
- Hold the fan blades: To prevent the fan blades from spinning while blowing air, use a small brush or toothpick to gently hold them in place. This prevents the blades from rotating too fast and causing potential damage.
- Blow air in short bursts: Use short bursts of air to avoid overloading the fan or causing the dust to spread inside the laptop. Aim the air at an angle to blow the dust out of the vents and away from the laptop.
- Work outdoors or in a well-ventilated area: It’s recommended to perform this step outdoors or in a well-ventilated area to avoid inhaling the dust particles that are being blown out.
Regularly dusting the vents and cooling fans is vital to prevent overheating which can lead to performance issues and potential damage to your gaming laptop’s hardware. By keeping these components clean, you ensure proper airflow and maintain the longevity and performance of your laptop.
Step 9: Clean the Hard Drive and Delete Unnecessary Files
As you use your gaming laptop over time, the hard drive can become cluttered with unnecessary files, which can impact its performance and storage capacity. Cleaning the hard drive and deleting unnecessary files not only frees up valuable space but also helps optimize system performance. Follow these steps to clean your hard drive and remove unnecessary files:
- Run Disk Cleanup: Windows operating systems have a built-in Disk Cleanup utility. To access it, click on the Start menu, search for “Disk Cleanup,” and select the utility. Choose the drive that you would like to clean and let the utility analyze and calculate the amount of space you can free up.
- Select the types of files to delete: Once the analysis is complete, you will be presented with a list of file types that can be safely removed. These include temporary files, system files, recycle bin contents, and more. Review the list and select the files or file categories you want to delete.
- Confirm file deletion: After selecting the files to delete, click on the “OK” or “Delete Files” button to confirm the deletion. This will initiate the removal process, and the selected files will be permanently deleted from your hard drive.
- Uninstall unused programs: Go to the Control Panel or the Settings menu and navigate to the “Programs” or “Apps” section. Locate any programs or applications that you no longer use and uninstall them to free up additional space on your hard drive.
- Organize and delete personal files: Manually go through your personal files such as documents, pictures, videos, and downloads folders. Delete any files that are no longer needed or move them to an external storage device to free up space on your hard drive.
Cleaning the hard drive and deleting unnecessary files not only improves the storage capacity of your gaming laptop but also helps maintain its overall performance. By regularly performing this maintenance task, you can ensure that your laptop runs smoothly and efficiently, providing you with the best gaming experience possible.
Step 10: Reassemble and Power On Your Laptop
After completing the cleaning process, it’s time to reassemble your gaming laptop and power it back on. Follow these steps to ensure a smooth reassembly:
- Replace the battery (if applicable): If you removed the laptop battery during the cleaning process, carefully reinsert it into its compartment, ensuring it is properly aligned and securely connected.
- Reattach any removed components: If you removed any other components, such as keyboard covers or access panels, make sure to reattach them securely. Refer to your laptop’s user manual or manufacturer’s instructions for proper reassembly.
- Connect any peripheral devices: If you unplugged any external devices, such as a mouse, speakers, or a monitor, reconnect them to the appropriate ports on your laptop.
- Plug in your laptop: Connect your laptop to a power source using the power adapter provided. Ensure that it is securely plugged in.
- Power on your laptop: Press the power button to turn on your laptop. Wait for it to boot up and enter the operating system.
- Inspect for any issues: Once your laptop has powered on, carefully observe the screen, keyboard, touchpad, and other components for any abnormalities. Check for proper functionality and ensure that everything is working as expected.
Reassembling and powering on your gaming laptop signifies the completion of the cleaning process. Take a moment to appreciate your newly cleaned and refreshed device, ready to embark on more gaming adventures. By following this step-by-step process and performing regular maintenance, you can prolong the life of your gaming laptop and enjoy optimal performance for years to come.
Conclusion
Cleaning your gaming laptop is an essential part of its maintenance routine to ensure optimal performance and longevity. By following the step-by-step process outlined in this guide, you can effectively and safely clean your laptop, from dusting the exterior to cleaning the keyboard, screen, and internal components.
Regularly cleaning your laptop helps prevent dust buildup, improves airflow, and maintains proper cooling, which is crucial for preventing overheating and potential damage to internal hardware. It also enhances the overall aesthetics of your laptop, keeping it looking sleek and professional.
Remember to gather the necessary tools, shut down and unplug your laptop, and prepare a clean work area before you start cleaning. Take care when handling delicate components, such as the keyboard, touchpad, and screen. Use appropriate cleaning solutions and tools to avoid damaging the laptop’s surfaces.
In addition to cleaning, it’s also important to regularly perform disk cleanup and delete unnecessary files to free up storage space and optimize system performance. Keeping your hard drive organized and removing unused programs and files will contribute to a smoother gaming experience.
Once your cleaning process is complete, reassemble your laptop carefully, ensuring that all components are securely in place. Power it back on and check for any abnormalities or issues to ensure that everything is functioning properly.
By incorporating regular cleaning into your laptop maintenance routine, you can extend the lifespan of your gaming laptop, prevent performance issues, and enjoy the best gaming experience possible. So, roll up your sleeves, gather your tools, and give your gaming laptop the cleaning it deserves!