Introduction
Welcome to the world of computer hardware! Whether you’re a seasoned tech enthusiast or a casual user, knowing the specifications of your computer’s components is crucial for troubleshooting, upgrading, or simply satisfying your curiosity. One such integral component is the Power Supply Unit (PSU), which is responsible for supplying power to all the hardware components within your computer.
In this article, we will focus on one question that often arises among computer users: How do I check what PSU I have? Whether you’re planning to upgrade your graphics card, install a new hard drive, or simply want to know more about your system’s power capabilities, understanding your PSU is essential. By the end of this article, you’ll be equipped with three different methods to determine the make and model of your PSU, giving you a better understanding of your computer’s power management.
Before delving into the methods, let’s take a moment to understand the role of the PSU. The Power Supply Unit is responsible for converting the AC (alternating current) power from your wall outlet into DC (direct current) power that your computer’s components can utilize. It provides power to everything from your motherboard and CPU to your graphics card, hard drives, and peripherals. Without a properly functioning PSU, your computer simply won’t turn on or operate efficiently.
Now that you have a basic understanding of the importance of the PSU, let’s explore why it’s crucial to know the specifications of your power supply.
Overview of PSU
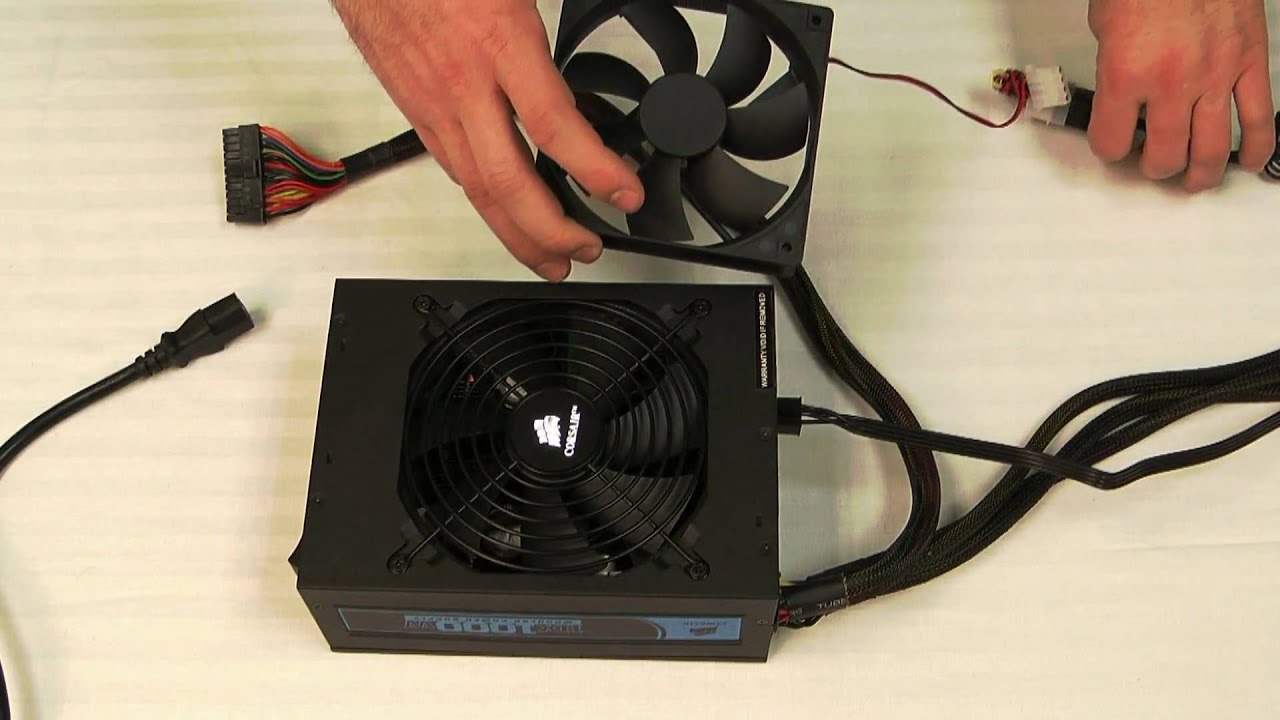
Before we dive into the methods of checking your PSU, let’s start with a brief overview of this essential component. The Power Supply Unit (PSU) is the heart of your computer’s power infrastructure. It converts the electrical power from your wall outlet into a stable and regulated power supply that your computer’s components require to function properly.
A PSU typically consists of various internal components such as transformers, capacitors, and voltage regulators, all working together to provide different levels of power to your computer’s hardware. The capacity of a PSU is measured in watts, which indicates how much power it can deliver to your components.
PSUs come in different form factors, with the most common being ATX (Advanced Technology Extended). The ATX form factor is standardized, meaning that most desktop computers have a compatible PSU. However, it’s important to note that some smaller form factor computers, such as Mini-ITX or microATX builds, may have specialized PSUs that are not interchangeable with standard ATX PSUs.
In addition to the form factor, PSUs are categorized based on their efficiency rating. The efficiency rating indicates how effectively a PSU converts AC power to DC power. The higher the efficiency rating, the less wasted energy and heat generated. The most common efficiency ratings include 80 Plus Bronze, Silver, Gold, Platinum, and Titanium, with Titanium being the highest and most efficient rating.
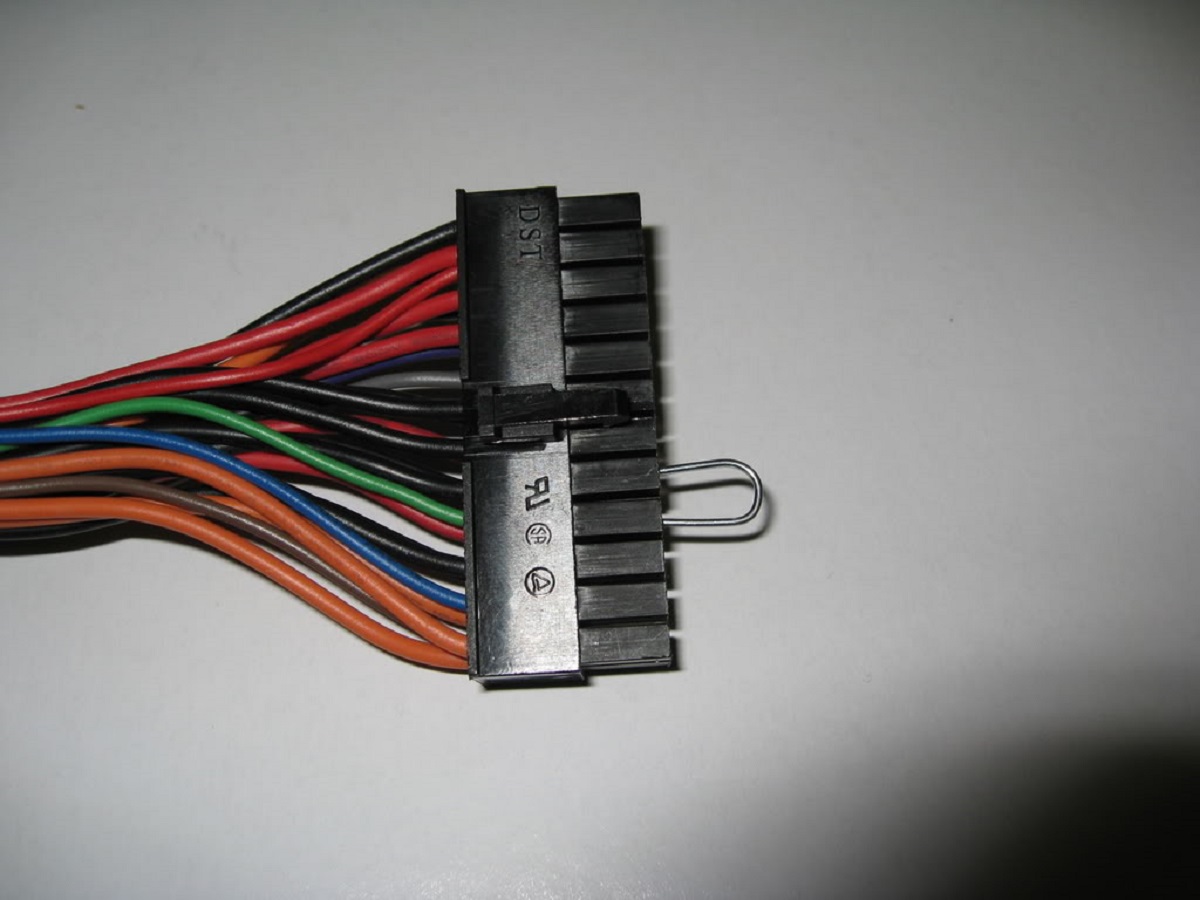
Another critical aspect of a PSU is its connectors. These connectors allow you to power your components, such as the motherboard, graphics card, storage drives, and peripherals. The most common connector types are the 24-pin ATX connector for the motherboard, 8-pin (or 4+4 pin) CPU power connectors, and PCIe connectors for graphics cards.
Understanding these basic aspects of the PSU will help you make informed decisions when upgrading or troubleshooting your computer. Now that we have a general overview of PSUs, let’s explore why it’s important to know the specifications of your PSU.
Why You Need to Know Your PSU
Knowing the specifications of your Power Supply Unit (PSU) is essential for several reasons. Let’s take a look at why it’s important to have this knowledge:
- Upgrading your hardware: If you’re planning to upgrade your computer’s components, such as adding a more powerful graphics card or increasing the number of storage drives, it’s crucial to ensure that your PSU can handle the increased power demands. Different components have specific power requirements, and exceeding your PSU’s capacity can lead to instability and potential damage to your hardware.
- Troubleshooting power-related issues: Power-related issues can cause a variety of problems in a computer system. Random crashes, system freezes, or unexpected shutdowns can all be indicative of a faulty PSU. By knowing the specifications of your PSU, you can compare it against the power requirements of your components and determine if power supply issues are the root cause.
- Efficient power management: Understanding the wattage and efficiency rating of your PSU enables you to better manage your computer’s power consumption. A PSU that is too powerful for your system may result in inefficient power usage, while a PSU that is too weak may struggle to deliver adequate power to your components. By matching your PSU’s capacity to your system’s power requirements, you can optimize energy usage and reduce wasted power.
- Compatibility with future upgrades: As technology advances, new hardware components with higher power requirements are released. By knowing your PSU’s capabilities, you can plan for future upgrades and ensure that your power supply can accommodate the increased demands. This helps to future-proof your system and saves you from costly PSU replacements when upgrading your computer down the line.
By understanding the importance of knowing your PSU, you can take proactive steps to ensure that your computer operates smoothly and efficiently. Now that we’ve covered the reasons why it’s crucial to be aware of your PSU’s specifications, let’s move on to the methods you can use to check what PSU you have.
Three Methods to Check Your PSU
Now that you understand the significance of knowing your Power Supply Unit (PSU), let’s explore three methods that you can use to check what PSU you have:
- Method 1: Physical Inspection: The simplest and quickest method is to physically inspect your PSU. First, make sure your computer is powered off and unplugged from the wall. Then, open your computer case and locate the PSU. Look for a label or sticker on the PSU that provides information such as the make, model, and wattage. Note down these details for future reference. If the label is not easily visible, you may need to remove the PSU temporarily for a closer inspection.
- Method 2: Using System Information Tools: Another way to identify your PSU is by using system information tools available on your operating system. On Windows, you can use the built-in System Information tool. To access it, press the Windows key + R, type “msinfo32”, and hit enter. In the System Information window, navigate to the “Components” section and select “Power Supply”. Here, you will find details about your PSU, including the manufacturer, model, and wattage. Mac users can use the “About This Mac” information window found in the Apple menu, which provides similar information for their PSU.
- Method 3: Opening Your Computer Case: If the previous methods do not reveal the necessary information or if you’re comfortable working inside your computer, you can open your computer case and directly examine the PSU. Carefully disconnect any power cables connected to the PSU, then remove it from the case. On the PSU itself, you should find a label or sticker displaying the make, model, and wattage information. Take note of these details and reinstall the PSU back into your computer.
By utilizing any of these three methods, you will be able to determine the make, model, and wattage of your PSU. This information is vital for various purposes, including upgrading hardware, troubleshooting power-related issues, managing power consumption, and ensuring compatibility with future upgrades.
Now that you’re equipped with these methods, take the time to check and record your PSU’s details. Having this knowledge will empower you to make informed decisions when it comes to your computer’s power supply. In the next section, we will wrap up and conclude our exploration of checking your PSU.
Method 1: Physical Inspection
One of the simplest and most straightforward methods to check what Power Supply Unit (PSU) you have is through physical inspection. This method allows you to quickly identify the make, model, and wattage of your PSU by examining it directly. Here’s how you can perform a physical inspection:
- Power off your computer: Ensure that your computer is turned off and completely unplugged from the wall outlet. This step is crucial for your safety and to prevent any potential damage to your computer or components.
- Open your computer case: Depending on the type of computer case you have, you may need to remove screws, slide panels, or use latches to open it. Refer to your computer’s manual or online resources if you are unsure how to access the internal components.
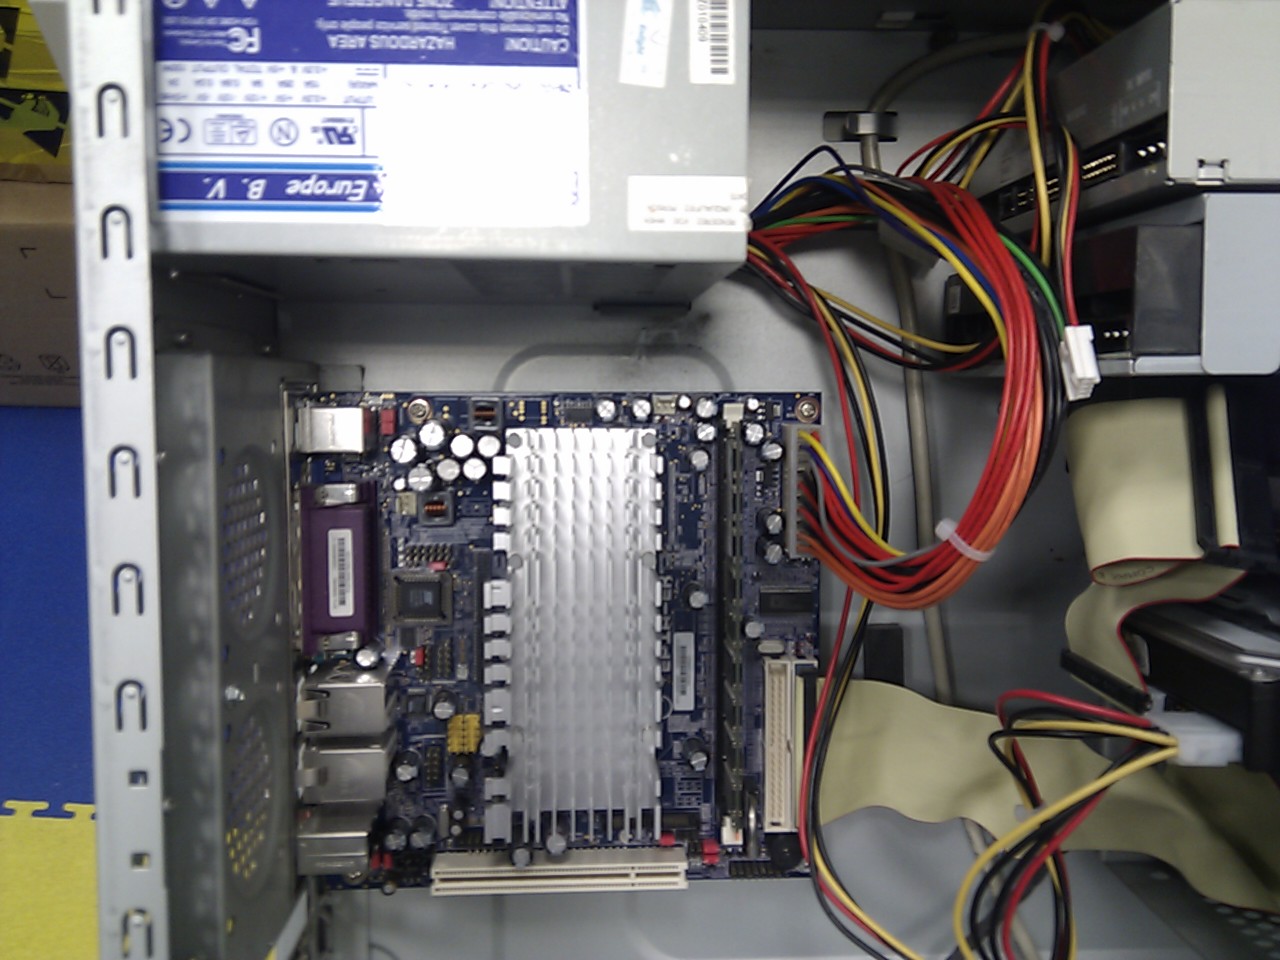
- Locate the PSU: Once the computer case is open, look for the Power Supply Unit. The PSU is typically a rectangular metal box located near the back of your computer. It is connected to the wall outlet through its power cord and has numerous cables extending from its other end to power the various components of your computer.
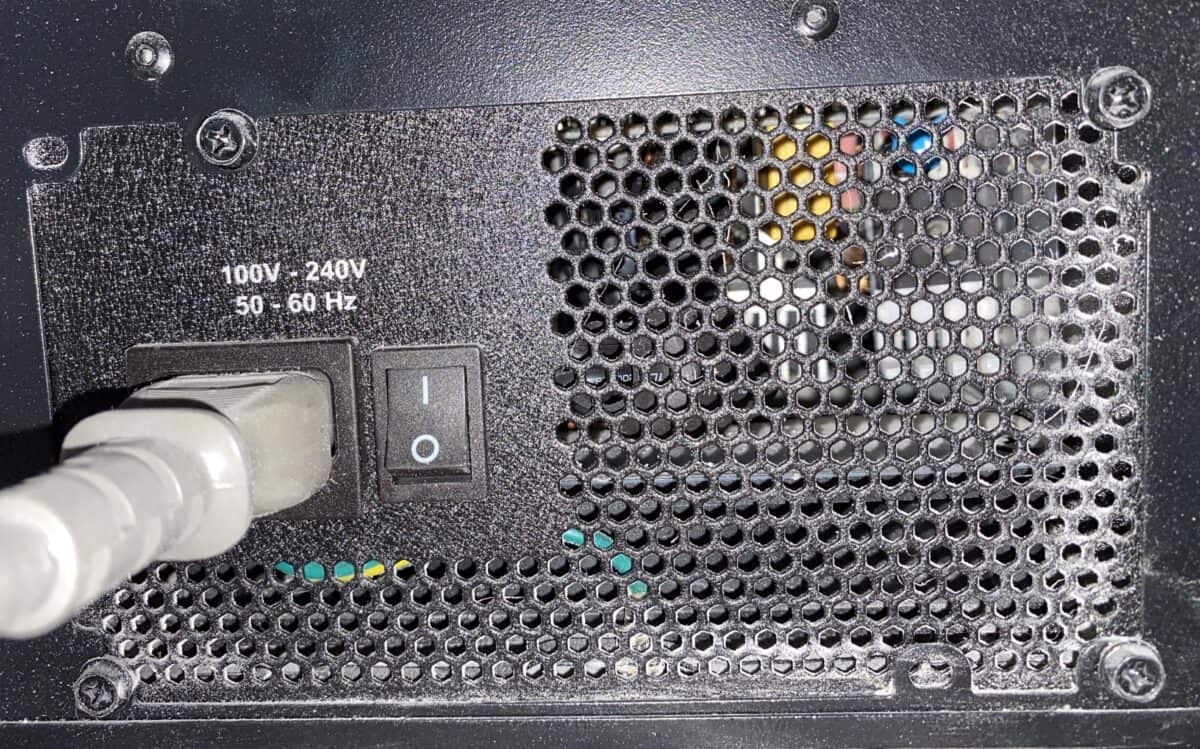
- Find the label or sticker: On the exterior of the PSU, you should find a label or sticker that provides important information about the PSU. This label may be located on the top, side, or bottom of the PSU. It typically displays details such as the manufacturer, model, and wattage of the PSU.
- Take note of the details: Carefully read and record the information from the label. Be sure to write down the make, model, and wattage of your PSU. This information will come in handy for future reference.
- Reassemble your computer: Once you have noted down the PSU details, close the computer case and secure it according to the manufacturer’s instructions. Make sure all connections are secure before plugging your computer back into the power outlet.
Performing a physical inspection is a quick and effective way to identify the make, model, and wattage of your PSU. It allows you to gather the necessary information without the need for any additional software or tools. However, please exercise caution when working inside your computer case to avoid any damage to yourself or your components.
Now that you’re familiar with the first method of checking your PSU through physical inspection, let’s move on to exploring another method: using system information tools to identify your PSU.
Method 2: Using System Information Tools
Another method to check what Power Supply Unit (PSU) you have is by utilizing system information tools provided by your operating system. These tools allow you to access detailed information about your computer’s components, including the PSU. Here’s how you can use system information tools to identify your PSU:
- Windows: If you’re using a Windows operating system, you can access the built-in System Information tool. To open it, press the Windows key + R to open the Run dialog box. Type “msinfo32” and hit enter.
- Mac: Mac users can use the “About This Mac” information window, accessible from the Apple menu. Click on the Apple menu icon in the top-left corner of your screen, then select “About This Mac.”
- System Information Window: In the System Information window on Windows or the About This Mac window on Mac, navigate to the “Components” section. Look for an option related to power or power supply. In Windows, choose “Power Supply,” while on Mac, select “Power.”
- PSU Details: Once you find the power supply-related information, you will likely see details such as the manufacturer, model, and wattage of your PSU. Take note of these details or alternatively, take a screenshot for future reference.
Using system information tools saves you the hassle of physically opening your computer case and provides you with a convenient way to access your PSU details. These tools are built into your operating system and provide a comprehensive view of your computer’s hardware components.
By following these steps, you can quickly retrieve the information you need about your PSU without the need for any additional software. Whether you’re using a Windows or Mac operating system, the system information tools offer a user-friendly interface to access important details about your computer’s PSU.
Now that you’re familiar with the second method of checking your PSU using system information tools, let’s move on to the third and final method: opening your computer case to directly examine the PSU.
Method 3: Opening Your Computer Case
If you are comfortable working inside your computer case, another method to check what Power Supply Unit (PSU) you have is by opening the case and directly examining the PSU. This method allows for a detailed inspection and ensures accurate identification of your PSU. Here’s how you can use method 3:
- Safety First: Before you begin, ensure that your computer is powered off and unplugged from the wall. Taking necessary precautions is essential to avoid electrical shock or damage to your components.
- Open the Computer Case: Depending on the type of computer case you have, remove any screws, slide panels, or release latches to gain access to the internal components. Refer to your computer’s manual or search online for specific instructions if needed.
- Locate the PSU: Once the computer case is open, locate the Power Supply Unit (PSU). It is a rectangular metal box typically found near the back of the computer. The PSU is connected to the wall outlet through a power cord, and it has several cables extending from its other end to power various components within your computer.
- PSU Identification: On the exterior of the PSU, you should find a label or sticker containing key information about the PSU. This label may be positioned on the top, side, or bottom of the unit. It will display details such as the make, model, and wattage of your PSU.
- Note Down the Details: Carefully read and record the information from the label. Make sure to take note of the make, model, and wattage of your PSU. Having these details handy will be helpful for future reference.
- Reassemble your computer: Once you have noted down the PSU details, secure the computer case according to the manufacturer’s instructions. Double-check that all connections are secure before plugging your computer back into the power outlet.
Performing a physical inspection of your PSU by opening the computer case allows for a direct and accurate identification of the make, model, and wattage. It is the most reliable method for obtaining detailed information about your PSU.
Remember to exercise caution when working inside your computer case and handle components with care. If you are unsure or uncomfortable with this method, it’s always recommended to seek assistance from a knowledgeable individual or a professional technician.
Now that you are familiar with method 3 – opening your computer case to examine the PSU, you have completed exploring all three methods of checking your PSU. In the next section, we’ll wrap up and conclude our discussion on how to identify your PSU.
Conclusion
Identifying your Power Supply Unit (PSU) is an important task for anyone who wants to understand their computer’s power capabilities, troubleshoot power-related issues, or plan for future upgrades. In this article, we explored three methods to check what PSU you have: physical inspection, using system information tools, and opening your computer case to directly examine the PSU.
During a physical inspection, you can quickly identify the make, model, and wattage of your PSU by examining it directly. This method is simple and requires no additional tools or software. System information tools provided by your operating system offer a convenient way to access detailed PSU information without opening your computer case. Finally, opening your computer case allows for a thorough examination of the PSU by directly inspecting the label or sticker on its exterior.
By knowing your PSU’s specifications, you can make informed decisions when it comes to upgrading your hardware, troubleshooting power-related issues, and managing power consumption. It helps you avoid compatibility issues, ensure efficient power usage, and plan for future upgrades without the need for PSU replacements.
Remember to exercise caution when working inside your computer case and always prioritize your safety. If you are unsure or uncomfortable with any of the methods, it is recommended to seek assistance from a knowledgeable person or a professional technician.
Now that you have learned how to check what PSU you have using these methods, take the time to identify and record the details of your PSU. This knowledge will empower you to better understand and manage your computer’s power supply. Happy computing!