Introduction
Welcome to the world of Minecraft! If you’re an avid player, you’re probably familiar with Feed the Beast (FTB), a popular modpack that adds tons of exciting features and content to the game. Managing your own FTB server allows you to create an immersive multiplayer experience for you and your friends. However, as your world grows and more players join, you may begin to notice some performance issues. One common solution to this problem is allocating more RAM to your FTB server.
RAM, or random access memory, is a crucial hardware component that dictates how effectively your server can handle the game’s processes. By allocating more RAM, you provide your server with extra memory to work with, resulting in improved performance, reduced lag, and a smoother gameplay experience for everyone involved.
If you’re unsure how to allocate more RAM to your FTB server, don’t worry – we’ve got you covered. In this guide, we’ll walk you through the process step by step, ensuring that you have all the necessary knowledge to optimize your server’s performance. By following these instructions, you’ll be well on your way to creating an even more enjoyable and seamless Minecraft adventure for you and your fellow players.
Why Allocate More RAM?
Allocating more RAM to your FTB server can provide several significant advantages for both you as the server administrator and the players. Let’s explore some of the reasons why allocating more RAM is a wise decision.
1. Enhanced Performance: Minecraft is a resource-intensive game, especially with the addition of mods from the FTB modpack. By allocating more RAM, you’ll give your server the extra resources it needs to handle the increased load, resulting in improved performance and reduced lag. This means smoother gameplay, faster world loading times, and a more enjoyable experience for all players.
2. Support for More Players: As your server gains popularity, more players will join the adventure. Allocating more RAM allows your server to handle the increased number of concurrent players better. With additional memory at its disposal, your server will be able to accommodate a larger player base without sacrificing performance or stability.
3. Modpack Optimization: FTB modpacks often include a wide range of mods, each adding unique features and content to the game. These mods require additional memory to function properly. By allocating more RAM, you provide the necessary resources for the mods to run efficiently, ensuring a seamless experience and preventing potential conflicts or crashes.
4. Future-Proofing: As Minecraft continues to evolve and modpacks get updated, the resource requirements for running a server may increase. Allocating more RAM now can help future-proof your server, ensuring it can handle any upcoming updates or additions without performance issues.
5. Flexibility and Customization: Allocating more RAM gives you the flexibility to run additional server-side modifications or plugins alongside the FTB modpack. These plugins can enhance your server with new functionalities, customizations, and administrative tools. With more RAM available, you can experiment with different plugins and configurations to create a unique and personalized Minecraft gameplay experience.
Now that we understand the benefits of allocating more RAM to your FTB server, let’s move on to the next step: checking the available RAM on your system.
Checking Available RAM
Before you allocate more RAM to your FTB server, it’s essential to determine how much RAM is currently available on your system. This information will help you determine the appropriate amount of memory to allocate without overloading your system. Here’s how you can check your available RAM:
1. Windows:
– Open the Task Manager by right-clicking on the taskbar and selecting “Task Manager.”
– In the Task Manager window, go to the “Performance” tab.
– Look for the “Memory” section to find information about your system’s memory usage and available RAM.
2. macOS:
– Click on the Apple menu and select “About This Mac.”
– In the pop-up window, click on the “Memory” tab.
– Here, you can check the “Memory Used” and “Memory Available” information.
3. Linux:
– Open a terminal window.
– Enter the command “free -h” to display the memory usage information.
– Look for the “available” column, which shows the amount of available RAM in your system.
Regardless of the operating system, make note of the available RAM value. This will guide you in determining how much RAM you can allocate to your FTB server without causing performance issues on your computer.
Now that you have an understanding of your available RAM, the next step is to download and configure the FTB server. Let’s move on to the following section.
Downloading and Configuring the FTB Server
Before you can allocate more RAM to your FTB server, you need to ensure that you have the necessary server files downloaded and properly configured. Follow these steps to download and set up the FTB server:
1. Visit the FTB Website:
– Open your web browser and visit the official Feed the Beast website (https://www.feed-the-beast.com/).
– Navigate to the “Downloads” section, where you can find various FTB modpacks available for download.
– Choose the modpack that you want to play and click on the download link.
2. Install the FTB Server Files:
– Once the download is complete, locate the downloaded file on your computer.
– Extract the contents of the downloaded file to a location of your choice.
– This will create a folder that contains all the necessary files for the FTB server.
3. Configure Server Settings:
– Open the newly created folder and find the server.properties file.
– Open the file using a text editor of your choice.
– Here, you can configure various server settings, such as the server name, maximum players, and game mode.
– You can also customize other options such as spawn protection, difficulty level, and more.
– Save the changes once you’ve configured the server to your preferences.
4. Start the FTB Server:
– Navigate to the folder where you extracted the server files.
– Look for the server-start.bat (Windows) or server-start.sh (Mac/Linux) file.
– Double-click the file to start the FTB server.
– The server will initiate and start loading the necessary files. It may take a few moments.
Once the server is up and running, you can connect to it using your Minecraft client and begin exploring your FTB world. However, before you jump into the game, let’s move on to the next section, where we will discuss how to allocate more RAM to the server.
Allocating More RAM
Now that your FTB server is set up and running, it’s time to allocate more RAM to enhance its performance. Follow these steps to allocate more RAM:
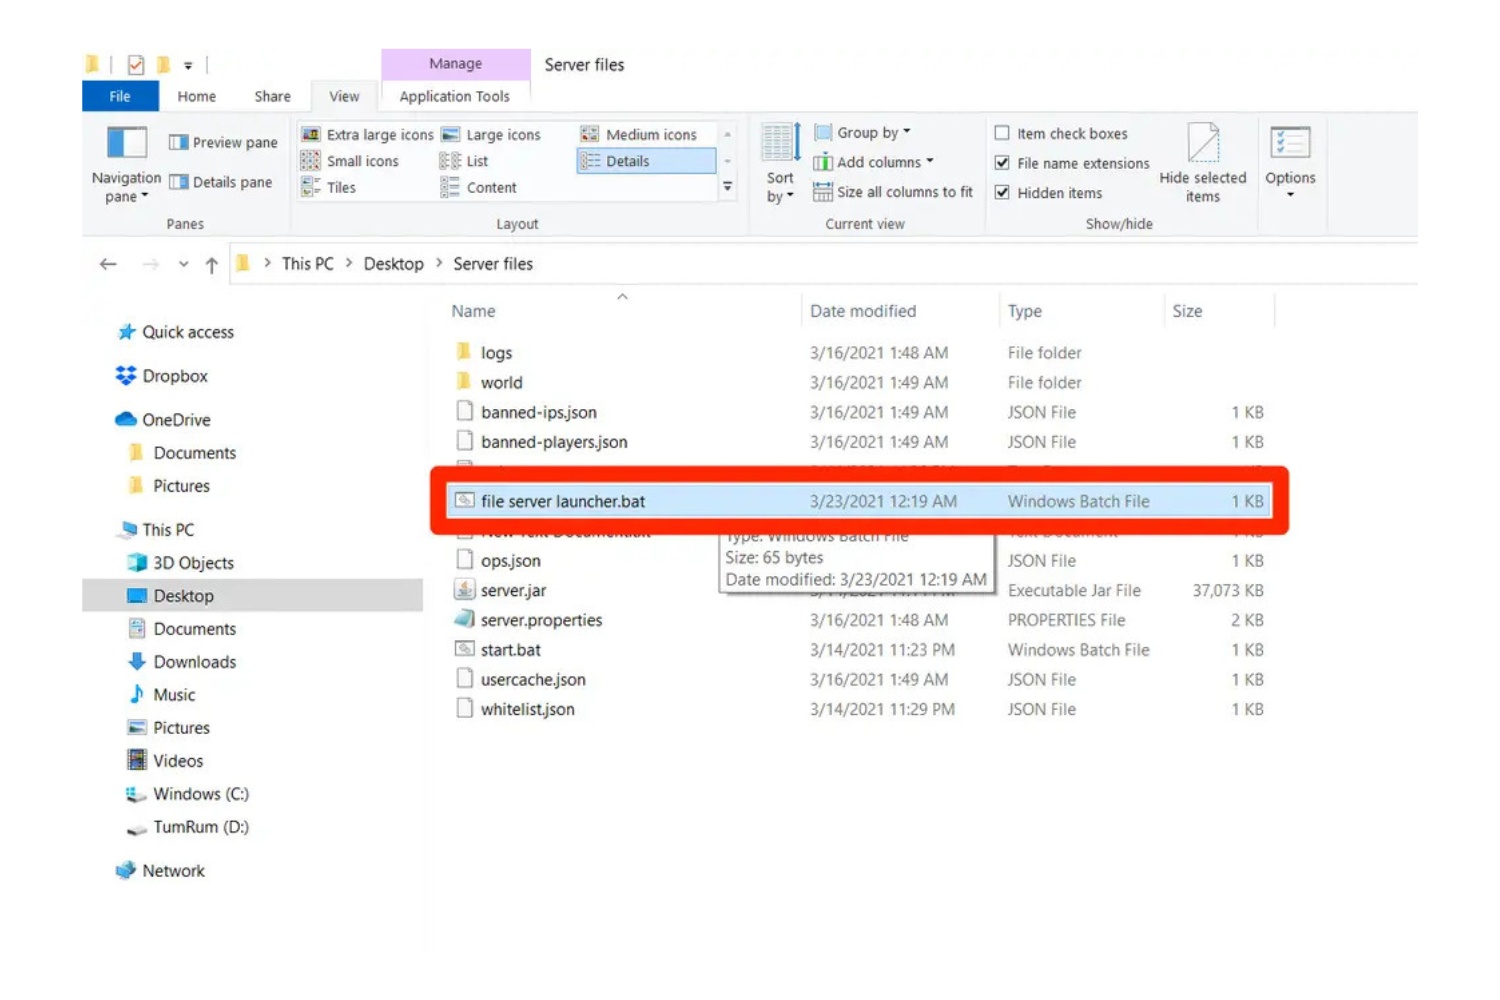
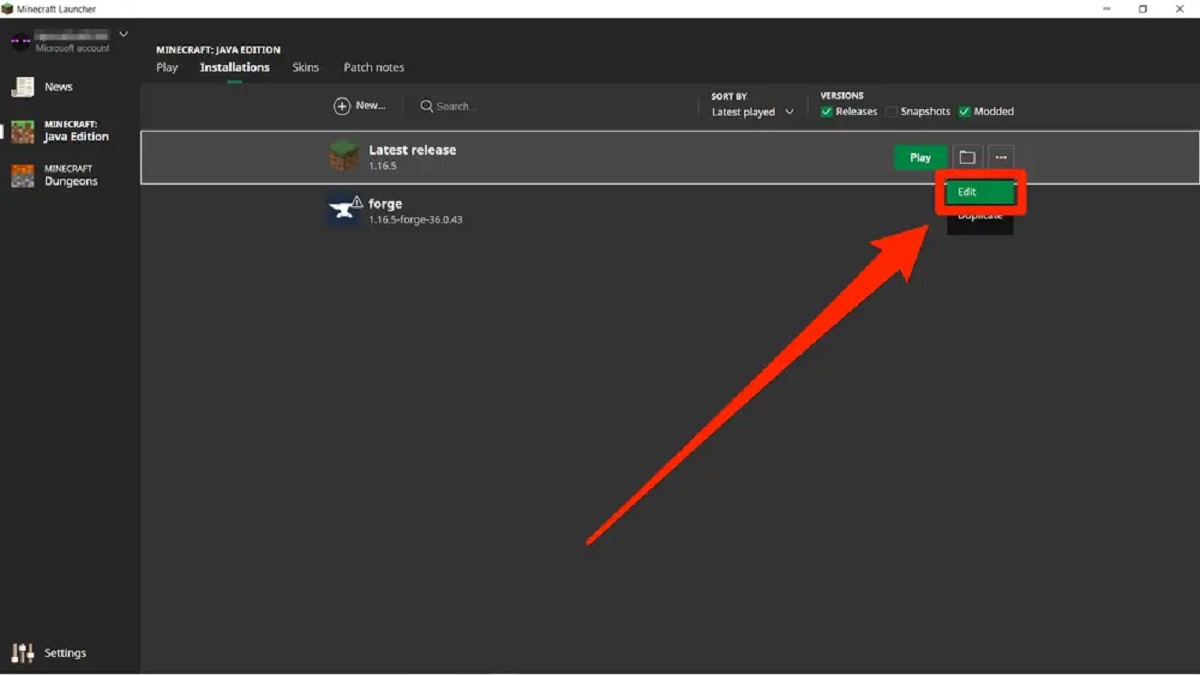
1. Locate the Server Launch Script:
– Navigate to the folder where you extracted the server files.
– Look for the server-start.bat (Windows) or server-start.sh (Mac/Linux) file.
– Open the file using a text editor.
2. Modify the Java Arguments:
– Within the launch script, look for the line that starts with “java -jar“.
– After “java -jar“, add “-Xmx” followed by the amount of RAM you want to allocate in megabytes. For example, “-Xmx4G” allocates 4GB of RAM.
– Save the changes to the launch script.
3. Increase PermGen Space (Java 7 and Older):
– If you’re using Java 7 or older, you may also need to increase the PermGen space to prevent memory-related errors.
– Look for the line that starts with “java -jar” in the launch script.
– After “java -jar“, add “-XX:PermSize=256m -XX:MaxPermSize=512m“.
– Save the changes to the launch script.
4. Restart the FTB Server:
– Close the text editor with the modified launch script.
– Restart the FTB server by running the server-start.bat (Windows) or server-start.sh (Mac/Linux) file again.
Your FTB server will now be allocated the specified amount of RAM, resulting in improved performance and stability. It’s important to note that allocating too much RAM can have a negative impact, so it’s recommended to allocate an amount that balances performance and system resources.
With the additional RAM allocated, your server should be able to handle more players and mods without experiencing lag or crashes. However, it’s always a good idea to test and verify the changes.
In the next section, we’ll discuss how to test and verify the RAM allocation to ensure that it has been successfully applied to your FTB server.
Testing and Verifying the Changes
After allocating more RAM to your FTB server, it’s important to test and verify that the changes have been successfully implemented. Follow these steps to ensure that the new RAM allocation is working as intended:
1. Monitor Server Performance:
– Observe the server’s performance during gameplay, paying close attention to any improvements in lag reduction and overall stability.
– Monitor the RAM usage of the server to ensure that it is consistently utilizing the allocated amount.
– Use server monitoring tools or plugins to track resource usage and identify any potential bottlenecks or issues.
2. Test with Increased Player Load:
– Invite a group of players to join the server simultaneously or simulate increased player load using performance testing tools.
– Observe if the server can handle the increased player load without experiencing significant lag or performance issues.
– Encourage players to provide feedback on their gameplay experience to determine if there are noticeable improvements.
3. Check Server Logs:
– Regularly inspect the server logs for any memory-related warnings or errors.
– Look for messages related to insufficient memory, garbage collection, or out-of-memory errors.
– If any issues are detected, review the allocated RAM size and consider readjusting if necessary.
4. Seek Player Feedback:
– Encourage players to share their feedback on the server’s performance after the RAM allocation changes.
– Ask for their opinions on any noticeable improvements in gameplay and overall experience.
– Address any issues or concerns raised by players and make necessary adjustments if required.
By thoroughly testing and verifying the RAM allocation changes, you can ensure that your FTB server is utilizing the allocated memory effectively and providing an improved gaming experience for all players. Keep in mind that server performance may still be influenced by other factors such as network connectivity and hardware limitations.
Once you are satisfied with the performance and stability of your server after allocating more RAM, you can confidently continue to enjoy your FTB adventure with an optimized gameplay experience.
Conclusion
Congratulations! You have successfully learned how to allocate more RAM to your FTB server, ensuring better performance and a smoother gameplay experience. By increasing the amount of memory available to your server, you have taken a crucial step in optimizing its performance, accommodating more players, and effectively running the FTB modpack.
We covered the importance of allocating more RAM to your server, highlighting the benefits such as enhanced performance, support for more players, modpack optimization, future-proofing, and flexibility for customization. These advantages will contribute to a more enjoyable and seamless Minecraft adventure for you and your fellow players.
We then discussed how to check the available RAM on your system, guiding you in determining the appropriate amount of additional memory to allocate. You also learned how to download and configure the FTB server files, ensuring that your server is properly set up before proceeding with the RAM allocation.
The next step involved allocating more RAM by modifying the server launch script. By adjusting the Java arguments, you provided your server with the necessary resources to handle the demands of the FTB modpack. We also discussed the importance of increasing PermGen space for older Java versions.
To ensure the effectiveness of the RAM allocation, we emphasized the importance of testing and verifying the changes. This involved monitoring server performance, testing with increased player load, checking server logs for potential issues, and seeking feedback from players to gauge any noticeable improvements.
With the changes implemented and verified, you can now enjoy a smoother and more stable gaming experience on your FTB server. Remember to regularly monitor server performance, address any issues that arise, and adapt the RAM allocation if needed to ensure optimal server performance.
Thank you for following this guide. We hope it has been helpful in your journey of optimizing your FTB server. Now, go ahead and explore the vast world of Minecraft with your friends and fellow adventurers!