**
Introduction
**
Your iPhone is a versatile device that allows you to communicate, listen to music, and enjoy various multimedia experiences. However, over time, the speaker on your iPhone may accumulate dust, lint, or debris, affecting the sound quality. Fortunately, cleaning your iPhone speaker is a simple process that can significantly enhance your audio experience. By following this step-by-step guide, you can effectively remove any obstructions and restore the clarity and volume of your iPhone's speaker.
Cleaning your iPhone speaker not only improves sound quality but also prevents potential damage caused by debris buildup. Whether you've noticed a decrease in volume or a muffled sound coming from your speaker, taking the time to clean it can make a noticeable difference in your overall iPhone experience.
In this comprehensive guide, we will walk you through the process of cleaning your iPhone speaker using simple and safe methods. From gathering the necessary supplies to testing your speaker after cleaning, each step is designed to help you achieve optimal results without risking damage to your device. With just a few minutes of your time, you can revitalize your iPhone speaker and enjoy crystal-clear sound once again. Let's dive into the step-by-step process and get your iPhone speaker back to its optimal performance.
Step 1: Gather Your Supplies
Before you begin the process of cleaning your iPhone speaker, it’s essential to gather the necessary supplies. Having the right tools at your disposal will ensure that you can effectively remove any debris and restore your speaker’s functionality. Here’s what you’ll need:
- Compressed Air: This will help dislodge any stubborn particles that may be trapped in the speaker grille.
- Soft-Bristled Brush: A gentle brush, such as a clean, dry toothbrush or a specialized electronics cleaning brush, can be used to loosen and remove debris from the speaker.
- Microfiber Cloth: This soft, lint-free cloth is ideal for wiping the speaker grille and surrounding areas without leaving behind any fibers or residue.
- Optional: Isopropyl Alcohol: If your speaker grille is particularly dirty, a small amount of isopropyl alcohol can be used with the microfiber cloth to gently clean the area.
By having these supplies on hand, you’ll be well-equipped to tackle the task of cleaning your iPhone speaker with precision and care. It’s important to use gentle and non-abrasive tools to avoid causing any damage to the delicate components of your device. With your supplies ready, you’re prepared to move on to the next step and power off your iPhone to begin the cleaning process.
Step 2: Power Off Your iPhone
Before you proceed with cleaning your iPhone speaker, it’s crucial to power off your device to prevent any potential damage and ensure your safety. Turning off your iPhone eliminates the risk of accidental button presses or screen interactions while you clean the speaker. Follow these simple steps to power off your iPhone:
- Press and Hold the Side Button: On newer iPhone models, simultaneously press and hold the side button along with either volume button until the “slide to power off” slider appears on the screen.
- Slide to Power Off: Use your finger to slide the power off slider from left to right. This action will initiate the shutdown process, and your iPhone’s screen will turn black once it’s powered off.
- Wait for Shutdown: Allow your iPhone to power off completely before proceeding to the next step. This ensures that the internal components are inactive, reducing the risk of electrical interference during the cleaning process.
Once your iPhone is powered off, you can confidently move on to the next steps of cleaning your speaker without any concerns about accidental damage to your device. Taking this precautionary step sets the stage for a safe and effective cleaning process, allowing you to focus on revitalizing your iPhone speaker without any distractions or potential risks.
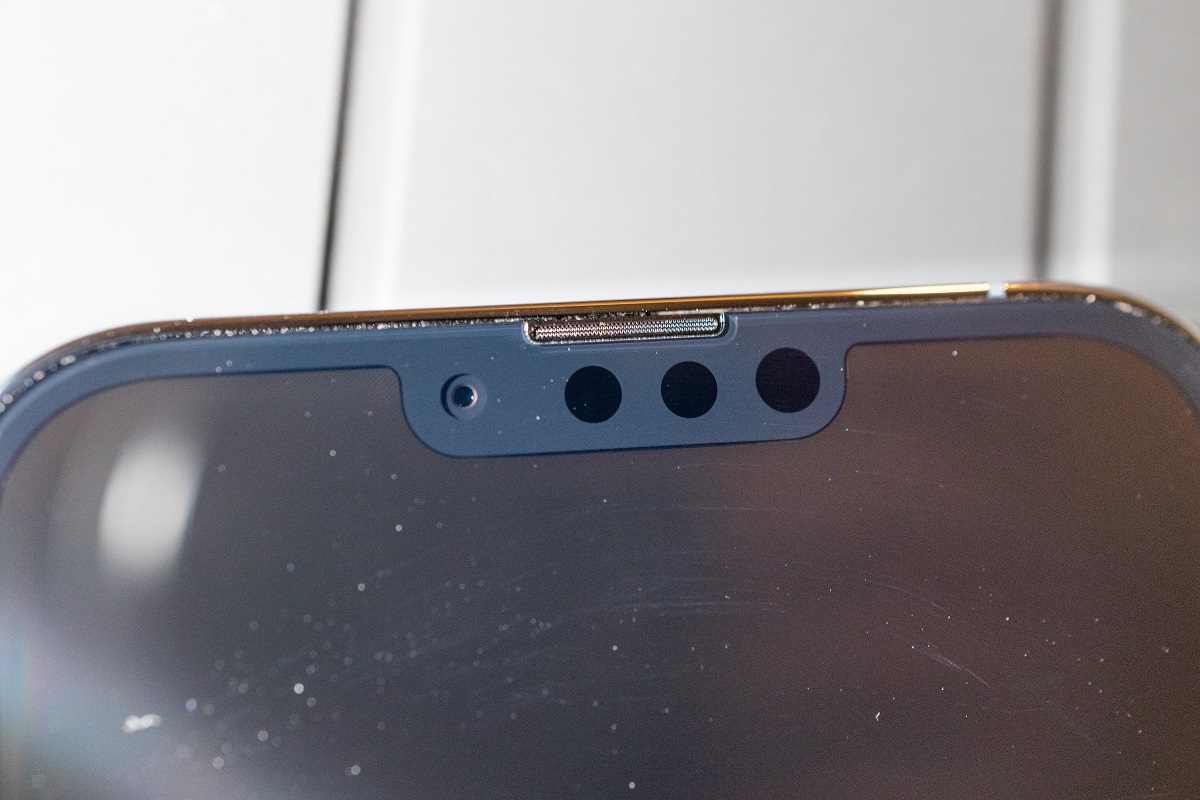
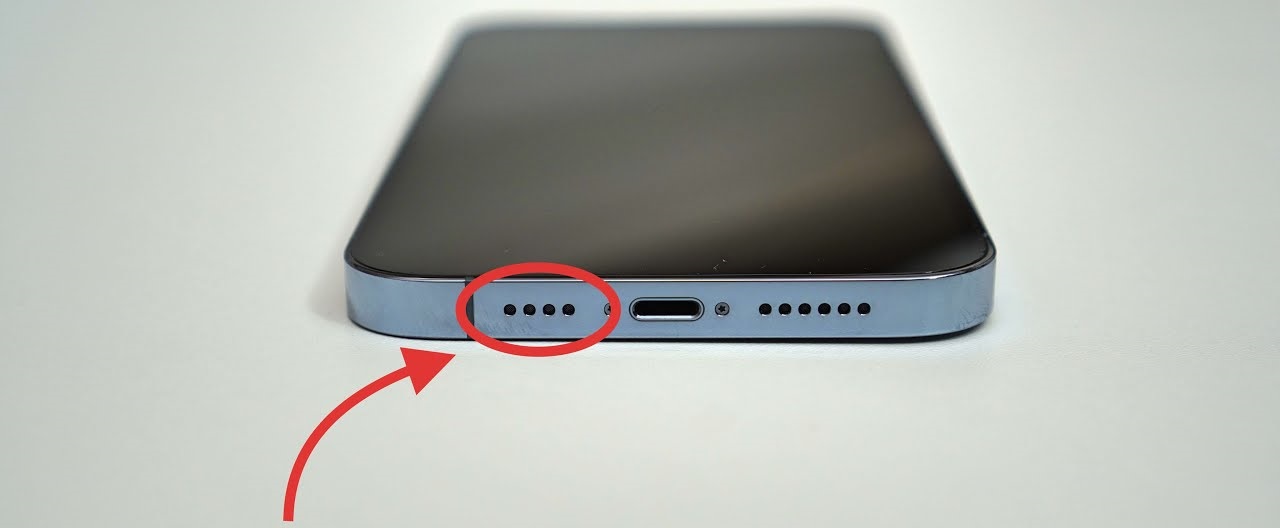
Step 3: Use Compressed Air
Using compressed air is an effective way to dislodge and remove loose particles and debris from your iPhone speaker grille and surrounding areas. This method is gentle and non-invasive, making it an ideal first step in the cleaning process. Here’s how to use compressed air to clean your iPhone speaker:
- Hold Your iPhone Securely: Ensure that your iPhone is held securely, with the speaker grille facing downward to prevent dislodged debris from falling further into the device.
- Position the Nozzle: Carefully position the nozzle of the compressed air canister near the speaker grille, maintaining a slight distance to avoid direct contact with the device.
- Apply Short Bursts of Air: Gently press the trigger of the compressed air canister to release short bursts of air into the speaker grille. The force of the air will help dislodge any loose particles or debris trapped in the grille.
- Rotate Your iPhone: While applying the compressed air, you can gently rotate your iPhone to ensure that the air reaches all areas of the speaker grille, dislodging any remaining particles.
- Inspect for Debris: After using the compressed air, visually inspect the speaker grille and surrounding areas to check for any dislodged debris. If necessary, you can repeat the process to ensure thorough cleaning.
By using compressed air, you can effectively remove superficial debris and particles that may be obstructing your iPhone speaker without the need for direct physical contact. This gentle approach sets the stage for the subsequent steps of the cleaning process, allowing you to address more stubborn or embedded debris with additional methods as needed.
Step 4: Use a Soft-Bristled Brush
When dealing with more stubborn debris or particles that compressed air alone may not dislodge, using a soft-bristled brush can be an effective next step in the cleaning process. A soft-bristled brush allows for targeted and gentle cleaning, helping to remove trapped particles without causing damage to the speaker grille or surrounding components. Here’s how to use a soft-bristled brush to clean your iPhone speaker:
- Select a Suitable Brush: Choose a clean, dry toothbrush with soft bristles or a specialized electronics cleaning brush specifically designed for delicate components.
- Gently Brush the Speaker Grille: Using light and precise movements, gently brush the speaker grille and surrounding areas to dislodge any remaining debris. Ensure that the bristles reach into the grille’s openings to loosen trapped particles.
- Rotate and Tilt Your iPhone: As you brush the speaker grille, you can gently rotate and tilt your iPhone to different angles, allowing the dislodged debris to fall away from the device.
- Inspect for Residue: After brushing, visually inspect the speaker grille and surrounding areas to check for any remaining residue or particles. If necessary, you can repeat the brushing process to ensure thorough cleaning.
Using a soft-bristled brush provides a targeted and controlled approach to cleaning your iPhone speaker, particularly when dealing with more persistent debris. The gentle nature of the brush ensures that the delicate components of the speaker remain unharmed while effectively removing obstructions. This method sets the stage for the subsequent steps of the cleaning process, allowing you to proceed with confidence in restoring your iPhone’s speaker to optimal performance.
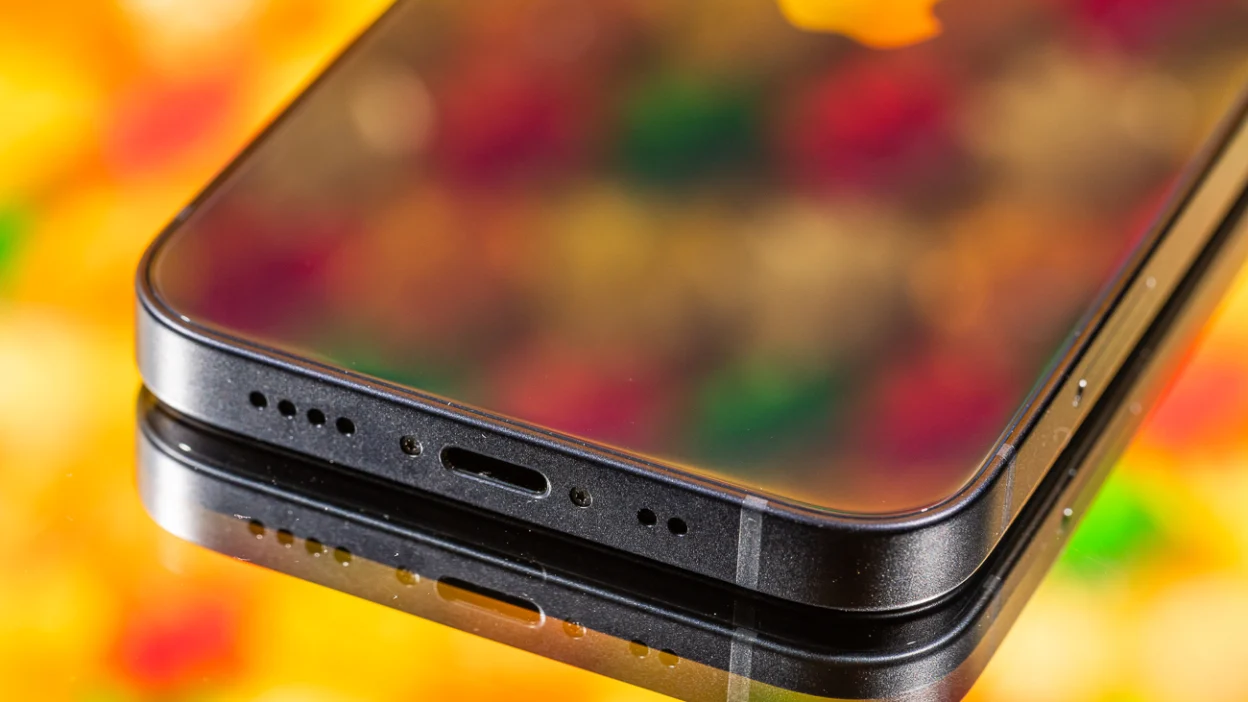
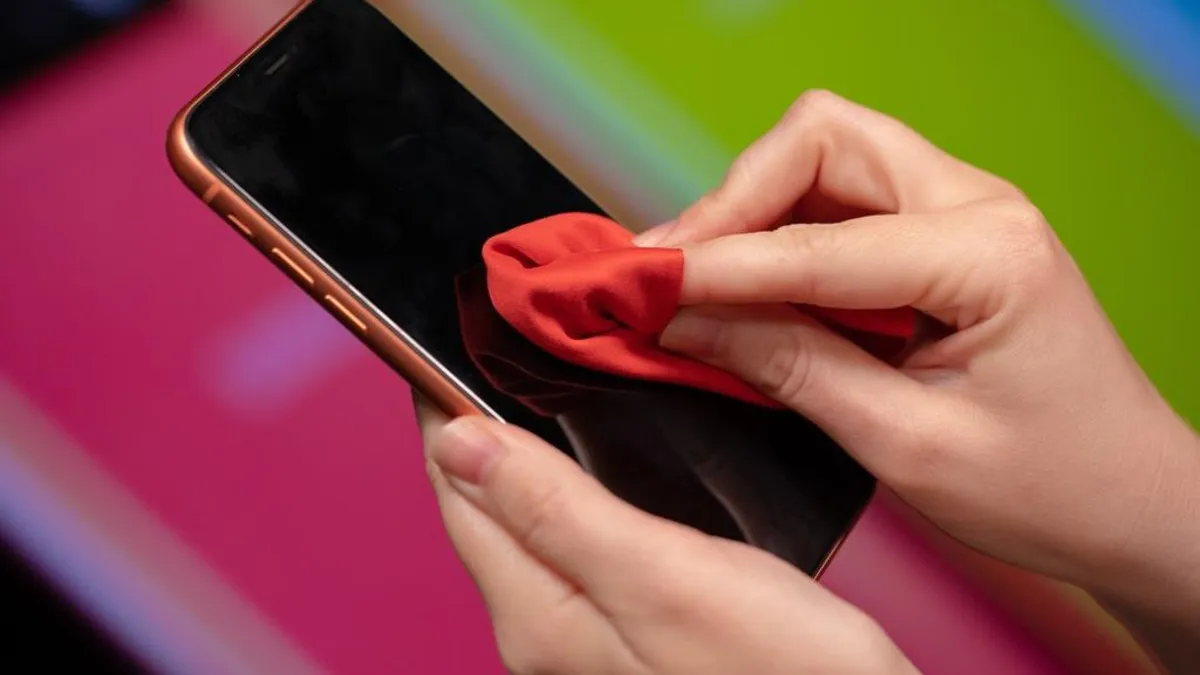
Step 5: Wipe with a Microfiber Cloth
After using compressed air and a soft-bristled brush to dislodge and remove debris from your iPhone speaker, the next step involves wiping the speaker grille and surrounding areas with a microfiber cloth. This gentle and non-abrasive material is ideal for removing any remaining particles and ensuring a clean and polished surface. Here’s how to effectively wipe your iPhone speaker with a microfiber cloth:
- Fold the Microfiber Cloth: Begin by folding a clean microfiber cloth into a small, manageable size, ensuring that you have a soft and clean surface to work with.
- Gently Wipe the Speaker Grille: Using light pressure, gently wipe the speaker grille and surrounding areas with the microfiber cloth. Ensure that you reach into the grille’s openings to remove any remaining debris.
- Rotate and Tilt Your iPhone: As you wipe the speaker grille, you can gently rotate and tilt your iPhone to different angles, allowing the microfiber cloth to access all areas of the speaker.
- Inspect for Clarity: After wiping, visually inspect the speaker grille to ensure that it is free from residue and particles. If necessary, you can repeat the wiping process to achieve a clean and clear surface.
Using a microfiber cloth provides a final touch to the cleaning process, ensuring that your iPhone speaker grille is free from debris and residue. The gentle nature of the cloth prevents scratching or damage to the delicate components while effectively polishing the surface. This step sets the stage for testing your speaker and experiencing the improved sound quality after the cleaning process.
Step 6: Test Your Speaker
After completing the cleaning process for your iPhone speaker, it’s essential to test the speaker to ensure that it has been effectively restored to optimal functionality. Testing the speaker allows you to gauge the improvement in sound quality and clarity, providing immediate feedback on the success of the cleaning process. Here’s how to test your iPhone speaker after cleaning:
- Power On Your iPhone: Turn on your iPhone and navigate to a media source that allows you to play audio, such as a music app or video with sound.
- Adjust the Volume: Gradually increase the volume to a comfortable level, allowing you to assess the clarity and strength of the sound emitted from the speaker.
- Listen for Clarity: Pay attention to the quality of the sound, noting any improvements in clarity, volume, and the absence of any muffled or distorted audio.
- Test Various Audio Sources: Play different types of audio, including music, podcasts, or videos, to evaluate the speaker’s performance across various media formats.
- Compare to Pre-Cleaning Performance: Recall the sound quality of your iPhone speaker before the cleaning process and compare it to the post-cleaning performance to assess the effectiveness of the cleaning.
Testing your iPhone speaker after cleaning allows you to directly experience the impact of the cleaning process on the sound quality and overall performance. By actively listening to various audio sources, you can ascertain the extent of the improvement and appreciate the difference in the speaker’s functionality. If you notice a significant enhancement in sound quality and clarity, it indicates that the cleaning process has been successful in restoring your iPhone speaker to its optimal state.
Conclusion
Congratulations! By following this comprehensive step-by-step guide, you have successfully cleaned your iPhone speaker and revitalized its performance. The process of cleaning your iPhone speaker not only enhances sound quality but also contributes to the overall maintenance and longevity of your device. As you reflect on the journey of restoring your speaker to optimal functionality, consider the following key takeaways:
- Regular Maintenance: Cleaning your iPhone speaker is an integral part of regular device maintenance, ensuring that it continues to deliver clear and crisp sound over time.
- Safe and Effective Methods: The use of compressed air, a soft-bristled brush, and a microfiber cloth provides safe and effective cleaning methods that prevent damage to delicate components.
- Immediate Impact: Testing your speaker after cleaning allows you to immediately experience the positive impact of the cleaning process on sound quality and clarity.
- Enhanced User Experience: A clean iPhone speaker contributes to an enhanced user experience, allowing you to fully enjoy music, videos, calls, and other audio content with improved quality.
As you continue to use your iPhone, remember that periodic cleaning of the speaker can help maintain its performance and prevent the accumulation of debris that may affect its functionality. By incorporating this simple maintenance task into your device care routine, you can ensure that your iPhone continues to deliver exceptional audio experiences.
Now that you’ve completed the cleaning process and tested your iPhone speaker, take a moment to appreciate the renewed clarity and volume of the sound emanating from your device. With a clear and vibrant speaker, you can immerse yourself in your favorite audio content and communicate effectively without any hindrances. Your proactive approach to maintaining your iPhone speaker demonstrates your commitment to preserving the quality and functionality of your device, ensuring that it remains a reliable companion in your daily activities.
By following this guide and embracing the importance of caring for your iPhone speaker, you have taken a proactive step toward optimizing your device’s performance and ensuring a superior audio experience for the days ahead.