Introduction
Autofill is a nifty feature in web browsers that saves time and effort by automatically populating online forms with previously entered information. While this can be incredibly convenient, there are instances when you may need to remove certain autofill entries, whether it's due to outdated or incorrect information, privacy concerns, or simply to declutter your autofill suggestions.
In this article, we will explore the process of removing autofill entries from Google Chrome, one of the most popular web browsers globally. Whether you're using Chrome on your desktop, laptop, or mobile device, understanding how to manage autofill settings can help you maintain a clean and accurate autofill experience.
So, if you've ever found yourself frustrated by outdated autofill suggestions or worried about privacy implications, fear not! We'll guide you through the steps to take control of your Chrome autofill and ensure that your online form-filling experience is as seamless and secure as possible. Let's dive into the world of Chrome autofill settings and learn how to remove unwanted entries with ease.
Accessing Chrome Autofill Settings
Accessing Chrome's autofill settings is the first step towards managing and removing autofill entries. Whether you're using Chrome on a desktop, laptop, or mobile device, the process of accessing autofill settings remains consistent. Here's how to access Chrome's autofill settings on different devices:
On Desktop or Laptop:
-
Open Chrome Browser: Launch the Google Chrome browser on your desktop or laptop.
-
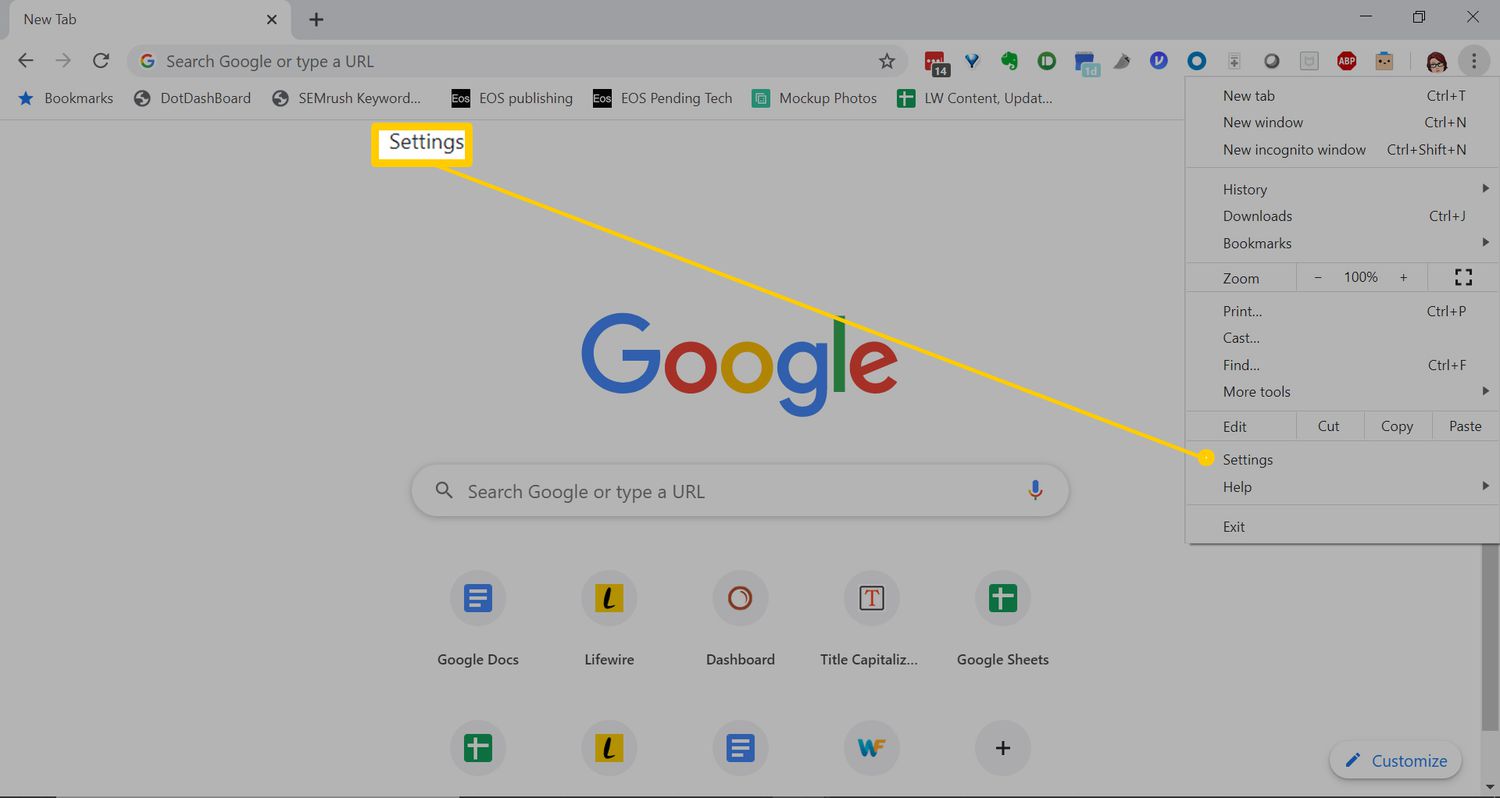
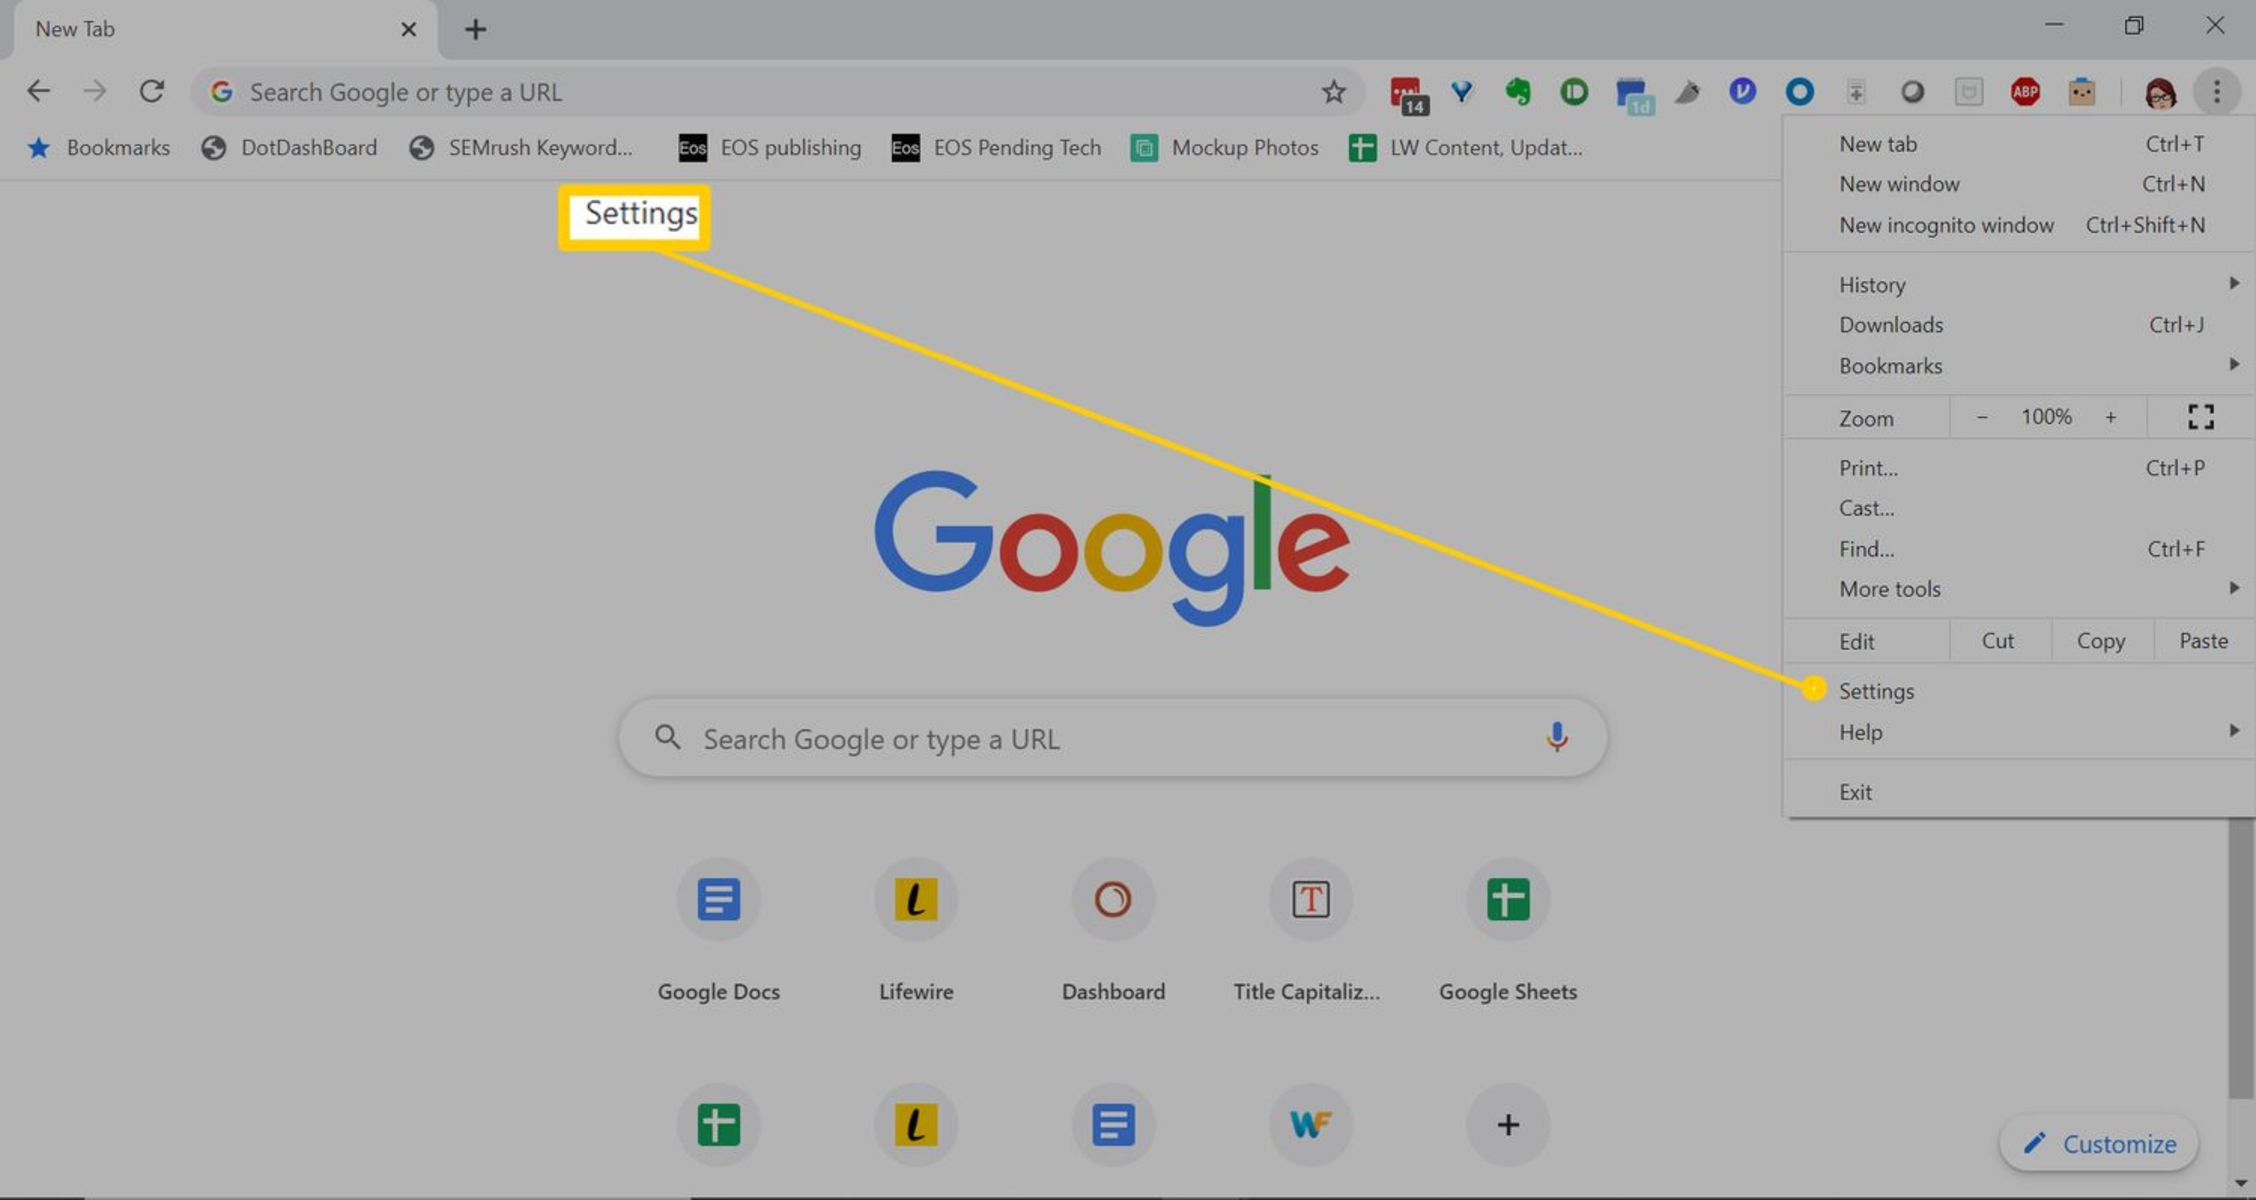
Access Settings: Click on the three-dot menu icon located in the top-right corner of the browser window. From the dropdown menu, select "Settings."
-
Navigate to Autofill Settings: In the Settings menu, scroll down and click on "Advanced" to reveal additional options. Under the "Passwords and forms" section, select "Autofill settings."
-
Access Autofill Entries: You will now be able to view and manage your saved autofill entries, including addresses, payment methods, and more.
On Mobile Devices:
-
Open Chrome App: Launch the Chrome app on your mobile device.
-
Access Settings: Tap on the three-dot menu icon located in the top-right corner of the app. From the menu, select "Settings."
-
Navigate to Autofill Settings: Scroll down and tap on "Autofill forms." This will allow you to access and manage your autofill entries.
By following these simple steps, you can easily access Chrome's autofill settings on your preferred device. Once you've accessed the autofill settings, you'll be ready to proceed with removing unwanted autofill entries, which we'll explore in the next section.
Understanding how to access Chrome's autofill settings empowers you to take control of your autofill experience, ensuring that your saved information is accurate, up-to-date, and reflective of your preferences. With this knowledge in hand, you're well-equipped to navigate the world of Chrome autofill settings and make the necessary adjustments to enhance your browsing experience.
Removing Autofill Entries
Removing unwanted autofill entries from Google Chrome is a straightforward process that allows you to maintain the accuracy and relevance of your autofill suggestions. Whether you're tidying up outdated addresses, removing obsolete payment methods, or simply decluttering your autofill suggestions, Chrome provides a user-friendly interface for managing and removing autofill entries. Here's a detailed guide on how to remove unwanted autofill entries from Chrome:
Step 1: Access Autofill Settings
Before you can remove autofill entries, you'll need to access the autofill settings in Google Chrome. As outlined in the previous section, accessing these settings involves navigating through the browser's menu to reach the specific section dedicated to autofill management. Once you've accessed the autofill settings, you'll be presented with a list of saved autofill entries, including addresses, payment methods, and other form data.
Step 2: Identify Unwanted Entries
Take a moment to review the list of autofill entries and identify the ones you wish to remove. This could include outdated addresses, incorrect payment methods, or any other form data that you no longer want Chrome to suggest when filling out online forms. By carefully reviewing the list, you can pinpoint the specific entries that require removal, ensuring that your autofill suggestions remain accurate and relevant.
Step 3: Remove Unwanted Entries
To remove an unwanted autofill entry, simply hover your cursor over the entry you wish to delete and click on the associated "X" icon or "Remove" option. This action will prompt Chrome to delete the selected autofill entry from your saved data. Repeat this process for each unwanted entry until your autofill suggestions reflect your desired and up-to-date information.
Step 4: Confirm Removal
After removing the unwanted autofill entries, it's a good practice to verify that the changes have taken effect. By revisiting the autofill settings, you can ensure that the entries you removed are no longer present in the list of saved autofill data. This confirmation step provides peace of mind, assuring you that your autofill suggestions have been tailored to your preferences.
By following these steps, you can effectively remove unwanted autofill entries from Google Chrome, streamlining your autofill experience and ensuring that the suggestions align with your current information and preferences. This simple yet impactful process empowers you to maintain a clean and accurate autofill repertoire, enhancing your browsing efficiency and privacy.
As you navigate the realm of Chrome's autofill settings, the ability to remove unwanted entries grants you greater control over your browsing experience, allowing you to curate your autofill suggestions to suit your evolving needs and preferences. With these insights, you're well-equipped to manage and refine your Chrome autofill, ensuring that it remains a valuable and personalized tool in your browsing arsenal.
Managing Autofill Settings
Managing autofill settings in Google Chrome is essential for maintaining a streamlined and personalized browsing experience. Once you've accessed Chrome's autofill settings and removed unwanted entries, it's crucial to understand how to manage and customize your autofill preferences effectively. By delving into the intricacies of autofill management, you can fine-tune your browsing environment to align with your specific needs and preferences.
Customizing Autofill Categories
Within Chrome's autofill settings, you have the ability to customize various autofill categories, including addresses, payment methods, passwords, and more. This customization empowers you to tailor your autofill suggestions to suit your unique browsing habits and requirements. By accessing the respective sections within the autofill settings, you can add, edit, or remove entries within each category, ensuring that your autofill suggestions remain accurate and relevant.
Adding New Autofill Entries
In addition to removing unwanted autofill entries, you may find it beneficial to add new entries to enhance your autofill repertoire. Whether it's a new address, an additional payment method, or a fresh set of credentials, Chrome's autofill settings provide a user-friendly interface for incorporating new information into your autofill suggestions. By seamlessly adding new entries, you can ensure that your autofill suggestions encompass your latest and most frequently used data, optimizing your form-filling experience.
Reviewing and Updating Autofill Data
Regularly reviewing and updating your autofill data is a proactive approach to maintaining the accuracy and relevance of your autofill suggestions. By periodically revisiting the autofill settings, you can verify the correctness of saved entries, update outdated information, and remove obsolete data. This ongoing maintenance ensures that your autofill suggestions remain reflective of your current preferences and browsing patterns, contributing to a more efficient and personalized browsing experience.
Exploring Advanced Autofill Options
Chrome's autofill settings also offer advanced options that allow for further customization and control. These advanced features may include the ability to sync autofill data across devices, manage payment methods securely, and fine-tune autofill behavior based on specific websites. By exploring these advanced options, you can harness the full potential of Chrome's autofill capabilities, tailoring them to suit your individual browsing habits and security preferences.
By actively managing your autofill settings in Google Chrome, you can optimize your browsing experience, enhance your privacy, and streamline the form-filling process across various websites. This proactive approach empowers you to curate your autofill suggestions, ensuring that they align with your current information and preferences. With a clear understanding of how to manage autofill settings effectively, you can harness the full potential of Chrome's autofill feature, transforming it into a valuable and personalized tool in your browsing arsenal.