Introduction
Google Chrome is one of the most popular web browsers, known for its user-friendly interface and extensive range of extensions. These extensions, also known as add-ons, provide additional functionality and customization options to enhance the browsing experience. While extensions can be incredibly useful, there are times when you may prefer to hide them from view. Whether you want to declutter your browser's interface or maintain a minimalist aesthetic, there are several methods you can use to achieve this.
In this article, we will explore three different approaches to hiding extensions in Google Chrome. The first method involves utilizing the browser's built-in settings to manage the visibility of extensions. The second method is tailored for Windows and Mac users, utilizing File Explorer and Finder, respectively, to achieve the desired outcome. Lastly, we will delve into the option of using a dedicated Chrome extension designed specifically for hiding other extensions.
By understanding these methods, you can gain greater control over your browsing environment and tailor it to your preferences. Whether you're a seasoned Chrome user or just getting started with the browser, learning how to manage extensions effectively can significantly enhance your overall browsing experience. Let's dive into the various methods and explore how you can hide extensions in Google Chrome to create a personalized and clutter-free browsing environment.
Method 1: Using Chrome Settings
Google Chrome offers a straightforward method for managing the visibility of extensions through its built-in settings. This approach allows users to customize their browsing experience by selectively hiding extensions from the browser's toolbar. Here's how you can utilize Chrome's settings to achieve this:
-
Accessing Chrome Extensions: To begin, open Google Chrome on your computer. Click on the three-dot menu icon located in the top-right corner of the browser window. From the dropdown menu, navigate to "More tools" and then select "Extensions." This will direct you to the Extensions page, where you can view all the installed extensions and manage their settings.
-
Hiding Extensions: On the Extensions page, you will see a list of all the extensions currently installed in your browser. Each extension will have a toggle switch next to it, allowing you to enable or disable its visibility on the toolbar. To hide an extension, simply toggle the switch to the off position. This action will remove the extension's icon from the toolbar, effectively hiding it from view.
-
Customizing Extension Visibility: Chrome also provides the option to customize the visibility of extensions based on your preferences. By clicking on the "Extensions" menu, you can choose to hide specific extensions while keeping others visible. This level of customization empowers users to tailor their browsing experience according to their individual needs and preferences.
-
Managing Hidden Extensions: If you ever wish to make a hidden extension visible again, you can easily do so through the Extensions page. Simply locate the hidden extension and toggle the switch to the on position. This will restore the extension's icon to the toolbar, making it readily accessible for immediate use.
By leveraging Chrome's settings, users can seamlessly manage the visibility of extensions, ensuring a clutter-free browsing experience tailored to their preferences. This method provides a convenient and intuitive way to hide extensions directly from the browser, empowering users to maintain a clean and organized interface while retaining access to their favorite extensions when needed.
Method 2: Using File Explorer (Windows) or Finder (Mac)
In addition to managing extension visibility through Chrome's settings, Windows and Mac users can utilize their respective file management tools, File Explorer and Finder, to hide extensions from view. This method provides an alternative approach for users who prefer to directly manipulate the files associated with Chrome's extensions. Here's how you can use File Explorer on Windows or Finder on Mac to achieve this:
For Windows Users:
-
Navigate to the Chrome Extensions Folder: Open File Explorer and enter the following path in the address bar:
%localappdata%\Google\Chrome\User Data\Default\Extensions. Press Enter to access the Extensions folder, which contains subfolders corresponding to each installed extension. -
Identify the Extension Folder: Within the Extensions folder, locate the subfolder associated with the extension you wish to hide. Each subfolder is named with a unique string of letters and numbers, representing the extension's ID.
-
Modify the Extension's Visibility: To hide the extension, simply rename the corresponding subfolder by adding a suffix such as ".old" to the folder name. This action effectively disables the extension without uninstalling it, allowing you to conceal it from the browser's interface.
-
Restart Chrome: After renaming the extension's folder, restart Google Chrome to apply the changes. Upon relaunching the browser, the hidden extension will no longer be visible on the toolbar, providing a streamlined browsing experience.
For Mac Users:
-
Access the Chrome Extensions Folder: Open Finder and navigate to the following path:
~/Library/Application Support/Google/Chrome/Default/Extensions. This directory contains subfolders representing each installed extension. -
Locate the Extension Subfolder: Within the Extensions folder, identify the subfolder corresponding to the extension you intend to hide. Each subfolder is named using a unique string of letters and numbers, denoting the extension's ID.
-
Adjust the Extension's Visibility: To hide the extension, rename the associated subfolder by appending a suffix such as ".old" to the folder name. This action effectively conceals the extension from the browser's interface while retaining it within the system.
-
Restart Chrome: After renaming the extension's folder, restart Google Chrome to implement the changes. Upon reopening the browser, the hidden extension will no longer be visible on the toolbar, offering a clutter-free browsing environment tailored to your preferences.
By leveraging File Explorer on Windows or Finder on Mac, users can directly manipulate the files associated with Chrome's extensions, providing an alternative method to hide extensions from view. This approach offers greater flexibility and control over extension visibility, allowing users to personalize their browsing experience according to their preferences.
Method 3: Using a Chrome Extension
In addition to the built-in features and file manipulation methods, Google Chrome offers a convenient solution for hiding extensions through the use of a dedicated Chrome extension. This method provides a user-friendly approach to managing extension visibility, allowing users to streamline their browsing experience with ease.
Exploring Chrome Web Store
To begin, users can navigate to the Chrome Web Store, which serves as a hub for a wide range of extensions designed to enhance the functionality of the browser. By entering the desired keywords, such as "hide extensions," in the search bar, users can explore various extensions tailored to the specific purpose of concealing other extensions from view.
Selecting a Hide Extensions Extension
Upon searching for "hide extensions," users will be presented with a selection of Chrome extensions designed to facilitate the hiding of other extensions. It is essential to review the details and user ratings of each extension to identify the most suitable option based on user feedback and functionality.
Installing the Chosen Extension
Once a suitable "hide extensions" extension has been identified, users can proceed to install it by clicking on the "Add to Chrome" button. This action will prompt a confirmation dialog, allowing users to grant the necessary permissions for the extension to function effectively within the browser.
Managing Extension Visibility
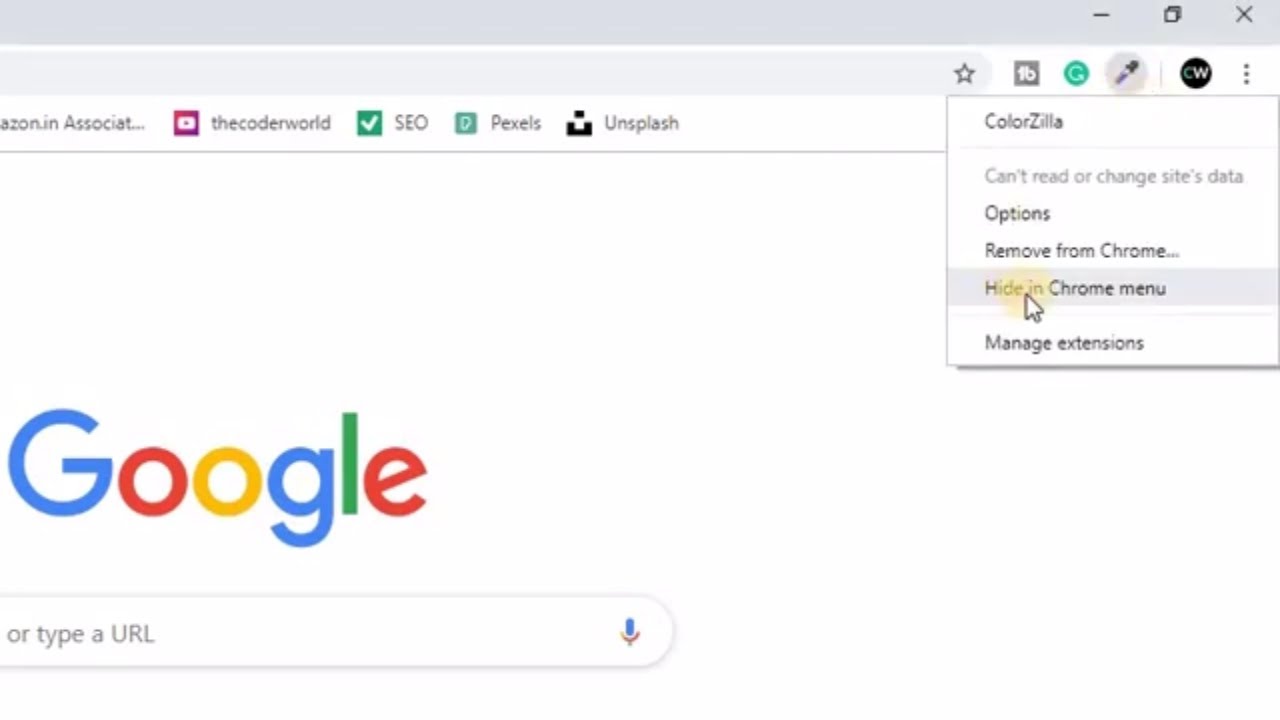
After the "hide extensions" extension has been successfully installed, users can access its settings and preferences to customize the visibility of specific extensions. This may involve accessing the extension's options through the Chrome menu or toolbar, where users can selectively hide or reveal extensions based on their preferences.
Enjoying a Streamlined Browsing Experience
By leveraging a dedicated Chrome extension designed for hiding other extensions, users can effortlessly manage the visibility of their installed extensions, ensuring a clutter-free and personalized browsing environment. This method offers a seamless and intuitive approach to tailoring the browser interface to individual preferences, empowering users to maintain a clean and organized workspace while retaining access to essential extensions.
By utilizing a Chrome extension specifically designed for hiding extensions, users can enhance their browsing experience by customizing the visibility of extensions with ease, ultimately creating a more streamlined and personalized environment within Google Chrome.
Conclusion
In conclusion, the ability to hide extensions in Google Chrome provides users with a valuable means of customizing their browsing experience to align with their preferences and organizational needs. By exploring the three distinct methods outlined in this article, users can gain a comprehensive understanding of the diverse approaches available for managing extension visibility within the browser.
The first method, utilizing Chrome's built-in settings, offers a user-friendly and intuitive way to selectively hide extensions directly from the browser interface. This approach empowers users to declutter their toolbar and maintain a streamlined workspace while retaining the flexibility to reveal specific extensions as needed.
For Windows and Mac users, the second method involving File Explorer and Finder presents an alternative approach to managing extension visibility by directly manipulating the files associated with Chrome's extensions. This method offers greater flexibility and control over extension visibility, allowing users to personalize their browsing experience according to their preferences.
Furthermore, the option of using a dedicated Chrome extension to hide other extensions provides a convenient and user-friendly solution for streamlining the browsing environment. By leveraging these specialized extensions, users can effortlessly manage the visibility of their installed extensions, ensuring a clutter-free and personalized browsing experience.
Overall, the ability to hide extensions in Google Chrome reflects the browser's commitment to providing users with a customizable and tailored browsing experience. Whether users seek a minimalist interface, a clutter-free workspace, or a personalized browsing environment, the methods outlined in this article offer practical and effective solutions to meet diverse user preferences.
By understanding and implementing these methods, users can take full advantage of the flexibility and customization options offered by Google Chrome, ultimately enhancing their overall browsing experience. Whether it's through the browser's settings, file manipulation, or the use of dedicated extensions, the ability to hide extensions in Google Chrome empowers users to curate a browsing environment that aligns with their unique needs and preferences.