Introduction
Adding a Google Chrome profile to your desktop can significantly enhance your browsing experience by allowing you to personalize your settings, bookmarks, and extensions. This feature is particularly useful for individuals who share a computer or for those who want to maintain separate browsing environments for work and personal use. By creating distinct profiles, you can keep your browsing history, saved passwords, and other preferences separate, ensuring a seamless and tailored browsing experience each time you log in.
In this guide, we will walk you through the simple and straightforward process of adding a Google Chrome profile to your desktop. Whether you are a seasoned Chrome user or just getting started, this step-by-step tutorial will equip you with the knowledge to effortlessly manage multiple profiles within the browser. With the ability to customize each profile with its own unique name and avatar, you can easily distinguish between them and switch seamlessly between different browsing environments.
By the end of this tutorial, you will have a comprehensive understanding of how to create and manage Google Chrome profiles, empowering you to tailor your browsing experience to your specific needs and preferences. So, let's dive in and explore the seamless process of adding a Google Chrome profile to your desktop!
Step 1: Open Google Chrome
To begin the process of adding a Google Chrome profile to your desktop, the first step is to open the Google Chrome browser on your computer. Whether you are using a Windows PC, Mac, or Linux system, the process of launching Google Chrome is fairly consistent across different operating systems.
If you are using a Windows PC, you can open Google Chrome by clicking on the Chrome icon located on your desktop or by searching for "Google Chrome" in the Windows Start menu and selecting the application from the search results. Alternatively, you can also access Google Chrome by clicking on the taskbar icon if it has been pinned for quick access.
For Mac users, launching Google Chrome is as simple as clicking on the Chrome icon in the Dock or locating the application in the Applications folder and double-clicking to open it. Additionally, you can use Spotlight Search by pressing Command + Space, typing "Google Chrome," and hitting Enter to launch the browser.
Linux users can open Google Chrome by accessing the application through the system's application launcher or by using the terminal to execute the appropriate command, depending on the distribution and installation method.
Once Google Chrome is launched, you will be greeted by the familiar interface, featuring the address bar, tabs, and various browser controls. With the browser now open, you are ready to proceed to the next step in the process of adding a new profile to your Google Chrome browser.
Opening Google Chrome is the first step in the journey to creating and managing multiple profiles within the browser. With the browser now at your fingertips, you are one step closer to customizing your browsing experience and optimizing your productivity. Let's move on to the next step and continue our exploration of adding a Google Chrome profile to your desktop.
Step 2: Click on Profile Icon
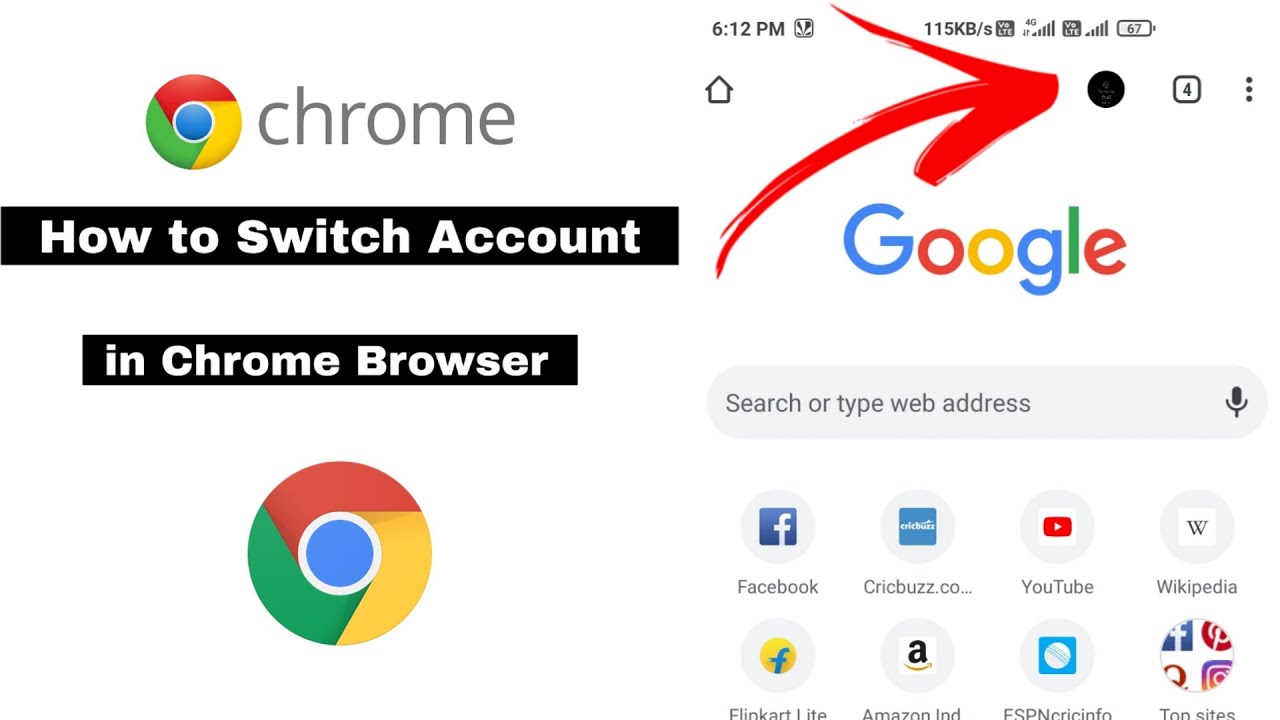
Upon opening Google Chrome, you will notice the profile icon located in the top right corner of the browser window. The profile icon is represented by a small circular image or initial, indicating the current active profile. Clicking on this icon will reveal a dropdown menu displaying the active profile name and avatar, as well as an option to manage profiles.
When you click on the profile icon, a menu will appear, showcasing the active profile's name and avatar at the top. Below the active profile details, you will find options to switch profiles, add a new profile, and manage existing profiles. This intuitive interface provides quick access to profile management features, allowing you to seamlessly navigate between different profiles and customize your browsing experience.
By clicking on the profile icon, you initiate the process of managing profiles within Google Chrome. This action serves as the gateway to accessing profile-specific settings, bookmarks, extensions, and browsing history. Whether you are adding a new profile or switching between existing ones, the profile icon is your starting point for managing multiple profiles within the browser.
As you click on the profile icon, the dropdown menu presents a user-friendly interface that streamlines the process of profile management. This accessibility empowers users to effortlessly create, customize, and switch between profiles, catering to their diverse browsing needs and preferences.
With the profile icon serving as your entry point to profile management, you are now ready to delve into the next step of adding a Google Chrome profile to your desktop. This seamless process ensures that you can easily create and manage multiple profiles within the browser, enhancing your browsing experience and productivity.
Now that you have clicked on the profile icon and accessed the profile management menu, let's proceed to the next step and continue our journey of adding a Google Chrome profile to your desktop.
Step 3: Select "Manage People"
After clicking on the profile icon and accessing the dropdown menu, the next step in adding a Google Chrome profile to your desktop is to select "Manage People." This action opens a dedicated window where you can view, add, and customize profiles within the browser, providing a centralized hub for profile management.
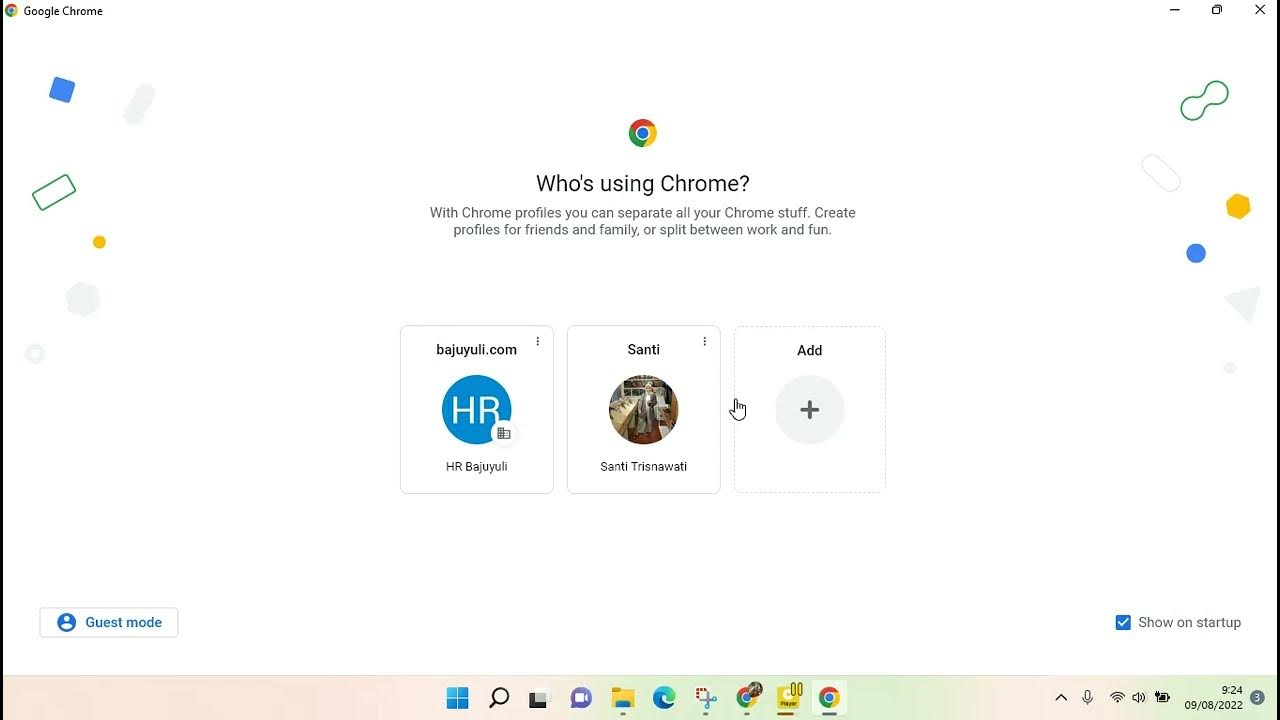
Upon selecting "Manage People," a new window will appear, presenting a comprehensive overview of the existing profiles associated with your Google Chrome browser. This window serves as a control center for managing profiles, offering a range of options to create new profiles, edit existing ones, and switch between different user environments.
The "Manage People" window displays a list of profiles, each accompanied by its respective name and avatar. This visual representation allows you to easily identify and distinguish between different profiles, facilitating seamless navigation and customization. Additionally, the window provides options to add a new profile, edit profile settings, and remove existing profiles, empowering you to tailor your browsing experience to your specific preferences.
By selecting "Manage People," you gain access to a user-friendly interface that streamlines the process of profile management. This centralized hub simplifies the creation and customization of profiles, ensuring that you can effortlessly organize and personalize your browsing environments. Whether you are adding a profile for personal use, work-related activities, or specific projects, the "Manage People" window offers the flexibility to accommodate diverse user needs.
Furthermore, the "Manage People" window allows you to set up separate browsing environments for different users sharing the same computer. This feature is particularly beneficial for households, offices, and educational institutions, where multiple individuals may utilize the same device while maintaining distinct browsing preferences and settings.
In addition to creating new profiles, the "Manage People" window enables you to customize profile names and avatars, further personalizing the browsing experience. This level of customization enhances user engagement and satisfaction, as individuals can easily identify and switch between profiles based on their unique visual representations.
With the ability to access the "Manage People" window, you are equipped with the tools to efficiently manage and customize profiles within your Google Chrome browser. This seamless process empowers you to create distinct browsing environments tailored to your specific needs, ensuring a personalized and efficient browsing experience.
Having selected "Manage People" and gained access to the profile management window, you are now prepared to proceed to the next step in adding a Google Chrome profile to your desktop. Let's continue our exploration and further enhance your browsing experience through the creation and customization of profiles within the browser.
Step 4: Click on "Add Person"
Once you have accessed the "Manage People" window, the next pivotal step in adding a Google Chrome profile to your desktop is to click on "Add Person." This action initiates the process of creating a new profile within the browser, allowing you to customize the settings, bookmarks, and extensions for the newly added user environment.
Upon clicking on "Add Person," a prompt will appear, prompting you to enter a name for the new profile. This name serves as the identifier for the profile, enabling you to distinguish it from other existing profiles. Whether you intend to create a profile for personal use, work-related tasks, or specific projects, the ability to assign a unique name to each profile ensures seamless navigation and organization within the browser.
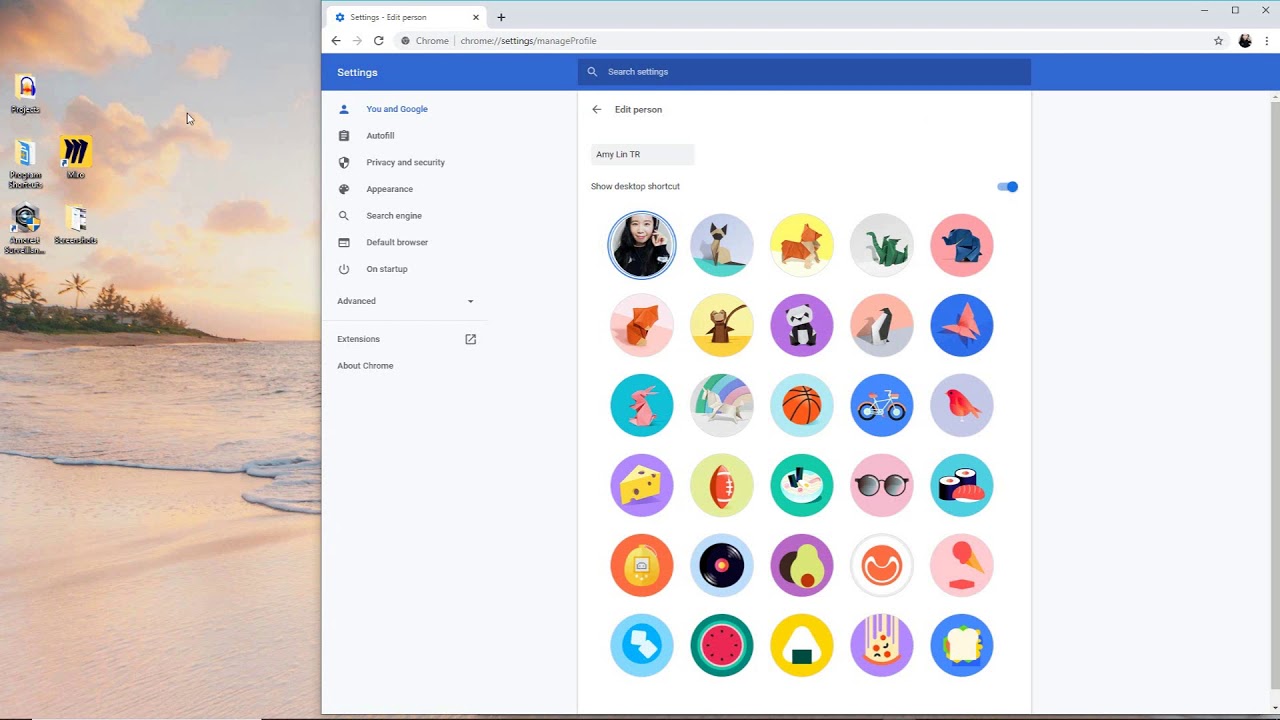
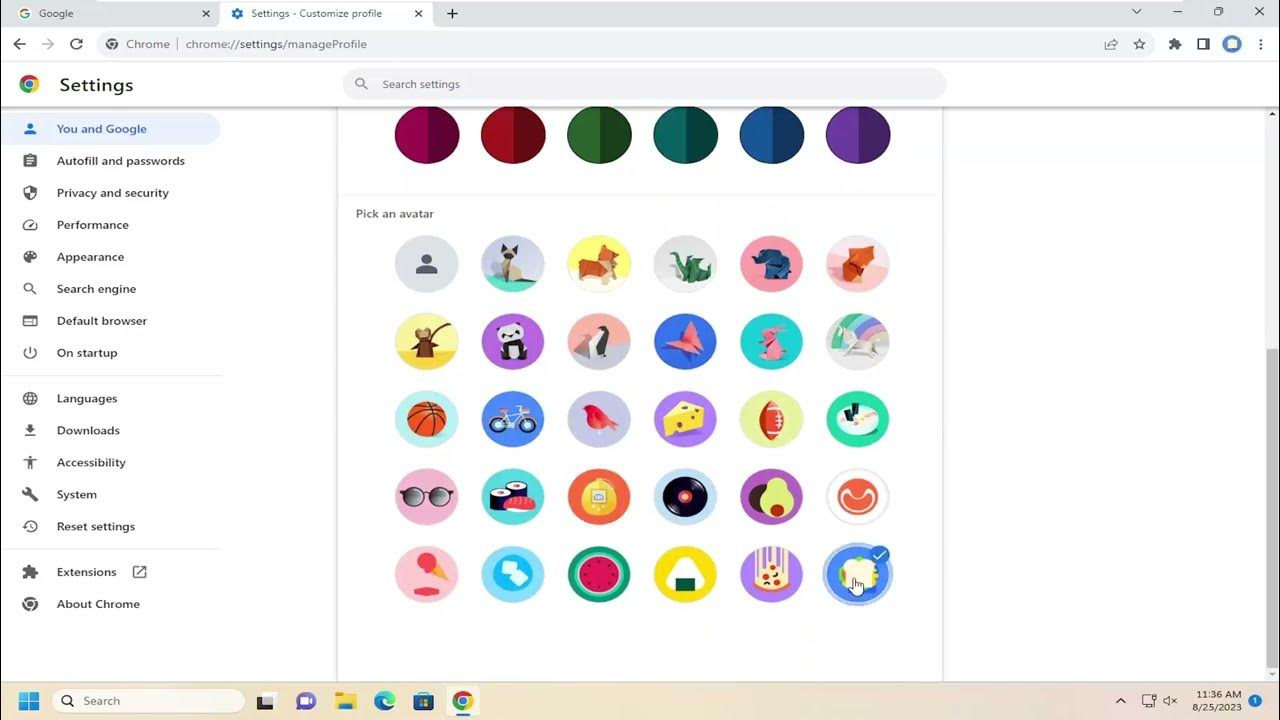
In addition to naming the new profile, you have the option to select an avatar to represent the user environment visually. Google Chrome offers a selection of predefined avatars, each featuring distinct designs and colors. This visual representation further enhances the ability to differentiate between profiles, allowing for quick and intuitive identification when switching between user environments.
By clicking on "Add Person" and customizing the profile name and avatar, you are laying the foundation for a tailored browsing experience. The newly created profile serves as a dedicated space where you can manage bookmarks, customize settings, and install extensions specific to the user's preferences and requirements.
Furthermore, the process of adding a new person to Google Chrome provides the flexibility to create separate browsing environments for different users sharing the same computer. This feature is particularly beneficial for households, offices, and educational institutions, where multiple individuals may utilize the same device while maintaining distinct browsing preferences and settings.
The seamless process of clicking on "Add Person" and customizing the profile details empowers you to create a personalized and efficient browsing environment. Whether you are managing multiple profiles for individual use or facilitating distinct user experiences for different individuals, the ability to add a new person to Google Chrome enhances the versatility and customization of the browser.
With the new profile successfully added to Google Chrome, you are now equipped with a tailored browsing environment that reflects your specific preferences and requirements. This seamless process ensures that you can effortlessly manage and switch between profiles, optimizing your productivity and enhancing your browsing experience.
Now that you have clicked on "Add Person" and customized the profile details, you are ready to proceed to the next step in adding a Google Chrome profile to your desktop. Let's continue our exploration and further enhance your browsing experience through the seamless management of multiple profiles within the browser.
Step 5: Choose a Name and Avatar
After clicking on "Add Person" and initiating the process of creating a new profile within Google Chrome, the next crucial step is to choose a name and avatar for the newly added profile. This step allows you to personalize the profile, making it easily distinguishable and visually appealing within the browser.
When prompted to choose a name for the new profile, consider selecting a name that reflects the intended use or user associated with the profile. Whether it's for personal browsing, work-related tasks, or specific projects, the name serves as the identifier for the profile, enabling seamless navigation and organization within the browser. By assigning a unique and descriptive name to the profile, you can easily differentiate it from other existing profiles, ensuring clarity and efficiency when switching between user environments.
In addition to naming the new profile, you have the opportunity to select an avatar to visually represent the user environment. Google Chrome offers a diverse range of predefined avatars, each featuring distinct designs and colors. The selection of an avatar adds a personalized touch to the profile, allowing for quick and intuitive identification when switching between profiles. Whether you opt for a vibrant and eye-catching avatar or a subtle and minimalist design, the visual representation enhances the overall browsing experience, making it visually engaging and user-friendly.
The process of choosing a name and avatar for the new profile empowers you to personalize the browsing environment, creating a distinct and visually appealing user space within Google Chrome. This customization not only enhances the aesthetic appeal of the browser but also facilitates efficient navigation and organization, ensuring that you can seamlessly manage and switch between profiles based on your specific preferences and requirements.
By customizing the name and avatar for the newly added profile, you are elevating the browsing experience, infusing it with a personalized touch that reflects your individuality and preferences. This level of customization underscores the versatility and user-centric design of Google Chrome, empowering you to tailor your browsing environment to align with your unique needs and visual preferences.
With the name and avatar successfully chosen for the new profile, you have personalized the browsing experience, creating a visually distinct and easily identifiable user environment within Google Chrome. This seamless process ensures that you can effortlessly manage and switch between profiles, optimizing your productivity and enhancing your browsing experience.
Step 6: Click "Add"
After customizing the name and avatar for the new profile, the final step in adding a Google Chrome profile to your desktop is to click "Add." This action solidifies the creation of the new profile, incorporating the personalized settings, bookmarks, and extensions specific to the user environment.
By clicking "Add," you confirm the creation of the new profile, signaling Google Chrome to finalize the setup process and integrate the customized details into the browser's profile management system. This seamless action ensures that the newly added profile becomes an integral part of your browsing experience, offering a dedicated space where you can manage bookmarks, customize settings, and install extensions tailored to your specific preferences and requirements.
The process of clicking "Add" serves as the culmination of the profile creation journey, marking the transition from customization to active utilization. With the new profile successfully added to Google Chrome, you gain access to a tailored browsing environment that reflects your individuality and browsing preferences. Whether you have created the profile for personal use, work-related tasks, or specific projects, the ability to click "Add" signifies the establishment of a distinct user space within the browser.
Furthermore, the seamless process of clicking "Add" reinforces the user-centric design of Google Chrome, emphasizing its commitment to providing a personalized and efficient browsing experience. This intuitive action streamlines the management of multiple profiles within the browser, ensuring that you can effortlessly switch between user environments based on your diverse needs and preferences.
With the click of "Add," you have successfully completed the process of adding a Google Chrome profile to your desktop, empowering you to navigate and customize your browsing experience with ease. This seamless journey culminates in the creation of a personalized and efficient user environment, reflecting your unique preferences and requirements within the browser.
By clicking "Add," you have seamlessly integrated the new profile into Google Chrome, unlocking a world of possibilities for tailored browsing experiences and efficient productivity. This final step ensures that you can effortlessly manage and switch between profiles, optimizing your browsing experience and empowering you to explore the diverse capabilities of Google Chrome.


