Introduction
Creating a hotspot on your iPhone can be a game-changer, especially when you need internet access on the go. Whether you're traveling, working remotely, or facing unexpected Wi-Fi issues, turning your iPhone into a hotspot can provide a reliable and secure connection for your other devices. With just a few simple steps, you can transform your iPhone into a portable Wi-Fi hub, allowing you to stay connected wherever you are.
By setting up a personal hotspot on your iPhone, you can share your cellular data connection with other devices such as laptops, tablets, or even other smartphones. This means that even if you're in an area with no Wi-Fi network available, you can still access the internet on your other devices by utilizing your iPhone's data connection.
Moreover, creating a hotspot on your iPhone is remarkably convenient, as it eliminates the need to search for public Wi-Fi networks or rely on potentially unsecure connections. It's like having your own personal Wi-Fi network that you can carry with you everywhere, ensuring that you can stay productive and connected regardless of your location.
Whether you need to send an urgent email, attend a virtual meeting, or simply browse the web, having the ability to create a hotspot on your iPhone provides a sense of freedom and flexibility that is invaluable in today's fast-paced world. Additionally, this feature can be particularly useful in situations where you need to connect multiple devices to the internet simultaneously, such as when traveling with family or friends.
In the following steps, we will guide you through the process of setting up a personal hotspot on your iPhone, enabling you to harness the full potential of your device and stay connected wherever your adventures take you. So, let's dive into the easy steps to transform your iPhone into a portable Wi-Fi hotspot!
Step 1: Open Settings
The first step to creating a hotspot on your iPhone is to open the Settings app. This is where you can access and customize various features and preferences of your device, including the option to set up a personal hotspot.
To begin, locate the Settings app on your iPhone's home screen. The icon resembles a gear and is typically found among your other apps. Once you've located the Settings app, tap on it to open the application.
Upon opening the Settings app, you will be greeted by a series of categorized options, each representing different aspects of your iPhone's settings. These categories include "Airplane Mode," "Wi-Fi," "Bluetooth," "Cellular," and more. To proceed with setting up your personal hotspot, you will need to navigate through these options to find the specific setting for creating a hotspot.
To find the hotspot setting, you may need to scroll down within the Settings app until you come across the "Personal Hotspot" option. Alternatively, you can use the search bar at the top of the Settings app to quickly locate the "Personal Hotspot" setting by typing "personal hotspot" into the search field.
Once you have located the "Personal Hotspot" option within the Settings app, you are ready to move on to the next step in the process of setting up your hotspot. This initial step of opening the Settings app is crucial, as it serves as the gateway to accessing the necessary settings for configuring your iPhone's personal hotspot feature.
By successfully navigating to the "Personal Hotspot" setting within the Settings app, you have taken the first essential step towards transforming your iPhone into a portable Wi-Fi hotspot. With the Settings app now open and the "Personal Hotspot" option within reach, you are well on your way to harnessing the power of your iPhone's connectivity and ensuring that you can stay connected wherever your journey leads.
In the next step, we will delve into the process of tapping on the "Personal Hotspot" setting to continue setting up your iPhone's hotspot feature. So, let's proceed to the next step and bring your personal hotspot to life!
Step 2: Tap on Personal Hotspot
After successfully opening the Settings app on your iPhone, the next crucial step in creating a hotspot is to tap on the "Personal Hotspot" option within the Settings menu. This action will allow you to access and configure the settings related to your iPhone's personal hotspot feature.
Upon locating the "Personal Hotspot" option within the Settings app, you will need to tap on it to proceed. Tapping on this option will open a new screen or menu dedicated to the personal hotspot settings, providing you with the necessary controls to enable, configure, and manage your iPhone's hotspot functionality.
Once you have tapped on the "Personal Hotspot" option, you may be prompted to enter additional details or configure specific settings related to your hotspot, such as setting a Wi-Fi password or adjusting the network name. These customizations allow you to personalize your hotspot and ensure that it remains secure and accessible only to authorized devices.
By tapping on the "Personal Hotspot" option and navigating through the related settings, you are taking a significant step towards activating and customizing your iPhone's hotspot feature. This action is essential for preparing your device to function as a portable Wi-Fi hub, enabling you to share your cellular data connection with other devices in your vicinity.
In the upcoming steps, we will delve into the process of turning on the personal hotspot, connecting other devices to your hotspot, and leveraging the full potential of your iPhone's connectivity. With the "Personal Hotspot" option now tapped and in focus, you are well on your way to harnessing the power of your iPhone's hotspot feature and ensuring that you can stay connected wherever your journey takes you.
So, with the "Personal Hotspot" option tapped and ready, let's move on to the subsequent steps and bring your personal hotspot to life!
Step 3: Turn on Personal Hotspot
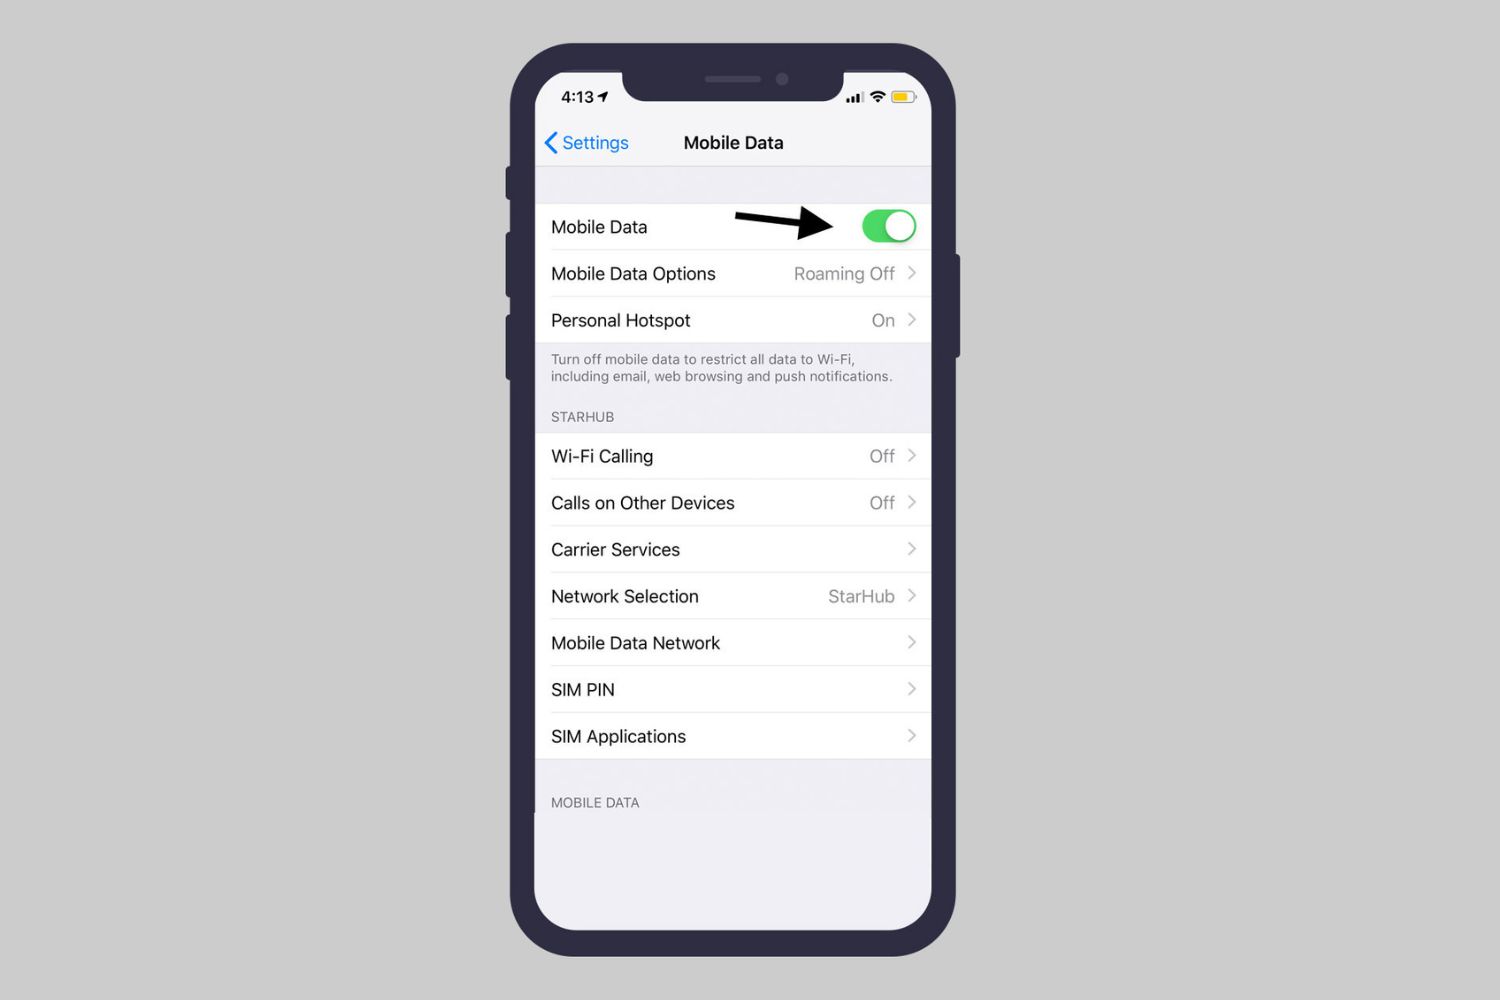
After tapping on the "Personal Hotspot" option within the Settings app, the next pivotal step in the process of creating a hotspot on your iPhone is to turn on the personal hotspot feature. This action is what activates your iPhone's capability to share its cellular data connection with other devices, effectively transforming it into a portable Wi-Fi hotspot.
Upon tapping on the "Personal Hotspot" option, you will encounter a toggle switch that allows you to turn on the personal hotspot feature. This toggle switch is typically positioned at the top of the screen dedicated to personal hotspot settings. By default, the personal hotspot feature may be turned off, and it is through this step that you will enable it to start sharing your iPhone's internet connection with other devices.
To turn on the personal hotspot, simply tap on the toggle switch, causing it to change from the "Off" position to the "On" position. Once the toggle switch is in the "On" position, your iPhone's personal hotspot feature becomes active, signifying that it is now ready to share its internet connection with other devices.
As you activate the personal hotspot feature, you may have the option to customize certain settings, such as setting a Wi-Fi password or adjusting the network name. These customizations allow you to enhance the security and accessibility of your hotspot, ensuring that only authorized devices can connect to it.
With the personal hotspot now turned on, your iPhone has officially become a portable Wi-Fi hub, capable of providing internet access to other devices in your vicinity. Whether you need to connect a laptop, tablet, or another smartphone to the internet, your iPhone's hotspot feature is ready to facilitate seamless connectivity.
By successfully turning on the personal hotspot, you have unlocked the full potential of your iPhone's connectivity, enabling you to stay connected and productive wherever your adventures take you. With the hotspot feature activated, you are now poised to connect other devices to your iPhone's hotspot and harness the convenience and flexibility it offers.
In the subsequent steps, we will explore the process of connecting to the hotspot and leveraging its capabilities to ensure that you can stay connected and productive on the go. With the personal hotspot now active, let's move on to the following steps and make the most of your iPhone's hotspot feature.
Step 4: Connect to the Hotspot
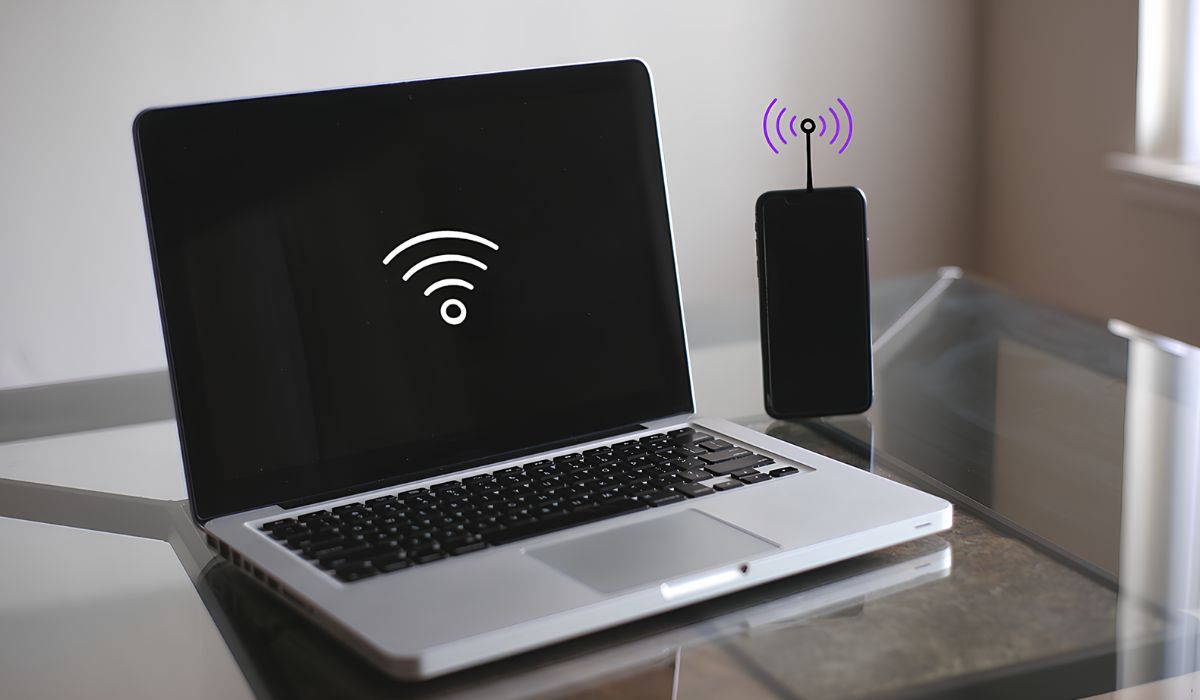
Once you have successfully turned on the personal hotspot feature on your iPhone, the next step is to connect other devices to the hotspot and start enjoying internet access on those devices. Whether you need to connect a laptop, tablet, or another smartphone, the process of joining your iPhone's hotspot is straightforward and can be completed in just a few simple steps.
To connect to the hotspot created by your iPhone, begin by accessing the Wi-Fi settings on the device you wish to connect. This could be a laptop, tablet, or any other Wi-Fi-enabled device that you want to provide with internet access through your iPhone's hotspot.
Within the Wi-Fi settings of the device you want to connect, you should see your iPhone's hotspot network listed among the available Wi-Fi networks. The name of your iPhone's hotspot network is typically the same as your iPhone's name or a customized name that you set during the hotspot setup process. Locate your iPhone's hotspot network in the list of available networks and select it to initiate the connection process.
If you have set a Wi-Fi password for your iPhone's hotspot during the setup, you will be prompted to enter this password to authenticate and connect to the hotspot network. Simply enter the password and proceed to join the network. Once the correct password is entered, the device will establish a connection to your iPhone's hotspot, enabling it to access the internet using your iPhone's cellular data connection.
Upon successfully connecting to your iPhone's hotspot, the device will display a confirmation message, indicating that it is now connected and has access to the internet through your iPhone. You can then proceed to use the internet on the connected device just as you would with any other Wi-Fi network, whether it's for browsing the web, streaming content, or accessing online services.
With the device now connected to your iPhone's hotspot, you have effectively expanded the reach of your iPhone's internet connection, allowing other devices to benefit from its connectivity. This capability is particularly useful in situations where a stable and secure internet connection is essential, such as when working remotely, attending virtual meetings, or simply staying connected while on the go.
By following these simple steps to connect to the hotspot created by your iPhone, you can ensure that all your devices are equipped with reliable internet access, regardless of your location. This seamless connectivity empowers you to stay productive and connected, enhancing your overall digital experience and enabling you to make the most of your iPhone's hotspot feature.
Conclusion
In conclusion, the ability to create a hotspot on your iPhone opens up a world of possibilities, allowing you to stay connected and productive wherever your adventures take you. By following the simple steps outlined in this guide, you can transform your iPhone into a portable Wi-Fi hub, sharing its cellular data connection with other devices and ensuring seamless connectivity on the go.
The process begins with opening the Settings app on your iPhone and tapping on the "Personal Hotspot" option. From there, you can turn on the personal hotspot feature, customizing settings such as the network name and Wi-Fi password to personalize your hotspot and enhance its security. Once the personal hotspot is activated, you can easily connect other devices to it, expanding the reach of your iPhone's internet connection and enabling seamless access to online resources.
Creating a hotspot on your iPhone is particularly valuable in situations where traditional Wi-Fi networks are unavailable or unreliable. Whether you're traveling, working remotely, or simply seeking a secure and dependable internet connection, your iPhone's hotspot feature empowers you to stay connected and productive, regardless of your location.
Furthermore, the convenience of sharing your iPhone's internet connection with other devices cannot be overstated. From laptops and tablets to additional smartphones, the ability to connect multiple devices to your iPhone's hotspot ensures that everyone in your vicinity can benefit from reliable internet access, fostering collaboration, communication, and productivity.
In today's fast-paced world, where connectivity is essential for work, leisure, and staying informed, the capability to create a hotspot on your iPhone provides a valuable solution to the challenges of staying connected on the go. Whether you're attending virtual meetings, accessing important documents, or simply staying in touch with friends and family, your iPhone's hotspot feature offers a reliable and secure means of accessing the internet, enhancing your digital experience and enabling you to make the most of your device's connectivity.
In essence, the process of creating a hotspot on your iPhone is a simple yet powerful way to unlock the full potential of your device, enabling you to stay connected, productive, and informed in any setting. By following the steps outlined in this guide, you can harness the convenience and flexibility of your iPhone's hotspot feature, ensuring that you are always equipped with a reliable internet connection, no matter where life takes you.