Introduction
Connecting to a hotspot on your MacBook can provide a convenient solution for accessing the internet when you're away from traditional Wi-Fi networks. Whether you're at a coffee shop, on a train, or in a location without a stable internet connection, leveraging a hotspot can keep you connected and productive. This step-by-step guide will walk you through the process of connecting to a hotspot on your MacBook, ensuring that you can seamlessly access the internet wherever you go.
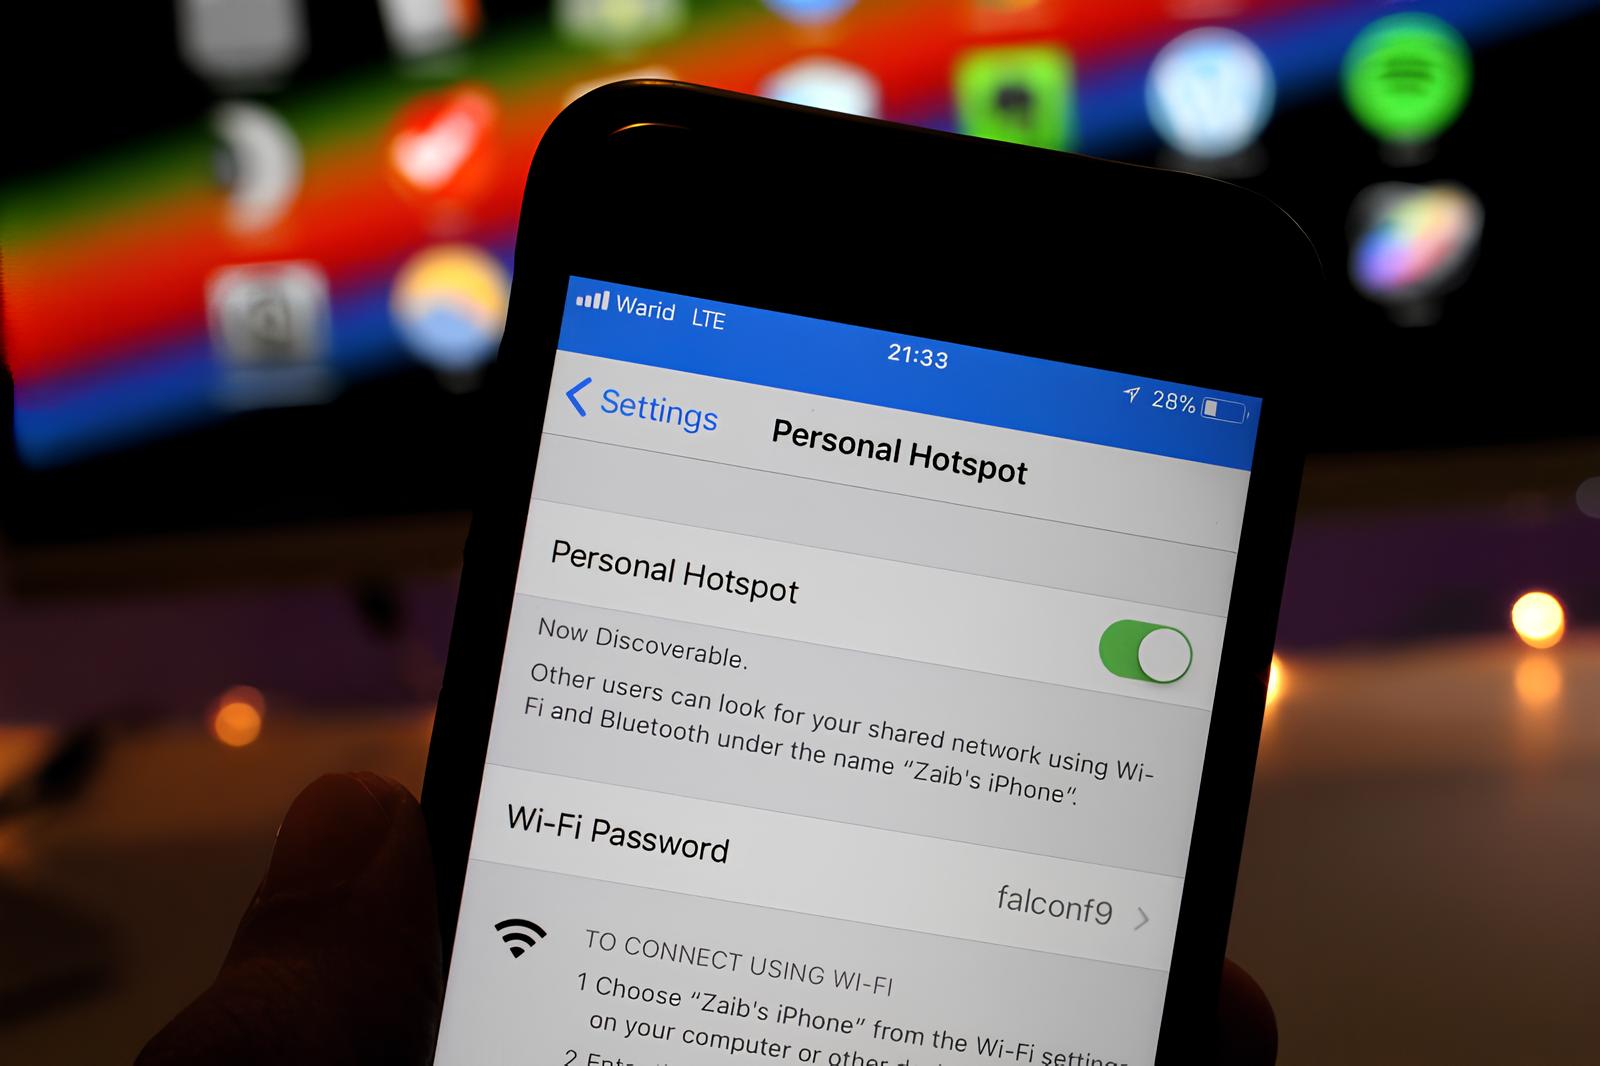
Hotspots are essentially wireless access points that provide internet connectivity to devices such as laptops, smartphones, and tablets. They are often created using mobile devices like smartphones or dedicated hotspot devices. When you connect your MacBook to a hotspot, you are essentially using the cellular data connection of the device hosting the hotspot to access the internet. This can be particularly useful when traditional Wi-Fi networks are unavailable or when you need a secure and reliable connection while on the go.
As we delve into the steps for connecting to a hotspot on your MacBook, it's important to note that the process may vary slightly depending on the version of macOS running on your device. However, the fundamental steps remain consistent, ensuring that you can easily navigate the process regardless of the specific macOS version you are using.
By following the steps outlined in this guide, you will gain the knowledge and confidence to connect your MacBook to a hotspot, enabling you to stay connected and productive in various environments. Whether you're a digital nomad, a student studying at a local cafe, or a professional working remotely, the ability to connect to a hotspot on your MacBook can be a valuable skill. Let's embark on this journey together and empower you to harness the power of hotspots for seamless internet connectivity on your MacBook.
Step 1: Turn on Wi-Fi
Before connecting to a hotspot on your MacBook, the first step is to ensure that the Wi-Fi functionality is enabled. Here's a detailed guide on how to turn on Wi-Fi:
-
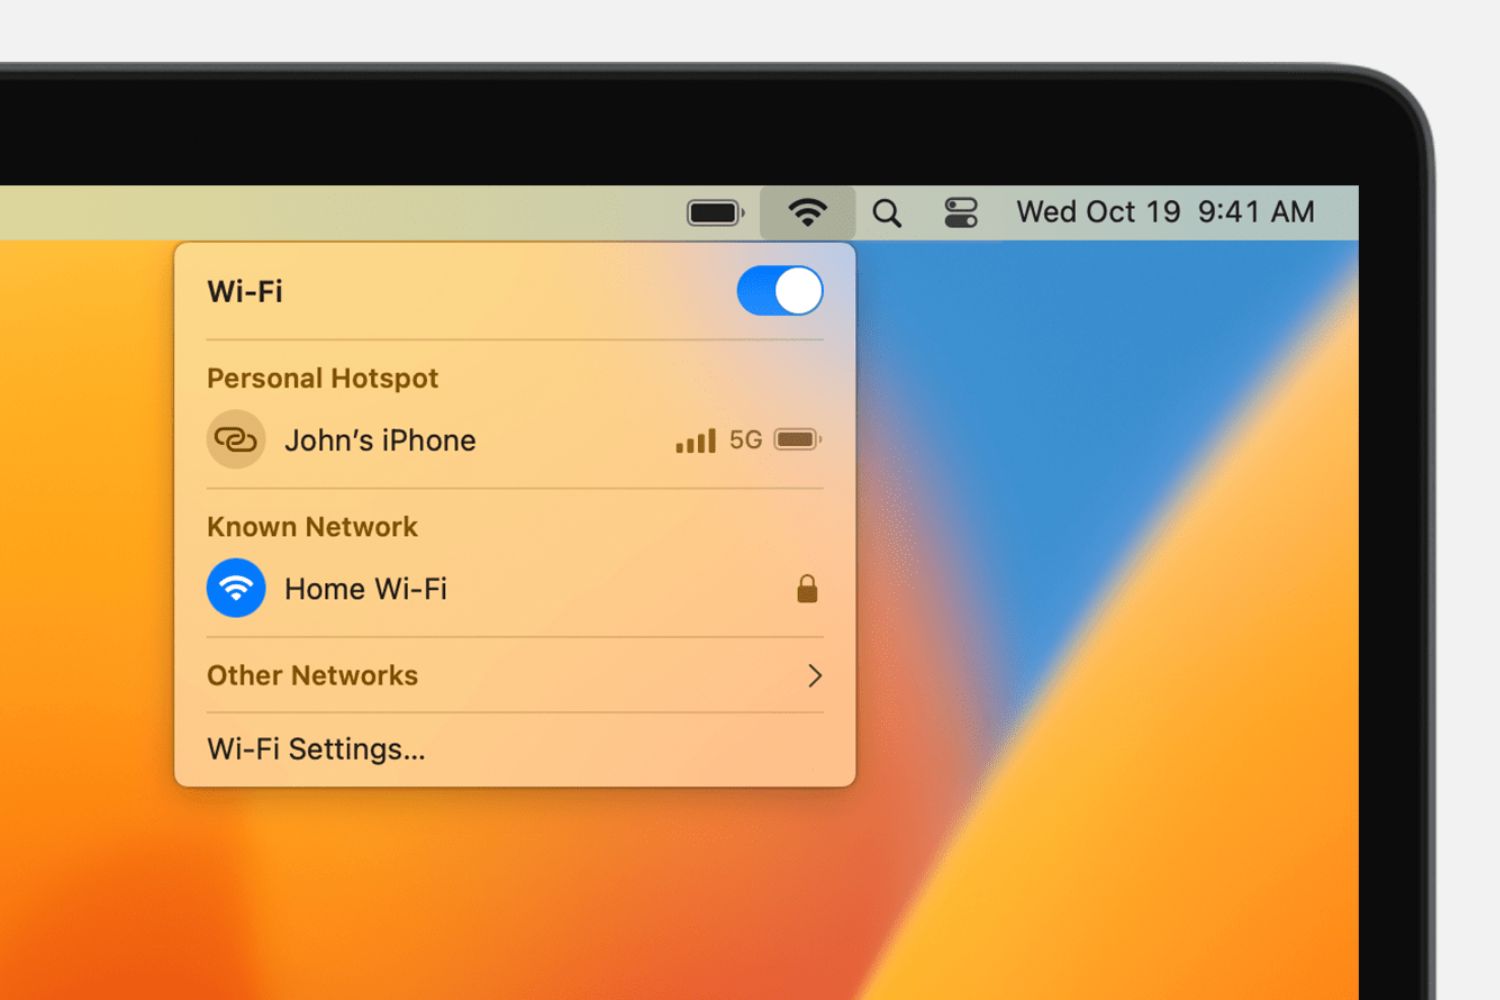
Accessing the Wi-Fi Icon: To initiate the process, navigate to the upper-right corner of your MacBook's screen. Here, you will find the Wi-Fi icon, which resembles a fan-like symbol. Click on this icon to reveal a dropdown menu containing a list of available Wi-Fi networks.
-
Activating Wi-Fi: In the dropdown menu, you will notice an option labeled "Wi-Fi: Off" or "Turn Wi-Fi On." Click on this option to activate the Wi-Fi functionality on your MacBook. Upon doing so, the Wi-Fi icon will transform from a gray color to a vibrant, connected state, indicating that Wi-Fi is now active and ready for use.
-
Verifying Wi-Fi Connection: After turning on Wi-Fi, take a moment to ensure that your MacBook has successfully connected to a Wi-Fi network. The dropdown menu will display a list of available Wi-Fi networks, with a checkmark next to the network to which your MacBook is currently connected. This verification step is crucial, as it confirms that your MacBook is ready to proceed with connecting to a hotspot.
By following these steps, you have successfully turned on Wi-Fi on your MacBook, laying the groundwork for connecting to a hotspot. With Wi-Fi activated, you are now ready to explore and connect to available hotspots, ensuring seamless internet accessibility wherever your MacBook takes you.
Next, we will delve into the process of finding and selecting the hotspot to which you wish to connect, further advancing your journey towards effortless internet connectivity on your MacBook.
Step 2: Find and Select the Hotspot
Once you have turned on the Wi-Fi on your MacBook, the next crucial step is to find and select the hotspot to which you intend to connect. This process involves identifying the available hotspots within your vicinity and choosing the one that aligns with your connectivity preferences.
Here's a detailed guide on how to find and select the hotspot on your MacBook:
Exploring Available Hotspots
Upon activating the Wi-Fi functionality, your MacBook will scan the surrounding area for available Wi-Fi networks, including hotspots. To view the list of available hotspots, click on the Wi-Fi icon located in the upper-right corner of your screen. A dropdown menu will appear, displaying a roster of Wi-Fi networks and hotspots within range.
Evaluating Hotspot Options
As you peruse the list of available hotspots, take note of the network names (SSIDs) and signal strengths associated with each hotspot. Signal strength is represented by the number of bars next to the network name, with more bars indicating a stronger signal. Assessing the signal strength is essential, as it can influence the stability and speed of your internet connection when connected to the hotspot.
Selecting the Desired Hotspot
After evaluating the available hotspots, click on the network name of the hotspot to which you wish to connect. If the hotspot is secured with a password, a lock icon will be displayed next to the network name, indicating that it is a secured network. Conversely, an open network will not feature a lock icon, signifying that it does not require a password for connection.
Entering the Hotspot Password (if applicable)
In the event that the selected hotspot is secured, a prompt will appear, requesting the password for the network. Enter the password in the designated field, ensuring accuracy and attention to case sensitivity. Upon successful entry of the password, your MacBook will proceed to establish a connection to the selected hotspot.
By following these steps, you will successfully find and select the hotspot on your MacBook, paving the way for seamless internet connectivity. With the hotspot selected and, if necessary, the password entered, you are now poised to proceed with connecting to the chosen hotspot, ushering in a world of boundless online possibilities.
Now, let's delve into the pivotal step of entering the password for the selected hotspot, propelling you closer to a robust and reliable internet connection on your MacBook.
Step 3: Enter the Password
Upon selecting a secured hotspot on your MacBook, the next critical step is entering the password to establish a secure connection. This process ensures that only authorized users can access the hotspot, safeguarding the network's integrity and protecting sensitive data. Here's a detailed guide on how to enter the password for the selected hotspot:
-
Prompt for Password: Upon selecting a secured hotspot, a dialog box will prompt you to enter the password for the network. This dialog box serves as a security measure, requiring users to authenticate their credentials before gaining access to the hotspot's internet connection.
-
Password Entry: Carefully type the password into the designated field, ensuring precision and attention to detail. It's essential to accurately input the characters, including uppercase and lowercase letters, numbers, and special symbols, if applicable. Paying close attention to the password entry minimizes the risk of authentication errors and ensures a seamless connection process.
-
Case Sensitivity: Be mindful of the case sensitivity of the password. If the password contains uppercase and lowercase letters, ensure that you input them exactly as specified. Failing to adhere to the correct case sensitivity may result in authentication failure, impeding your ability to connect to the hotspot.
-
Verification and Connection: After entering the password, click the "Join" or "Connect" button to initiate the authentication process. Your MacBook will then verify the entered password with the hotspot's security credentials. Upon successful verification, your device will establish a secure connection to the hotspot, granting you access to the internet through the network.
-
Connection Confirmation: Once connected, the Wi-Fi icon on your MacBook will display a checkmark or a signal strength indicator next to the selected hotspot's network name. This visual cue signifies that your MacBook is successfully connected to the hotspot, ready to harness the internet connectivity provided by the network.
By meticulously following these steps and entering the password for the selected hotspot, you will effectively establish a secure and reliable connection on your MacBook. This seamless process ensures that you can access the internet with confidence, leveraging the hotspot's connectivity to stay productive and connected in various environments.
With the password entered and the connection established, you are now equipped to maximize the potential of the selected hotspot, enabling seamless internet accessibility and empowering you to navigate the digital landscape with ease.
Step 4: Connect to the Hotspot
After successfully entering the password for the selected hotspot, the final step is to connect to the hotspot on your MacBook. This pivotal stage solidifies the establishment of a stable and secure connection, enabling you to harness the internet connectivity provided by the hotspot. Here's a comprehensive guide on how to connect to the hotspot on your MacBook:
-
Automatic Connection: In most cases, upon entering the correct password and authentication, your MacBook will seamlessly connect to the selected hotspot. The device will initiate the connection process, leveraging the provided credentials to establish a secure link to the hotspot's internet network.
-
Signal Strength Verification: Upon successful connection, take a moment to verify the signal strength indicator next to the hotspot's network name in the Wi-Fi dropdown menu. A strong signal strength is indicative of a stable and reliable connection, ensuring optimal internet accessibility for your MacBook.
-
Network Preferences: To ensure that your MacBook prioritizes the connected hotspot for internet access, navigate to the "Network Preferences" section. Here, you can manage the priority of available Wi-Fi networks, ensuring that your device consistently connects to the preferred hotspot when within range.
-
Internet Accessibility: Once connected to the hotspot, open a web browser or any internet-dependent application to confirm internet accessibility. By initiating web browsing or accessing online services, you can verify that your MacBook is successfully leveraging the hotspot's internet connection for seamless online activities.
-
Network Stability: As you engage in online activities, pay attention to the network stability and speed provided by the hotspot. A stable and robust connection ensures uninterrupted internet access, enabling you to browse the web, stream media, or engage in remote work with confidence.
By meticulously following these steps and connecting to the hotspot on your MacBook, you have effectively harnessed the power of the hotspot's internet connectivity, empowering you to stay connected and productive in diverse environments. Whether you're working from a bustling coffee shop, attending virtual meetings on the go, or simply enjoying online entertainment, the ability to connect to a hotspot on your MacBook enhances your digital experience, ensuring that you are always just a connection away from the boundless opportunities of the internet.
Conclusion
In conclusion, mastering the art of connecting to a hotspot on your MacBook opens a gateway to seamless internet accessibility, empowering you to stay connected and productive in various settings. By following the step-by-step guide outlined in this comprehensive walkthrough, you have gained the knowledge and confidence to navigate the intricacies of connecting to hotspots, ensuring that your MacBook serves as a reliable portal to the digital world, regardless of your location.
The process commences with the activation of Wi-Fi on your MacBook, laying the foundation for exploring and connecting to available hotspots. This initial step sets the stage for a streamlined connection experience, enabling you to harness the power of wireless internet connectivity.
Subsequently, the pivotal task of finding and selecting the desired hotspot allows you to evaluate available networks and make an informed choice based on signal strength and network preferences. This step ensures that you connect to a hotspot that aligns with your connectivity needs, setting the stage for a robust internet connection.
Entering the password for the selected hotspot represents a crucial security measure, safeguarding the network and granting you exclusive access to its internet resources. With attention to detail and precision, you successfully authenticate your credentials, paving the way for a secure and reliable connection.
The final step culminates in connecting to the hotspot, solidifying the establishment of a stable and seamless link to the internet. This stage marks the fruition of your efforts, ensuring that your MacBook leverages the hotspot's connectivity to facilitate a myriad of online activities, from web browsing to remote work and entertainment.
By embracing the process of connecting to hotspots on your MacBook, you have unlocked a world of possibilities, transcending the constraints of traditional Wi-Fi networks and embracing the flexibility of wireless internet connectivity. Whether you're a digital nomad, a student seeking a change of scenery for studies, or a professional navigating remote work environments, the ability to connect to hotspots on your MacBook empowers you to thrive in the digital age.
As you embark on your journey with newfound expertise in connecting to hotspots, may your digital endeavors be enriched by seamless internet accessibility, ensuring that you are always just a connection away from the boundless opportunities of the online realm.


