Introduction
Creating a hotspot on your MacBook can be incredibly useful, especially when you need to share your internet connection with other devices or provide a temporary network for colleagues, friends, or family members. Whether you're on the go or need to set up a quick wireless network at home, turning your MacBook into a hotspot is a convenient solution.
In this comprehensive guide, you will learn how to create a hotspot on your MacBook step by step. By following these instructions, you'll be able to share your internet connection with other devices such as smartphones, tablets, and laptops. This feature comes in handy when you're in a location with limited or no Wi-Fi access, allowing you to connect your devices to your MacBook's hotspot and stay connected seamlessly.
Without further ado, let's dive into the process of setting up a hotspot on your MacBook. Whether you're a tech-savvy individual or new to this concept, the following steps will walk you through the entire process, ensuring that you can easily create and configure a hotspot on your MacBook without any hassle. Let's get started with the first step: accessing System Preferences.
Step 1: Accessing System Preferences
To begin the process of creating a hotspot on your MacBook, the first step is to access the System Preferences. This is where you'll find the necessary settings to configure your MacBook's hotspot feature. Follow these simple steps to access System Preferences:
-
Click on the Apple Logo: Located at the top-left corner of your screen, the Apple logo is the gateway to a range of essential settings and options for your MacBook. Click on the Apple logo to reveal a drop-down menu.
-
Select "System Preferences": Within the drop-down menu, you'll find the "System Preferences" option. Click on it to open the System Preferences window.
-
Locate "Sharing": Once the System Preferences window is open, you'll see a grid of icons representing various settings and preferences. Look for the "Sharing" icon, which resembles a blue globe. Click on this icon to proceed to the next step.
Accessing System Preferences is the initial and crucial step in setting up a hotspot on your MacBook. By following these simple instructions, you'll be well on your way to configuring your MacBook's hotspot feature and sharing your internet connection with other devices. Now that you've successfully accessed the System Preferences, you're ready to move on to the next step: setting up the hotspot.
With System Preferences open, you're one step closer to creating a seamless network for your devices. Let's proceed to the next step and delve into the process of setting up the hotspot on your MacBook.
This step is vital in initiating the hotspot creation process, and once you've accessed the System Preferences, you'll be able to proceed with configuring the hotspot settings, ultimately enabling you to share your MacBook's internet connection with other devices.
Step 2: Setting Up the Hotspot
After accessing the System Preferences on your MacBook, the next step is to set up the hotspot. This process involves configuring the necessary settings to enable your MacBook to function as a hotspot, allowing other devices to connect to it and access the internet. Follow these detailed instructions to set up the hotspot on your MacBook:
-
Navigate to the "Sharing" Menu: Within the System Preferences window, locate and click on the "Sharing" icon. This will open a new window with a list of sharing options for your MacBook.
-
Select "Internet Sharing": Once you're in the "Sharing" menu, you'll find a list of sharing services on the left-hand side of the window. Locate and select "Internet Sharing" from the list of sharing options.
-
Choose the Source of Internet Connection: After selecting "Internet Sharing," you'll need to specify the source of the internet connection that your MacBook will share. You can share your MacBook's internet connection from various sources, such as Wi-Fi, Ethernet, or even a USB modem. Select the source from the "Share your connection from" dropdown menu.
-
Select the Target Device for Sharing: Under the "To computers using" section, choose the method through which you want to share the internet connection with other devices. You can select either Wi-Fi, Bluetooth, or Thunderbolt Ethernet, depending on the devices you intend to connect to your MacBook's hotspot.
-
Enable the Hotspot: Once you've chosen the internet connection source and the method of sharing, tick the box next to "Internet Sharing" on the left-hand side of the window to enable the hotspot. A confirmation dialog will appear, asking you to confirm the activation of the internet sharing feature.
-
Confirm the Activation: After enabling internet sharing, a prompt will appear, confirming the changes you've made. Click "Start" to activate the hotspot and begin sharing your MacBook's internet connection with other devices.
By following these step-by-step instructions, you'll be able to set up the hotspot on your MacBook seamlessly. This process empowers your MacBook to function as a wireless access point, allowing other devices to connect and utilize its internet connection. With the hotspot now set up, the next step involves configuring the hotspot settings to ensure a secure and efficient connection for all connected devices.
Step 3: Configuring Hotspot Settings
Configuring the hotspot settings on your MacBook is a critical aspect of ensuring a seamless and secure internet sharing experience for all connected devices. By customizing the hotspot settings, you can optimize the network for performance, privacy, and convenience. Follow these detailed instructions to configure the hotspot settings on your MacBook:
-
Access the Hotspot Configuration Menu: After setting up the hotspot, navigate to the "Sharing" menu within the System Preferences window. Locate and click on the "Internet Sharing" option on the left-hand side of the window. This will open the configuration panel for the hotspot settings.
-
Customize Network Name (SSID): Under the "Wi-Fi Options" for Internet Sharing, you can customize the Network Name, also known as the Service Set Identifier (SSID), for your hotspot. Choose a unique and easily identifiable name that reflects the purpose of the hotspot, making it simple for other users to locate and connect to the network.
-
Set a Secure Password: To ensure the security of your hotspot, it's essential to set a strong password. Click on the "Security" dropdown menu and select the appropriate encryption method for the hotspot network. Choose a WPA2 Personal or WPA3 Personal security type for enhanced protection. Then, enter a secure password in the "Password" field. It's recommended to use a combination of uppercase and lowercase letters, numbers, and special characters to create a robust password.
-
Adjust Channel and Band: Depending on the Wi-Fi environment and potential interference from nearby networks, you may need to adjust the Channel and Band settings for your hotspot. By selecting the appropriate channel and band, you can optimize the wireless signal and minimize potential disruptions, ensuring a stable and reliable connection for connected devices.
-
Review and Confirm Settings: Once you've customized the hotspot settings according to your preferences, review the configurations to ensure everything is set up as desired. Double-check the Network Name, Security type, Password, Channel, and Band settings to confirm that they align with your requirements.
-
Activate the Configured Settings: After finalizing the hotspot configurations, click the "OK" or "Apply" button to activate the updated settings. Your MacBook's hotspot is now configured with the customized settings, ready to provide a secure and efficient internet connection to other devices.
By meticulously configuring the hotspot settings, you can establish a robust and secure wireless network that caters to your specific needs. These tailored configurations ensure that your MacBook's hotspot operates optimally, fostering a reliable and safe internet sharing environment for all connected devices. With the hotspot settings now configured, you're all set to connect devices to your MacBook's hotspot and enjoy seamless internet access.
Step 4: Connecting Devices to the Hotspot
Once you have successfully set up the hotspot on your MacBook and configured the necessary settings, it's time to connect your devices to the newly created wireless network. Whether you want to connect a smartphone, tablet, or another laptop to your MacBook's hotspot, the process is straightforward and can be completed in just a few simple steps.
Here's a detailed guide on how to connect devices to your MacBook's hotspot:
-
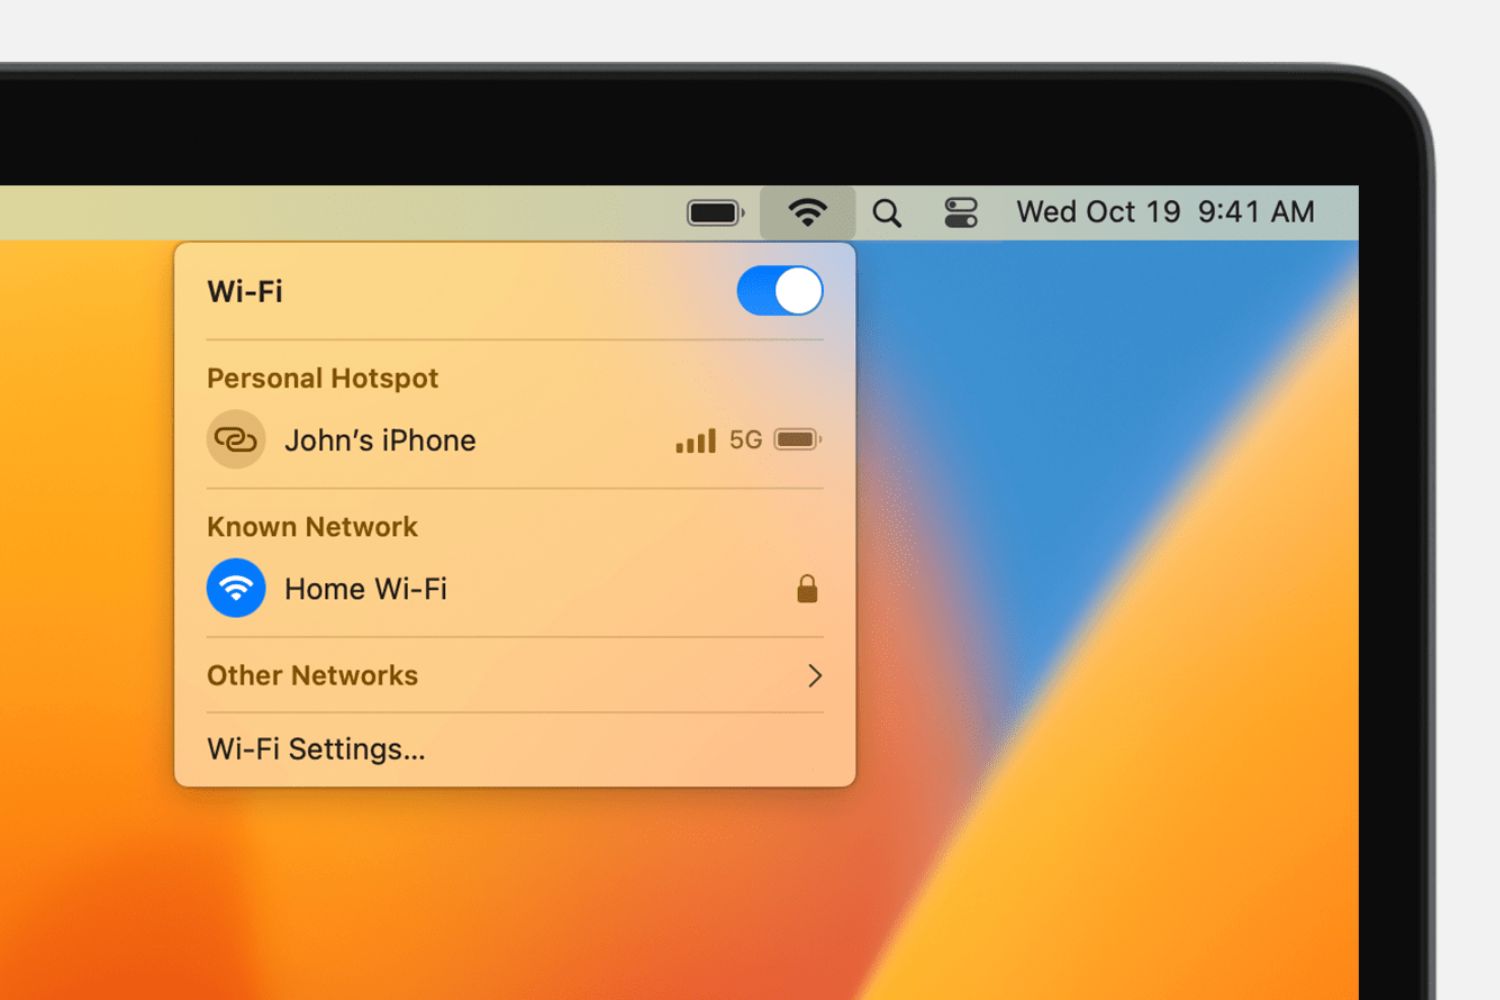
Access Device Settings: On the device you wish to connect to the hotspot, navigate to the Wi-Fi settings or network preferences. This can usually be found in the device's settings menu under "Wi-Fi" or "Network."
-
Scan for Available Networks: In the Wi-Fi settings, the device will automatically scan for available wireless networks. Look for the Network Name (SSID) that you specified when configuring the hotspot settings on your MacBook. The Network Name should be visible in the list of available networks.
-
Connect to the MacBook's Hotspot: Once you've located the Network Name corresponding to your MacBook's hotspot, select it from the list. If you configured a password for the hotspot, the device will prompt you to enter the password. Enter the secure password you set for the hotspot and proceed to connect.
-
Establish Connection: After entering the correct password, the device will attempt to establish a connection to your MacBook's hotspot. Once the connection is successfully established, the device will be connected to the hotspot, allowing you to access the internet and other network resources provided by your MacBook.
-
Verify Connection: To ensure that the device is successfully connected to the hotspot, open a web browser or any internet-dependent application on the device. Verify that you can access the internet and browse web pages without any issues. If the device can access the internet seamlessly, it indicates that the connection to the MacBook's hotspot is functioning properly.
By following these steps, you can effortlessly connect various devices to your MacBook's hotspot, enabling them to utilize the shared internet connection and stay connected while on the go. Whether you're sharing the hotspot with colleagues during a meeting, providing internet access to friends at a social gathering, or simply ensuring connectivity for your own devices, the ability to connect devices to your MacBook's hotspot offers unparalleled convenience and flexibility.
With the devices successfully connected to the hotspot, you can enjoy a seamless internet sharing experience, allowing you to stay connected and productive across multiple devices. Now that you've learned how to connect devices to your MacBook's hotspot, you have the knowledge and capability to create and manage a wireless network that meets your connectivity needs.
Conclusion
In conclusion, the ability to create a hotspot on your MacBook presents a valuable solution for sharing your internet connection with other devices in a variety of scenarios. By following the step-by-step instructions outlined in this guide, you can seamlessly configure your MacBook to function as a wireless access point, providing a convenient and reliable internet sharing experience for smartphones, tablets, laptops, and other devices.
The process begins with accessing the System Preferences on your MacBook, where you can navigate to the "Sharing" menu and initiate the setup of the hotspot. Once the hotspot is set up, configuring the hotspot settings becomes essential to ensure optimal performance, security, and customization according to your specific requirements. This involves customizing the Network Name (SSID), setting a secure password, and adjusting channel and band settings to create a robust and tailored wireless network.
After configuring the hotspot settings, the next step involves connecting devices to your MacBook's hotspot. This straightforward process enables various devices to seamlessly access the shared internet connection, fostering connectivity and productivity across multiple devices.
The ability to create a hotspot on your MacBook empowers you to establish a temporary network in environments with limited or no Wi-Fi access, such as meetings, conferences, or outdoor gatherings. Additionally, it serves as a convenient solution for providing internet access to colleagues, friends, or family members, enhancing collaboration and communication in various settings.
Furthermore, the flexibility of the MacBook's hotspot feature allows you to extend your internet connection to devices that may not have direct access to a Wi-Fi network, ensuring connectivity for all your devices regardless of the surrounding network infrastructure.
By mastering the process of creating and managing a hotspot on your MacBook, you gain the capability to leverage your MacBook's internet connection to create a reliable and secure wireless network whenever and wherever the need arises.
In essence, the ability to create a hotspot on your MacBook represents a versatile and practical feature that enhances your connectivity options, fosters collaboration, and enables seamless internet sharing across a multitude of devices. With the knowledge and skills acquired from this guide, you are well-equipped to harness the full potential of your MacBook's hotspot feature and enjoy uninterrupted connectivity in diverse environments.