Introduction
Setting up a USB headset with your Xbox can significantly enhance your gaming experience, allowing you to communicate with friends and immerse yourself in the virtual world with crystal-clear audio. Whether you're gearing up for an intense multiplayer battle or diving into a captivating single-player adventure, a USB headset can be the perfect companion to elevate your gaming sessions to a whole new level.
A USB headset offers the advantage of a direct digital connection, ensuring high-quality audio transmission without the need for additional adapters or cables. This streamlined setup not only simplifies the process but also minimizes potential audio interference, providing a seamless and immersive audio experience.
By following a few simple steps, you can seamlessly integrate your USB headset with your Xbox, unlocking a world of clear, crisp sound and seamless communication. Whether you're a seasoned gamer or a newcomer to the Xbox universe, setting up your USB headset is a straightforward process that can significantly enrich your gaming adventures. So, let's dive into the steps and embark on this journey to elevate your gaming experience!
Step 1: Check Compatibility
Before diving into the setup process, it's crucial to ensure that your USB headset is compatible with your Xbox console. Compatibility is key to a smooth and hassle-free integration, allowing you to make the most of your gaming experience without encountering technical roadblocks.
Compatibility Checkpoints
-
Xbox Compatibility: Start by verifying that your Xbox console supports USB headsets. Most modern Xbox models, including the Xbox One and Xbox Series X/S, are designed to accommodate USB audio devices, making them compatible with a wide range of USB headsets available in the market.
-
USB Headset Specifications: Take a closer look at the specifications of your USB headset. Check whether it is explicitly designed for use with Xbox consoles. Some headsets are optimized for specific platforms, so it's essential to confirm that your headset is tailored for seamless integration with Xbox gaming systems.
-
Firmware Updates: Ensure that your Xbox console is running the latest firmware to support USB audio devices effectively. Periodic system updates often include enhancements and compatibility improvements, so keeping your console up to date is crucial for a smooth setup process.
-
Additional Adapters: In some cases, certain USB headsets may require additional adapters or accessories to function optimally with Xbox consoles. Check whether your headset package includes any specific adapters, or if you need to purchase them separately to facilitate the connection process.
Research and Consultation
If you're uncertain about the compatibility of your USB headset with your Xbox console, consider consulting user manuals, online forums, or the official Xbox support resources for detailed information. Additionally, reaching out to the headset manufacturer's customer support can provide valuable insights into compatibility and any additional requirements for seamless integration.
By meticulously checking these compatibility checkpoints, you can set the stage for a successful USB headset integration with your Xbox, ensuring that you're equipped with the right tools for an immersive and uninterrupted gaming experience. Once you've confirmed compatibility, you're ready to move on to the next step and establish the physical connection between your USB headset and the Xbox console.
Step 2: Connect the USB Headset to the Xbox
Connecting your USB headset to the Xbox is a pivotal step that bridges the gap between your gaming console and the audio device, paving the way for seamless communication and immersive sound. This process involves establishing a direct digital connection, enabling your headset to harness the audio capabilities of the Xbox console. Follow these straightforward steps to effortlessly link your USB headset with your Xbox:
1. USB Port Identification
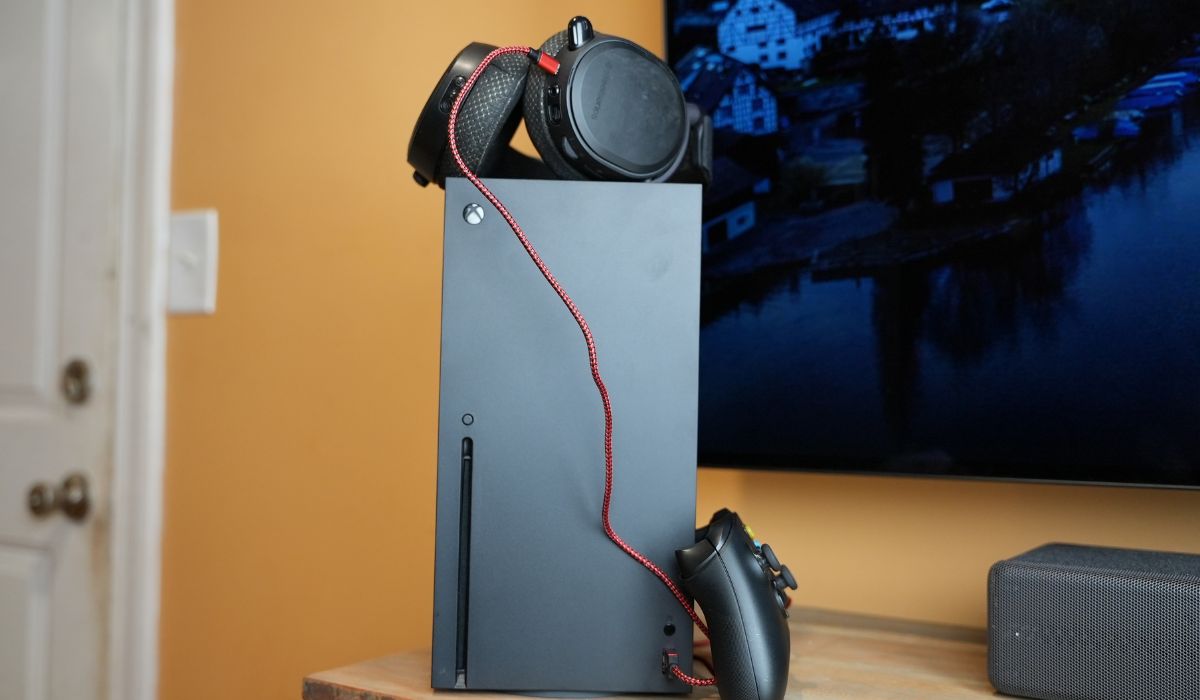
Locate the USB port on your Xbox console. Depending on the Xbox model, the USB port may be positioned on the front, back, or side of the console. This port serves as the entry point for connecting your USB headset, facilitating the transmission of audio signals and power between the headset and the console.
2. Inserting the USB Connector
Gently insert the USB connector of your headset into the available USB port on the Xbox console. Ensure a secure and snug fit to establish a stable connection. The USB connector is designed to seamlessly interface with the Xbox, initiating the transfer of audio data and enabling the headset to receive power directly from the console.
3. Recognition and Configuration
Upon connecting the USB headset, the Xbox console should promptly recognize the audio device. The system may display a notification acknowledging the newly connected headset. In some cases, the console may automatically configure the audio settings to prioritize the USB headset as the primary audio output and input device for communication and game audio.
4. Headset Confirmation
Verify that the USB headset is successfully recognized and operational. You can navigate to the audio settings within the Xbox dashboard to confirm the detection of the headset. Additionally, check the headset itself for any indication, such as LED lights or audio prompts, signaling that it is successfully connected to the Xbox and ready for use.
5. Cable Management
Once the USB headset is connected and confirmed, take a moment to manage the headset cable for optimal convenience and tidiness. Position the cable in a way that allows comfortable movement during gaming sessions while avoiding potential tangles or obstructions. This simple step contributes to a clutter-free gaming setup and ensures a hassle-free experience.
By following these steps, you can seamlessly integrate your USB headset with your Xbox console, establishing a direct digital connection that unlocks the full potential of your audio device. With the physical connection in place, the next step involves fine-tuning the audio settings to ensure an optimal audio experience tailored to your preferences and gaming requirements.
Step 3: Adjust Audio Settings
Fine-tuning the audio settings on your Xbox is a crucial aspect of optimizing the performance of your USB headset. By customizing the audio parameters to suit your preferences and gaming environment, you can elevate the overall audio experience, immersing yourself in the captivating soundscapes of your favorite games while ensuring seamless communication with fellow gamers. Here's a detailed exploration of the essential audio settings and adjustments to consider:
1. Headset Audio Output
Navigate to the Xbox audio settings to configure the output settings specifically tailored for your USB headset. Select the dedicated audio output option for headsets, ensuring that the audio signals are channeled directly to your headset for an immersive and personalized auditory experience. Adjust the audio output levels to achieve a balanced mix, allowing you to discern crucial in-game sounds and communication cues with clarity.
2. Microphone Sensitivity and Monitoring
Optimize the microphone settings to fine-tune the sensitivity levels, ensuring that your voice is captured accurately without unnecessary background noise or distortion. Additionally, explore the option for microphone monitoring, enabling you to hear your own voice through the headset, providing real-time feedback on your communication clarity and volume levels during intense gaming moments.
3. Spatial Sound and Equalization
Delve into the spatial sound settings to explore immersive audio enhancements, such as spatial surround sound or 3D audio technologies, depending on the capabilities of your USB headset. Experiment with equalization presets or manual adjustments to tailor the audio profile, emphasizing impactful bass, clear mid-range frequencies, and crisp high-end details, catering to your gaming preferences and the sonic characteristics of your favorite titles.
4. Chat Mixer and Game/Chat Balance
Leverage the chat mixer functionality to strike the perfect balance between in-game audio and communication channels. Adjust the game/chat audio balance to prioritize either the game sound effects or the voice communication from your fellow gamers, ensuring that neither aspect overpowers the other, thus maintaining a harmonious blend that enhances your overall gaming experience.
5. Volume Control and Audio Feedback
Explore the volume control options to fine-tune the audio output levels, allowing you to adjust the headset volume according to your comfort and the audio dynamics of the game. Additionally, consider the audio feedback settings, enabling or disabling audio prompts or notifications, providing a seamless and uninterrupted audio experience tailored to your preferences.
By meticulously adjusting these audio settings, you can create a personalized audio environment that aligns with your gaming preferences, ensuring an immersive and seamless audio experience tailored to your USB headset. These adjustments empower you to harness the full potential of your audio device, immersing yourself in the captivating audio landscapes of your favorite games while fostering clear and effective communication with your gaming companions.
Step 4: Test the Headset
After completing the physical connection and fine-tuning the audio settings, it's essential to conduct a comprehensive test of your USB headset to ensure that it seamlessly integrates with your Xbox console and delivers the expected audio performance. The testing phase allows you to validate the functionality of the headset, assess the audio quality, and confirm the effectiveness of the communication features. Here's a detailed exploration of the crucial steps involved in testing your USB headset on your Xbox:
1. Audio Playback Verification
Initiate a test run of your favorite game or multimedia content on your Xbox console to experience the audio output through your USB headset. Pay close attention to the clarity, depth, and positional accuracy of the sound effects, dialogues, and ambient audio. Evaluate the immersive qualities of the audio, ensuring that the headset effectively delivers the intended sonic experience, enriching your gaming escapades with detailed soundscapes and impactful audio cues.
2. Communication Check
Engage in a test communication session with friends or fellow gamers to assess the effectiveness of the microphone and the clarity of voice transmission. Coordinate a brief conversation or in-game communication to confirm that your voice is accurately captured and transmitted without distortion or interference. This step is crucial for ensuring seamless communication during multiplayer gaming sessions, fostering clear and effective interaction with your gaming companions.
3. Comfort and Ergonomics
During the testing phase, pay attention to the comfort and ergonomics of the USB headset. Evaluate the fit, weight distribution, and overall comfort during extended gaming sessions. Assess the breathability and pressure points to ensure that the headset remains comfortable and conducive to prolonged use. Comfort is a pivotal aspect that contributes to an enjoyable gaming experience, allowing you to remain focused and immersed in your gameplay without discomfort or distractions.
4. Environmental Noise Isolation
Evaluate the noise isolation capabilities of the USB headset, particularly in bustling or noisy environments. Assess the degree to which external sounds are attenuated, allowing you to maintain focus on the game audio and communication without being unduly disturbed by ambient noise. Effective noise isolation enhances the immersive qualities of your gaming experience, ensuring that you remain fully immersed in the captivating audio landscapes of your favorite games.
5. Feature Validation
Explore any additional features or functionalities offered by your USB headset, such as customizable audio presets, dedicated control buttons, or software integration. Validate the effectiveness and convenience of these features, ensuring that they enhance your overall gaming experience and align with your preferences. This step allows you to leverage the full potential of your USB headset, maximizing its capabilities to enrich your gaming adventures.
By meticulously testing these aspects of your USB headset, you can confirm its seamless integration with your Xbox console, ensuring that it delivers the anticipated audio performance, communication clarity, and comfort. The testing phase serves as a critical validation process, allowing you to fine-tune any settings or make necessary adjustments to optimize the overall audio experience, paving the way for immersive and enjoyable gaming sessions with your newly integrated USB headset.
Conclusion
In conclusion, the process of setting up a USB headset with your Xbox console encompasses a series of straightforward yet pivotal steps that culminate in an immersive and seamless audio experience. By meticulously checking compatibility, establishing the physical connection, fine-tuning audio settings, and conducting comprehensive testing, you can integrate your USB headset with your Xbox, unlocking the full potential of your gaming audio and communication capabilities.
The journey begins with a thorough compatibility assessment, ensuring that your USB headset aligns perfectly with your Xbox console, setting the stage for a harmonious integration. This initial step serves as the foundation for a hassle-free setup process, mitigating potential compatibility issues and ensuring a smooth transition into the subsequent phases of the setup.
The pivotal moment arrives as you physically connect your USB headset to the Xbox console, establishing a direct digital link that facilitates seamless audio transmission and power delivery. This step not only initiates the technical integration but also symbolizes the union of your gaming environment and the immersive audio capabilities of your USB headset.
Fine-tuning the audio settings represents a crucial phase, allowing you to tailor the audio parameters to suit your preferences and gaming requirements. By delving into the intricacies of the audio settings, you can create a personalized sonic environment that amplifies the immersive qualities of your gaming experience, fostering clear communication and captivating audio landscapes.
The testing phase serves as the ultimate validation, allowing you to experience the full spectrum of your USB headset's capabilities in the context of your gaming adventures. Through comprehensive testing, you can confirm the seamless integration, audio performance, communication clarity, and comfort, ensuring that your USB headset seamlessly aligns with your gaming aspirations.
In essence, the journey to integrate your USB headset with your Xbox console transcends technical configurations, encapsulating the spirit of elevating your gaming experience to new heights. By following the outlined steps with precision and attention to detail, you can embark on a transformative audio journey, immersing yourself in the captivating soundscapes of your favorite games while fostering clear and effective communication with your gaming companions.
Ultimately, the integration of your USB headset with your Xbox console represents a pivotal milestone in your gaming endeavors, unlocking a realm of immersive audio and seamless communication that enriches your gaming escapades and fosters a deeper connection with the virtual worlds you explore. With your USB headset seamlessly integrated, you're poised to embark on exhilarating gaming adventures, empowered by the captivating audio and seamless communication capabilities at your disposal.


