Introduction
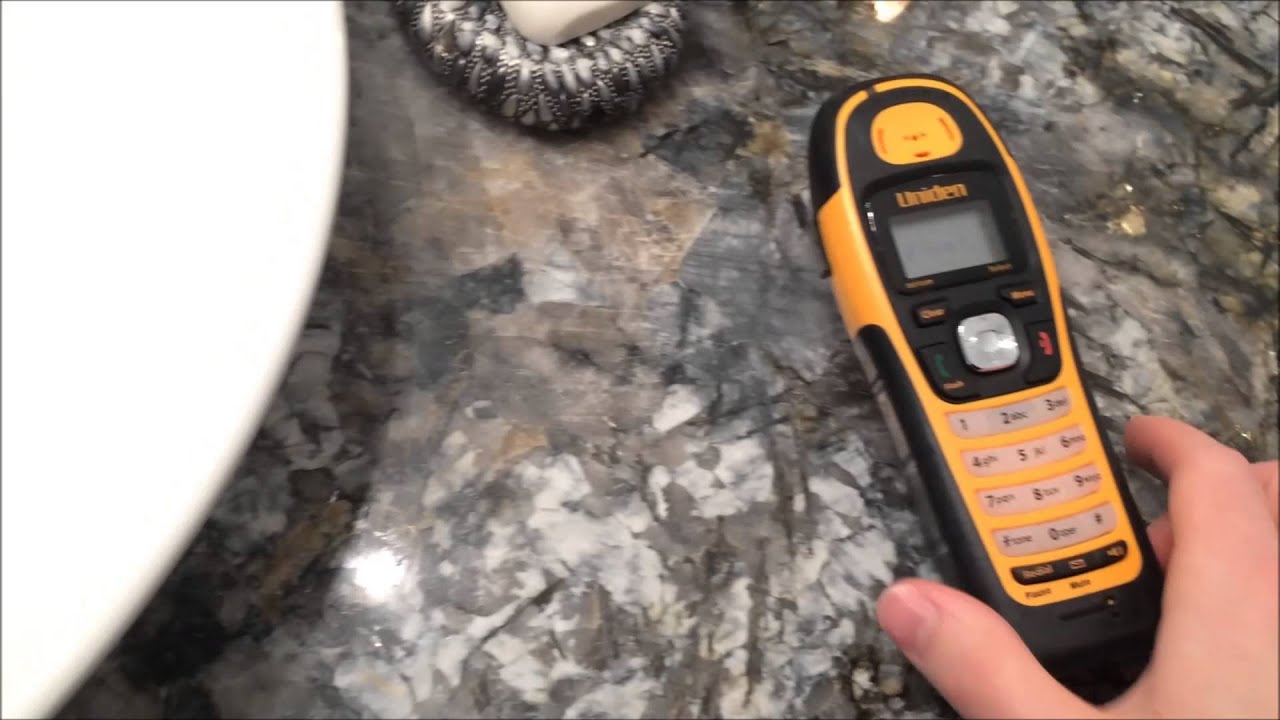
Welcome to this comprehensive guide on replacing the battery in a waterproof Uniden cordless phone from the Tru9585 series. Cordless phones have become an indispensable part of our daily lives, offering the convenience of mobility and reliable communication. However, over time, the battery in these devices can lose its ability to hold a charge, leading to decreased talk and standby times. In this guide, we will walk you through the process of replacing the battery in your Uniden cordless phone, allowing you to restore its functionality and enjoy uninterrupted conversations once again.
Whether you are experiencing a shortened battery life or your cordless phone is failing to hold a charge altogether, a DIY battery replacement can breathe new life into your device. By following the steps outlined in this guide, you can save time and money by avoiding the need for professional assistance or purchasing a new cordless phone.
The Tru9585 series from Uniden is known for its durability and waterproof design, making it suitable for various environments, including kitchens, bathrooms, and outdoor spaces. With its reliable performance and advanced features, this cordless phone series has gained popularity among users seeking a robust communication solution for both personal and professional use.
By taking on the task of replacing the battery in your Uniden cordless phone, you can extend the lifespan of your device and contribute to environmental sustainability by reducing electronic waste. This DIY approach empowers you to take control of the maintenance and longevity of your gadgets, fostering a sense of accomplishment and self-reliance.
Throughout this guide, we will provide detailed instructions and valuable insights to ensure a smooth and successful battery replacement process for your Uniden cordless phone. From gathering the necessary tools and supplies to inserting the new battery and securing the battery cover, each step is designed to be accessible and straightforward, even for individuals with minimal technical experience.
So, let's embark on this DIY journey to revitalize your Uniden cordless phone and rediscover the convenience and performance it was designed to deliver. Get ready to tackle the battery replacement process with confidence and precision, and soon you'll be enjoying seamless communication once again.
Step 1: Gather Necessary Tools and Supplies
Before embarking on the battery replacement process for your waterproof Uniden cordless phone from the Tru9585 series, it's essential to gather the required tools and supplies to ensure a smooth and efficient procedure. Here's a comprehensive list of items you will need:
-
Replacement Battery: Begin by obtaining a compatible replacement battery specifically designed for the Uniden Tru9585 series. It's crucial to choose a high-quality battery that meets the specifications of your cordless phone to ensure optimal performance and longevity.
-
Screwdriver Set: A set of precision screwdrivers, including Phillips and flathead screwdrivers, will be necessary for accessing the battery compartment of your cordless phone. Ensure that the screwdriver set includes the appropriate sizes for the screws used in the phone's construction.
-
Work Surface: Prepare a clean and well-lit work surface to carry out the battery replacement process. A stable and clutter-free area will provide the ideal environment for handling the phone and its components with care and precision.
-
Safety Gloves: While not mandatory, wearing safety gloves can protect your hands from any sharp edges or potential hazards during the disassembly and reassembly of the cordless phone. Opt for gloves that allow for dexterity and a firm grip on small components.
-
Cleaning Cloth: A soft, lint-free cleaning cloth will come in handy for wiping any dust or debris from the phone's exterior and interior components. Keeping the phone clean throughout the battery replacement process will help maintain its overall condition.
-
User Manual: It's advisable to have the user manual for the Uniden Tru9585 series cordless phone on hand. The manual can serve as a valuable reference guide, providing insights into the phone's construction and specific instructions for accessing the battery compartment.
By ensuring that you have all the necessary tools and supplies at your disposal, you can proceed with confidence and efficiency as you embark on the journey of replacing the battery in your Uniden cordless phone. With these items in hand, you are well-equipped to navigate the subsequent steps of the battery replacement process with ease and precision.
Step 2: Remove the Battery Cover
To commence the battery replacement process for your waterproof Uniden cordless phone from the Tru9585 series, the initial step involves removing the battery cover to gain access to the old battery. This step requires careful handling to prevent any damage to the phone's exterior and ensure a smooth transition to the subsequent stages of the replacement procedure.
-
Prepare the Work Surface: Begin by placing the cordless phone on a stable and clean work surface. This will provide a secure area for maneuvering the phone and help prevent any accidental damage during the battery cover removal process.
-
Identify the Battery Cover: Examine the back of the cordless phone to locate the battery cover. In most models of the Uniden Tru9585 series, the battery cover is situated at the back of the handset and is designed to be easily accessible for battery replacement.
-
Use the Screwdriver: Depending on the specific model of the Tru9585 series, the battery cover may be secured in place by screws. Utilize the appropriate screwdriver from your set to carefully remove the screws holding the battery cover in position. It's crucial to keep the screws in a safe place to prevent misplacement.
-
Handle with Care: With the screws removed, gently pry open the battery cover using your fingertips or a plastic opening tool if necessary. Exercise caution to avoid exerting excessive force, as this may cause damage to the cover or the phone's housing.
-
Inspect for Latches or Clips: Some cordless phone models may feature latches or clips securing the battery cover. If applicable, carefully disengage these latches or clips by applying gentle pressure while lifting the cover away from the phone.
-
Set Aside the Battery Cover: Once the battery cover is detached, place it in a secure location to prevent misplacement and ensure that it remains free from any potential damage or scratches.
By meticulously following these steps, you can effectively remove the battery cover from your Uniden cordless phone, paving the way for accessing the old battery and proceeding with the subsequent stages of the battery replacement process. This careful approach sets the stage for a successful and seamless transition to the next critical phase of the DIY battery replacement endeavor.
Step 3: Take Out the Old Battery
With the battery cover successfully removed, you are now ready to proceed with the pivotal step of extracting the old battery from your Uniden cordless phone. This phase demands precision and attentiveness to ensure the safe removal of the old battery and prepare for the insertion of the new one. Follow these detailed steps to effectively take out the old battery:
-
Locate the Old Battery: Upon opening the battery compartment, you will immediately spot the existing battery nestled within its designated slot. Take a moment to familiarize yourself with the battery's positioning and orientation within the compartment.
-
Handle with Care: Before proceeding, it's crucial to exercise caution and handle the phone delicately to avoid any accidental damage. Ensure that the phone is placed on a stable surface to provide a secure foundation for the battery removal process.
-
Identify the Battery Connector: Depending on the specific model of the Tru9585 series, the old battery will be connected to the phone via a designated connector. Take note of the connector's location and the manner in which it is attached to the battery.
-
Disconnect the Battery: Gently detach the connector from the old battery by firmly grasping the connector and carefully pulling it away from the battery. Exercise patience and precision to prevent any undue strain on the connector or the battery itself.
-
Remove the Old Battery: With the connector detached, carefully lift the old battery out of its slot within the compartment. Take care to avoid applying excessive force or causing any unnecessary pressure on the surrounding components of the phone.
-
Inspect the Battery Compartment: Upon removing the old battery, take a moment to inspect the battery compartment for any dust, debris, or signs of corrosion. Use a clean, dry cloth to gently wipe the compartment, ensuring that it is free from any contaminants that may affect the performance of the new battery.
By meticulously following these steps, you can effectively extract the old battery from your Uniden cordless phone, setting the stage for the subsequent phase of inserting the new battery. This diligent approach ensures that the battery removal process is carried out with precision and care, laying the groundwork for a seamless transition to the upcoming stage of the DIY battery replacement endeavor.
Step 4: Insert the New Battery
With the old battery successfully removed from your Uniden cordless phone, the next crucial step involves the precise insertion of the new battery. This phase is pivotal in ensuring the seamless integration of the replacement battery, thereby revitalizing your cordless phone and restoring its functionality. Follow these detailed steps to effectively insert the new battery:
-
Prepare the New Battery: Begin by carefully unpacking the new replacement battery designed for the Uniden Tru9585 series. Take a moment to inspect the battery, ensuring that it is free from any defects or damage that may have occurred during shipping or handling.
-
Align the Battery: Orient the new battery in the correct position for insertion, ensuring that the contacts on the battery align with the corresponding connectors within the battery compartment. Taking note of the battery's orientation is crucial to ensure a secure and proper connection.
-
Place the Battery in the Compartment: With the new battery aligned, gently lower it into the designated slot within the battery compartment. Exercise care to avoid applying excessive force, ensuring that the battery fits snugly and securely within the compartment.
-
Connect the Battery: Once the new battery is positioned within the compartment, proceed to reconnect the designated connector to the battery. Align the connector with the corresponding terminals on the battery and carefully press it into place, ensuring a firm and secure connection.
-
Secure the Battery: Confirm that the new battery is securely seated within the compartment and that the connector is firmly attached. Take a moment to verify that the battery is positioned correctly and that there are no obstructions or misalignments that may affect its performance.
-
Test the Connection: With the new battery in place, briefly power on the cordless phone to verify that the battery is functioning correctly. Check for any error messages or indicators that may suggest a faulty connection or improper installation of the new battery.
By meticulously following these steps, you can effectively insert the new battery into your Uniden cordless phone, setting the stage for the final phase of replacing the battery cover. This meticulous approach ensures that the new battery is integrated with precision and care, laying the groundwork for the seamless restoration of your cordless phone's functionality.
Step 5: Replace the Battery Cover
After successfully inserting the new battery into your Uniden cordless phone, the final step involves securing the battery cover to complete the battery replacement process. This critical phase ensures the protection of the new battery and the overall integrity of the phone, culminating in the restoration of its seamless functionality. Follow these detailed steps to effectively replace the battery cover:
-
Position the Battery Cover: Begin by aligning the battery cover with the corresponding grooves or slots on the back of the cordless phone. Ensure that the cover is positioned correctly and that it aligns seamlessly with the phone's housing.
-
Engage Latches or Clips: If the battery cover features latches or clips, gently press them into place to secure the cover. Ensure that each latch or clip is firmly engaged, providing a snug fit for the battery cover and preventing any potential movement or dislodgment.
-
Reattach Screws: If the battery cover is secured with screws, utilize the appropriate screwdriver to carefully reattach the screws to the designated positions. Exercise caution to avoid overtightening the screws, ensuring that they are firm but not excessively tightened.
-
Verify Secure Fit: Once the battery cover is in place, take a moment to verify that it is securely fastened to the phone. Gently press on the edges of the cover to ensure that it remains firmly attached and that there are no gaps or loose areas that may compromise its integrity.
-
Power On the Phone: With the battery cover securely replaced, power on the cordless phone to confirm that it functions as expected. Check for any error messages or indicators that may suggest an issue with the battery cover installation, ensuring that the phone operates seamlessly.
By meticulously following these steps, you can effectively replace the battery cover on your Uniden cordless phone, finalizing the battery replacement process with precision and care. This meticulous approach ensures that the new battery is safeguarded within the phone, and the overall integrity of the device is maintained. With the battery cover securely in place, your cordless phone is ready to resume its reliable performance, allowing you to enjoy uninterrupted communication and convenience once again.
Conclusion
Congratulations on successfully completing the DIY battery replacement process for your waterproof Uniden cordless phone from the Tru9585 series. By embarking on this journey, you have not only revitalized the functionality of your cordless phone but also demonstrated a commendable commitment to sustainability and self-reliance.
The process of replacing the battery in your cordless phone may initially seem daunting, but your dedication and attention to detail have undoubtedly paid off. Through each step, from gathering the necessary tools and supplies to carefully inserting the new battery and securing the battery cover, you have exhibited precision and care, ensuring the seamless restoration of your device's performance.
By opting for a DIY approach to battery replacement, you have not only saved time and resources but also contributed to the reduction of electronic waste. Instead of discarding a perfectly functional cordless phone due to a worn-out battery, you have extended its lifespan and minimized your environmental impact. This proactive stance aligns with the principles of sustainability and responsible consumerism, reflecting a conscientious approach to gadget maintenance.
Furthermore, your willingness to engage in DIY maintenance fosters a sense of empowerment and self-sufficiency. Taking control of the maintenance and upkeep of your gadgets instills a profound sense of accomplishment and confidence in your technical abilities. By embracing the DIY spirit, you have transcended the role of a mere consumer, evolving into a proactive custodian of your electronic devices.
As you reconnect your newly revitalized cordless phone and engage in seamless communication, take pride in the knowledge that your efforts have not only restored a vital piece of technology but have also contributed to a more sustainable and self-reliant lifestyle. Your commitment to DIY maintenance serves as an inspiration to others, encouraging a shift towards mindful consumption and active participation in the preservation of our technological resources.
With your Uniden cordless phone now equipped with a new battery, you can relish the uninterrupted communication it offers, knowing that your proactive approach has breathed new life into a cherished device. As you enjoy the convenience and reliability of your revitalized cordless phone, remember the impact of your DIY endeavor and the valuable contribution it represents in the realm of sustainable gadget usage.