Introduction
Are you the proud owner of a brand-new PC and eager to get started using it? One of the essential steps in setting up your new computer is downloading and installing the Windows operating system. Windows provides a user-friendly interface and a wide range of features that make it a popular choice among PC users.
In this guide, we will take you through the step-by-step process of downloading Windows onto your new PC. Whether you’re a seasoned tech enthusiast or a beginner, this guide will assist you in successfully completing the installation.
Before we dive into the downloading process, it’s crucial to note that Windows is available in different versions. The most recent version at the time of writing this article is Windows 10, but there might be newer versions available by the time you read it. It’s always recommended to check for the latest version to ensure that you have access to the most up-to-date features and security patches.
Additionally, it’s important to ensure that your new PC meets the minimum system requirements for the Windows version you plan to install. Failing to meet these requirements may result in compatibility issues and hinder optimal performance. We’ll cover how to check your system requirements in the first step of this guide.
Lastly, before starting the installation process, it’s advisable to back up your important data. Installing Windows involves formatting the hard drive, which will erase all existing data. Backing up your files and folders will help prevent any data loss during the installation process.
Now that we’ve covered the basics, let’s move on to the first step: checking the system requirements for Windows installation on your new PC.
Step 1: Check System Requirements
Before proceeding with the installation of Windows on your new PC, it’s vital to ensure that your computer meets the minimum system requirements. These requirements ensure that your PC has the necessary hardware and specifications to run Windows smoothly and efficiently.
The specific system requirements may vary depending on the version of Windows you plan to install. However, the general requirements are as follows:
- Processor: A compatible processor with a clock speed of at least 1 GHz or higher is recommended. Some versions of Windows may have specific processor requirements, so make sure to check the official documentation for the version you intend to install.
- Memory (RAM): Windows typically requires a minimum of 2 GB of RAM to function properly. However, for a smoother experience, it is recommended to have 4 GB or more.
- Storage Space: The amount of storage space required depends on the Windows version and its installation files. Generally, 32-bit versions of Windows require at least 16 GB of free space, while 64-bit versions require 20 GB or more. It’s advisable to have additional free space available for temporary files and future updates.
- Graphics Card: A DirectX 9 graphics device with WDDM driver support is usually required for optimal performance. Some versions of Windows may have specific graphics card requirements, so it’s essential to verify compatibility.
- Display: A monitor with a minimum resolution of 800×600 pixels is recommended. Higher resolutions provide a better visual experience, especially if you plan to work with graphics-intensive applications.
- Internet Connection: An active internet connection is required for downloading updates during the installation process and for accessing various Windows features and services.
To check the system specifications of your new PC, follow these steps:
- Click on the “Start” menu or press the Windows key on your keyboard to open the Start menu.
- Type “System” in the search box, and then select “System Information” from the search results.
- A window will open displaying detailed information about your computer’s hardware and software. Here, you can find the necessary details to compare against the system requirements for Windows.
If your PC meets the minimum requirements, you are ready to proceed with the installation. However, if your computer falls short in any aspect, you may need to consider upgrading specific components to ensure compatibility and optimal performance with Windows.
Once you have confirmed that your system meets the requirements, you can proceed to the next step: backing up your important data to prevent any loss during the installation process.
Step 2: Backup Your Data
Before proceeding with the installation of Windows on your new PC, it’s crucial to back up your important data. Installing a new operating system involves formatting the hard drive, which will erase all existing data. By backing up your files and folders, you can prevent any potential loss during the installation process.
There are several methods you can use to back up your data, depending on your preferences and the amount of data you need to save. Here are a few common backup methods:
- External Hard Drive: Connect an external hard drive to your computer and copy your important files and folders onto it. This method provides a physical backup that you can easily access and restore when needed.
- Cloud Storage: Upload your files and folders to a cloud storage service, such as Google Drive, Dropbox, or Microsoft OneDrive. This allows you to access your data from any device with an internet connection and provides an extra layer of security in case of hardware failure.
- Network Storage: If you have a home network with multiple computers, you can back up your data onto a network-attached storage (NAS) device. This method enables easy access to your files from any connected device on the network.
Regardless of the backup method you choose, make sure to include all important documents, photos, videos, music, and any other files that you deem valuable. It’s also a good idea to create a list of installed applications or take screenshots of your desktop layout for reference later.
Once you have successfully backed up your data, double-check that all your important files have been securely saved. It’s always better to be safe than sorry when it comes to preserving your personal and work-related information.
Now that your data is safely backed up, you can proceed to the next step: choosing the version of Windows you want to install on your new PC.
Step 3: Choose the Version of Windows
When it comes to choosing the version of Windows for your new PC, several factors need to be considered. Each version of Windows offers different features and functionalities, and choosing the right one depends on your specific needs and preferences.
As of now, the most recent version of Windows is Windows 10, which has become the standard choice for most users. Windows 10 provides a user-friendly interface, improved security, regular updates, and compatibility with a wide range of software and hardware.
However, it’s essential to keep in mind that there may be newer versions available by the time you read this guide. It’s always recommended to check for the latest version of Windows before making a decision. You can visit the official Microsoft website for more information on the different versions of Windows and their respective features.
Here are a few key factors to consider when choosing the version of Windows for your new PC:
- Requirements: Ensure that your hardware meets the system requirements for the version of Windows you plan to install. Some advanced features may require specific hardware configurations, so it’s important to verify compatibility.
- Editions: Windows offers different editions designed for different user groups. For most home users, the standard Home edition is sufficient. However, if you require more advanced features like BitLocker encryption or remote desktop access, you may need to consider the Pro edition.
- License: Windows licenses can be purchased as full versions or upgrades for existing Windows installations. Depending on your situation, you may need to choose the appropriate license option.
- Support: Consider the availability of support and updates for the version of Windows you choose. Microsoft regularly releases updates to improve security and fix bugs, so it’s important to stay up-to-date with the latest patches.
Take your time to research and evaluate the different versions of Windows and their features. Consider your specific needs, budget, and long-term requirements for your new PC.
Once you have decided on the version of Windows you want to install, you can proceed to the next step: downloading the Windows installation media.
Step 4: Download the Windows Installation Media
After choosing the version of Windows you want to install on your new PC, the next step is to download the Windows installation media. This media contains all the necessary files and data required for the installation process.
There are a few different methods you can use to download the Windows installation media:
- Official Microsoft Website: Visit the official Microsoft website and navigate to the Windows download page. Here, you can find the download links for various versions of Windows. Make sure to select the correct version and edition that you decided upon in the previous step.
- Windows Creation Tool: Microsoft provides a tool called the Windows Creation Tool, which allows you to create a bootable USB drive or download an ISO file directly. This tool simplifies the download and preparation process, making it suitable for users of all levels of technical expertise.
- Third-Party Websites: There are several trustworthy third-party websites that offer Windows ISO files for download. However, exercise caution and ensure that you only download from reputable sources to avoid malware or counterfeit copies of Windows.
When downloading the Windows installation media, it’s crucial to ensure that you have a stable and high-speed internet connection. The size of the download can vary depending on the version and edition of Windows you choose, so it may take some time to complete.
Once the download is complete, it’s essential to verify the integrity of the downloaded files. You can do this by comparing the checksum provided by the official Windows download page with the checksum of the downloaded file. This ensures that the installation media is free from any errors or corruption. Various checksum verifying tools are available online to assist you with this process.
Now that you have successfully downloaded the Windows installation media, you are ready for the next step: creating a bootable USB drive to install Windows on your new PC.
Step 5: Create Bootable USB Drive
Creating a bootable USB drive is an essential step to install Windows on your new PC. A bootable USB drive allows you to start the installation process from the USB drive itself, bypassing the need for a physical installation disc. It’s a convenient and efficient method, especially for devices without an optical drive.
To create a bootable USB drive, follow these steps:
- Insert a USB drive with sufficient storage capacity (at least 8 GB is recommended) into your computer.
- Open the Windows installation media that you downloaded in the previous step. If you downloaded an ISO file, you’ll need to use a tool like Rufus or the Windows Creation Tool to create a bootable USB drive.
- Run the tool and select the option to create a bootable USB drive. Follow the on-screen instructions, ensuring that you choose the correct USB drive as the destination for the bootable files.
- Wait for the tool to format the USB drive and copy all the necessary installation files.
- Once the process is complete, safely remove the USB drive from your computer.
Now you have a bootable USB drive ready for the Windows installation on your new PC. Remember to keep the USB drive in a safe place as you will need it during the installation process.
Creating a bootable USB drive provides flexibility and convenience during the installation process. It allows you to install Windows on multiple computers and provides an easier and faster installation experience compared to using physical discs.
Next, we will move on to configuring the BIOS settings of your new PC in preparation for the Windows installation.
Step 6: Configure BIOS Settings
Configuring the BIOS settings is an important step before installing Windows on your new PC. The BIOS (Basic Input/Output System) is a firmware that controls the hardware initialization process and provides the basic functionality needed for your operating system to communicate with the hardware.
To configure the BIOS settings, follow these steps:
- Start your computer and immediately press the designated key to enter the BIOS setup. The key to access the BIOS may vary depending on the manufacturer, but common keys include F2, F10, or Delete.
- Once inside the BIOS setup, navigate to the “Boot” or “Boot Order” section. This section contains options related to boot devices and their priority.
- Set the boot priority to prioritize the USB drive as the first boot device. This ensures that your PC boots from the USB drive when starting the installation process.
- Save the changes you made in the BIOS settings and exit the BIOS setup. The computer will restart.
It’s important to note that the BIOS setup interface may vary depending on the manufacturer and model of your computer. Refer to the documentation provided by the manufacturer or visit their official website for specific instructions related to your PC.
Configuring the BIOS settings correctly is crucial to ensure that the Windows installation process goes smoothly. By setting the USB drive as the first boot device, your computer will be able to boot from the USB drive and initiate the installation process.
With the BIOS settings configured, your new PC is now prepared for the installation of Windows. In the next step, we will guide you through the process of installing Windows on your computer.
Step 7: Install Windows
Now that you have prepared your new PC by checking system requirements, backing up your data, choosing the Windows version, downloading the installation media, creating a bootable USB drive, and configuring the BIOS settings, it’s time to proceed with the installation of Windows.
Follow these steps to install Windows on your new PC:
- Insert the bootable USB drive into one of the USB ports on your computer.
- Restart your computer. As it boots up, you may need to press a key, such as F12 or Esc, to access the boot menu. Select the USB drive as the boot option.
- The Windows installation process will begin. Select your language preference, time zone, and keyboard layout when prompted.
- Click “Install Now” to start the installation process.
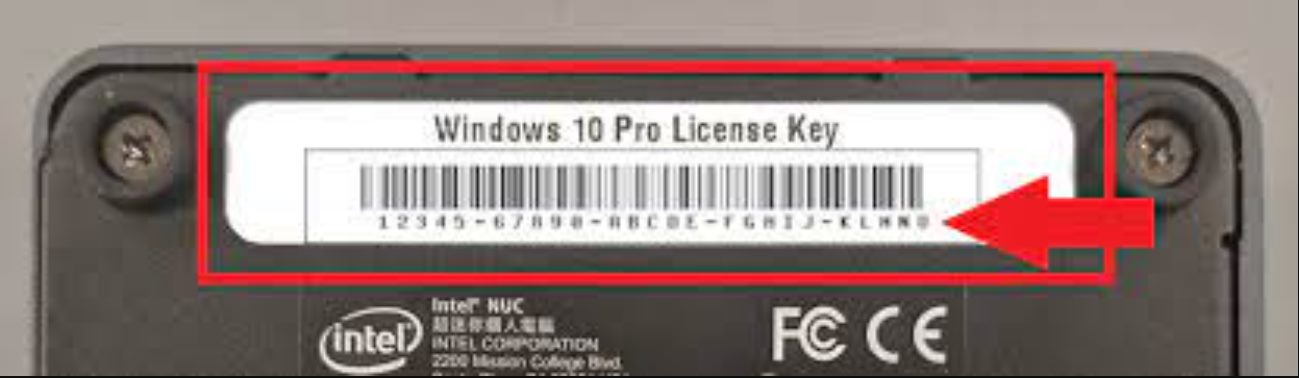
- Enter the product key when prompted. This is usually found on the packaging or in the email if you purchased a digital copy of Windows.
- Read and accept the license terms and conditions.
- Choose the type of installation you prefer. You can either perform a clean installation to format the hard drive and start fresh or upgrade your existing Windows installation.
- Follow the on-screen instructions to select the partition or drive where you want to install Windows.
- Wait for the installation process to complete. Your computer may restart several times during this process.
- Once the installation is finished, you will be prompted to set up your computer by entering your username, password, and other preferences.
After completing these steps, Windows will finalize the installation and take you to the desktop. Congratulations! You have successfully installed Windows on your new PC.
Remember to install any necessary drivers for your specific hardware, as well as update Windows to ensure that you have the latest security patches and features.
In the next and final step, we will cover how to activate your copy of Windows to ensure its full functionality.
Step 8: Activate Windows
After successfully installing Windows on your new PC, the final step is to activate your copy of Windows. Activation is necessary to validate your license and ensure that you have access to all the features and updates provided by Microsoft.
Follow these steps to activate Windows:
- Ensure that your computer is connected to the internet.
- Click on the “Start” menu and go to “Settings”.
- In the Settings window, click on “Update & Security”.
- In the left-hand menu, select “Activation”.
- Click on the “Activate” button.
- Windows will attempt to activate itself automatically using the digital license tied to your hardware. If successful, you will see a confirmation message. If not, proceed to the next step.
- If automatic activation fails, you will be prompted to enter the product key manually. Enter the product key that came with your copy of Windows and click “Next”.
- Follow the on-screen instructions to complete the activation process.
Once your copy of Windows is activated, you will have full access to all the features and updates provided by Microsoft. It’s important to note that a valid product key is required for successful activation. If you are using a trial version or obtained Windows through other means, make sure to follow the necessary steps to acquire a valid product key.
It’s recommended to periodically check for Windows updates to ensure that your operating system remains secure and up-to-date. Windows Update will automatically download and install important updates, patches, and drivers for your system.
Congratulations! You have now successfully installed and activated Windows on your new PC. Enjoy exploring the features and capabilities of your operating system.
Conclusion
Setting up a new PC and installing the Windows operating system can be an exciting and fulfilling experience. By following the step-by-step guide outlined in this article, you have successfully navigated through the process of checking system requirements, backing up your data, choosing the Windows version, downloading the installation media, creating a bootable USB drive, configuring the BIOS settings, installing Windows, and activating your copy.
Throughout this process, it’s crucial to ensure that your new PC meets the minimum system requirements for Windows and that you have taken the necessary precautions to back up your important data. Selecting the appropriate edition of Windows and downloading the installation media from trusted sources are vital steps in ensuring a smooth installation experience.
Remember to configure the BIOS settings to prioritize the bootable USB drive, as this allows for a seamless installation process. Once Windows is successfully installed, activating your copy is essential to access all features and updates provided by Microsoft.
With Windows now up and running on your new PC, you can explore the user-friendly interface, take advantage of the multitude of features, and enjoy a versatile computing experience. Don’t forget to regularly check for Windows updates to keep your system secure and benefit from the latest enhancements.
We hope this guide has been helpful to you in the process of downloading and installing Windows on your new PC. If you encounter any difficulties along the way, consult the official documentation or seek support from the Windows community. Embrace the possibilities and unleash the full potential of your new PC with Windows!