Introduction
Welcome to the world of technology, where we have the luxury of accessing our files and data across different platforms and devices. One such scenario is when you want to download files from iCloud to an Android device. While iCloud is primarily designed for Apple users, there are ways to access and download files from iCloud to Android.
Downloading files from iCloud to an Android device can be a bit tricky since Apple and Android operate on different operating systems. However, there are a couple of methods you can explore to make this transfer possible. In this article, we will explore two options: using the iCloud for Windows app and using the iCloud website.
By leveraging the power of the iCloud for Windows app, you can seamlessly transfer files from iCloud to your Windows PC, and then from there, you can easily transfer them to your Android device. This option requires you to have a Windows PC and the iCloud for Windows app installed.
If you don’t have a Windows PC, don’t worry! Using the iCloud website is another viable option. With this method, you can directly access your iCloud files through the web browser on your Android device and download them to your computer. Once the files are on your computer, you can proceed to transfer them to your Android device.
Now that you have a brief overview of what we will cover, let’s dive into each method in detail. By following the step-by-step instructions provided, you will be able to download your files from iCloud to your Android device with ease.
Option 1: Using the iCloud for Windows App
If you have a Windows PC, using the iCloud for Windows app is a convenient way to download files from iCloud to your Android device. Follow the steps below to get started:
Step 1: Download and Install the iCloud for Windows App
The first step is to download and install the iCloud for Windows app on your PC. You can download it directly from Apple’s official website. Once the download is complete, run the installer and follow the on-screen instructions to install the app on your computer.
Step 2: Set up iCloud for Windows
After installing the app, launch it and sign in with your Apple ID and password. Make sure to check the box next to “iCloud Drive” and any other services you want to sync with your Windows PC. Then, click on the “Apply” button to save your settings.
Step 3: Download Files from iCloud to Windows
Once the iCloud for Windows app is set up on your PC, it will automatically start syncing your iCloud files to your computer. To download specific files or folders, open File Explorer and navigate to the iCloud Drive folder. Here, you can browse through your files and choose the ones you want to download.
Simply right-click on the file or folder, select “Download,” and choose a location on your PC to save the file. The selected files will be downloaded from iCloud to your Windows PC.
Step 4: Transfer Files from Windows to Android
Now that your files are downloaded to your Windows PC, you can transfer them to your Android device. There are several ways to do this, including using a USB cable, cloud storage services, or email.
If you prefer a direct transfer, connect your Android device to your PC using a USB cable. Once connected, navigate to the folder where you saved the downloaded files, select them, and copy them to your Android device’s internal storage or SD card.
Alternatively, you can also upload the downloaded files to a cloud storage service like Google Drive or Dropbox and then access them on your Android device using the respective app. Another option is to email the files to yourself and download them on your Android device.
With these steps, you can successfully download files from iCloud to your Android device using the iCloud for Windows app. Now, let’s explore another option for downloading files from iCloud to Android.
Option 2: Using the iCloud Website
If you don’t have a Windows PC, or if you prefer a more direct approach, you can use the iCloud website to download files from iCloud to your Android device. Follow the steps below to proceed:
Step 1: Open the iCloud Website
On your Android device, open a web browser and navigate to the iCloud website. You can access it by entering “www.icloud.com” in the address bar.
Step 2: Sign In to Your iCloud Account
Once you are on the iCloud website, sign in using your Apple ID and password. Make sure to use the same account that you use for iCloud on your Apple devices.
Step 3: Access Your iCloud Files
After signing in, you will be presented with various iCloud services. Click on the “iCloud Drive” icon to access your files stored in iCloud.
Step 4: Select and Download Files to Your Computer
In the iCloud Drive interface, navigate through the folders to find the specific files you want to download. You can use the folder hierarchy or the search bar to locate your files quickly.
Once you have found the files you want to download, select them by clicking on the checkbox next to each file. If you want to select all files in a folder, click on the checkbox in the header row to select all.
After selecting the files, click on the download button (represented by a cloud with an arrow pointing downwards) to initiate the download process. The selected files will be downloaded to your computer’s default download location.
Step 5: Transfer Files from Computer to Android
Now that the files are downloaded to your computer, you can proceed to transfer them to your Android device. Connect your Android device to your computer using a USB cable.
Once connected, you can either navigate to the location where the downloaded files are saved and manually copy them to your Android device’s internal storage or SD card, or you can use software like Android File Transfer to make the transfer process more seamless.
With these steps, you can easily download files from iCloud to your Android device using the iCloud website. The process may require an extra step of transferring the files from your computer to your Android device, but it provides a reliable and direct method for accessing your iCloud files.
Step 1: Download and Install the iCloud for Windows App
In order to download files from iCloud to your Windows PC and subsequently transfer them to your Android device, you will need to download and install the iCloud for Windows app. Follow the steps below to get started:
1. Open your preferred web browser and go to the official Apple website.
2. Search for “iCloud for Windows” or directly visit the iCloud for Windows download page.
3. Once on the download page, click on the “Download” button to initiate the download process.
4. Depending on your browser settings, you may be asked to choose a destination folder to save the installation file. Select an appropriate location on your computer and click “Save”.
5. Once the download is complete, locate the installation file on your computer. It is usually saved in the default downloads folder or the folder you selected earlier.
6. Double-click on the installation file to start the installation process.
7. Follow the prompts and on-screen instructions provided by the installer to proceed with the installation.
8. Read and accept the terms and conditions, and choose the destination folder where the iCloud for Windows app will be installed. You can use the default folder or select a different one as per your preference.
9. Click on the “Install” button to begin the installation process. Wait for the installation to complete, as it may take a few moments.
10. Once the installation is finished, you will be prompted to restart your computer. It is recommended to save any unsaved work and close any open applications before proceeding with the restart.
11. After your computer has rebooted, the iCloud for Windows app will be installed and ready to use.
With the iCloud for Windows app successfully installed on your computer, you are now ready to set it up and start downloading files from iCloud to your Windows PC. This is the first step towards accessing your iCloud files on your Android device. Let’s move on to the next step to proceed further.
Step 2: Set up iCloud for Windows
Now that you have successfully downloaded and installed the iCloud for Windows app on your computer, it’s time to set it up so you can access your iCloud files. Follow these steps to get started:
1. Open the iCloud for Windows app by either clicking on its desktop shortcut or searching for it in the Windows start menu.
2. Once the app is launched, you will be prompted to sign in with your Apple ID and password. Enter the required credentials and click on the “Sign In” button.
3. After signing in, you will see a list of iCloud services available for synchronization. Make sure to check the box next to “iCloud Drive” so that your files can be accessed and downloaded to your Windows PC.
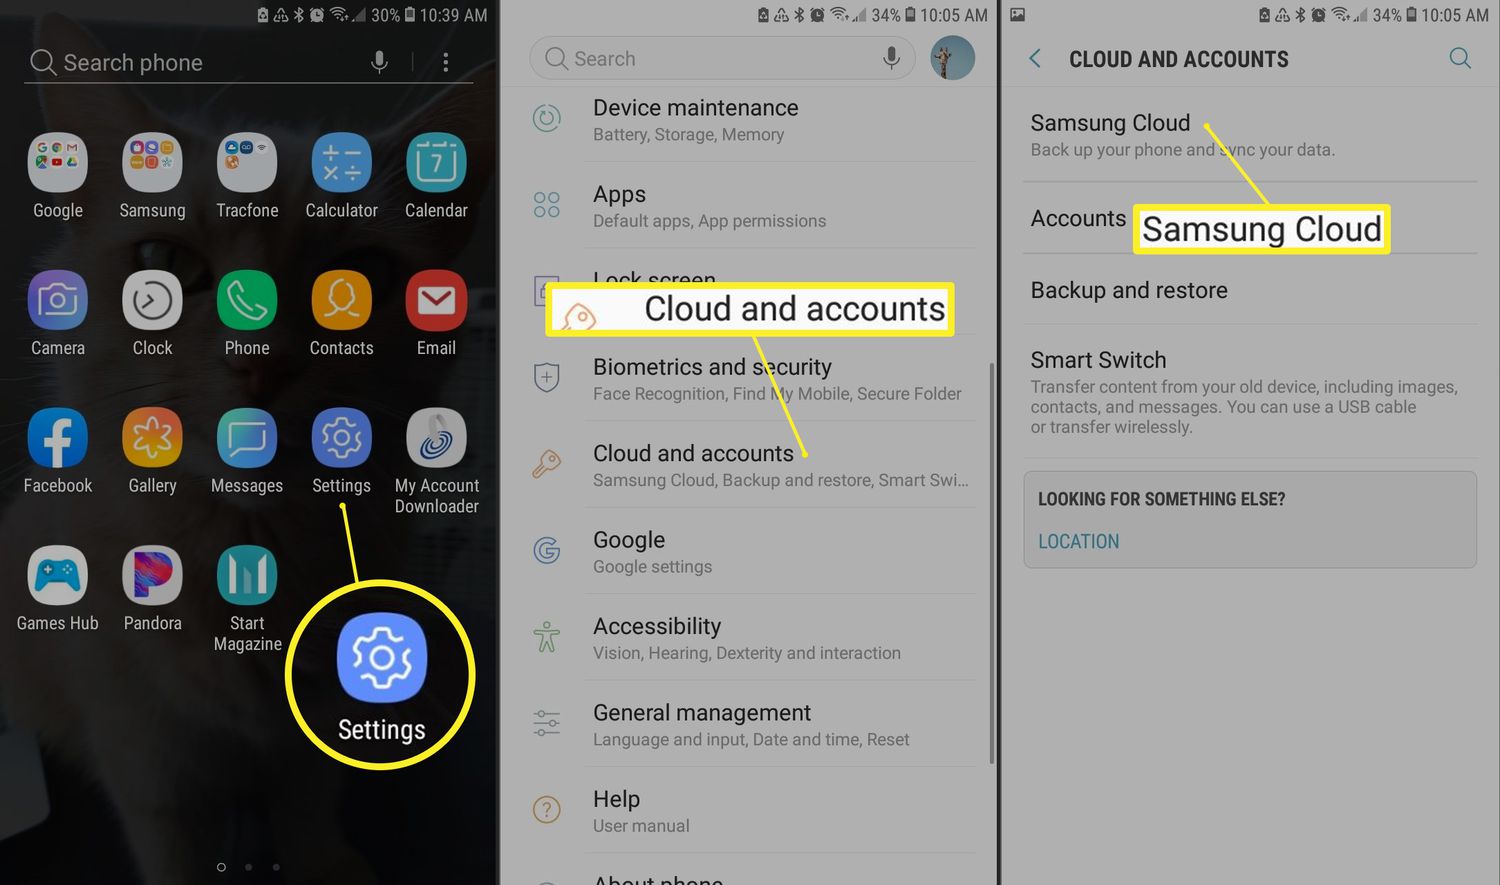
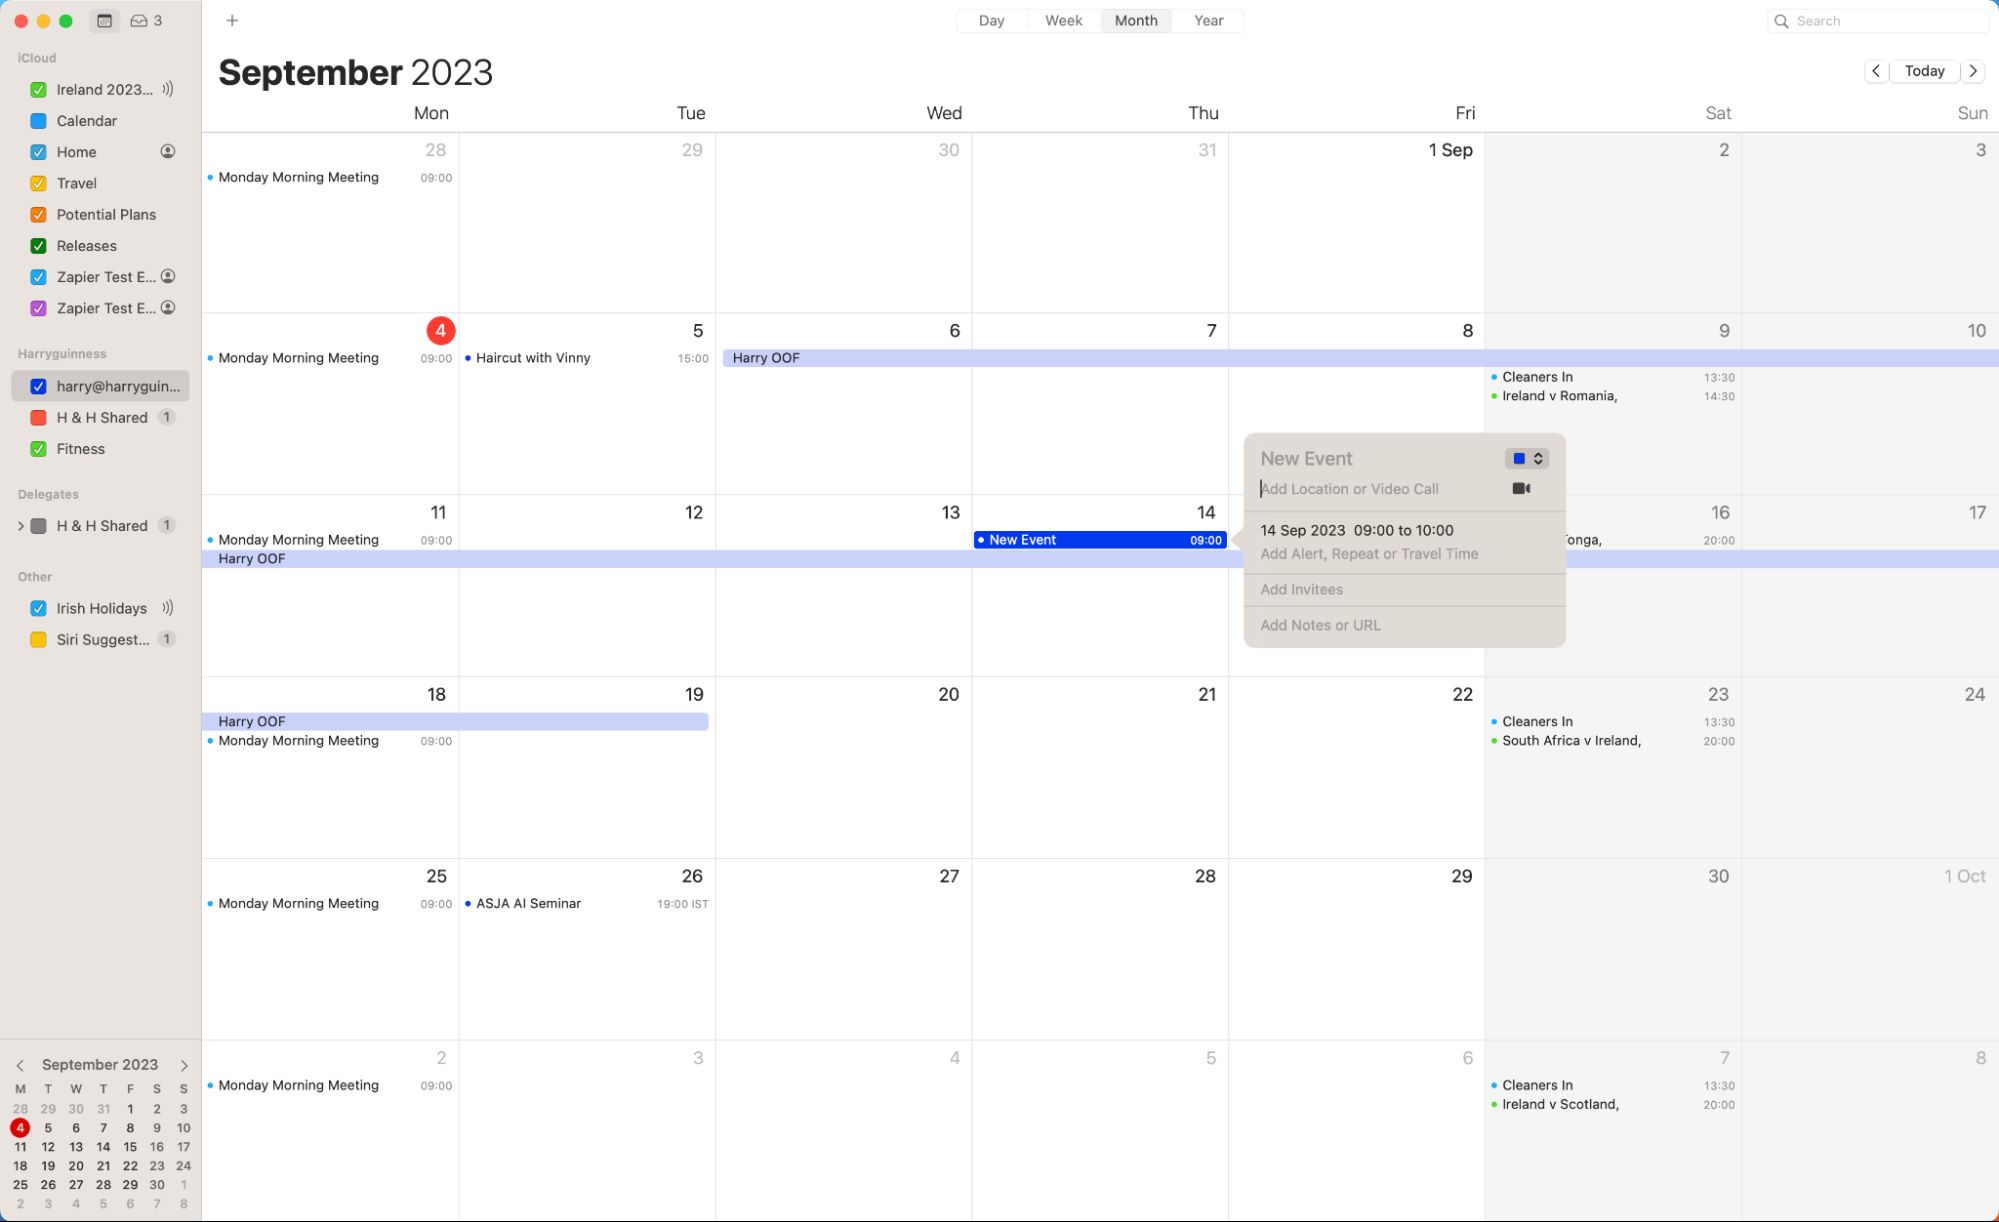
4. Optionally, you can also select other iCloud services you want to sync with your computer, such as Mail, Contacts, Calendar, and Photos. Check the boxes next to the desired services to enable synchronization.
5. Next, you have the option to choose the location on your computer where you want to save the iCloud Drive files. By default, it automatically sets the iCloud Drive folder in your user directory. If you want to change the location, click on the “Change” button and select a different folder.
6. Beneath the iCloud Drive settings, you will see an option called “Options…”. Click on it to adjust additional settings, such as enabling automatic downloads of new photos or videos, syncing bookmarks with browsers, and managing iCloud storage.
7. After customizing the settings, click on the “Apply” button to save your changes and apply them to the iCloud for Windows app.
8. The app will now begin syncing your iCloud Drive files to your Windows PC. Depending on the size and number of files, this process may take some time.
9. Once the syncing process is complete, you will have access to your iCloud files on your Windows PC, and you can proceed to download and transfer them to your Android device.
By following these steps, you have successfully set up the iCloud for Windows app and synchronized your iCloud Drive files with your Windows PC. The next step involves downloading the files from iCloud to your PC, which we will cover in the next section. Let’s move on to the following step to proceed further.
Step 3: Download Files from iCloud to Windows
Now that you have set up the iCloud for Windows app on your computer, you can proceed to download specific files or folders from iCloud to your Windows PC. Follow these steps to download files from iCloud:
1. Open the File Explorer on your Windows PC by either clicking on the folder icon on the taskbar or pressing the Windows key + E shortcut.
2. On the left-hand side of the File Explorer window, you will see a list of Quick Access folders. Scroll down and click on the “iCloud Drive” folder.
3. In the iCloud Drive folder, you will find all the files and folders that are stored in your iCloud Drive. Browse through the folders to find the specific file or folder you want to download.
4. Once you locate the desired file or folder, right-click on it and select “Download” from the context menu. If you want to download multiple files or folders, you can select them by holding down the Ctrl key while clicking on each item.
5. After selecting the file(s) or folder(s) you want to download, choose a location on your Windows PC where you want to save them. You can either select an existing folder or create a new one by clicking on the “New Folder” option.
6. Click on the “Save” button to start the download process. The selected file(s) or folder(s) will be downloaded from iCloud to your specified location on your Windows PC.
7. Depending on the size and number of files, the download process may take some time. You can monitor the progress in the Downloads section of your web browser or by checking the File Explorer window.
8. Once the download is complete, you can access the downloaded files from the location you designated earlier. They are now stored on your Windows PC and ready to be transferred to your Android device.
By following these steps, you have successfully downloaded specific files or folders from iCloud to your Windows PC. In the next step, we will discuss how to transfer these downloaded files from your Windows PC to your Android device. Let’s move on to the next step to proceed further.
Step 4: Transfer Files from Windows to Android
Now that you have successfully downloaded the files from iCloud to your Windows PC, it’s time to transfer them to your Android device. There are several methods you can use to achieve this. Here are some popular options:
Option 1: USB Cable
One of the simplest ways to transfer files from your Windows PC to your Android device is by using a USB cable:
- Connect your Android device to your Windows PC using a USB cable.
- On your Android device, make sure to unlock the screen and choose the “File Transfer” option if prompted.
- On your Windows PC, open the File Explorer and navigate to the location where you saved the downloaded files.
- Select the files you want to transfer by either dragging and dropping them into your Android device’s storage or using the copy and paste function.
- Wait for the files to transfer from your PC to your Android device. The length of time will depend on the size and amount of files being transferred.
- Once the transfer is complete, disconnect your Android device from the USB cable.
Option 2: Cloud Storage Services
Another convenient method is to upload the downloaded files to a cloud storage service and then access them on your Android device. Here’s how:
- Upload the downloaded files to a cloud storage service like Google Drive, Dropbox, or OneDrive. Sign in to your account and follow the instructions provided by the service to upload the files.
- On your Android device, download and install the corresponding cloud storage app from the Google Play Store, if you haven’t already.
- Open the cloud storage app on your Android device and sign in to your account.
- Navigate to the location where you uploaded the files and download them to your Android device’s internal storage or SD card.
Option 3: Email
If the files you downloaded are relatively small, you can also send them to yourself via email:
- Compose a new email on your Windows PC’s email client or webmail.
- Attach the files you want to transfer to the email.
- Send the email to your own email address.
- On your Android device, open the email app or webmail and find the email containing the attachments.
- Download the attached files to your Android device’s internal storage or SD card by tapping on them.
Regardless of the method you choose, once the files are transferred to your Android device, you can access them using the appropriate file manager app or the app associated with the file type.
By following these steps, you have successfully transferred the downloaded files from your Windows PC to your Android device. You can now enjoy your iCloud files on your Android device. In the next section, we will explore an alternative option for downloading files from iCloud to Android. Let’s continue to the next section.
Step 1: Open the iCloud Website
If you don’t have access to a Windows PC or prefer a more direct approach, you can download files from iCloud to your Android device by using the iCloud website. Follow these steps to get started:
1. On your Android device, open a web browser such as Google Chrome or Mozilla Firefox.
2. In the address bar, type in “www.icloud.com” and press Enter. This will take you to the iCloud website.
3. Once the iCloud website loads, you will be greeted with the iCloud sign-in page.
4. If you have previously signed in to iCloud on your device, you may be automatically logged in. If not, enter your Apple ID and password in the respective fields and tap on the “Sign In” button.
5. If you have enabled two-factor authentication, you might be prompted to verify your identity through a code sent to your trusted device or phone number. Follow the instructions on the screen to complete the verification process.
6. After successfully signing in, you will be taken to the iCloud dashboard. This is where you can access your iCloud files and data.
Please note that while you can access the iCloud website on your Android device, not all features and functionalities may be available or optimized for mobile browsing. This may vary depending on the web browser you are using and the specific capabilities of your Android device.
However, the iCloud website provides a convenient way to access and download your iCloud files on your Android device without the need for any additional software or applications.
With the iCloud website open and your iCloud account signed in, you are now ready to access your iCloud files and proceed to download them to your Android device. In the next step, we will explore how to sign in to your iCloud account and access your files. Let’s move on to the next step to proceed further.
Step 2: Sign In to Your iCloud Account
Now that you have opened the iCloud website on your Android device, it’s time to sign in to your iCloud account. Follow these steps to access your iCloud files:
1. On the iCloud website’s sign-in page, enter your Apple ID and password in the provided fields.
2. Make sure to use the same Apple ID and password that you use on your Apple devices to access your iCloud data.
3. If you have enabled two-factor authentication, you may receive a verification code on your trusted device or phone number. Enter the code in the appropriate field when prompted.
4. Once you have entered the required information and completed any additional security steps, tap on the “Sign In” button.
5. If all the provided login credentials are correct, you will be successfully signed in to your iCloud account.
6. After signing in, you will be taken to the iCloud dashboard, where you can access your iCloud files, emails, calendar, contacts, and other iCloud services.
It’s important to note that signing in to your iCloud account on the iCloud website does not create or link an iCloud account to your Android device. It simply allows you to access your iCloud files stored in the cloud.
Make sure to safeguard your Apple ID and password and be cautious while signing in to your account on a public or shared device.
With successful sign-in to your iCloud account on the iCloud website, you can now access your iCloud files and proceed to download them to your Android device. In the next step, we will explore how to access and download your iCloud files. Let’s move on to the next step to proceed further.
Step 3: Access Your iCloud Files
Now that you have signed in to your iCloud account on the iCloud website, you can easily access your iCloud files. Follow these steps to locate and access your files:
1. After signing in, you will be directed to the iCloud dashboard. Here, you will find various icons representing different iCloud services like Mail, Contacts, Calendar, Photos, and iCloud Drive.
2. To access your iCloud files, click on the “iCloud Drive” icon. This will take you to the iCloud Drive interface, which displays all the files and folders stored in your iCloud Drive.
3. In the iCloud Drive interface, you will see a familiar file explorer-like layout, with folders and file icons representing your documents, photos, and other files.
4. You can navigate through the folders by clicking on them to access subfolders, or you can use the breadcrumbs at the top of the page to quickly jump to a specific folder.
5. If you have organized your files in folders, click on the folder that contains the specific file you want to download. Alternatively, you can use the search bar at the top of the page to search for a specific file or folder by name.
6. Once you have located the file you want to download, click on it to select it. You can also select multiple files by holding down the Ctrl key (or the Command key on Mac) while clicking on the desired files.
7. With the files selected, you can now proceed to download them to your Android device.
The iCloud Drive interface on the iCloud website provides a convenient way to access and manage your iCloud files, allowing you to navigate through folders, search for specific files, and select multiple files for download.
Note that not all file types may be directly supported or openable on your Android device without the appropriate apps. However, you can transfer the downloaded files to compatible apps on your Android device for further use and viewing.
With access to your iCloud files on the iCloud website, you can proceed to the next step and learn how to download those files to your computer. Let’s move on to the next step to proceed further.
Step 4: Select and Download Files to Your Computer
Once you have accessed your iCloud files on the iCloud website, you can select and download specific files to your computer. Follow these steps to download files to your computer:
1. In the iCloud Drive interface, navigate to the folder that contains the files you want to download. You can click on the folders to access subfolders or use the search bar to find specific files.
2. Once you have located the files you want to download, click on them to select them. You can hold down the Ctrl key (or the Command key on Mac) to select multiple files at once.
3. After selecting the files, click on the download button located at the top of the page. The button is represented by a cloud with an arrow pointing downwards.
4. A pop-up window will appear, asking you to confirm the download. Review the selected files and click on the “Download” button to initiate the downloading process.
5. Depending on the size and number of files, the download process may take some time. You can monitor the progress either through the browser’s download manager or by checking the Downloads folder on your computer.
6. Once the download is complete, the selected files will be saved to your computer’s default download location unless you specified a different location.
When downloading files from iCloud, it’s important to consider the storage capacity and available space on your computer. Be mindful of downloading large files if you have limited disk space.
After downloading the files to your computer, you can access them from the download location and transfer them to your Android device through various methods such as USB cable, cloud storage services, or email.
With these steps, you have successfully selected and downloaded files from iCloud to your computer. In the next step, we will explore how to transfer these downloaded files from your computer to your Android device. Let’s move on to the next step to proceed further.
Step 5: Transfer Files from Computer to Android
After successfully downloading the files from iCloud to your computer, the next step is to transfer them to your Android device. There are several methods you can use to accomplish this:
Option 1: USB Cable
Using a USB cable is a common and straightforward method to transfer files from your computer to your Android device:
- Connect your Android device to your computer using a USB cable.
- On your Android device, make sure to unlock the screen and choose the “File Transfer” option if prompted.
- Open the File Explorer on your computer and navigate to the folder where the downloaded files are located.
- Select the files you want to transfer and either drag and drop them onto your Android device’s internal storage or use the copy and paste function.
- Wait for the file transfer to complete, which may take some time depending on the size and number of files being transferred.
- Once the transfer is finished, safely disconnect your Android device from the USB cable.
Option 2: Cloud Storage Services
Utilizing cloud storage services is another convenient method to transfer files from your computer to your Android device:
- Upload the downloaded files to a cloud storage service such as Google Drive, Dropbox, or OneDrive. Sign in to your account and follow the instructions provided to upload the files.
- On your Android device, download and install the corresponding cloud storage app from the Google Play Store, if you haven’t already.
- Open the cloud storage app on your Android device, sign in to your account, and navigate to the location where you uploaded the files.
- Download the files to your Android device’s internal storage or SD card by tapping on them.
Option 3: Email
If the files are small in size, you can also send them to yourself via email:
- Compose a new email on your computer’s email client or webmail.
- Attach the downloaded files to the email.
- Send the email to yourself.
- On your Android device, open the email app or webmail and find the email containing the attachments.
- Download the attached files to your Android device’s internal storage or SD card by tapping on them.
After transferring the files to your Android device, you can access them using a file manager app or open them directly with compatible apps for viewing or editing.
With these methods, you can easily transfer files from your computer to your Android device, allowing you to enjoy your iCloud files on the Android platform. Congratulations! You have completed all the necessary steps to download files from iCloud to your Android device. Happy file transferring!
Conclusion
Transferring files from iCloud to an Android device may seem like a daunting task at first, but with the right methods and steps, it can be accomplished smoothly. In this guide, we explored two options for downloading files from iCloud to Android: using the iCloud for Windows app and accessing the iCloud website.
If you have a Windows PC, using the iCloud for Windows app offers a seamless way to sync your iCloud files with your computer and then transfer them to your Android device. By following the steps outlined, you can easily set up iCloud for Windows, download your files, and transfer them to your Android device.
For those who don’t have a Windows PC or prefer a direct approach, accessing the iCloud website on your Android device allows you to download files from iCloud without the need for additional software. By signing in to your iCloud account, accessing your files, and following the steps provided, you can successfully download your iCloud files to your Android device.
Once the files are downloaded to your computer, you have various methods for transferring them to your Android device, including using a USB cable, cloud storage services, or email. Choose the method that best fits your needs and preferences to complete the file transfer process.
Remember to ensure you have enough storage space on your computer and Android device, as well as taking proper security measures like using a secure Internet connection and protecting your Apple ID credentials.
With these steps, you can now easily download files from iCloud to your Android device. Enjoy the freedom of accessing and managing your iCloud files across different platforms and devices. Whether you’re switching from an Apple device or simply need to access your files on your Android device, these methods provide a convenient way to do so.
Now, armed with the knowledge and steps outlined in this guide, you can confidently navigate the process of downloading files from iCloud to your Android device. Embrace the versatility of technology and make the most out of your files, regardless of the platforms you use. Happy downloading and transferring!