Introduction
Welcome to our guide on how to download team chat history. In today’s modern workplace, communication plays a vital role in collaboration and effective teamwork. With the widespread use of team chat apps, it’s important to have a way to access and preserve the valuable conversations that take place within these platforms.
Whether you need to refer back to important discussions, analyze project updates, or simply want to keep a record of your team’s communication, downloading chat history can be incredibly useful.
In this guide, we’ll walk you through the step-by-step process of downloading team chat history. We’ll cover everything from navigating to the chat history section to saving the chat history file. By following these simple instructions, you’ll be able to effortlessly save and access your team’s valuable conversations.
It’s important to note that the specific steps may vary depending on the team chat app you are using. However, the general principles and techniques we’ll discuss can be applied to most popular team chat apps available today.
So, whether you’re using Slack, Microsoft Teams, or any other team chat app, let’s dive into the process of downloading your team chat history and ensure that your valuable conversations are securely saved and easily accessible.
Step 1: Open the team chat app
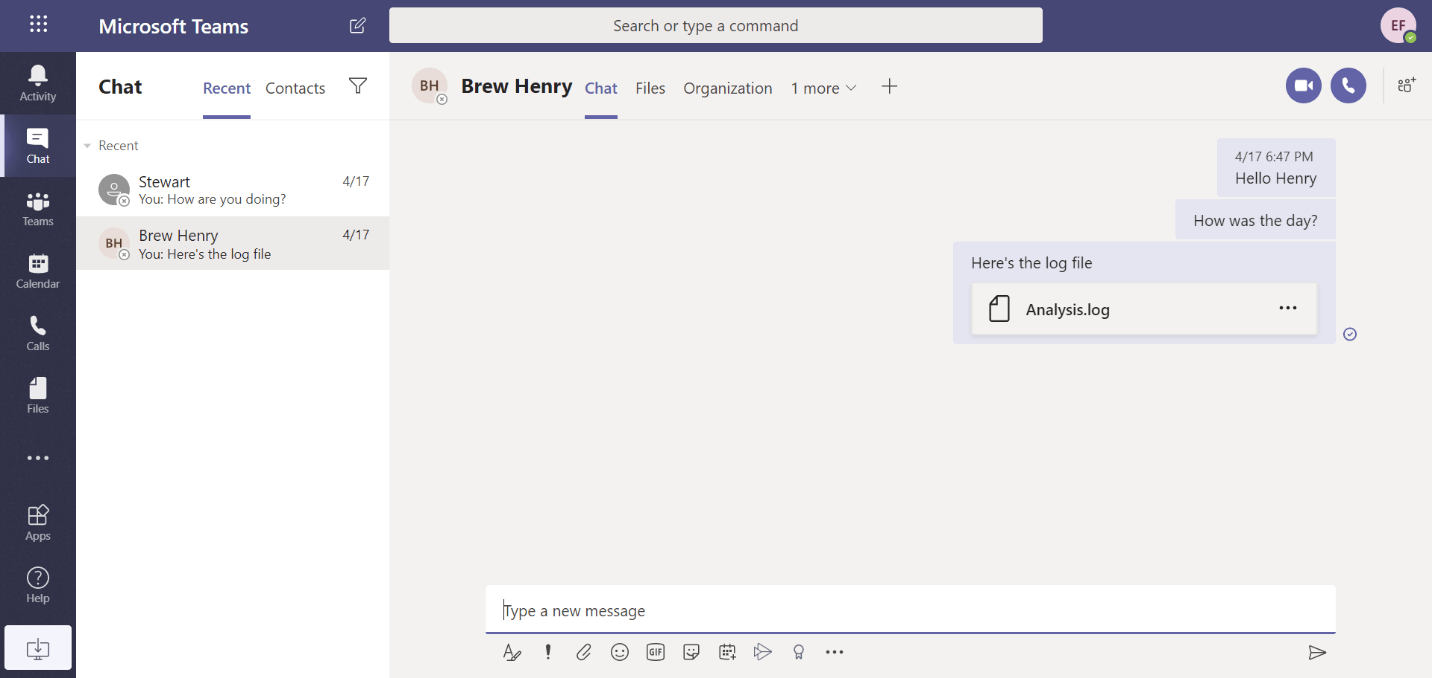
The first step in downloading team chat history is to open the team chat app on your device. This can be done by finding the app icon on your home screen or by searching for it in the application list.
Once you locate the app, tap on it to open it. Depending on your device and settings, you may be required to enter your credentials, such as your username and password, to log in to the app.
Once you have successfully logged in, you will be taken to the main screen of the team chat app, where you can access various features and functionalities.
It’s important to ensure that you have a stable internet connection when opening the team chat app. This is necessary to ensure a seamless experience and access to all the chat history available to download.
Take a moment to familiarize yourself with the app’s interface and navigation options. Each team chat app may have a different layout, but they generally provide a straightforward user experience with intuitive menus and options.
By opening the team chat app, you have completed the first step towards downloading the chat history. Now, let’s move on to the next step and navigate to the chat history section.
Step 2: Navigate to the chat history section
After opening the team chat app, the next step is to navigate to the chat history section. This section allows you to access and manage all the past conversations that have taken place within the app.
The location of the chat history section may vary depending on the team chat app you are using. In some apps, you might find it in the sidebar, while in others, it could be located within the settings or under a specific menu tab.
Take a moment to explore the app’s interface and look for the section or option that allows you to access the chat history. Look for labels such as “History,” “Archived Chats,” or a similar term that indicates the storage of previous conversations.
Once you have located the chat history section, click on it to access the archived chats. In some cases, you might need to select a specific team or channel before getting access to the chat history.
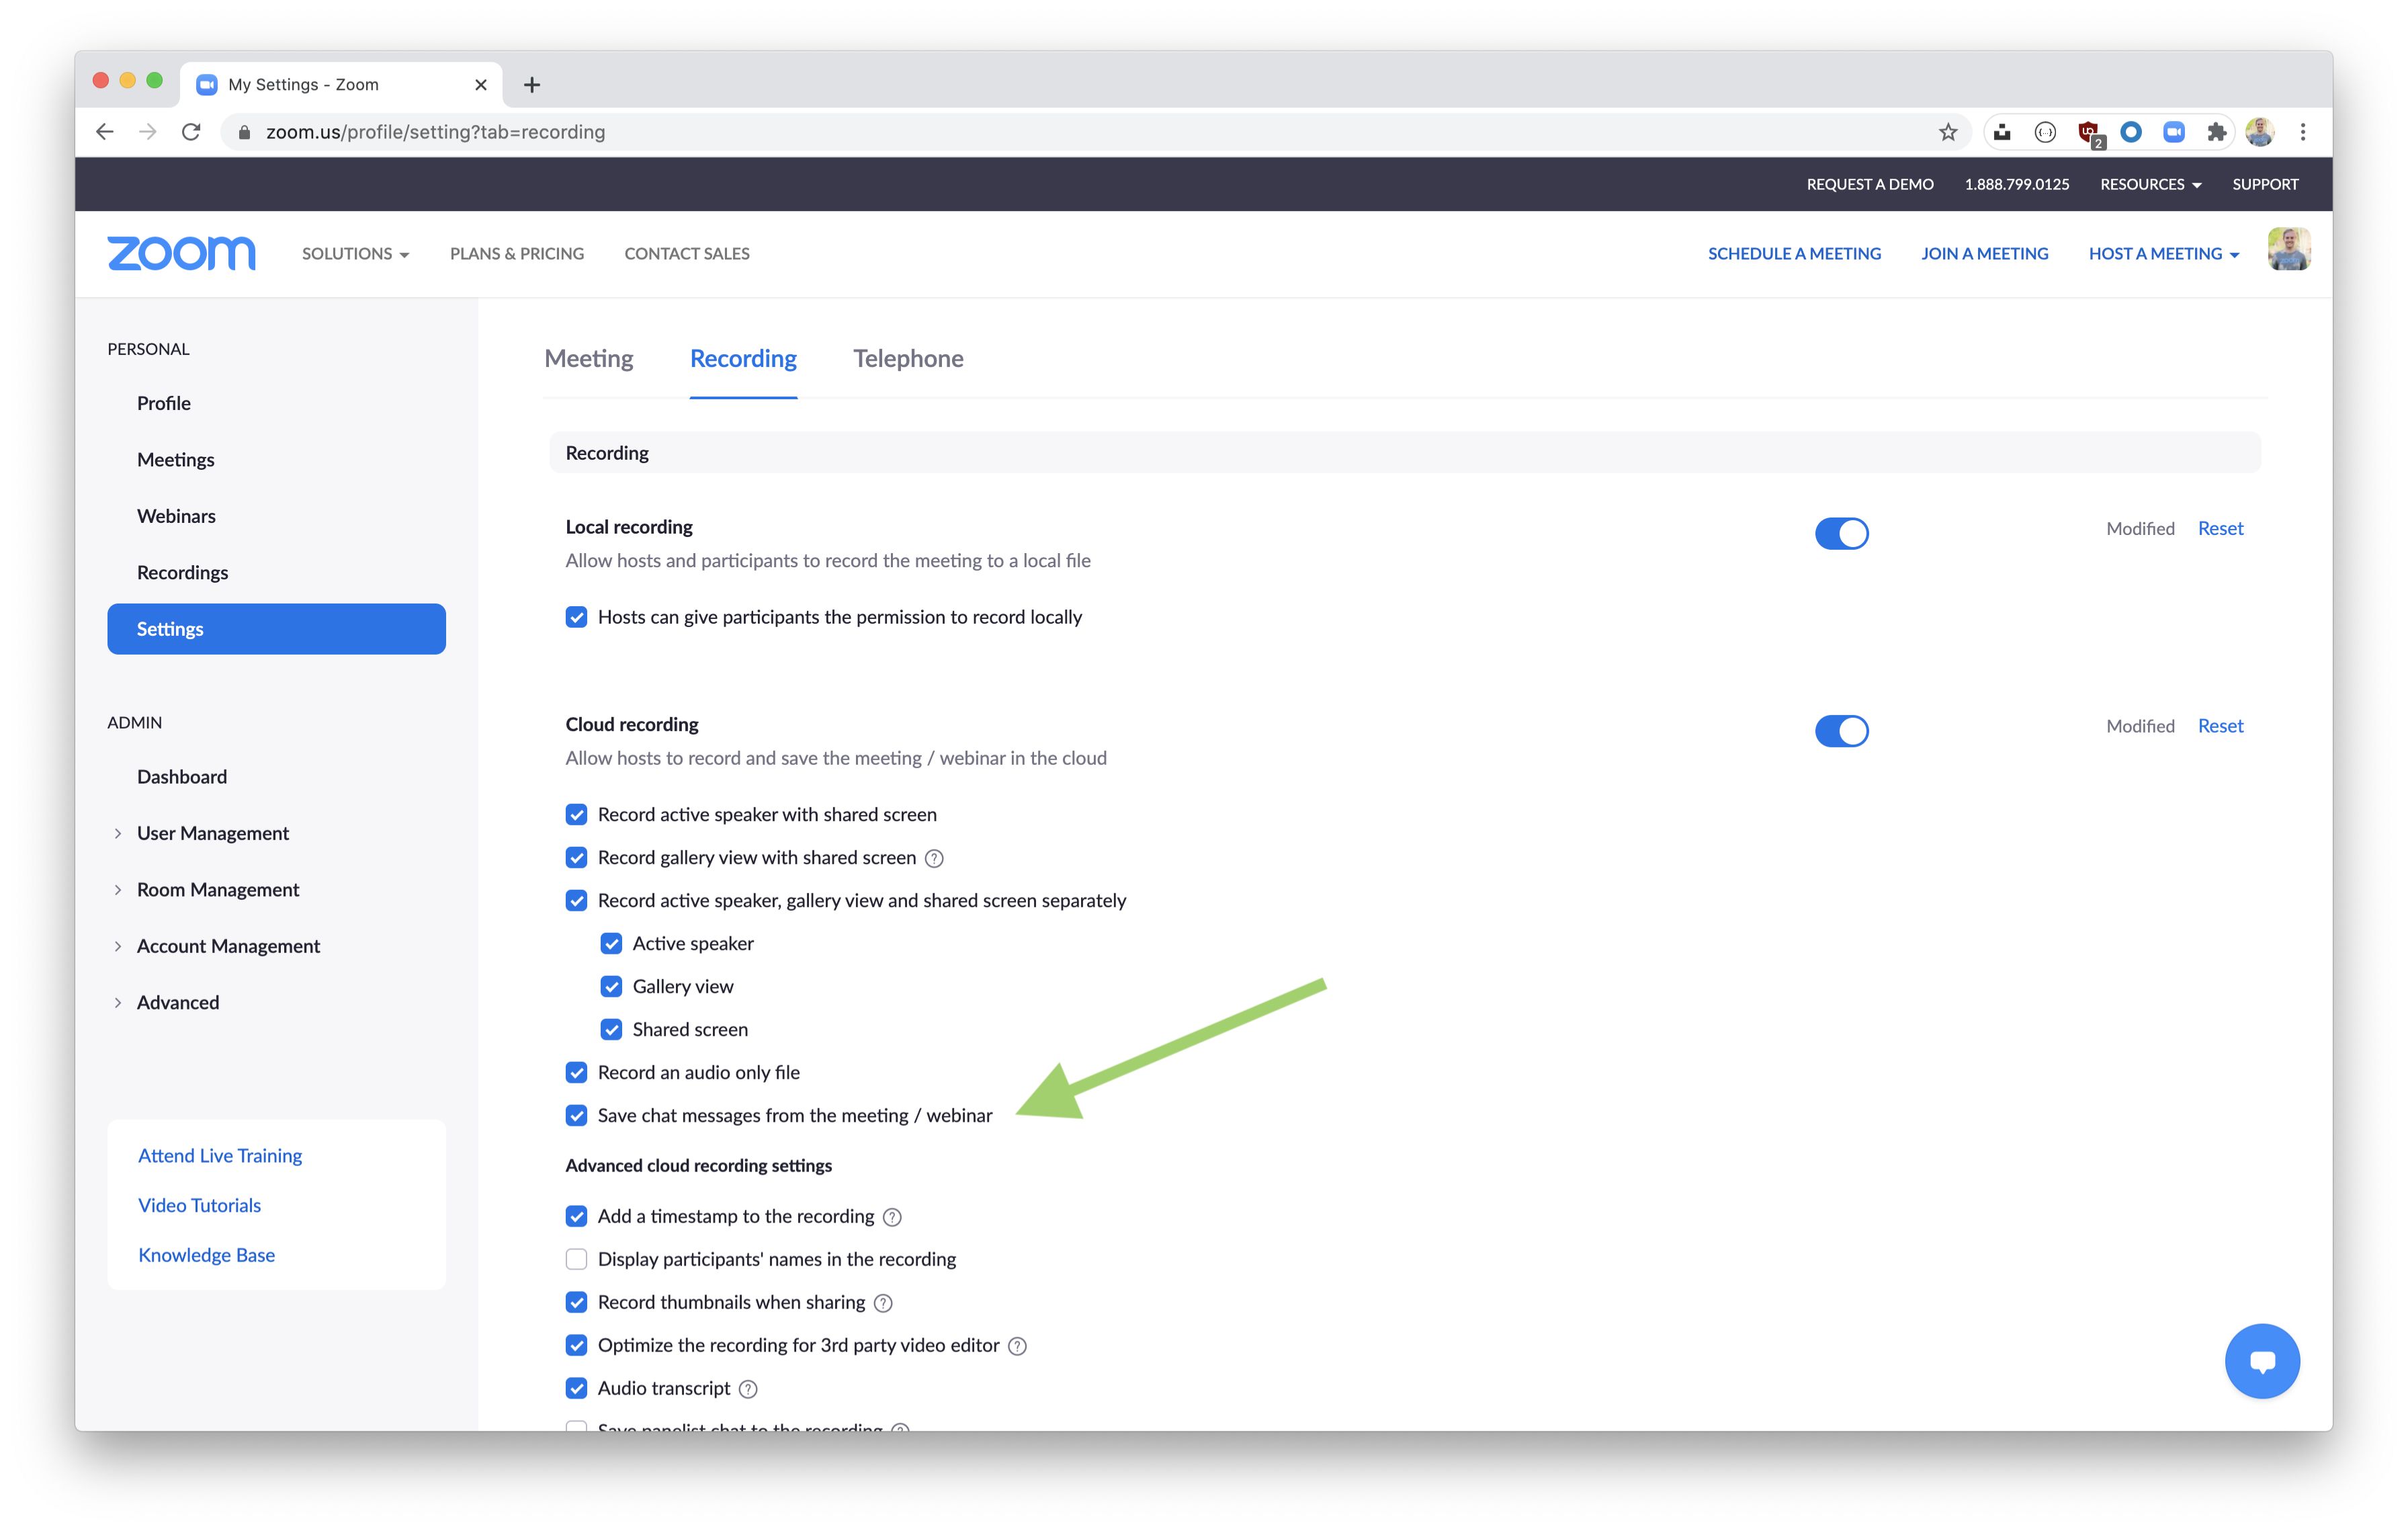
It’s worth mentioning that some team chat apps provide advanced search options within the chat history section. This allows you to search for specific keywords or message threads to quickly find the information you need.
As you navigate through the chat history section, you’ll notice that the conversations may be organized by date, channel, or team. This organization helps you locate and identify specific chats that you want to download.
By successfully navigating to the chat history section, you have completed the second step towards downloading the team chat history. In the next step, we will learn how to select the desired chat history for download.
Step 3: Select the desired chat history
Once you have accessed the chat history section in your team chat app, the next step is to select the desired chat history that you want to download. This allows you to choose which conversations or message threads you wish to save for future reference.
Look through the list of available chat histories and identify the specific conversations or channels that you want to download. Depending on the app, you may be able to select multiple chat histories at once or choose them one by one.
Some team chat apps provide additional options to filter the chat history based on specific criteria such as date range, participants, or keywords. These filters can help you narrow down your selection and find the exact chats you are looking for.
Consider the purpose of why you are downloading the chat history. Are you looking to save all the conversations from a specific project, or do you only need to preserve certain discussions related to a particular topic or task?
Once you have identified the chat history you want to download, select it by clicking on it or using the app’s provided checkbox or selection feature. You can repeat this process for any additional chat histories you want to include in the download.
It’s important to keep in mind that depending on the size and volume of the selected chat history, the download process may take some time. Larger chat histories with numerous messages and attachments may require more time to download.
By successfully selecting the desired chat history, you have completed the third step towards downloading the team chat history. In the next step, we will learn how to download the chat history itself.
Step 4: Download the chat history
Now that you have selected the desired chat history in your team chat app, it’s time to proceed with downloading it. This step allows you to save the chosen conversations and messages as a downloadable file onto your device.
Look for the download option or button within the chat history section of your team chat app. The specific location of this option may vary depending on the app you are using, but it is typically indicated by an icon or label that represents downloading or saving.
Click on the download option to initiate the download process. Depending on the size of the chat history, it may take a few moments or longer for the download to complete.
During the download, avoid closing the app or navigating away from the chat history section to ensure a successful transfer. It’s also important to have a stable internet connection throughout the download process to avoid any interruptions.
As the chat history is being downloaded, a progress indicator may appear to show you how much of the download is completed. Once the download is finished, you will be notified or prompted with an option to open or save the downloaded file.
Choose the appropriate option based on your preference and the capabilities of your device. If you choose to save the file, select a location on your device’s storage where you want to store the chat history.
Keep in mind that the downloaded chat history file might be in a specific format, such as HTML, CSV, or TXT, depending on the team chat app. Check the file extension or format to ensure that it is compatible with your preferred method of accessing and viewing the chat history.
By successfully downloading the chat history, you have completed the fourth step towards preserving your team’s valuable conversations. In the next step, we will learn how to save the chat history file for future access.
Step 5: Save the chat history file
After successfully downloading the chat history file from your team chat app, the final step is to save the file for future access and reference. This step ensures that you have a secure and convenient way to retrieve the chat history whenever you need it.
Depending on your device and operating system, there are different options available for saving the chat history file. Here are a few common methods:
- Save to local storage: Choose a location on your device’s storage, such as the Documents folder or a dedicated folder for chat history, to save the file. This allows you to access the chat history from your device’s file manager.
- Save to cloud storage: Upload the chat history file to a cloud-based storage platform, such as Google Drive, Dropbox, or OneDrive. This option provides the advantage of accessing the chat history from multiple devices and easily sharing it with others.
- Email the file: Attach the chat history file to an email and send it to your own email address or another designated email account. This method serves as a backup and allows you to access the chat history file whenever you have access to your email.
- Transfer to external storage: If you prefer to keep a physical copy of the chat history file, transfer it to an external storage device, such as a USB flash drive or an external hard drive. This method provides an additional layer of security and allows you to access the chat history offline.
Choose the saving method that aligns with your preferences and storage capabilities. It’s a good practice to organize and label the chat history file appropriately to make it easier to locate and retrieve in the future.
Additionally, consider implementing a regular backup routine to ensure that your chat history remains safe and accessible. Depending on the team chat app, there may be automated backup options available within the app or through third-party integrations.
By successfully saving the chat history file, you have completed the final step towards downloading and preserving your valuable team conversations. Congratulations! You can now access and refer back to the chat history whenever you need it.
Conclusion
Downloading team chat history is a valuable practice that allows you to save and access important conversations that occur within your team chat app. By following the steps outlined in this guide, you can effortlessly preserve your team’s communication for future reference.
We started by opening the team chat app on our device, ensuring a stable internet connection to access the chat history section. From there, we navigated to the chat history section and selected the desired chat histories that we wanted to download.
Next, we learned how to download the chat history files, being mindful of the download progress and avoiding interruptions. Once the files were successfully downloaded, we explored different options for saving them, such as local storage, cloud storage, email attachments, or external storage devices.
Remember to regularly back up your chat history files to ensure that they remain secure and accessible. This will help safeguard against accidental loss or device malfunctions.
Whether you need to refer back to past discussions, analyze project updates, or comply with legal requirements, downloading team chat history provides a reliable means of preserving your team’s valuable conversations.
By following the steps outlined in this guide, you can conveniently access and retrieve chat history whenever you need it. So, start downloading and saving your team’s chat history today to enhance collaboration, knowledge sharing, and effective teamwork.