Introduction
Dropbox is a popular cloud storage platform that allows users to store and share files with ease. Whether you are a professional photographer, an avid traveler capturing beautiful moments, or simply someone who wants to keep their photos safe, Dropbox provides a convenient solution to store and access your images from any device.
In this article, we will guide you through the process of downloading photos from Dropbox. Whether you want to save your entire photo collection to your computer or download specific images for a project, we’ve got you covered. By following these simple steps, you can have your photos safely stored on your device in no time.
Please note that the steps mentioned here are applicable for both the Dropbox web interface and the Dropbox desktop app. Make sure you have the Dropbox application installed on your computer or access to the Dropbox website before proceeding.
So, without further ado, let’s dive into the steps to download photos from Dropbox!
Step 1: Sign in to your Dropbox account
The first step to downloading photos from Dropbox is to sign in to your Dropbox account. If you don’t have an account yet, you can easily create one by visiting the Dropbox website and following the sign-up process.
Once you have your account set up, open your preferred web browser and navigate to the Dropbox website at www.dropbox.com. On the homepage, you will find the “Sign In” button located at the top right corner of the screen.
Click on the “Sign In” button, and you will be redirected to the Dropbox login page. Here, enter your email address and password associated with your Dropbox account. Double-check the information you’ve entered to ensure it is correct, as any errors can cause login issues.
After verifying your credentials, click on the “Sign In” button to log in to your Dropbox account. If the login details are correct, you will be successfully logged in and redirected to your Dropbox dashboard.
Alternatively, if you have the Dropbox desktop app installed on your computer, you can sign in directly from the app by clicking on the Dropbox icon in your system tray or menu bar, entering your login credentials, and clicking “Sign In.”
Now that you’re signed in to your Dropbox account, you’re ready to proceed to the next step and navigate to the folder where your photos are stored.
Step 2: Navigate to the folder containing the photos
After signing in to your Dropbox account, the next step is to navigate to the folder where the photos you want to download are stored. Dropbox organizes files and folders in a hierarchical structure, making it easy to locate specific items.
On the Dropbox website, you will see the main dashboard after logging in. This dashboard displays an overview of your files and folders. Take a moment to familiarize yourself with the layout and features of the Dropbox interface.
To find the folder containing your photos, use the sidebar located on the left-hand side of the screen. The sidebar displays a list of your folders and provides convenient navigation options. Look for the section labeled “Files” or “Folders,” and expand it if necessary.
If you have many folders in your Dropbox account, you may need to scroll through the list or use the search bar at the top of the sidebar to find the specific folder. Enter the name of the folder or any relevant keywords associated with it to narrow down the search results.
Once you have located the folder with your photos, click on the folder name to enter the folder. The folder view will display all the files and subfolders contained within it.
If your photos are stored in a subfolder within the main folder, you will need to navigate through the folder structure to reach the desired location. Click on each folder in the path until you reach the folder where your photos reside.
Take your time to ensure that you have reached the correct folder before proceeding to the next step. Double-check the folder name and any specific details or descriptions to ensure that you are in the right location.
Now that you have successfully navigated to the folder containing your photos, let’s move on to the next step and select the photos you want to download.
Step 3: Select the photos you want to download
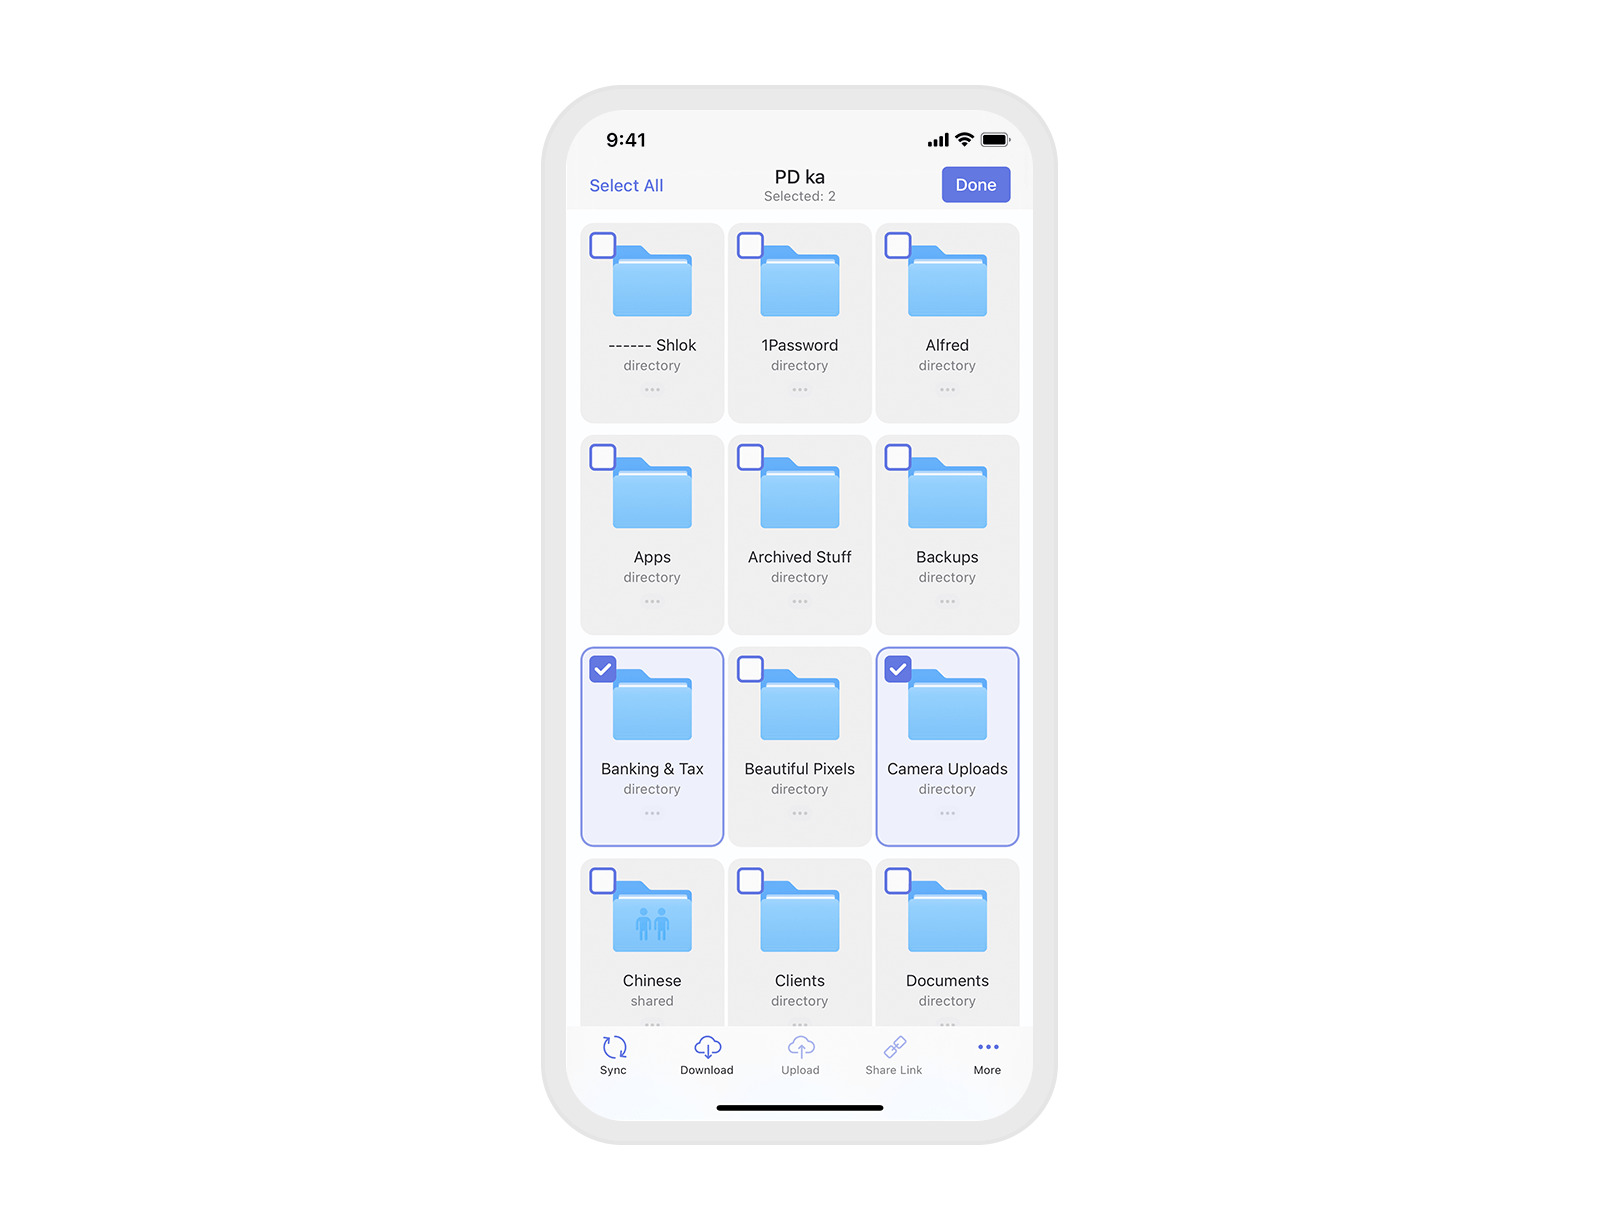
Once you have successfully navigated to the folder containing your photos, the next step is to select the specific photos you want to download. Dropbox provides various options for selecting multiple files or individual files, depending on your preference and requirements.
To select multiple photos at once, you can use a combination of keyboard shortcuts and mouse clicks. Hold down the Ctrl (Windows) or Command (Mac) key on your keyboard and click on each photo you want to download. As you click on each photo, you will notice that they are highlighted or selected.
If you want to select a consecutive range of photos, select the first photo, hold down the Shift key on your keyboard, and click on the last photo in the range. Dropbox will automatically select all the photos in between the first and last selections.
Alternatively, if you only need to download one photo, simply click on that photo to select it.
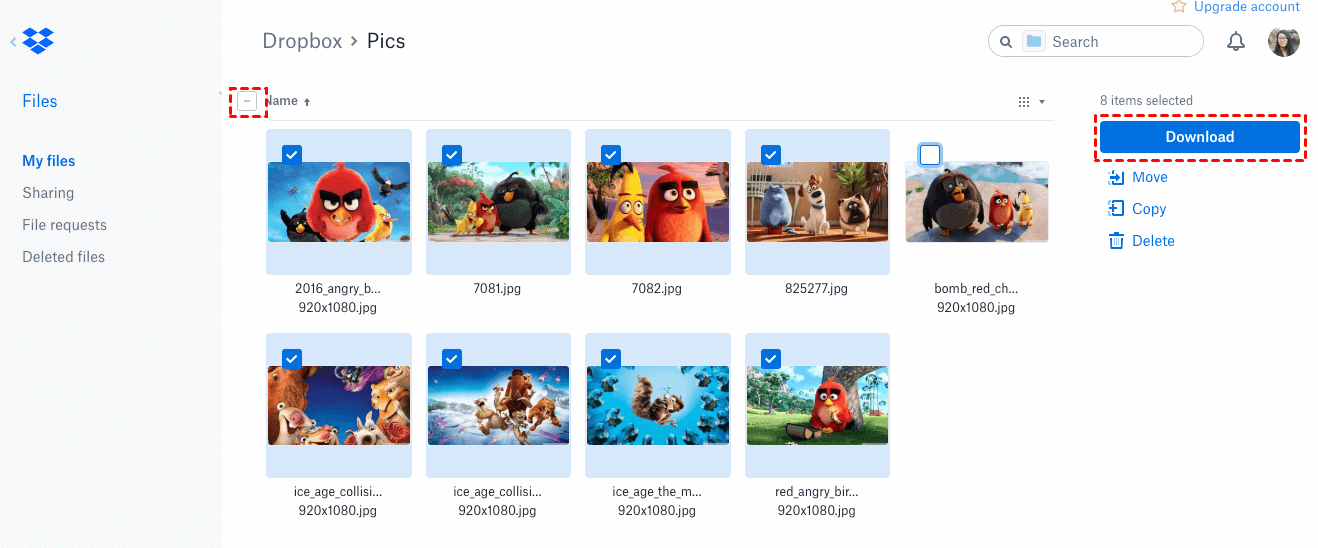
Moreover, Dropbox also provides additional options for selecting files using the checkboxes associated with each photo. Hover your cursor over each photo to reveal a checkbox, and click on the checkbox to select the photo. This method can be especially useful when dealing with large numbers of photos.
As you select the photos, you may also notice that additional options appear in the Dropbox toolbar. These options allow you to perform various actions on the selected photos, such as moving them to a different folder, sharing them with others, or downloading them.
Take a moment to review your selected photos and ensure that you have chosen all the necessary files for download. If you accidentally select the wrong photo or need to deselect a photo, simply click on it again to remove the selection.
Now that you have successfully selected the photos you want to download from your Dropbox account, let’s move on to the next step and proceed with the actual downloading process.
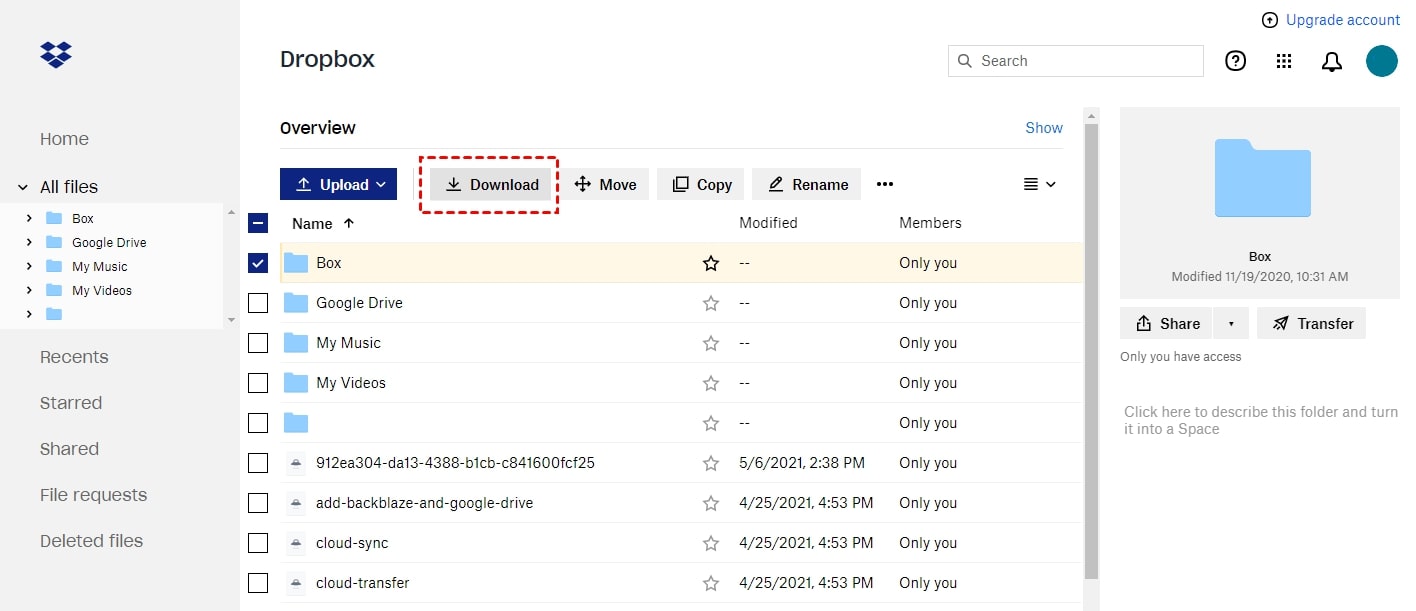
Step 4: Click the “Download” button
After selecting the photos you want to download from your Dropbox account, the next step is to click the “Download” button. This action will initiate the process of downloading the selected photos to your device.
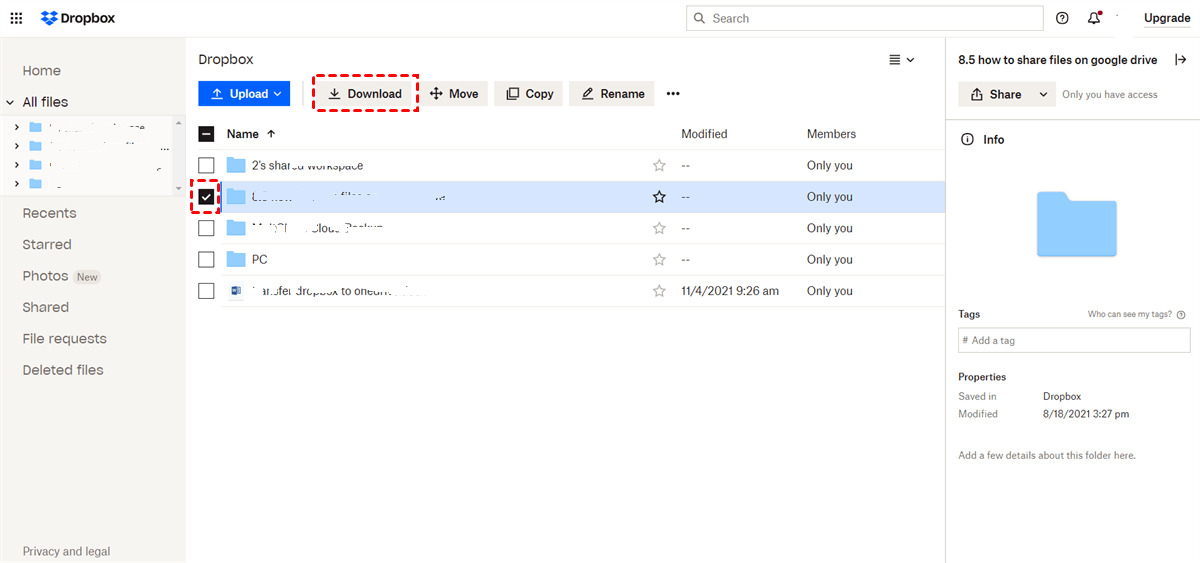
Within the Dropbox interface, you will find the “Download” button located in the toolbar or menu options at the top of the screen. Look for a downward-facing arrow icon or a button labeled “Download.”
Once you have located the “Download” button, click on it to start the download process. Dropbox will then prepare the selected photos for download and may prompt you to confirm your action or specify any additional preferences.
If you are using the Dropbox desktop app on your computer, you may notice that the download process begins automatically once you click the “Download” button. The app will save the photos to the default download location on your computer or the location you have specified in your app settings.
It’s worth noting that the time taken to download the photos will depend on various factors, such as the file sizes, your internet connection speed, and the number of photos being downloaded. Larger files or a slower internet connection may result in a longer download time.
While the download is in progress, you may see a progress indicator or a download status displayed on the screen. This indicator will provide information on the current download speed, estimated time remaining, or the total size of the files being downloaded.
It’s important to ensure that you have a stable internet connection throughout the download process. Interrupting the download, such as by closing the browser or the Dropbox app, may result in an incomplete download or the need to restart the process.
Once the download is complete, you will have successfully saved the selected photos from your Dropbox account to your device.
In the next step, we will guide you on how to choose a suitable location on your device to save the downloaded photos.
Step 5: Choose a location to save the photos on your device
After downloading the photos from your Dropbox account, the next step is to choose a suitable location on your device to save them. By selecting the right location, you can easily access and organize your downloaded photos for future use.
When the download is complete, your browser or the Dropbox app may prompt you to choose a location for saving the downloaded photos. In most cases, a default download location, such as the “Downloads” folder on your computer, is selected. However, depending on your settings, you may have the option to specify a different location.
If you wish to save the photos to the default download location, you can simply proceed with the prompt by clicking on the “Save” or “Continue” button. The photos will be saved in the designated folder without any further action required from you.
On the other hand, if you want to choose a different location for saving the photos, you can click on the “Browse” or “Choose Folder” button in the download prompt. This will open a file browser window on your device, allowing you to navigate to the desired location.
Once the file browser window is open, you can browse through your device’s file system to locate the folder where you want to save the photos. If the desired folder is not readily accessible, you can navigate through the folder structure by opening each directory until you reach the desired location.
Once you have found the appropriate folder, simply select it and click on the “Save” or “Open” button in the file browser window. This action will save the downloaded photos to the chosen location on your device.
It’s important to choose a location that is easily accessible and organized for your convenience. Consider creating a dedicated folder or subfolder specifically for storing downloaded photos. This will help you keep them separate from other files and make it easier to locate and manage them in the future.
Now that you have successfully chosen a location to save the downloaded photos, let’s move on to the next step and wait for the download process to complete.
Step 6: Wait for the download to complete
Once you have chosen a location to save the photos on your device, the next step is to patiently wait for the download process to complete. The time it takes to download the photos will depend on factors such as the size of the files and the speed of your internet connection.
During this step, it is important to refrain from interrupting the download process. Avoid closing the browser tab or the Dropbox app, as doing so may result in an incomplete download or the need to restart the process.
While the download is in progress, you may see a progress bar, a download indicator, or a status message on your screen. This will provide you with information about the current download speed, the remaining time, or the total size of the files being downloaded.
If you are using the Dropbox desktop app, you may notice that the photos are being saved directly to your specified location in the background. You can continue using your computer or device as usual while the download is ongoing.
It is also good practice to ensure that you have a stable internet connection during the download process. A stable connection will help prevent any interruptions or delays that could hinder the progress of the download.
While you are waiting for the download to complete, you can take this time to organize your files or prepare the destination folder for the downloaded photos. Create appropriate subfolders, rename files if necessary, or delete any unwanted files to keep your photo collection organized and clutter-free.
Once the download is finished, you will have all the selected photos saved to your chosen location on your device. Now, you can access and enjoy your downloaded photos whenever you want.
In the next step, we will guide you on how to access your downloaded photos and ensure a smooth transition from the downloading process.
Step 7: Access your downloaded photos
After the download process is complete, the final step is to access and view the photos you have downloaded to your device. By successfully accessing your downloaded photos, you can enjoy and utilize them for various purposes, such as editing, sharing, or organizing.
Open the file explorer or the file manager on your device, depending on the operating system you are using. Navigate to the location where you saved the downloaded photos. If you saved them to the default download location, you can usually find them in the “Downloads” folder.
Once you have located the folder containing the downloaded photos, you can simply double-click on any photo to open and view it. The default photo viewer or image viewer on your device will be launched, allowing you to see the photo in its full size and quality.
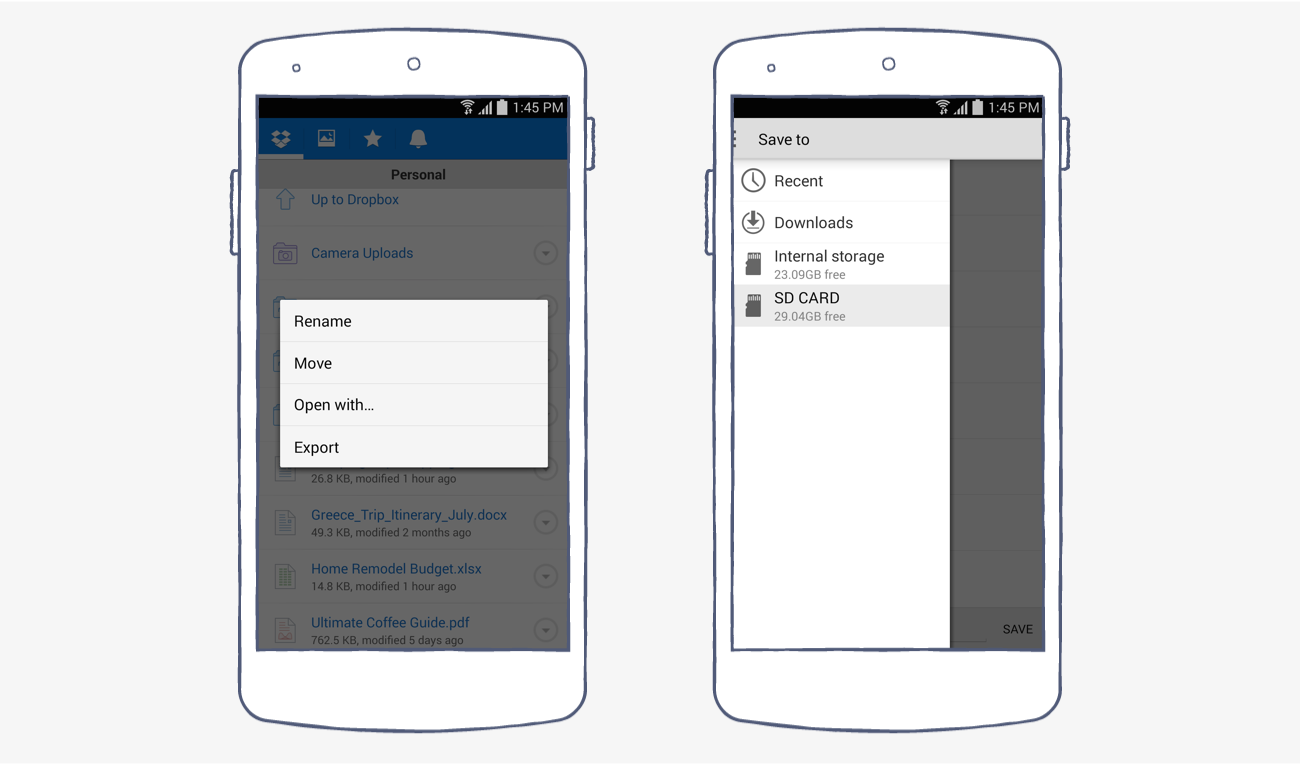
If you prefer to use a specific photo editing software or application, you can right-click on a photo and select “Open With” to choose your preferred program. This will open the photo in the selected editing software, enabling you to make any desired modifications or enhancements.
To share the downloaded photos with others, you can either attach them to an email, upload them to a cloud storage service, or share them through a messaging app or social media platform. Most file sharing methods allow you to select multiple photos simultaneously for convenience.
If you find that the downloaded photos are not organized in a way that suits your preferences, you can create new folders or move them to existing folders within your device’s file explorer or file manager. This will help you keep your photos organized and easily accessible for future use.
It’s important to back up your downloaded photos to an external storage device or a cloud storage service to ensure their safety and prevent any potential data loss. Consider regularly creating backups as a precautionary measure.
By following these steps, you have successfully accessed your downloaded photos from Dropbox. Now you can enjoy, edit, share, and organize your photo collection however you like.
With your photos safely stored on your device, you can explore various creative possibilities and treasure your memories for years to come.