Introduction
Welcome to the digital age where music is easily accessible with just a few clicks. The rise of peer-to-peer file sharing networks has revolutionized the way we consume music. One such popular platform is uTorrent, a lightweight and feature-packed BitTorrent client that allows users to download and share files effortlessly. In this guide, we will walk you through the process of using uTorrent to download music, enabling you to build your digital music library.
With uTorrent, you can download music from a wide range of genres, artists, and albums directly to your computer. Whether you’re a fan of pop, rock, hip-hop, or classical music, uTorrent provides a vast selection for you to explore and enjoy.
Before we delve into the specifics of how to download music with uTorrent, it’s important to note that downloading copyrighted material without proper authorization is illegal in many countries. This guide is intended for educational purposes only, and we encourage you to respect copyright laws and support artists by purchasing their music legally.
Now that the disclaimer is out of the way, let’s get started on our journey to discover how to use uTorrent for music downloads. By the end of this article, you’ll have a solid understanding of the steps involved in finding and downloading music using uTorrent, as well as tips for troubleshooting common issues along the way.
What is uTorrent?
uTorrent is a popular BitTorrent client that allows users to download and share files on the internet. It is a lightweight and efficient software that offers a multitude of features tailored for fast and seamless downloading experiences.
Developed by BitTorrent Inc., uTorrent is available for Windows, Mac, and Linux operating systems, making it accessible to a wide range of users. Its small file size and minimal system requirements make it an ideal choice for those seeking a lightweight torrent client without sacrificing functionality.
One of the key advantages of uTorrent is its ability to handle large file transfers with ease. It uses a peer-to-peer (P2P) file sharing protocol called BitTorrent, which allows users to download and upload files simultaneously while leveraging the collective bandwidth of other users downloading the same file.
Using uTorrent, you can not only download music but also movies, TV shows, software, games, and more. The software provides a user-friendly interface that makes it easy to search for torrents, manage downloads, and monitor overall download progress. Additionally, uTorrent offers advanced features such as bandwidth control, scheduling, and RSS feed subscriptions, allowing you to customize your download preferences and optimize your internet usage.
While uTorrent is free to download and use, it does offer a premium version called uTorrent Plus, which provides additional features such as antivirus protection, HD media player, and device conversion for seamless playback on various devices.
It’s important to note that uTorrent itself is legal to use. However, it’s essential to exercise caution when downloading files, as downloading copyrighted material without permission is illegal in many jurisdictions. Always ensure that you are downloading or sharing files that are in compliance with copyright laws and respect the intellectual work of others.
In the next section, we will guide you through the process of downloading and installing uTorrent on your computer, so you can begin your music downloading journey.
Step 1: Downloading uTorrent
Before you can start using uTorrent to download music, you’ll need to download the uTorrent software itself. Follow the steps below to get started:
- Visit the official uTorrent website. Open your preferred web browser and navigate to the uTorrent website. You can do this by typing “uTorrent” in your search engine or by directly entering “www.utorrent.com” in the address bar.
- Locate the download page. Once you’re on the uTorrent website, look for the “Download” button or tab. Click on it to proceed.
- Select the appropriate version. uTorrent offers different versions for Windows, Mac, and Linux. Make sure to choose the version that matches your operating system. Click on the corresponding download link to initiate the download.
- Wait for the download to complete. The uTorrent installer will be downloaded to your computer. The time it takes to download will depend on your internet connection speed.
- Save the installation file. Once the download is complete, you’ll be prompted to save the uTorrent installation file. Choose a location on your computer where you want to save the file and click “Save”.
Congratulations! You have successfully downloaded the uTorrent software onto your computer. In the next section, we’ll guide you through the process of installing uTorrent so you can start using it for music downloads.
Step 2: Installing uTorrent
Now that you have downloaded the uTorrent installation file, it’s time to install the software on your computer. Follow the steps below to complete the installation process:
- Locate the uTorrent installation file. Navigate to the location on your computer where you saved the uTorrent installation file in the previous step.
- Double-click the installation file. The uTorrent installer should have a filename with the extension “.exe” on Windows or “.dmg” on Mac. Double-click on the file to begin the installation process.
- Review the license agreement. Before proceeding with the installation, you will be presented with a license agreement. Take the time to read through it and click on the “I Agree” or “Accept” button to continue.
- Select the installation options. During the installation process, you may be presented with various options such as choosing the installation location and shortcut preferences. You can typically leave these settings at their default values unless you have specific preferences.
- Start the installation. Once you have reviewed and adjusted the installation options, click on the “Install” or “Next” button to begin the installation process.
- Wait for the installation to complete. The installation process may take a few moments to complete, depending on your computer’s speed. Avoid interrupting the installation process and wait for it to finish.
- Launch uTorrent. After the installation is complete, you will see a notification indicating the successful installation of uTorrent. Check the option to launch uTorrent immediately and click on the “Finish” or “Close” button.
Great job! You have successfully installed uTorrent on your computer. In the next section, we will guide you through the process of configuring uTorrent settings to optimize your music downloading experience.
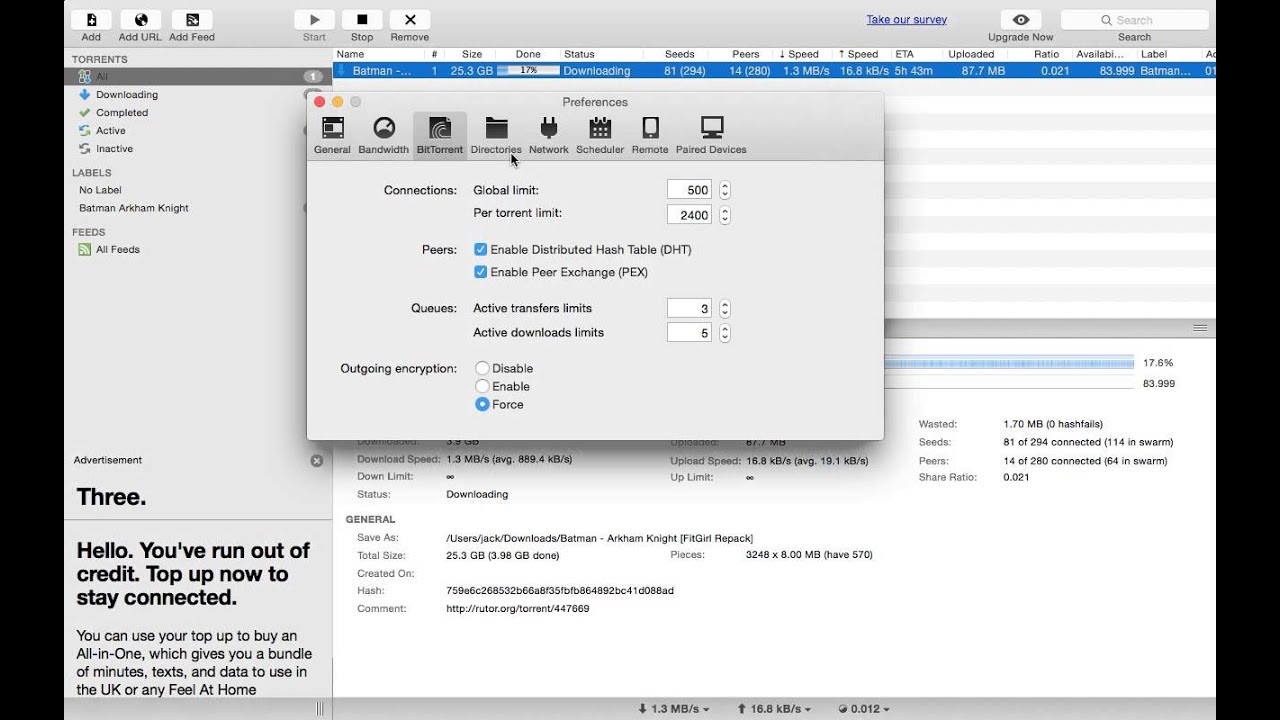
Step 3: Configuring uTorrent settings
Now that you have installed uTorrent, it’s important to configure the settings to ensure optimal performance and smooth music downloading. Follow the steps below to configure uTorrent settings:
- Open uTorrent. Locate the uTorrent icon on your desktop or in your list of installed programs and double-click on it to open the application.
- Access the options menu. Look for the “Options” or “Preferences” tab at the top of the uTorrent window and click on it to access the settings menu.
- Adjust general settings. In the settings menu, you’ll find various options to customize uTorrent. Start by reviewing the general settings such as language preferences, startup behavior, and notifications. Adjust these settings according to your preferences.
- Configure bandwidth settings. The bandwidth settings control how much of your internet connection uTorrent can utilize. Set the maximum upload and download rates to values that will not impact your overall internet experience negatively. Keep in mind that upload bandwidth is crucial for maintaining a good sharing ratio on torrent platforms.
- Choose download location. Specify the default download location for your music files. You can choose a specific folder on your computer where all your downloaded music will be saved.
- Enable automatic startup. If you want uTorrent to start automatically when your computer boots up, navigate to the “General” or “Startup” settings and check the option to enable automatic startup.
- Save your settings. Once you have configured the desired settings, click on the “Apply” or “Save” button to save the changes.
By configuring uTorrent settings according to your preferences, you can ensure a seamless and personalized music downloading experience. In the next section, we will discuss how to search for music torrents using uTorrent.
Step 4: Searching for music torrents
Now that you have uTorrent configured, it’s time to start searching for music torrents. A torrent is a small file that contains information about the files and folders being shared. Follow the steps below to search for music torrents:
- Open uTorrent. Locate the uTorrent icon on your desktop or in your list of installed programs and double-click on it to open the application.
- Access the built-in search feature. In uTorrent, you have the option to search for torrents directly within the software. Look for the search bar or the magnifying glass icon, usually located in the top-right corner of the uTorrent window.
- Enter your search query. In the search bar, enter keywords related to the music you want to download. For example, you can search for the name of an artist, album, or specific song.
- Refine your search. If you get too many results or want to narrow down your search, you can use filters such as category, size, quality, or seeders (users who already downloaded the file and are sharing it).
- Choose a torrent. Browse through the search results and select a torrent that matches your preferences. Look for torrents with a good number of seeders and positive user comments to ensure a reliable and high-quality download.
- Preview the torrent details. Before starting the download, it’s recommended to preview the torrent details to ensure it meets your expectations. This can include checking the file format, bitrate, or any additional information provided by the torrent uploader.
- Start the download. Once you’ve found the desired torrent, click on the download button or the magnet icon next to it. uTorrent will automatically start downloading the music files to your specified location.
Remember, when downloading music torrents, it’s essential to respect copyright laws and only download files that you have the rights to or that are legally available for sharing. In the next section, we will explore the process of downloading music with uTorrent.
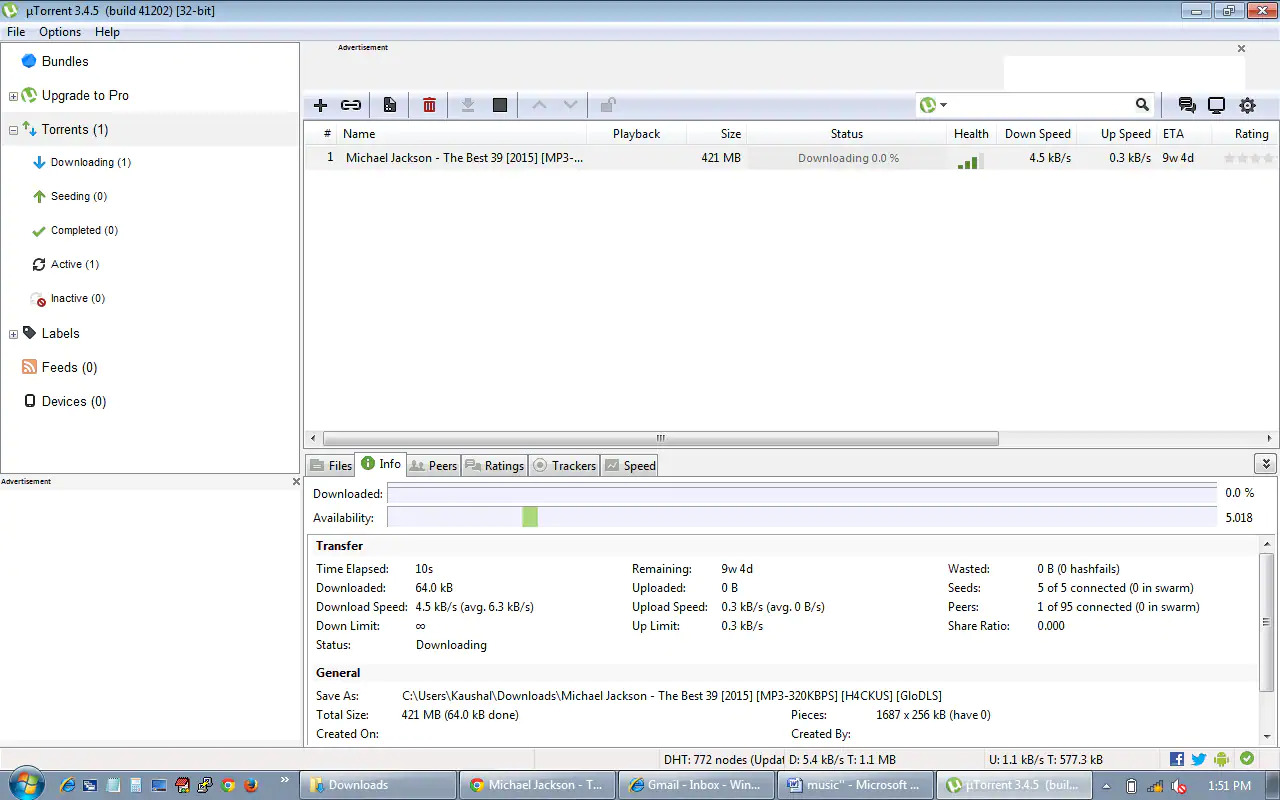
Step 5: Downloading music with uTorrent
Now that you’ve found the music torrent you want to download, it’s time to start the actual downloading process. Follow the steps below to download music with uTorrent:
- Open uTorrent. Locate the uTorrent icon on your desktop or in your list of installed programs and double-click on it to open the application.
- Access the torrenting tab. In uTorrent, navigate to the “Torrents” or “Downloads” tab. Here, you will find a list of all the torrents you have downloaded or are currently downloading.
- Add the torrent file. There are two ways to add the torrent file to uTorrent:
- Click on the “Add Torrent” or “Open Torrent” button, then browse your computer to find the downloaded torrent file.
- If you used the magnet link to initiate the download, simply click on the magnet icon in uTorrent, and it will automatically start downloading.
- Monitor the download progress. Once the torrent is added, uTorrent will begin downloading the music files. You can monitor the progress of the download in the uTorrent interface, where you’ll find information such as download speed, number of seeders, and estimated time remaining.
- Manage your downloads. In uTorrent, you have the option to prioritize certain files within a torrent and choose the specific files you want to download. You can access these options by right-clicking on the torrent and selecting “Properties” or “Set Download Location”.
- Leave uTorrent running. For uninterrupted downloads, it’s recommended to keep uTorrent running while the files are downloading. This allows uTorrent to continue seeding the downloaded files, contributing to the overall health of the torrent network.
- Play your music. Once the downloaded music files are complete, you can navigate to the specified download location on your computer and start enjoying your music collection.
Remember to consider the legal implications of downloading copyrighted material without proper authorization. Ensure that you are downloading music files that are legal and in compliance with copyright laws. In the next section, we will discuss how to manage and organize your downloaded music files effectively.
Step 6: Managing downloaded music files
Now that you have successfully downloaded music with uTorrent, it’s important to organize and manage your music files effectively. Follow the steps below to manage your downloaded music files:
- Locate your downloaded music. By default, uTorrent saves downloaded files in the specified download location on your computer. Navigate to this location to find your downloaded music files.
- Organize your files. To keep your music collection organized, consider creating folders based on genres, artists, or albums. You can do this by right-clicking and selecting “New Folder” to create a new directory for each category.
- Update music metadata. It’s common for downloaded music files to have incomplete or incorrect metadata such as song titles or artist names. To ensure your music library is properly organized, use software like iTunes or a dedicated music file tagging tool to update the metadata of your music files.
- Backup your music files. It’s always a good idea to create regular backups of your downloaded music files. Consider using external hard drives, cloud storage services, or dedicated backup software to keep your music collection safe and accessible even if you experience data loss or hardware failure.
- Sort and categorize. If you have a vast music collection, consider creating playlists or using music management software to sort and categorize your music. This will make it easier to find specific songs or create customized playlists for different occasions.
- Clean up unused files. Periodically review your music library and delete any duplicate or unused files. This will help to free up storage space and keep your music collection streamlined.
- Keep your music library updated. As you continue to download music, remember to keep your library up to date by periodically searching for new music torrents and adding them to uTorrent for download.
By effectively managing your downloaded music files, you can create a well-organized and easily accessible music library. In the next section, we’ll discuss common troubleshooting tips for overcoming issues that may arise while using uTorrent.
Step 7: Troubleshooting common issues
While uTorrent is a reliable and user-friendly software for downloading music, you may encounter some common issues along the way. Here are a few troubleshooting tips to help you overcome these issues:
- Slow download speeds: If you’re experiencing slow download speeds, try the following steps:
- Check your internet connection to ensure it’s stable and working properly.
- Adjust the bandwidth settings in uTorrent to allow for faster download speeds.
- Verify that you have enough seeders for the torrent you’re downloading. Higher seeder counts generally result in faster downloads.
- Stalled downloads: If your downloads are stuck or stalled, try these troubleshooting steps:
- Ensure that you have enough free space on your computer’s hard drive to accommodate the downloaded files.
- Check the availability of the torrent. If there are no seeders or leechers, the download may not progress.
- Restart uTorrent and verify that you have a stable internet connection.
- Torrent not starting: If your downloaded torrent is not starting, try the following solutions:
- Check if the torrent file or magnet link is valid and not corrupted.
- Ensure that your firewall or antivirus software is not blocking uTorrent’s access to the internet.
- Restart uTorrent and try adding the torrent file again.
- High CPU or memory usage: If uTorrent is causing high CPU or memory usage on your computer, consider these troubleshooting steps:
- Limit the maximum number of active torrents or downloads in uTorrent’s settings.
- Reduce the number of active connections in uTorrent’s preferences.
- Close any other resource-intensive programs running on your computer.
- Legal issues: If you encounter legal issues related to downloaded files, it’s important to seek legal advice specific to your jurisdiction. Be mindful of copyright laws and ensure you are downloading and sharing files that are legal and authorized.
By implementing these troubleshooting tips, you can overcome common issues that may arise while using uTorrent. Remember to always use uTorrent responsibly and respect the rights of copyright holders. Now that you have a good understanding of how to use uTorrent to download music and overcome potential issues, you’re ready to embark on your music downloading journey.
Conclusion
Downloading music with uTorrent can be an exciting and convenient way to build your digital music library. By following the steps outlined in this guide, you have learned how to download and install uTorrent, configure its settings, search for music torrents, and manage your downloaded music files. Additionally, you have gained valuable insights into troubleshooting common issues that may arise during the downloading process.
While uTorrent provides a seamless and efficient platform for music downloads, it is essential to approach the process responsibly and legally. Respect copyright laws and ensure that the files you download are authorized for sharing or that you have the necessary rights to download them. Supporting artists and the music industry by purchasing legally licensed music is not only the ethical choice but also allows them to continue creating the music we love.
Now that you have the knowledge and tools to download music with uTorrent, immerse yourself in the world of music. Explore different genres, discover new artists, and create playlists that resonate with your taste. Remember to keep your downloaded music organized, backup your files regularly, and stay updated with new releases to grow your music collection.
Enjoy the journey of building your music library with uTorrent and let the power of music accompany you wherever you go.