Introduction
Are you a proud owner of a PSP (PlayStation Portable) and looking to download free music to enjoy on the go? Look no further! In this guide, we will walk you through the step-by-step process of how to download free music to your PSP so that you can have your favorite tunes anytime, anywhere.
The PSP is not only a powerful handheld gaming device, but it also doubles as a portable media player, allowing you to listen to music on the go. While there are many online platforms where you can purchase and download music for your PSP, there are also plenty of websites that offer free music downloads.
Downloading free music to your PSP can be a great way to discover new songs and artists without breaking the bank. Whether you’re a fan of pop, rock, hip-hop, or any other genre, you’ll find a vast library of free music available for download.
However, it’s important to note that not all websites offering free music downloads are legal or safe. Some may infringe on copyright laws or contain malware that can harm your PSP. In this guide, we will only focus on safe and legitimate methods to download free music to your PSP.
Before we begin, there are a few things you’ll need to ensure a smooth and successful music download process. First and foremost, you’ll need a computer with a reliable internet connection. Additionally, you’ll need a USB cable to connect your PSP to the computer. Make sure you have enough storage space on your PSP to accommodate the music files, and it’s always a good idea to have a fully charged battery before starting the download process.
Now that you have the necessary tools and precautions in place, let’s dive into the step-by-step guide on how to download free music to your PSP. By the end of this guide, you’ll be enjoying your favorite tunes on your PSP in no time!
Step 1: Get the Necessary Tools
Before you can start downloading free music to your PSP, you’ll need to gather the necessary tools for the task. Here’s what you’ll need:
1. Computer: Ensure that you have a computer with a stable internet connection. This will be used to connect to the websites from where you’ll be downloading the music files.
2. USB Cable: Grab a USB cable that is compatible with your PSP. This cable will be used to establish a connection between your PSP and the computer. If you don’t have a USB cable, you can purchase one online or at a local electronics store.
3. PSP with Sufficient Storage: Make sure your PSP has enough storage space to accommodate the music files you’ll be downloading. It’s a good idea to free up some space by deleting any unnecessary files or games from your PSP before starting the download process.
4. Fully Charged PSP Battery: It’s important to have a fully charged battery on your PSP to prevent any interruptions during the download process. If your battery is low, connect your PSP to its charger and wait for it to charge before proceeding.
5. Internet Security Software: To ensure a safe and secure download experience, it’s recommended to have up-to-date internet security software installed on your computer. This will help protect your computer from potential malware or viruses.
Once you have gathered all the necessary tools, you’re ready to move on to the next step: connecting your PSP to your computer. Make sure all the required tools are easily accessible before proceeding.
By obtaining these tools, you’ve taken the first step towards downloading free music to your PSP. Now, let’s move on to the next step and establish a connection between your PSP and computer to get ready for the music download process.
Step 2: Connect Your PSP to Your Computer
With your necessary tools in hand, it’s time to connect your PSP to your computer. This step will allow you to transfer the downloaded music files from your computer to your PSP. Here’s how to do it:
1. Power off Your PSP: Before connecting your PSP to your computer, make sure it is powered off. This will prevent any potential data loss or errors during the connection process.
2. Locate the USB Port: Take your USB cable and locate the USB port on your PSP. The USB port is typically found at the top or bottom of the device, depending on the model. Insert one end of the USB cable into the USB port on your PSP.
3. Connect the USB Cable to Your Computer: Take the other end of the USB cable and connect it to an available USB port on your computer. Make sure the connection is secure.
4. Turn on Your PSP: Once the USB cable is connected to both your PSP and computer, power on your PSP. This will initiate the connection between your devices.
5. Select USB Connection Mode: On your PSP, navigate to the Settings menu and look for the “USB Connection” option. Select it to activate the USB connection mode on your PSP. This will allow your computer to recognize your PSP as an external storage device.
6. Confirm Connection on Your Computer: After selecting the USB connection mode on your PSP, your computer should detect your PSP as a connected device. Depending on your computer’s operating system, a pop-up window or notification may appear, indicating that a new device has been connected.
7. Access Your PSP on Your Computer: Open the file explorer or file manager on your computer and navigate to the section where external devices are displayed. You should see your PSP listed as a connected device. Click on it to access the contents of your PSP.
8. Create a Music Folder: If you don’t already have a folder dedicated to music on your PSP, create one now. Right-click inside the PSP window on your computer and select “New Folder.” Name the folder “Music” or any other name you prefer.
By successfully connecting your PSP to your computer, you’re now ready to transfer the downloaded music files to your PSP. In the next step, we’ll explore how to locate and download free music files for your PSP.
Step 3: Locate the Music Files to Download
Now that your PSP is connected to your computer, it’s time to find and download the music files that you want to transfer to your PSP. Here’s how to locate the music files for download:
1. Search for Trusted Websites: Start by searching for websites that offer free and legal music downloads. Look for reputable websites that have a wide range of music genres and ensure that they comply with copyright laws. Some popular websites that offer free music downloads include SoundCloud, Jamendo, and Free Music Archive.
2. Select the Music Genre: Once you’ve found a trusted website, explore the different music genres available. Choose the genre that suits your preferences and click on it to browse through the available songs.
3. Browse the Song Collection: Within the selected genre, you’ll find a collection of songs. Take your time to browse through the available options and listen to song samples if they are provided. This will help you narrow down your choices and find the songs that resonate with you.
4. Check for Download Options: Look for a download button or a similar option next to each song. Click on it to initiate the download process. Some websites may also offer the option to download an entire album or playlist.
5. Verify File Format and Compatibility: Before downloading the music files, make sure they are in a compatible format for your PSP. The preferred format for PSP music is MP3. Check the website or song details to ensure that the files are in this format. If not, you may need to convert the files using a reliable audio converter tool.
6. Save the Music Files: Choose a location on your computer where you want to save the downloaded music files. It’s a good practice to create a separate folder on your computer to keep all the downloaded music files organized.
7. Download the Music Files: Once you have selected the desired songs and confirmed their compatibility, click on the download button for each song. The music files will begin downloading and will be saved to the specified location on your computer.
By following these steps, you’ll be able to locate and download the music files that you want to transfer to your PSP. In the next step, we’ll cover how to transfer the downloaded music files from your computer to your PSP.
Step 4: Transfer Music Files to Your PSP
Now that you have successfully downloaded the music files to your computer, it’s time to transfer them to your PSP. Follow these steps to transfer the music files:
1. Open Your PSP on Your Computer: Make sure your PSP is still connected to your computer via the USB cable. Access your PSP on your computer by opening the file explorer or file manager and navigating to the section where external devices are displayed. Click on your PSP to open it.
2. Open the Music Folder: Within your PSP, locate the folder named “Music” or the folder where you want to store the music files. Double-click on the folder to open it.
3. Select and Copy the Music Files: On your computer, navigate to the folder where you saved the downloaded music files. Select the desired music files by holding down the Ctrl (Windows) or Command (Mac) key while clicking on each file. Right-click on the selected files and choose “Copy” from the context menu.
4. Paste the Music Files onto Your PSP: Return to the open Music folder on your PSP. Right-click inside the folder and choose “Paste” from the context menu. The music files will be transferred from your computer to your PSP.
5. Wait for the Transfer to Complete: Depending on the size of the music files and the transfer speed, it may take a few moments for the transfer to complete. Ensure that all the files have been successfully copied to your PSP before proceeding.
6. Safely Disconnect Your PSP: Once the transfer is complete, safely disconnect your PSP from your computer. On your computer, find the “Eject” or “Safely Remove Hardware” option. Click on it and select your PSP to safely disconnect it from your computer.
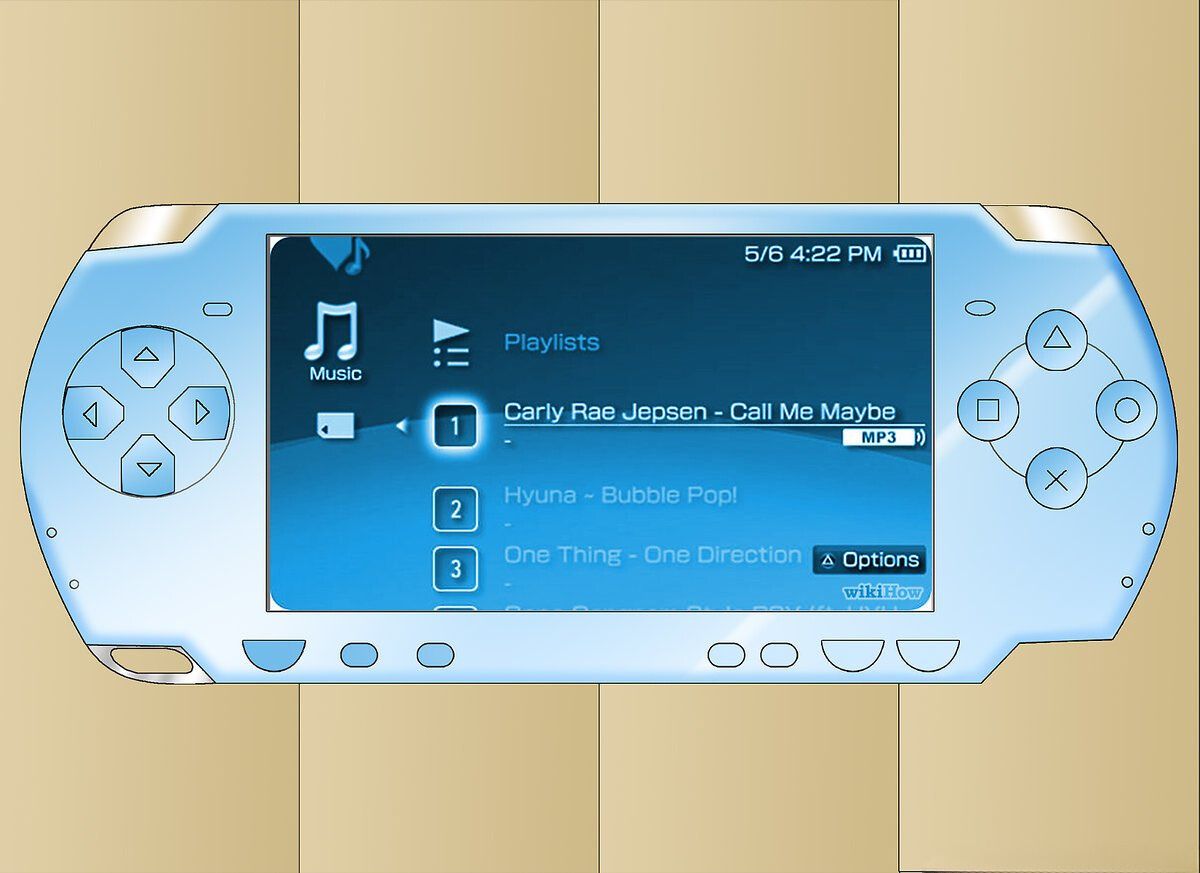
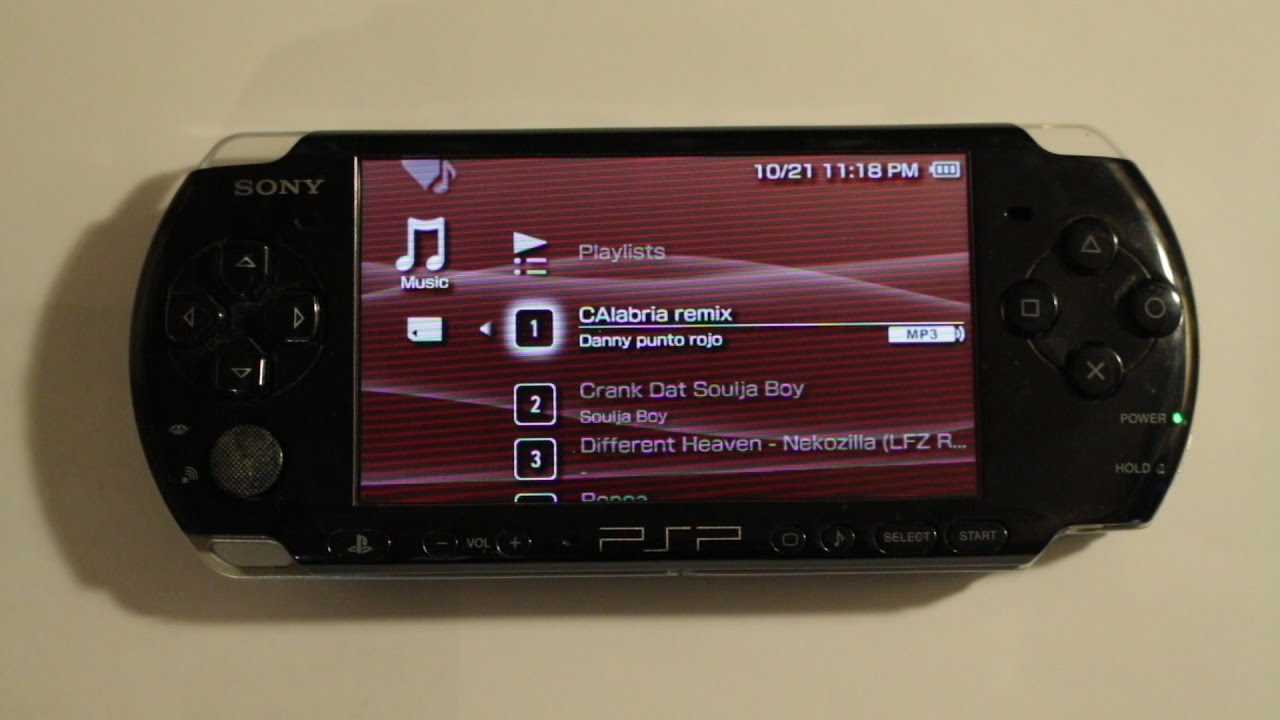
7. Check the Music on Your PSP: Power on your PSP and navigate to the Music section. You should see the transferred music files listed. Select a song to play and enjoy your free music on your PSP.
By following these steps, you have successfully transferred the downloaded music files from your computer to your PSP. Now, it’s time to enjoy your favorite tunes on the go with your PSP.
Step 5: Enjoy Your Free Music on Your PSP
Now that you have transferred the music files to your PSP, it’s time to sit back, relax, and enjoy your favorite tunes on your portable gaming device. Here’s how to make the most of your free music on your PSP:
1. Organize Your Music: Take some time to organize your music files on your PSP. Create playlists based on genres, moods, or any other criteria that suit your preferences. This will make it easier to navigate and find the songs you want to listen to.
2. Customize Your Music Settings: Explore the music settings on your PSP and customize them according to your preferences. Adjust the equalizer settings, choose the desired playback mode (shuffle, repeat, etc.), and set the volume level to your liking.
3. Create a Music Library: Keep adding new music files to your PSP to expand your music library. Continuously discover new artists and genres to keep your music collection fresh and exciting. You can revisit the websites where you downloaded the music files or explore other platforms for more free music options.
4. Use Headphones or Speakers: Enhance your music experience on your PSP by using headphones or external speakers. This will help you enjoy the music with better sound quality and immerse yourself in the melodies.
5. Share Your Music: If you have friends or family members who also own a PSP, share your favorite songs with them. You can transfer the music files to their PSP using the same method mentioned in Step 4. It’s a great way to bond over music and expand each other’s music library.
6. Explore Music Games: Many music-themed games are available for PSP. Explore the gaming section on your PSP and try out music games that allow you to play along with your favorite songs. It adds a fun and interactive element to your music experience.
7. Stay Updated with New Releases: Keep an eye out for new music releases from your favorite artists or discover up-and-coming musicians. Subscribe to music blogs or newsletters to stay informed about the latest songs and albums. This way, you’ll never miss out on new music downloads for your PSP.
With these steps, you are now fully equipped to enjoy your free music on your PSP. Take advantage of the portability and convenience of your PSP to listen to your favorite songs whenever and wherever you want.
Conclusion
Downloading free music to your PSP can be an exciting and cost-effective way to enjoy your favorite tunes on the go. By following the step-by-step guide outlined in this article, you have learned how to download free music to your PSP and transfer it from your computer. Here’s a quick recap of the steps:
- Step 1: Get the necessary tools, including a computer, USB cable, and charged PSP.
- Step 2: Connect your PSP to your computer using the USB cable.
- Step 3: Locate the music files to download from trusted websites.
- Step 4: Transfer the downloaded music files from your computer to your PSP.
- Step 5: Enjoy your free music on your PSP by organizing, customizing, and expanding your music library.
Remember to always download music from reputable websites that comply with copyright laws to ensure a safe and legal experience. Additionally, regularly update your PSP’s firmware to access new features and enhance its performance.
With your PSP loaded with free music, you can now immerse yourself in your favorite songs while traveling, exercising, or simply relaxing. Allow the melodies to transport you to another world, and let the rhythm uplift your mood.
Lastly, keep in mind that while downloading free music is an enjoyable and convenient option, supporting artists by purchasing their music is essential for the growth of the music industry. Consider supporting your favorite artists by buying their albums or attending their concerts when possible.
Now that you have all the knowledge and tools at your disposal, it’s time to embark on your music-filled journey with your PSP. Enjoy the rhythm, embrace the melody, and let the magic of music accompany you every step of the way.


