Introduction
Welcome to our guide on how to download MP3 from YouTube to iTunes! YouTube is a wonderful platform for discovering and enjoying a wide variety of music, but unfortunately, it doesn’t offer a direct option to download the audio files. If you’re an avid music lover who prefers having your favorite songs in your iTunes library, fret not! With the right tools and a few simple steps, you can easily convert and download YouTube videos to MP3 format and then import them into iTunes.
Before we dive into the step-by-step process, it’s important to note that downloading copyrighted music from YouTube for personal use may infringe upon the artist’s rights. We encourage you to only download and convert videos that are copyright-free or that you have the necessary permissions to use. Always respect the intellectual property rights of artists and creators.
Now that we’ve established the guidelines, let’s get started on how to download MP3 from YouTube to iTunes!
Throughout this guide, we’ll be using a reliable YouTube to MP3 converter to extract the audio from YouTube videos and save it as an MP3 file. Once you have the MP3 file, you can easily import it into your iTunes library and enjoy it on your iPhone, iPad, iPod, or any other Apple device connected to your iTunes account.
So, whether you want to create a playlist of your favorite songs, listen to podcasts, or simply have quick access to audio content from YouTube, this guide will walk you through the entire process. Let’s begin by finding a reliable YouTube to MP3 converter.
Step 1: Find a reliable YouTube to MP3 converter
In order to download MP3 files from YouTube, you’ll need a reliable YouTube to MP3 converter. There are numerous options available online, but it’s important to choose one that is safe, trustworthy, and provides high-quality conversions. Here are a few things to consider when finding the right converter:
1. Reputation and Reviews: Look for converters that have positive reviews and a good reputation among users. Check for feedback regarding the quality of the converted files, the speed of conversion, and any potential issues users have experienced.
2. User-Friendly Interface: Opt for a converter that offers a user-friendly interface, making it easy for you to navigate and use its features. A clean and intuitive design will enhance your overall experience and ensure a smooth conversion process.
3. Supported Platforms: Make sure the converter you choose supports your operating system, as some converters are specifically designed for Windows, Mac, or other platforms. This will ensure compatibility and seamless usage.
4. Conversion Quality: A reputable converter should provide high-quality MP3 files that preserve the audio integrity of the original video. Look for converters that offer different options for audio quality and bitrate, allowing you to customize your preferences.
5. Additional Features: Consider converters that offer additional features such as batch conversion, ID3 tag editing, and support for playlists. These features can greatly enhance your experience and save you time when converting multiple videos.
6. Safety and Security: Ensure that the converter you choose is safe to use and doesn’t pose a risk to your computer or personal information. Look for converters that are free from malware and provide a secure connection for the file conversion process.
Once you’ve considered these factors and found a reliable YouTube to MP3 converter that meets your requirements, you’re ready to move on to the next step: copying the YouTube video’s URL. Remember to exercise caution when using online converters and be mindful of copyright laws.
Step 2: Copy the YouTube video’s URL
Now that you have a reliable YouTube to MP3 converter, the next step is to copy the URL of the YouTube video that you want to convert into an MP3 file. Follow these simple steps:
1. Open YouTube and search for the video: Launch your web browser and visit YouTube’s website. Using the search bar, enter the name or keywords related to the video you wish to convert. Click on the video to open it.
2. Copy the video’s URL: Once you have the video open, go to the address bar at the top of your web browser. The URL of the video should be displayed in the address bar. Highlight the entire URL and right-click on it. From the options that appear, select “Copy” to copy the URL to your clipboard. Alternatively, you can press “Ctrl + C” on your keyboard to copy the URL.
3. Ensure you have the correct video URL: Double-check that you have copied the correct URL and that it corresponds to the specific video you want to convert. It’s crucial to copy the exact URL of the video, as any discrepancies may lead to converting the wrong video or encountering errors during the conversion process.
4. Store the copied URL safely: It’s a good practice to store the copied URL in a safe place, such as a text document or note-taking app, to easily access it when required. This way, you can quickly retrieve the URL without having to search for the video again, saving you time and effort.
With the YouTube video URL copied and securely stored, you’re now ready to move on to the next step: converting the video to MP3 format using your chosen YouTube to MP3 converter.
Step 3: Convert the video to MP3 format
Now that you have the YouTube video’s URL copied, it’s time to convert it into MP3 format using the YouTube to MP3 converter you’ve chosen. Follow these steps to convert the video:
1. Open the YouTube to MP3 converter: Launch your web browser and go to the website of the YouTube to MP3 converter you’ve selected. Most converters have a user-friendly interface and provide a clear way to initiate the conversion process.
2. Paste the copied video URL into the converter: Look for the designated input field on the converter’s website. Right-click on the input field and select “Paste” or use the “Ctrl + V” shortcut to paste the YouTube video URL from your clipboard. Ensure that you are pasting the correct URL before proceeding to the next step.
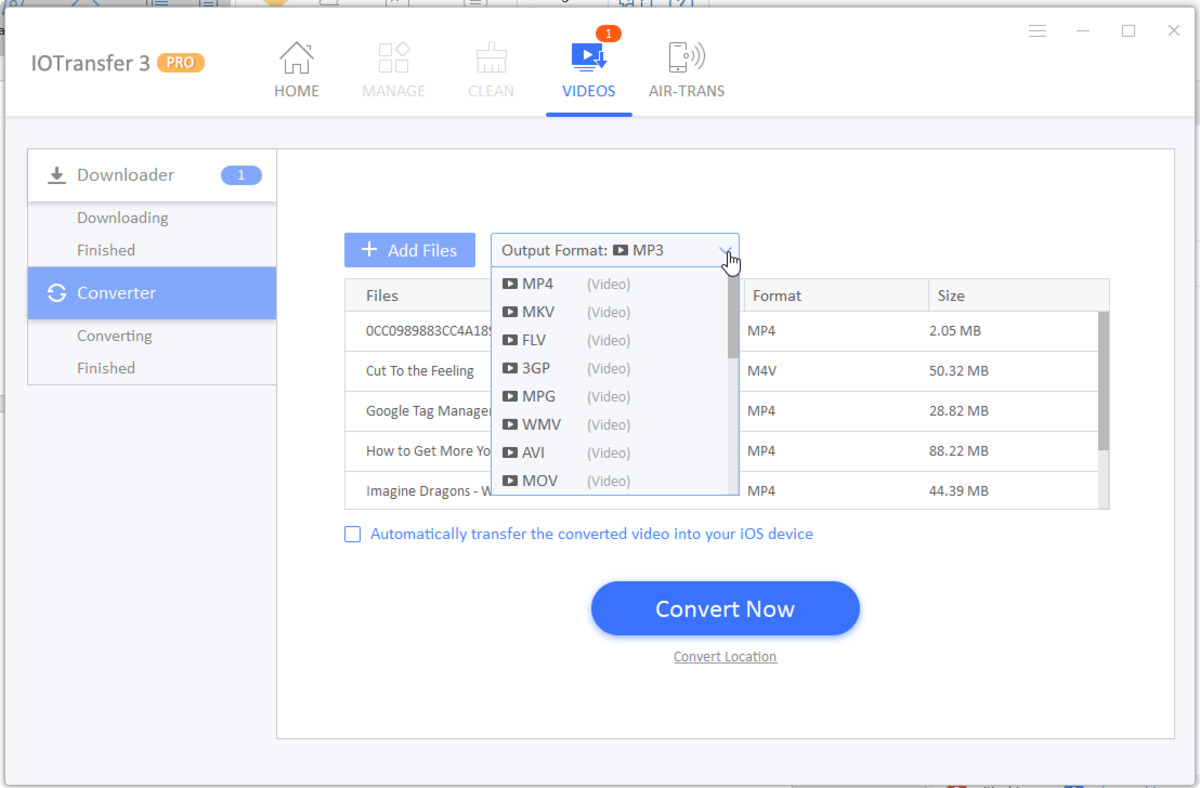
3. Choose the MP3 format and quality: In the converter, you’ll find options to select the desired format for the conversion. Choose MP3 as the output format and select the preferred quality for your MP3 file. Some converters offer various bitrate options, allowing you to balance file size and audio quality according to your preferences.
4. Initiate the conversion process: Once you have selected the MP3 format and quality, look for a button or option to start the conversion process. It may be labeled as “Convert,” “Start,” or something similar. Click on this button to initiate the conversion.
5. Wait for the conversion to complete: The time taken to convert the video to MP3 format depends on the length and quality of the original video, as well as the performance of the converter. During the conversion process, the converter will extract the audio from the video and save it as an MP3 file. Be patient and wait for the conversion to complete.
6. Download the converted MP3 file: Once the conversion is finished, the converter will provide a download link for the converted MP3 file. Look for a button or link labeled “Download” or similar. Click on it to start the download process. Depending on your web browser settings, you may need to specify a location on your computer to save the MP3 file.
With the YouTube video successfully converted to MP3 format, you’re now ready to proceed to the next step: downloading the MP3 file to your computer.
Step 4: Download the MP3 file to your computer
After converting the YouTube video to MP3 format, the next step is to download the MP3 file to your computer. Follow these straightforward steps to complete the download:
1. Locate the download link: Once the conversion process is complete, the YouTube to MP3 converter will provide a download link or button for the MP3 file. Look for a clearly labeled button or a clickable link that indicates “Download MP3” or a similar phrase.
2. Click on the download link: When you find the download link, simply click on it to start the downloading process. Depending on your web browser settings, the MP3 file may automatically start downloading, or a prompt will appear asking you to confirm the download.
3. Choose a location to save the MP3 file: After clicking the download link, your web browser will prompt you to choose a location on your computer to save the MP3 file. Select a folder or location that is easily accessible and where you can find the file later. You can choose the default “Downloads” folder or create a specific folder for your downloaded MP3 files.
4. Monitor the download progress: Once you have selected the download location, keep an eye on the download progress. Your web browser will display a progress bar or notification to indicate the download status. Allow the download to complete fully before proceeding to the next step.
5. Verify the downloaded MP3 file: After the download is complete, navigate to the chosen download location on your computer. Locate the MP3 file and verify that it has been downloaded successfully. You can check the file size, duration, and file format to ensure that it matches your expectations.
6. Rename the MP3 file if necessary: If you want to make the file easier to identify or organize, you can rename the downloaded MP3 file. Right-click on the file, select “Rename,” and enter a new name that reflects the song title, artist, or any other relevant information.
Now that you have successfully downloaded the MP3 file to your computer, you’re ready for the next step: importing the MP3 file into iTunes.
Step 5: Import the MP3 file into iTunes
With the downloaded MP3 file in hand, it’s time to import it into iTunes so you can easily access and listen to it on your Apple devices. Follow these steps to import the MP3 file into iTunes:
1. Open iTunes: Launch the iTunes application on your computer. If you don’t have iTunes installed, you can download it for free from the Apple website.
2. Navigate to the “Library” section: In the iTunes interface, select the “Library” tab. This will give you access to your iTunes library where all your music files are stored.
3. Click on “File” and select “Add File to Library”: In the top left corner of the iTunes window, click on the “File” option. From the drop-down menu, select “Add File to Library.” This will open a file explorer window.
4. Locate and select the downloaded MP3 file: Using the file explorer window, navigate to the folder or location where you saved the downloaded MP3 file. Select the MP3 file and click “Open” to import it into iTunes. Alternatively, you can drag and drop the MP3 file directly into the iTunes library window.
5. Wait for the MP3 file to import: iTunes will automatically import the MP3 file into the library. The time required for the import process will depend on the file size and the performance of your computer. Be patient and wait for the import to complete.
6. Verify the imported MP3 file: Once the import is complete, you should see the imported MP3 file in your iTunes library. To ensure that the file has been successfully imported, you can search for it by title, artist, or any other identifying information. Play a few seconds of the file to ensure that it plays correctly.
7. Add metadata (optional): If your MP3 file is missing metadata such as the song title, artist name, or album information, you can manually add or edit these details in iTunes. Right-click on the imported MP3 file, select “Get Info,” and fill in the appropriate details in the “Info” tab.
By following these steps, you have successfully imported the MP3 file into iTunes. You can now enjoy your favorite music or audio content on your iPhone, iPad, iPod, or any other Apple device connected to your iTunes library. The next and final step is to sync your iTunes library with your Apple device.
Step 6: Sync your iTunes library with your iPhone or other Apple devices
After successfully importing the MP3 file into iTunes, the final step is to sync your iTunes library with your iPhone or other Apple devices. Follow these steps to sync your iTunes library:
1. Connect your device to your computer: Use the USB cable that came with your iPhone or other Apple device to connect it to your computer. Ensure that both ends of the cable are securely plugged in.
2. Open iTunes: If iTunes isn’t already open, launch the application on your computer. It will detect your connected device and display its icon in the upper left corner of the iTunes window.
3. Select your device: Click on the device icon in the upper left corner of the iTunes window. This will take you to the device’s summary page, where you can view various options and settings.
4. Choose the “Music” tab: In the left sidebar of the device summary page, click on the “Music” tab. This will display the music syncing options for your device.
5. Select the desired syncing method: iTunes offers two options for syncing music: “Entire music library” or “Selected playlists, artists, albums, and genres.” Choose the one that suits your preferences. If you only want to sync specific songs, playlists, or artists, select the second option and choose the desired items to sync.
6. Start the sync process: Once you have selected your preferred syncing method, click on the “Apply” or “Sync” button at the bottom right corner of the iTunes window. This will initiate the syncing process between your iTunes library and your connected Apple device.
7. Wait for the sync to complete: The syncing process may take some time, depending on the amount of data being synced and the speed of your computer. Ensure that your device remains connected to your computer until the sync is complete, indicated by a progress bar on the device’s summary page.
8. Verify the MP3 file on your device: Once the sync is finished, disconnect your iPhone or other Apple device from your computer. On your device, open the Music app or the desired music player app. Search for the imported MP3 file by title, artist, or album to confirm that it has been successfully synced and is available for playback.
By following these steps, you have successfully synced your iTunes library with your iPhone or other Apple devices. Now you can enjoy your favorite music and audio content on the go!
Conclusion
Congratulations! You have successfully learned how to download MP3 files from YouTube and import them into iTunes for easy access on your Apple devices. By following the step-by-step process outlined in this guide, you can enjoy your favorite music, podcasts, or any other audio content from YouTube right in your iTunes library.
Throughout this guide, we emphasized the importance of using a reliable YouTube to MP3 converter to ensure the integrity and quality of the downloaded files. Remember to respect copyright laws and only download and convert videos that you have the necessary permissions to use.
From finding a trustworthy YouTube to MP3 converter to copying the video URL, converting the video to MP3 format, downloading the MP3 file to your computer, and finally importing it into iTunes, each step plays a vital role in the seamless integration of YouTube content into your iTunes library.
Once you have imported the MP3 files into iTunes, you can further enhance your music experience by organizing your library, creating playlists, and syncing the music with your iPhone or other Apple devices. You now have complete control over your music collection and can enjoy it anytime and anywhere.
We hope this guide has been helpful in assisting you with downloading MP3 files from YouTube and importing them into iTunes. Enjoy exploring new music, rediscovering old favorites, and creating personalized playlists for your listening pleasure!
Remember to keep your music library updated and explore other features offered by iTunes to enhance your overall music experience. Stay tuned for more guides and tips on optimizing your digital media content!


![12 BEST Music Converter to Convert Music into All Formats [MP3, MP4]](https://robots.net/wp-content/uploads/2020/03/image1-3-300x202.jpg)