Introduction
Welcome to the world of Minecraft Windows 10 Edition! If you’re an avid Minecraft player, you know that the game offers a vast and infinite landscape to explore and build in. But did you know that you can also download and play custom-made maps created by other players? These maps can take you on exciting adventures, challenge your survival skills, or showcase stunning builds and creations.
Downloading maps on Minecraft Windows 10 Edition allows you to expand your gameplay experience and discover new worlds crafted by the Minecraft community. Whether you’re looking for epic fantasy realms, intricate puzzle challenges, or realistic cityscapes, there’s a map out there to satisfy your gaming cravings.
In this article, we’ll guide you through the step-by-step process of downloading and installing maps on Minecraft Windows 10 Edition. We’ll cover everything from finding a reliable map website to importing the downloaded maps into your game. So let’s dive in and embark on a thrilling journey beyond the boundaries of the Minecraft universe!
But before we get started, make sure you have the Minecraft Windows 10 Edition installed on your computer. If you don’t have it yet, head to the Microsoft Store and grab yourself a copy. Once you’re all set, let’s move on to the first step: opening Minecraft Windows 10 Edition.
Step 1: Open Minecraft Windows 10 Edition
The first step in downloading maps on Minecraft Windows 10 Edition is to open the game itself. Launch Minecraft Windows 10 Edition by locating it in your list of installed applications or by searching for it in the Start menu.
Once you find the Minecraft Windows 10 Edition icon, click on it to open the game. It may take a few moments to load, depending on your computer’s speed and performance.
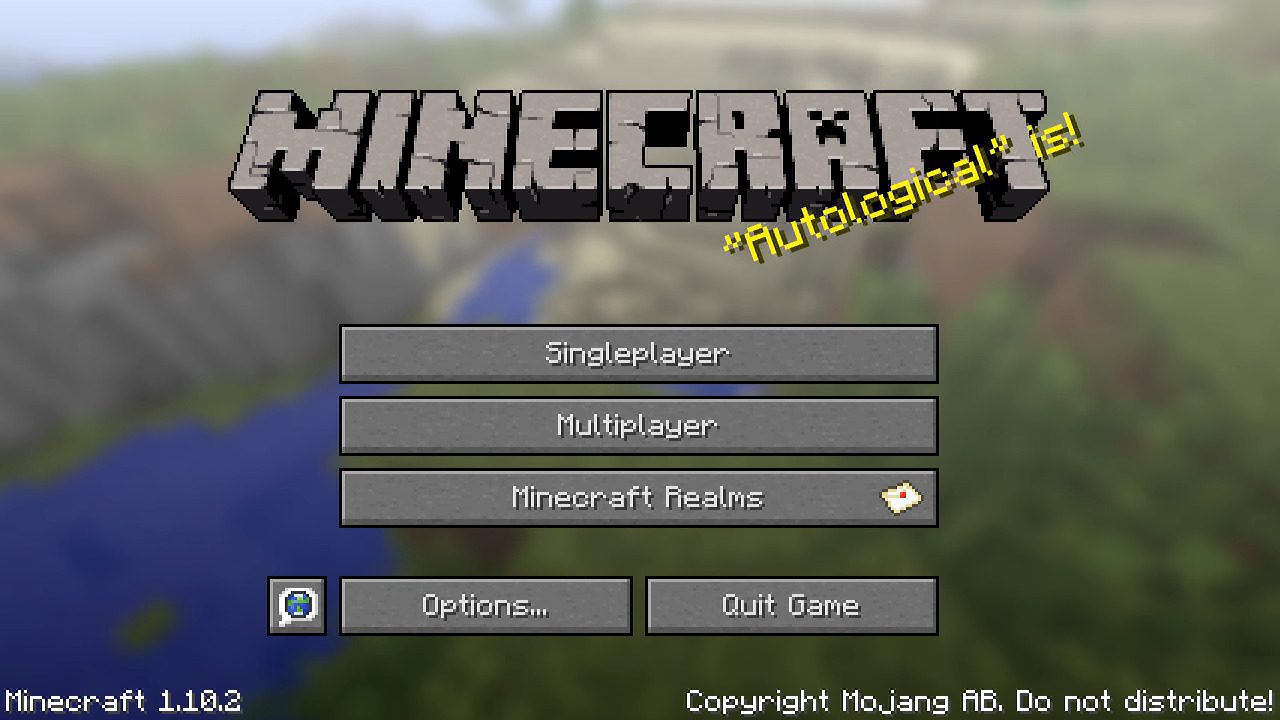
After the game has loaded, you’ll be greeted with the Minecraft main menu. Here, you’ll find various options such as Singleplayer, Multiplayer, and Realms. For the purpose of downloading maps, we’ll be focusing on the Singleplayer mode.
To proceed, click on the “Singleplayer” button. This will take you to a screen where you can view and select your existing worlds or create a new one. If you already have a world you’d like to use to install the downloaded map, you can select it from the list. Otherwise, continue reading to find out how to create a new world.
If you want to create a new world, click on the “Create New World” button. This will open a new screen where you can customize various settings for your world. You can choose a name, select a game mode (such as Survival or Creative), and adjust other options like difficulty, seed, and world size.
Once you’ve customized your settings, click on the “Create” button to generate your new world. You’ll then be transported to your freshly created Minecraft world, ready to explore and build. Now that you have Minecraft Windows 10 Edition open and a world to install the map into, let’s move on to the next step: opening a web browser.
Step 2: Select or Create a World
Now that you have Minecraft Windows 10 Edition open, the next step is to select an existing world or create a new one to install the downloaded map into. If you already have a saved world that you want to use, you can skip ahead to the next step. Otherwise, read on to find out how to create a new world.
To create a new world, click on the “Singleplayer” button on the main menu. This will take you to a screen where you can see a list of your existing worlds, as well as options to create a new world. Click on the “Create New World” button to continue.
On the next screen, you’ll have the opportunity to customize various settings for your new world. Give your world a unique name that reflects the type of gameplay or theme you have in mind. You can also select a game mode, such as Survival or Creative. The game mode determines the rules and objectives of the world.
In addition to the name and game mode, you can also adjust other settings like difficulty, seed, and world size. The difficulty setting determines the level of challenge you’ll face in the world, with higher difficulties introducing tougher mobs and survival mechanics. The seed is a code that generates the terrain and landscape of the world. You can either choose a specific seed or leave it blank for a random world generation. The world size determines the overall dimensions of the map.
Once you’ve customized your settings, click on the “Create” button to generate your new world. Minecraft will then generate the terrain and load the world. You’ll find yourself standing in your newly created world, ready to embark on your adventure.
If you already have an existing world that you want to install the downloaded map into, simply select it from the list of saved worlds on the main menu. Click on the world’s name to load it and continue to the next step.
Now that you have a world ready, let’s move on to the next step: opening a web browser to find a reliable Minecraft map website.
Step 3: Open a Web Browser
Now that you have Minecraft Windows 10 Edition open and a world to install the downloaded map into, it’s time to open a web browser to find a reliable Minecraft map website. Opening a web browser will allow you to search for and download the map files that you wish to add to your game.
To open a web browser, minimize or exit out of Minecraft Windows 10 Edition. This will bring you to your computer’s desktop or home screen. From there, locate and click on the icon for your preferred web browser. This could be Google Chrome, Mozilla Firefox, Microsoft Edge, or any other browser you have installed on your computer.
Once your web browser is open, you’ll see the familiar interface with an address bar at the top. The address bar is where you can enter website URLs or search terms to navigate the internet.
It’s important to note that when searching for Minecraft maps, it’s best to use legitimate and reputable websites. These websites curate and host quality maps and ensure that they are safe to download. Avoid downloading maps from untrustworthy sources, as they may contain viruses or be of low quality.
To find a reliable Minecraft map website, you can either search for “Minecraft map websites” in a search engine or visit well-known Minecraft community forums and websites. These sites often have dedicated sections or forums for map sharing and downloading.
Once you’ve found a trustworthy map website, it’s time to move on to the next step: searching for the desired map.
Step 4: Find a Reliable Minecraft Map Website
Now that you have your web browser open, it’s time to find a reliable Minecraft map website. These websites host a vast collection of user-created maps that you can download and add to your Minecraft Windows 10 Edition game. Finding a reputable website is crucial to ensure the quality and safety of the maps you download.
When searching for a reliable Minecraft map website, there are a few key factors to consider. Look for websites that have a good reputation within the Minecraft community. These websites are often well-established and have a large user base. They carefully curate and review the maps they host, ensuring that they are of high quality and safe to download.
One way to find reputable Minecraft map websites is to search for recommendations within the Minecraft community. Joining Minecraft forums, social media groups, and discussion boards can provide insights and recommendations from experienced players. Pay attention to websites that are frequently mentioned and recommended by the community.
Another way to find reliable Minecraft map websites is to visit popular Minecraft-related websites and blogs. These websites often have curated lists of recommended map websites, making it easier for you to find quality maps. They may also provide reviews and ratings for different maps, helping you choose the ones that best suit your preferences and gameplay style.
Once you’ve found a Minecraft map website that you trust, it’s time to move on to the next step: searching for the specific map you want to download. Most reputable map websites have search functions or categories that allow you to browse and find maps based on different themes, genres, or gameplay styles.
Remember to exercise caution when downloading maps from any website. Ensure that the website is secure and free from any malware or malicious content. Avoid downloading maps from unreliable sources or websites that seem suspicious in any way.
With a reliable Minecraft map website in hand, you’re ready to move on to the next step: searching for the desired map that you want to download and play in your Minecraft Windows 10 Edition game.
Step 5: Search for the Desired Map
Now that you have found a reliable Minecraft map website, it’s time to search for the specific map that you want to download and play in your Minecraft Windows 10 Edition game. Whether you’re looking for an epic adventure map, a challenging parkour course, or a realistic cityscape, the map website should have a search function or categories to help you find what you’re looking for.
Start by exploring the different categories or tags on the map website. These categories can include popular themes like survival, adventure, puzzle, parkour, creatives, and many more. Clicking on a category will show you a list of maps that fall under that specific theme.
If you already have a specific map in mind or a specific keyword you want to search for, the website’s search function will come in handy. Simply enter the name of the map or a relevant keyword into the search bar, and the website will display a list of maps that match your search criteria.
When searching for maps, it’s important to read the descriptions and user reviews to get a sense of the map’s quality and gameplay experience. The description should provide details about the map’s objectives, features, and any special mechanics or challenges it offers. User reviews can give you insights into the satisfaction and enjoyment of other players who have downloaded and played the map.
Take your time and browse through different maps until you find the one that catches your interest. Consider the map’s difficulty level, size, and recommended number of players if applicable. It’s also a good idea to check if the map is compatible with Minecraft Windows 10 Edition, as some maps may be designed specifically for other versions of Minecraft.
Once you have found the desired map that you want to download, it’s time to move on to the next step: downloading the map file onto your computer.
Note: Be cautious when downloading maps from external websites. Make sure to have a reliable antivirus software installed and exercise caution to avoid downloading any malicious files.
Step 6: Download the Map
After finding the desired map on a reliable Minecraft map website, it’s time to download the map file onto your computer. The map file contains all the necessary data and assets for the map to function properly in your Minecraft Windows 10 Edition game.
Most map websites have a download button or link associated with each map. Look for a prominent download button or link next to the map you want to download. Clicking on it will initiate the downloading process.
When you click on the download button, your web browser will typically prompt you with a download confirmation dialog box. This dialog box will ask you where you want to save the downloaded map file on your computer. Choose a location that you can easily access, such as your desktop or a dedicated folder for Minecraft maps.
Once you have selected the download location, click the “Save” or “OK” button to begin the download. The map file may take a few seconds or minutes to download, depending on the size of the map and the speed of your internet connection. During the download, you can monitor the progress in your web browser’s download manager or in the bottom corner of your browser window.
It’s important to note that some map files may come in compressed formats like ZIP or RAR. If this is the case, you will need to extract the contents of the compressed file before using the map in Minecraft. To extract a map from a compressed file, simply right-click on the file and select “Extract” or “Extract All.” Choose the destination folder where you want the extracted map files to be saved.
Once the map file is downloaded and extracted (if necessary), you are ready to proceed to the next step: locating the downloaded map file on your computer.
Note: As a precaution, it’s always a good idea to scan downloaded files with an antivirus program to ensure they are safe before using them in your Minecraft game.
Step 7: Locate the Downloaded Map File
After downloading the map file onto your computer, the next step is to locate the downloaded file. Finding the downloaded map file is essential to import it into Minecraft Windows 10 Edition and begin exploring the new world.
The location of the downloaded map file will depend on the settings of your web browser or the download location you specified during the download process. By default, most web browsers save downloaded files in the “Downloads” folder on your computer.
To locate the downloaded map file, open the file explorer or file manager on your computer. You can usually access this by clicking on the file folder icon on your desktop or by searching for “File Explorer” in the start menu.
Once the file explorer is open, navigate to the “Downloads” folder or to the folder where you chose to save the downloaded map file. Look for the map file with a file extension specific to Minecraft, such as “.mcworld”, “.zip”, or “.rar”. The filename may also include the name of the map or the Minecraft username of the creator.
If the map file is in a compressed format, such as ZIP or RAR, you will need to extract the contents of the file before proceeding. To do this, right-click on the map file and select “Extract” or “Extract All”. Choose the destination folder where you want the extracted map files to be saved.
Once you have located the downloaded map file and extracted it if necessary, you’re now ready to import the map into Minecraft Windows 10 Edition. This will allow you to explore and experience the new world created by the map.
Note: It’s a good practice to keep the downloaded map files in a dedicated folder or a location that you can easily access. This will make it easier to manage and organize your Minecraft map collection.
Step 8: Import the Map into Minecraft
Now that you have located the downloaded map file on your computer, it’s time to import the map into Minecraft Windows 10 Edition. Importing the map will make it available for you to explore and play within the game.
To import the map, follow these steps:
- Open Minecraft Windows 10 Edition and make sure you are signed in to your Microsoft account.
- From the main menu, click on “Play” to access the list of available worlds.
- Click on the “Create New” button to start creating a new world.
- In the “Create World” screen, click on the “Resource Packs” or “Behavior Packs” options, depending on the type of map you downloaded.
- Click on the “Add+” button to open the file explorer or file manager on your computer.
- Navigate to the location where you saved the downloaded map file.
- Select the map file and click on the “Open” button to import it into Minecraft.
- Once the map is successfully imported, it will appear in the list of available resource packs or behavior packs.
- Select the imported map and click on the “Activate” or “Apply” button to enable it for the new world.
- Customize any other world settings, such as game mode or difficulty, as desired.
- Click on the “Create” button to generate the new world with the imported map.
After following these steps, Minecraft Windows 10 Edition will create a new world using the imported map. The world will be ready for you to explore and enjoy the unique features and challenges of the downloaded map.
It’s important to note that some maps may require additional steps or instructions provided by the map creator. These instructions may include specific installation procedures or additional resource packs or behavior packs that need to be downloaded and enabled. Make sure to read any accompanying documentation or instructions provided with the map to ensure a smooth and enjoyable experience.
Now that you have successfully imported the map into Minecraft, it’s time to embark on an exciting adventure within the new world! Enjoy exploring, building, and uncovering the secrets that the map holds.
Step 9: Enjoy Exploring Your Downloaded Map
Congratulations! You’ve successfully imported the downloaded map into Minecraft Windows 10 Edition. Now it’s time to embark on an exciting journey and explore the new world you’ve acquired. Put on your virtual boots, grab your tools, and get ready for an adventure of a lifetime!
Once your new world has been generated with the imported map, you’ll find yourself right in the middle of a unique and custom-made environment. Take a moment to soak in the sights, appreciate the creative builds, and marvel at the intricate details that the map creator has put together.
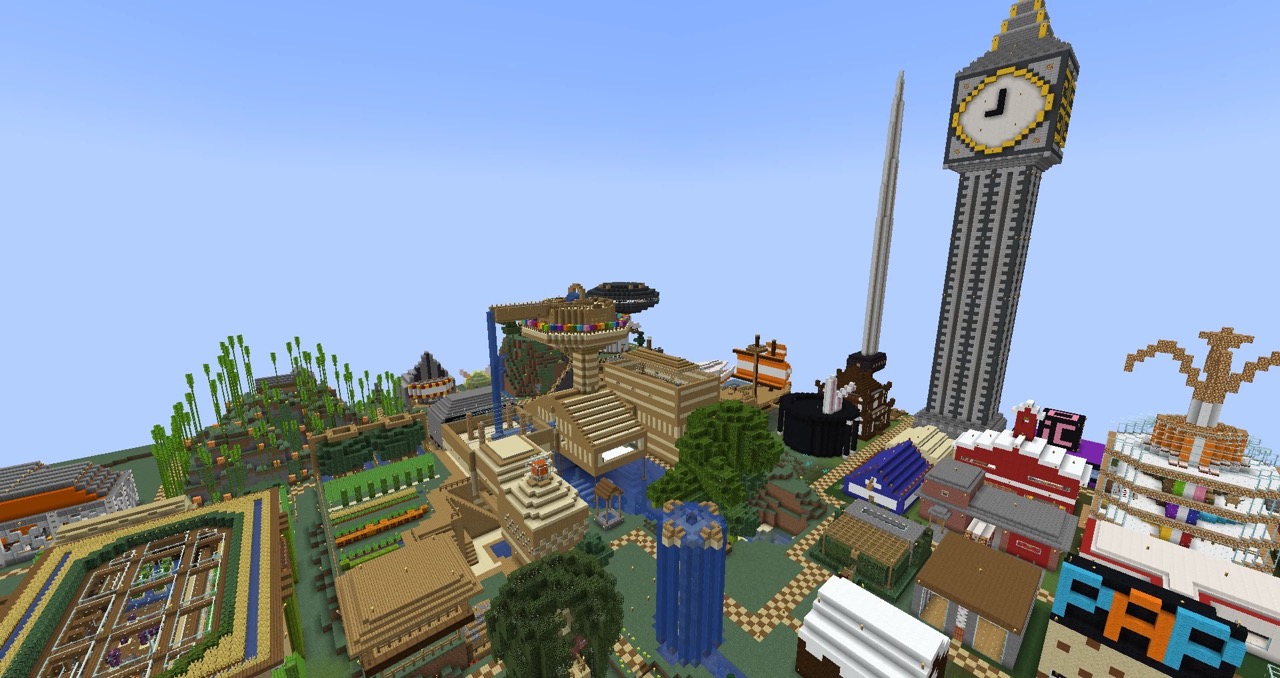
Every map is different and offers its own set of challenges and objectives. Whether it’s surviving the perils of a dungeon, solving complex puzzles, or simply enjoying the beauty of a meticulously designed cityscape, there’s something for everyone to enjoy in a downloaded map.
Explore every nook and cranny, uncover hidden treasures, and unravel the secrets that the map holds. Take your time to fully immerse yourself in the world and interact with its unique features. Use the resources available to you to build, mine, and craft your way through the map, or follow any specific objectives or quests provided by the map creator.
Don’t forget to capture screenshots or record your gameplay to share with others or to reminisce about your adventures later on. You can also invite friends to join you in exploring the map, either through multiplayer or by sharing the map file with them so they can import it into their own Minecraft Windows 10 Edition game.
Whether you’re playing alone or with friends, remember that the main goal is to have fun and enjoy the experience. Take your time to fully appreciate the effort and creativity put into the map by its creator. Some maps even have replay value, allowing you to discover new things with each playthrough.
So, grab your sword, gather your resources, and get ready for an amazing and immersive Minecraft adventure. The world is yours to explore and conquer, thanks to the downloaded map that you’ve brought to life in Minecraft Windows 10 Edition. Enjoy!
Conclusion
Downloading and playing custom maps in Minecraft Windows 10 Edition is a fantastic way to enhance your gameplay experience. It opens up a whole new world of possibilities, allowing you to explore unique landscapes, engage in thrilling adventures, and appreciate the creativity of other players within the Minecraft community.
In this article, we’ve walked you through the step-by-step process of downloading and installing maps on Minecraft Windows 10 Edition. We started by opening the game and selecting or creating a world to install the map into. Next, we opened a web browser to find a reliable Minecraft map website where we searched and downloaded our desired map.
We then located the downloaded map file on our computer and learned how to import it into Minecraft Windows 10 Edition. Finally, we concluded by emphasizing the enjoyment and exploration that awaits as we delve into our newly downloaded map and embark on unique adventures.
Remember, when downloading maps, it’s important to use reputable websites and exercise caution to ensure the safety and quality of the maps. Always read descriptions, user reviews, and follow any instructions provided by the map creators.
Now that you have the knowledge and tools to download and play custom maps, go ahead and dive into the wonderful world of user-created content. Immerse yourself in the creativity and imagination of others, and don’t forget to share your own experiences and creations with the Minecraft community.
Happy exploring and gaming in Minecraft Windows 10 Edition!