Introduction
Welcome to our guide on how to download all your Snapchat memories to your computer. Snapchat memories is a feature that allows users to save and store their snaps, stories, and other shared content. While it’s convenient to have these memories stored on your Snapchat account, you may also want to have a local copy on your computer for safekeeping or easy access. In this article, we will walk you through the step-by-step process of exporting and saving all your Snapchat memories to your computer.
Having a backup of your Snapchat memories on your computer can bring peace of mind, especially if you accidentally lose access to your Snapchat account or if you want to free up storage space on your device. Additionally, having your memories stored locally allows you to easily share them with friends and family or use them for creative projects.
In the following sections, we will guide you through the necessary steps to download all your Snapchat memories to your computer. We will cover various methods, including exporting the memories directly from the Snapchat app and transferring them from your device to your computer. Whether you are using a Windows PC, a Mac, or even a mobile device, we have got you covered.
Before we begin, please make sure you have the latest version of the Snapchat app installed on your device. Also, ensure that you have enough storage space available on your computer to save your memories. Now, let’s dive in and learn how to export and save all your Snapchat memories to your computer.
Step 1: Open Snapchat Memories
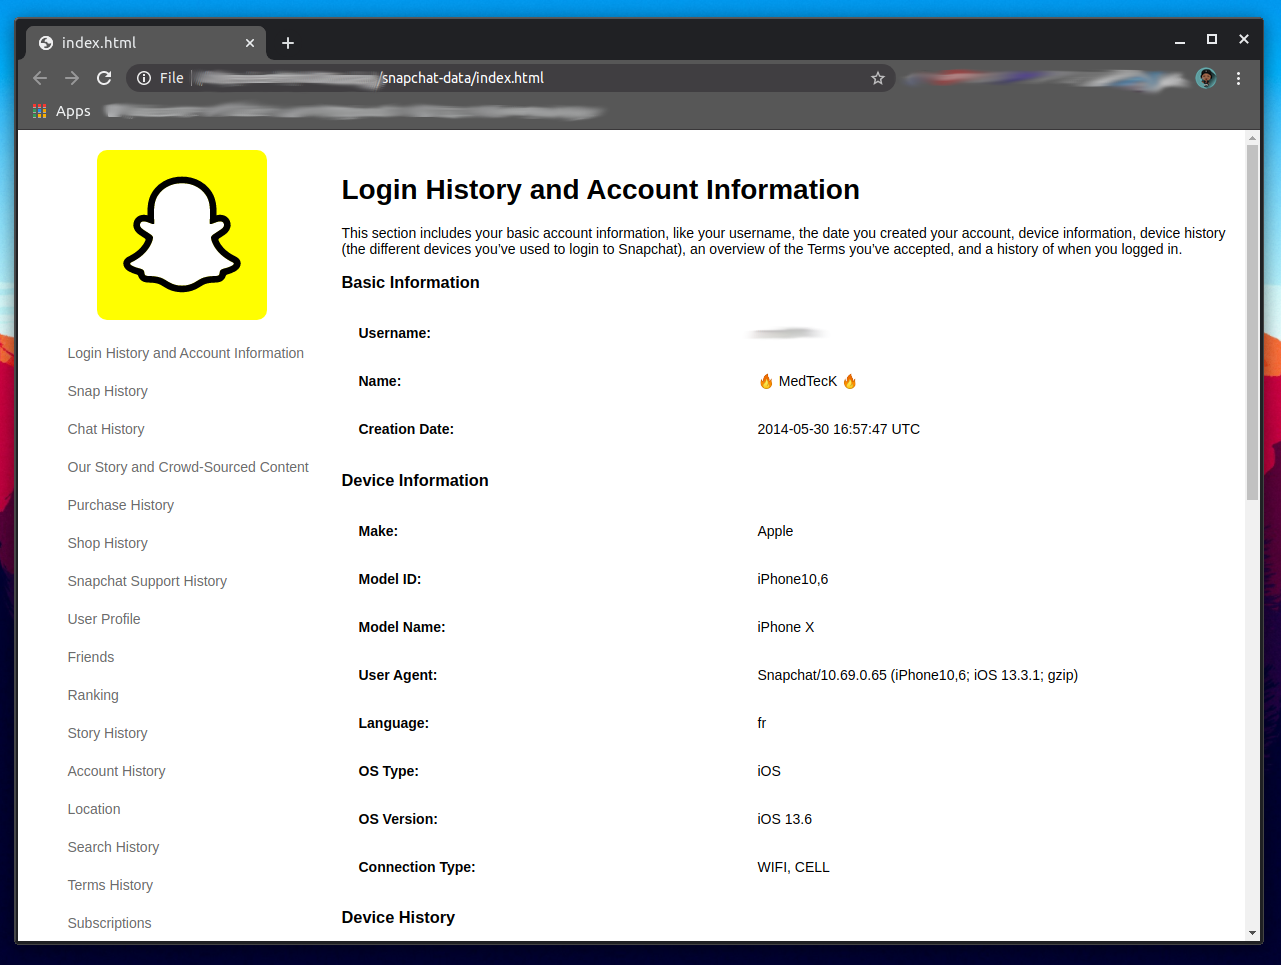
The first step to downloading all your Snapchat memories to your computer is to open the Memories feature within the Snapchat app. Memories is where all your saved snaps, stories, and other shared content are stored.
Launch the Snapchat app on your smartphone or tablet. If you’re not already logged in, enter your username and password to access your account.
Once you’re logged in, you’ll find yourself on the camera screen. Tap on the small circle underneath the capture button to access the Memories section. It is located at the bottom-center of the screen and looks like a small thumbnail of a picture. Alternatively, you can swipe up from the camera screen to open Memories.
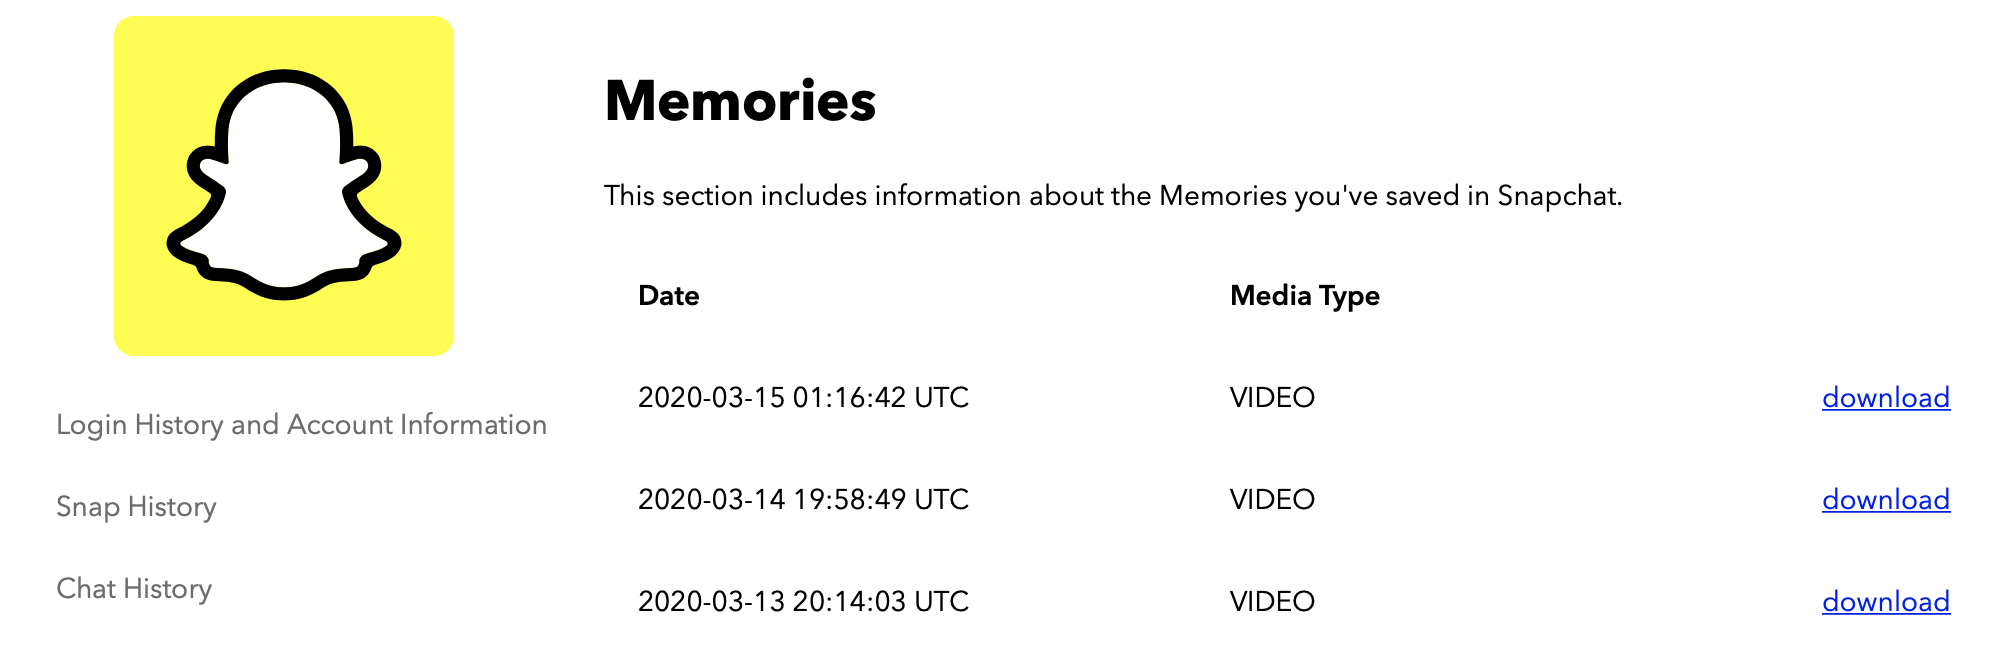
Once you’re in the Memories section, you will find different tabs for different types of content, such as Snaps, Stories, Camera Roll, and more. You can navigate through these tabs to view and manage your saved memories.
To download all your Snapchat memories, make sure you are in the tab that contains the specific type of content you want to export. For example, if you want to download all your saved Snaps, ensure you are in the Snaps tab. This step is important as it ensures that you are exporting the desired content only.
In the next section, we will discuss how to select all the memories you want to download and export to your computer.
Step 2: Select All Memories to Download
Once you are in the relevant tab of the Memories section in Snapchat, it’s time to select all the memories you want to download and export to your computer. This step ensures that you don’t have to manually select each memory individually, saving you time and effort.
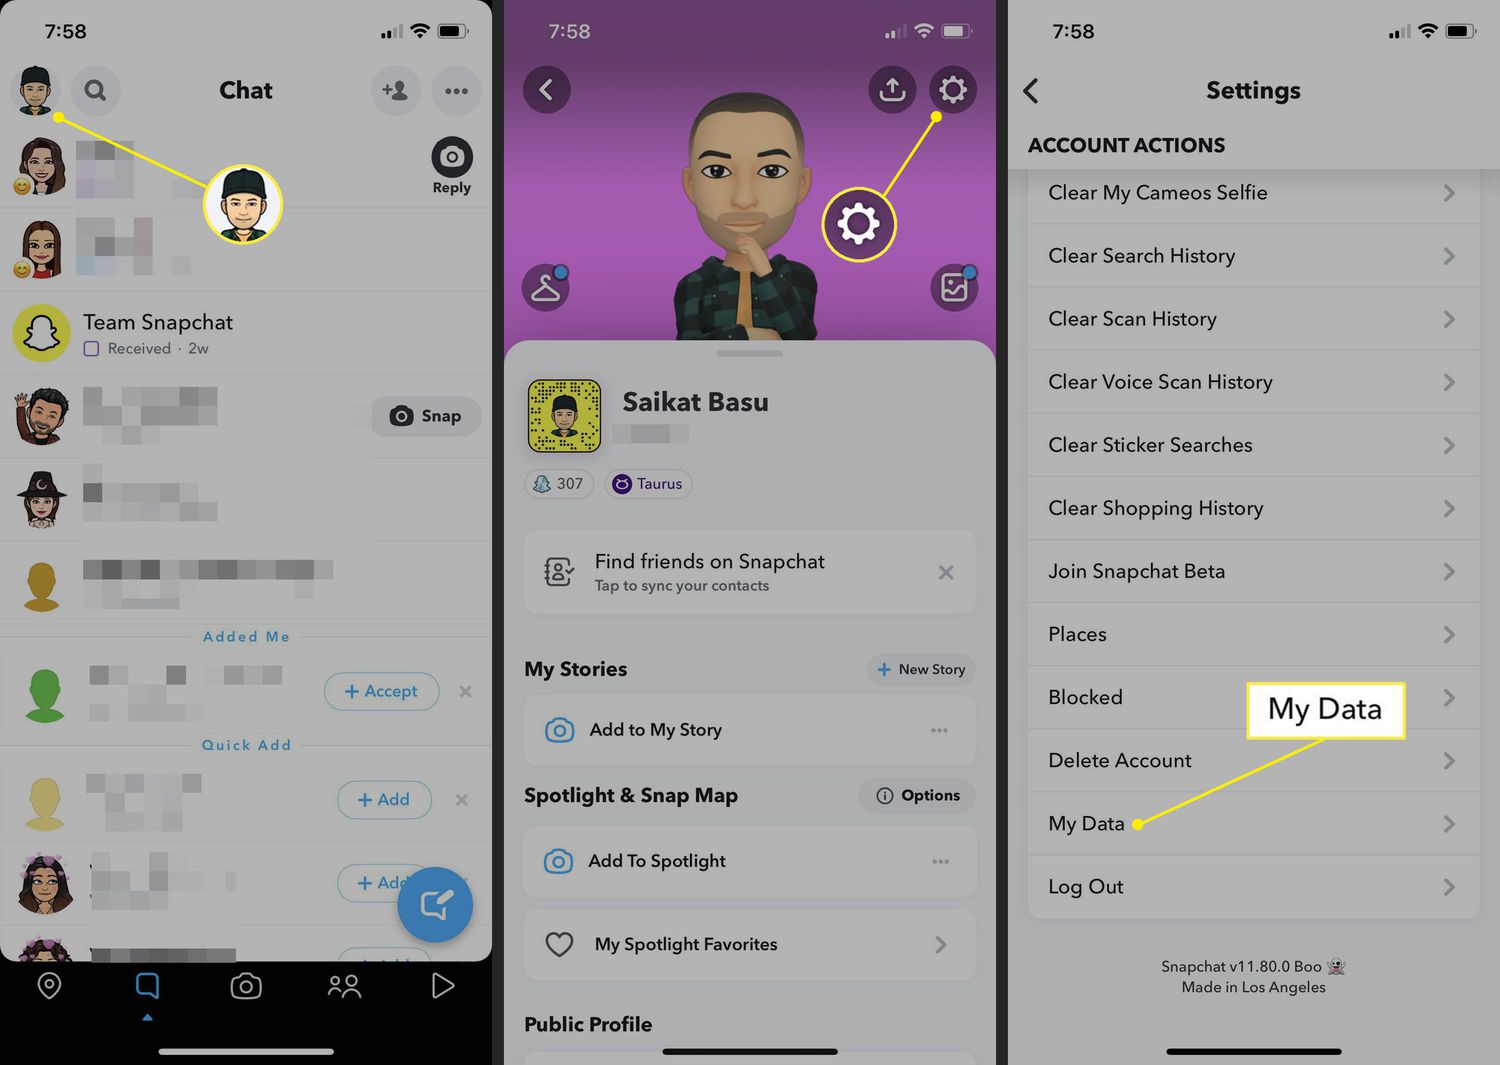
To select all memories at once, tap on the select icon located in the top-right corner of the screen. It typically looks like a checkbox or a square with a checkmark inside it. By tapping on this icon, you enable the “Select All” option, which allows you to choose all the memories within the current tab.
If you prefer to select specific memories rather than all of them, you can tap on each memory to mark it with a checkmark. This allows you to customize your selection according to your preferences.
Once you have selected all the memories you want to download, you will notice that each memory is marked with a checkmark. This indicates that it is included in your selection.
If you realize that you missed some memories or want to remove a particular memory from your selection, simply tap on it again to remove the checkmark.
In case you have a large number of memories and it takes a while to select them manually, Snapchat provides a helpful feature called “Batch Selection.” To use this feature, long-press on a memory until it is highlighted. Then, without releasing your finger, scroll up or down to select multiple memories at once. This can be a time-saving technique if you have a lot of memories to select.
Once you have finished selecting all the memories you want to download, proceed to the next step to learn how to export them to your computer.
Step 3: Export Memories to Your Computer
After selecting all the memories you want to download, it’s time to export them from Snapchat and save them to your computer. There are a few different methods you can use to accomplish this, depending on the device you are using and your personal preferences.
Method 1: Export from Snapchat App
With this method, you can directly export and save your selected memories from the Snapchat app itself.
- Once you have completed selecting your memories, tap on the share icon, usually represented by an arrow pointing upwards. It is typically located in the bottom-left or bottom-right corner of the screen.
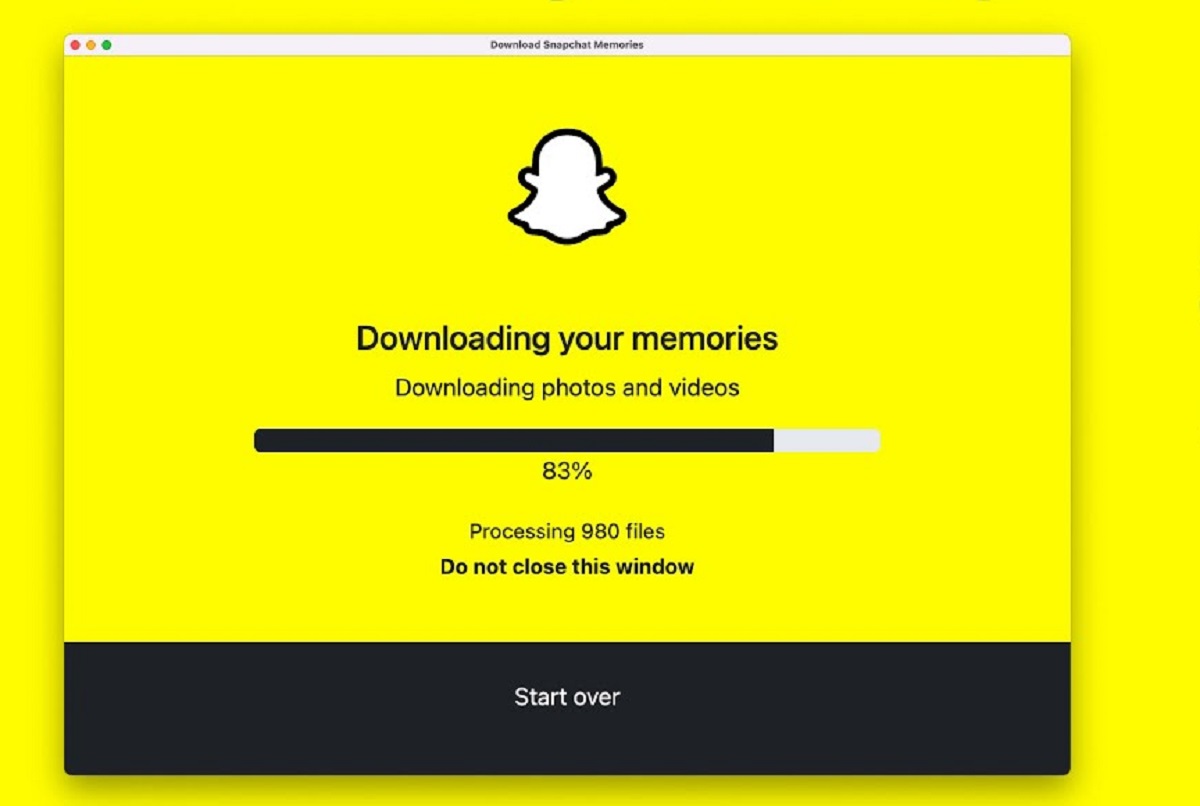
- A list of sharing options will appear on your screen. Look for the option to “Save to Camera Roll” or “Save to Gallery” and tap on it. This will initiate the process of saving your selected memories to your device’s local storage.
- Once the export process is complete, you can connect your device to your computer using a USB cable or any other method of file transfer. This will allow you to access your device’s storage on your computer.
- Navigate to the folder or directory where your exported memories are saved. Locate the files corresponding to your selected memories; they are usually in image or video file formats (e.g., .jpeg, .mp4).
- Copy or move these files from your device’s storage to your computer by dragging and dropping or using the appropriate file transfer method.
- Finally, ensure that the transferred files are saved and accessible on your computer. You can create a new folder or use an existing one to organize your downloaded Snapchat memories.
Method 2: Online Cloud Storage
If you prefer to transfer your memories to your computer using online cloud storage services, such as Google Drive or Dropbox, you can follow these steps:
- Repeat steps 1 and 2 from Method 1 to save your selected memories to your device’s local storage.
- Install the Google Drive or Dropbox app on your device if you haven’t already done so.
- Upload the saved memories to your cloud storage account using the respective app.
- Access your cloud storage account on your computer by visiting the website or using the desktop application.
- Locate the uploaded memories and download them to your computer using the provided options in the cloud storage interface.
- Once the download is complete, ensure that the memories are safely stored and easily accessible on your computer.
Now that you have successfully exported and saved your Snapchat memories to your computer, you can move on to the next step to learn how to transfer them from your device to your computer.
Step 4: Connect Your Device to the Computer
Once you have exported and saved your Snapchat memories to your device, the next step is to connect your device to your computer. This connection allows you to transfer the memories from your device’s storage to your computer easily.
Depending on the type of device you have and the computer you are using, there are a few different methods to establish this connection:
Method 1: USB Cable
- Locate the USB cable that came with your device or any compatible USB cable.
- Connect one end of the USB cable to your device’s charging or data transfer port.
- Connect the other end of the USB cable to an available USB port on your computer.
- Ensure that your device is unlocked and the screen is active to allow the necessary permissions for data transfer.
- Your computer will detect the connected device, and a file transfer prompt may appear on the device’s screen. Follow the on-screen instructions to allow access to your device’s storage.
Method 2: Wi-Fi Transfer
- Ensure that both your device and computer are connected to the same Wi-Fi network.
- On your device, go to the Settings menu and look for the option related to file sharing or wireless transfer.
- Follow the prompts to enable file sharing over Wi-Fi.
- On your computer, open a web browser and enter the IP address or URL provided on your device’s screen.
- A web interface will appear, allowing you to access your device’s storage and transfer files between your device and computer.
Method 3: Cloud Storage
- If you have uploaded your Snapchat memories to a cloud storage service, such as Google Drive or Dropbox, you can access and download them directly from your computer.
- Open a web browser and visit the website of the cloud storage service you are using.
- Log in to your account and navigate to the folder or directory where your memories are stored.
- Select the files you want to download and choose the appropriate download option provided by the cloud storage service.
Once your device is successfully connected to your computer, proceed to the next step to learn how to transfer the Snapchat memories from your device to your computer.
Step 5: Transfer Memories from Device to Computer
With your device successfully connected to your computer, you are now ready to transfer your downloaded Snapchat memories from your device to your computer. This step allows you to move the files from your device’s storage to a designated location on your computer for safekeeping and easy access.
Follow these steps to transfer your memories:
- If your device is connected via a USB cable, your computer will treat it as an external storage device. Open the file explorer or finder on your computer to access the connected device.
- Navigate to the folder or directory where your exported Snapchat memories are stored on your device. It may be in the “Downloads” folder, or you may have chosen a custom location during the export process.
- Select the files you want to transfer by either clicking and dragging to select multiple files or using the appropriate keyboard shortcuts.
- Once the desired files are selected, right-click and choose the “Copy” option from the context menu.
- Next, navigate to the desired location on your computer where you want to transfer the memories. It could be a specific folder, your desktop, or any other location of your preference.
- Right-click within the destination folder and select the “Paste” option from the context menu. Alternatively, you can use the appropriate keyboard shortcuts to paste the files.
- The selected memories will begin transfer from your device to your computer. The time it takes will depend on the number and size of the files being transferred.
- Once the transfer is complete, you can verify that the memories have been successfully transferred by checking the destination folder on your computer.
If you are using a cloud storage service to transfer your memories, the process may be slightly different. Simply follow the instructions provided by the service to download the selected memories to your computer.
After transferring your memories from your device to your computer, you can proceed to the final step to learn how to save them on your computer securely.
Step 6: Save Memories on Your Computer
After successfully transferring your Snapchat memories from your device to your computer, the final step is to save them securely on your computer. This ensures that your cherished memories are stored in a designated location and easily accessible whenever you want to revisit them.
Follow these steps to save your memories on your computer:
- Open the destination folder on your computer where you transferred your Snapchat memories.
- Review the files to confirm that all the memories you selected have been transferred successfully.
- If desired, create a new folder within the destination folder to organize your Snapchat memories.
- Select all the transferred files by either clicking and dragging to select multiple files or using the appropriate keyboard shortcuts.
- Right-click on the selected files and choose the “Cut” option from the context menu.
- Navigate to the new folder you created within the destination folder (if applicable).
- Right-click within the new folder and choose the “Paste” option from the context menu. Alternatively, you can use the appropriate keyboard shortcuts to paste the files.
- The selected memories will be moved from the source folder to the new folder within the destination folder.
- Once the move is complete, verify that the memories have been successfully saved in the new folder.
By following these steps, your Snapchat memories are now securely saved on your computer. Organizing them in specific folders can make it easier to locate and access specific memories in the future.
It is recommended to periodically create backups of your saved memories on an external hard drive or cloud storage service to ensure their safety in case of any loss or device failure.
Congratulations! You have successfully downloaded, transferred, and saved all your cherished Snapchat memories on your computer. Now you can revisit and enjoy them whenever you want!
Conclusion
Congratulations on successfully downloading all your Snapchat memories and saving them to your computer! By following the step-by-step process outlined in this guide, you have ensured that your cherished memories are safely stored and easily accessible.
Having your Snapchat memories saved on your computer provides added peace of mind, as it serves as a backup in case of accidental data loss or device failure. Additionally, storing them locally allows you to organize and manage your memories more conveniently.
Throughout this guide, we covered various methods for exporting, transferring, and saving your Snapchat memories. From exporting directly from the Snapchat app to using cloud storage services or connecting your device to your computer, you now have the knowledge and tools to preserve your special moments.
Remember to regularly create backups of your memories to ensure their longevity and security. You can consider storing them on external devices or utilizing cloud storage services for an extra layer of protection.
Now that you have mastered the process of downloading and saving your Snapchat memories, you can relish the joy of revisiting those precious moments whenever you desire. Share them with friends and family, create digital albums, or use them for creative projects – the possibilities are endless.
Thank you for following along with this guide. We hope it has been helpful in assisting you in preserving your Snapchat memories. Happy reminiscing!