Introduction
Overleaf is an online collaborative LaTeX editor that allows users to create, edit, and share LaTeX documents. LaTeX is a typesetting system commonly used for scientific and technical documents, as it provides excellent control over formatting and mathematical equations.
One of the great features of Overleaf is the ability to download your LaTeX files to your local computer. This can be useful if you want to have a local backup of your work, if you want to continue working on your document offline, or if you need to submit your document to a journal or conference that requires a specific file format.
In this tutorial, we will guide you through the steps to download a .tex file from Overleaf. We will also show you how to choose different file formats if you need to download your document in a specific format, such as PDF or Word.
So, if you’re ready to learn how to download your .tex files from Overleaf, let’s get started!
Step 1: Sign in to Overleaf
The first step to download a .tex file from Overleaf is to sign in to your Overleaf account. If you don’t have an account yet, you can easily create one by visiting the Overleaf website.
Once you have signed in to your account, you will be directed to your dashboard, where you can see a list of your projects. If you have an existing project that you want to download, simply click on the project name to open it.
If you don’t have an existing project and want to create a new one, you can do so by clicking on the “New Project” button and selecting the appropriate template.
It’s important to note that Overleaf offers both free and paid plans. The features and limitations may vary depending on your subscription level. However, the steps to download a .tex file are the same for both free and paid users.
Now that you are signed in to your Overleaf account and have your project open, let’s move on to the next step: opening your project.
Step 2: Open your project
After signing in to Overleaf and accessing your dashboard, you will see a list of your projects. Locate the project that you want to download the .tex file from, and click on its name to open it.
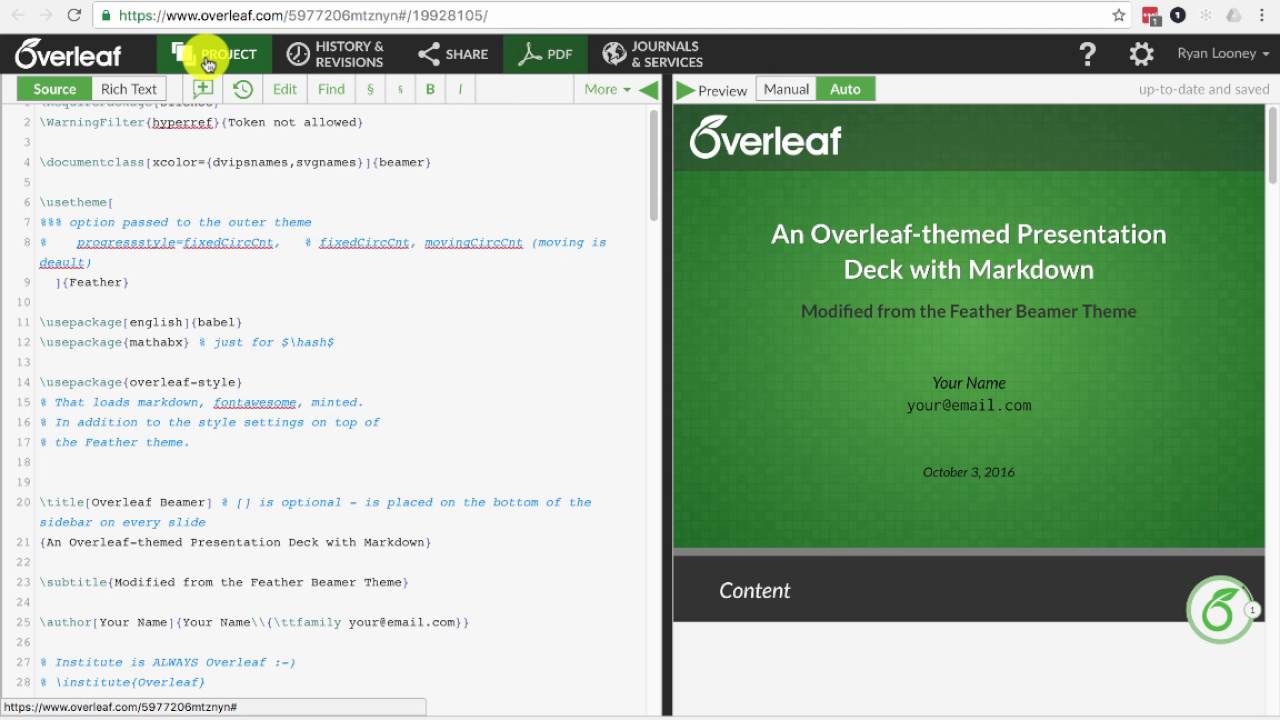
Once you open your project, you will be directed to the project editor. This is where you can view and edit your LaTeX document. The editor interface is user-friendly and equipped with helpful features, such as syntax highlighting, auto-completion, and a preview pane to visualize your document in real-time.
Take a moment to familiarize yourself with the project editor interface. You will notice different sections, including a file tree on the left, where you can access and manage your files, and a code editor in the center, where you write your LaTeX code.
If you have multiple .tex files in your project, ensure that you have the correct file open. You can select the file from the file tree on the left or use the tabs at the top of the editor to switch between open files.
Now that you have your project open and the correct .tex file selected, let’s move on to the next step: clicking on the “Download” button.
Step 3: Click on “Download” button
Once you have your project open in Overleaf and the desired .tex file selected, it’s time to download the file. To initiate the download process, locate the toolbar at the top of the project editor.
On the toolbar, you will see a “Download” button represented by an icon that resembles a downward-facing arrow. Click on this button to proceed with downloading your .tex file.
After clicking on the “Download” button, a dropdown menu will appear, providing you with various file format options for download. This offers flexibility in how you want to save your document.
Overleaf provides several file formats to choose from, including:
- LaTeX source (.tex) – This is the original .tex file format.
- PDF (.pdf) – This format is perfect if you need to share or print a printable version of your document.
- Rich Text Format (.rtf) – Ideal for compatibility with other text editing software.
- Word Document (.docx) – Useful if you need to edit or collaborate on your document using word processing software.
- Plain Text (.txt) – Suitable if you want to extract the plain text content from your document.
- Others – Overleaf also offers additional formats depending on your needs.
Select the appropriate file format for your download by clicking on the corresponding option from the dropdown menu.
With the file format chosen, you are now ready to save the .tex file to your computer. In the next step, we will guide you through this process.
Step 4: Choose the file format
After clicking on the “Download” button in Overleaf, a dropdown menu will appear, providing you with various file format options for your .tex file. This step allows you to choose the file format that best suits your requirements.
Each file format has its own advantages and purposes. Let’s take a closer look at the available options:
- LaTeX source (.tex): This is the original file format in which your document was created. It contains all the LaTeX code and formatting specificities. You may choose this format if you need to work on your document in a LaTeX editor or further customize it.
- PDF (.pdf): This format is widely accepted and is great for sharing or printing your document. It preserves the layout, fonts, and images exactly as intended and ensures that the document is viewed consistently across different devices.
- Rich Text Format (.rtf): If you need to collaborate with others using a word processing software like Microsoft Word, this format allows for convenient compatibility. It retains the basic formatting, such as bold, italics, and font styles.
- Word Document (.docx): This format is suitable if you want to edit your document in a word processor. It maintains the structure, formatting, and styles of your document and can be easily opened in programs such as Microsoft Word, Google Docs, or LibreOffice.
- Plain Text (.txt): If you require the plain text content of your document without any formatting, this format is ideal. It removes all formatting elements and presents the text in a simple, unadorned format.
- Others: Depending on your specific needs, Overleaf may offer additional file formats, such as HTML, EPUB, or ODT.
Consider the purpose of your downloaded file and select the file format that best suits your needs. Once you have made your selection, you can proceed to the next step to save the .tex file to your computer.
Step 5: Save the .tex file to your computer
After choosing the desired file format for your .tex file download from Overleaf, the next step is to save the file to your computer. This ensures that you have a local copy of your document that you can access and work on offline.
When you select the file format, Overleaf will begin generating the file in the chosen format. This process may take a few seconds, depending on the complexity and size of your document.
Once the file is ready, a download prompt will appear on your screen. The prompt will typically ask you to choose a location on your computer where you want to save the file.
Click on the “Save” or “Download” button in the prompt, and a standard file browser window will appear. Navigate to the folder or directory where you want to save the .tex file. You can choose an existing folder or create a new one for easier organization.
Give the file a suitable and descriptive name so that it is easy to identify and locate later. Keep in mind that it’s a good practice to include the .tex file extension in the file name to maintain clarity.
After selecting the folder and providing a name for the file, click on the “Save” or “Download” button in the file browser window to initiate the download process.
Once the download is complete, you will have successfully saved the .tex file to your computer. You can now access and work on the file using a LaTeX editor or any compatible text editing software.
By saving the .tex file locally, you have the freedom to continue working on your document without an internet connection. It also serves as an important backup to safeguard your work.
Congratulations! You have successfully completed the process of saving the .tex file from Overleaf to your computer. In the next step, we will provide an additional tip on syncing your files with Dropbox for seamless access and collaboration.
Step 6: Additional tip: Syncing with Dropbox
In addition to downloading your .tex file from Overleaf to your computer, you can also take advantage of the seamless syncing capabilities with Dropbox. Syncing your files with Dropbox allows for convenient access, collaboration, and automatic backups of your LaTeX documents.
To sync your Overleaf project with Dropbox, follow these steps:
- Ensure that you have a Dropbox account. If you don’t have one, you can easily create a free account at www.dropbox.com.
- In the Overleaf project editor, click on the “Menu” icon (usually represented by three horizontal lines) located at the top left corner of the interface.
- From the menu, select “Sync” and then choose “Dropbox” from the available options.
- If you haven’t connected your Dropbox account with Overleaf before, follow the prompts to authorize the connection. This will allow Overleaf to access and sync your files with Dropbox.
- Once the connection is established, Overleaf will prompt you to choose a location in your Dropbox where you want to store the synced project. Select a suitable folder or create a new one for better organization.
- Click on the “Sync” button, and Overleaf will start syncing your project with Dropbox. This process may take a few moments, depending on the size of your project.
Once the syncing is complete, your Overleaf project will be automatically saved and updated in the designated Dropbox folder. Any changes made in Overleaf will be reflected in the synced files in Dropbox, allowing you to seamlessly collaborate with others or access your project from different devices.
Syncing with Dropbox provides an added layer of security by creating automatic backups of your LaTeX documents. In case of any accidental file loss or system failure, you can easily retrieve the synced files from Dropbox.
Remember to keep your Overleaf project and Dropbox in sync by periodically clicking on the “Sync” button in the Overleaf project editor. This ensures that any changes made in Overleaf are reflected in Dropbox.
By following these steps, you can leverage the advantages of Dropbox’s syncing capabilities to enhance your workflow, collaboration, and document management.
Congratulations! You have now successfully learned how to download a .tex file from Overleaf and utilize the additional tip of syncing with Dropbox for seamless access and collaboration.
Conclusion
Downloading a .tex file from Overleaf is a straightforward process that allows you to access your LaTeX documents offline, create backups, and submit your work in various file formats. By following the steps outlined in this tutorial, you can easily download your .tex files and choose the appropriate file format for your needs.
We began by signing in to Overleaf and opening our project, ensuring that we have the correct .tex file selected. Then, we clicked on the “Download” button and chose the desired file format from the dropdown menu. After selecting the format, we saved the .tex file to our computer by choosing a location and providing a meaningful name.
Additionally, we discussed the option to sync our Overleaf projects with Dropbox. This feature enhances collaboration and ensures automatic backups of your LaTeX documents. By connecting Overleaf and Dropbox, you can easily access and work on your projects from different devices while maintaining the simplicity and security provided by Dropbox’s syncing functionality.
Whether you need to continue working on your document offline, share a printable version of your work, collaborate with others using different software, or back up your important LaTeX files, Overleaf offers a flexible and user-friendly solution.
Remember to explore the various file formats available to download your .tex files from Overleaf and choose the one that best serves your purpose. Keep in mind that syncing with Dropbox can provide added convenience and peace of mind when it comes to accessing and safeguarding your LaTeX documents.
Now that you’re equipped with the knowledge of how to download .tex files from Overleaf and utilize the syncing capabilities with Dropbox, you can enhance your LaTeX workflow, improve collaboration, and make your research and writing process more efficient.
So go ahead, start utilizing the power of Overleaf to create, edit, and download your LaTeX documents, and take your academic and technical writing to new heights!