Introduction
Google Docs is a popular cloud-based document editor that offers many useful features, including the ability to add images to your documents. Whether you are using Google Docs for work, school, or personal projects, you may find yourself needing to download an image from your document. However, this process may not be as straightforward as it seems.
In this article, we will guide you through the steps to download an image from Google Docs. We will explain how to locate the image within your document and provide you with a step-by-step process to save the image onto your computer. By following these simple steps, you will be able to access and use the images from your Google Docs documents with ease.
Before we dive into the details, it is important to note that downloading an image from Google Docs does not delete the image from your document. It simply creates a copy of the image on your computer, allowing you to use it for other purposes. Now, let’s get started with the first step of the process: opening Google Docs.
Step 1: Open Google Docs
The first step in downloading an image from Google Docs is to open the Google Docs application. You can access Google Docs through your web browser or by using the Google Docs mobile app on your smartphone or tablet.
If you are using a web browser, simply navigate to docs.google.com and sign in to your Google account. Once you are signed in, you will be taken to the Google Docs homepage where you can create and access your documents.
For users on mobile devices, download and install the Google Docs app from the App Store (iOS) or Play Store (Android). After installation, open the app and sign in to your Google account. Once you are signed in, you will be able to access your Google Docs documents from your mobile device.
Now that you have successfully opened Google Docs, you are ready to proceed to the next step: locating the image within your document.
Step 2: Locate the Image
Once you have opened your document in Google Docs, the next step in downloading an image is to locate the specific image you want to download. Google Docs allows you to add images to your documents in various ways, such as inserting images from your computer, using URLs, or even selecting images from your Google Drive.
To locate the image within your document, you first need to identify where it is placed. Scroll through your document and look for the image you want to download. Images in Google Docs are typically embedded within the text or placed as standalone elements.
If the image is embedded within the text, it might be part of a paragraph or placed between sentences. In this case, you can click on the image to select it. You will see blue handles around the edges of the image, indicating that it is selected. If the image is standalone, it might be positioned on its own or in a separate section of the document. Again, you can click on the image to select it and see the blue handles.
Once you have located and selected the image, you are ready to move on to the next step: downloading the image.
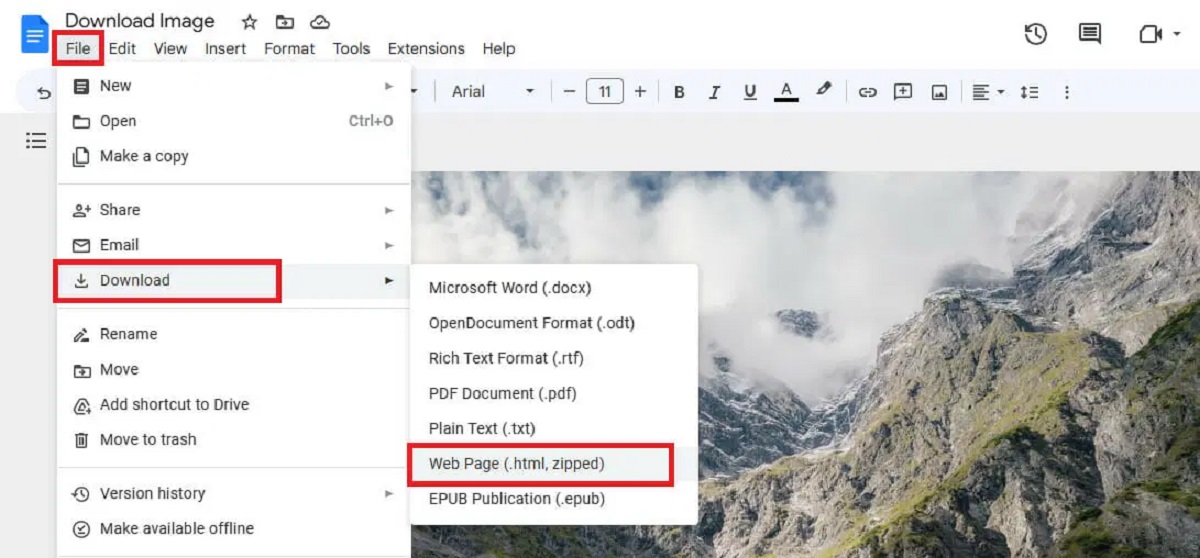
Step 3: Download the Image
Now that you have located the image in your Google Docs document, it’s time to download it onto your computer. Google Docs provides an easy way to download images, allowing you to save a copy of the image file for further use.
To download the image, right-click on the selected image. A context menu will appear with various options. Look for the option that says “Save as picture” or “Save image as.” Click on this option to initiate the download process.
A pop-up window will appear, allowing you to choose the location on your computer where you want to save the image. Select a destination folder or create a new one, and then click the “Save” button.
Google Docs will automatically save the image as a file in the selected location on your computer. The file format of the image will depend on the original format of the image in your document. Common image formats include JPEG, PNG, and GIF.
Once the download is complete, you can access the image on your computer using a file explorer or by navigating to the destination folder you selected. The image file can now be used for various purposes, such as inserting it into other documents, sharing it with others, or using it for personal or professional projects.
With the image successfully downloaded, you have completed the third step of the process. The next step will guide you through choosing the format of the downloaded image.
Step 4: Choose the Format
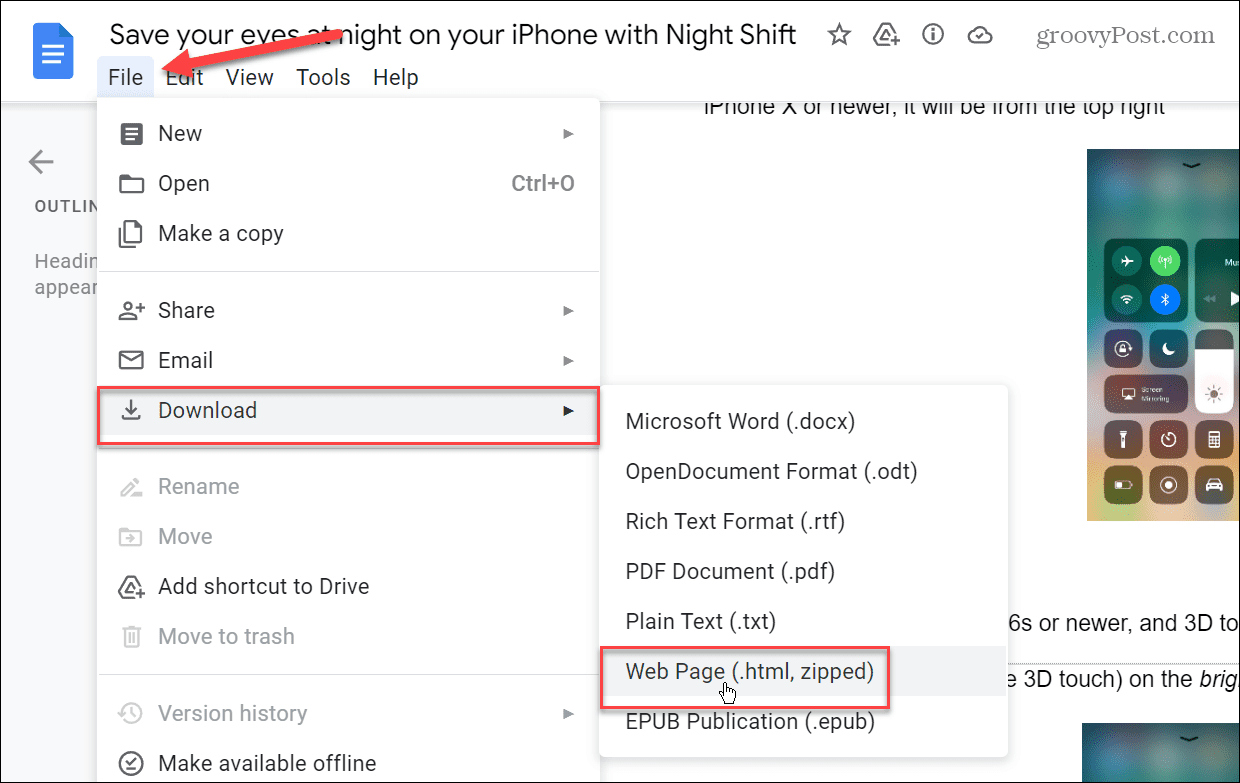
After downloading the image from your Google Docs document, you have the option to choose the format in which the image will be saved. The format you choose will depend on the specific requirements and preferences of your project or intended use.
When you right-clicked on the image and selected “Save as picture” or “Save image as,” the image was saved with its original format by default. However, if you wish to change the format, you can do so before finalizing the download.
To choose the format of the downloaded image, look for the dropdown menu labeled “Save as type” or a similar option. Click on the dropdown menu to view the available formats, which may include popular options such as JPEG, PNG, GIF, or even SVG (scalable vector graphics).
If you are unsure about which format to choose, consider the following:
- JPEG: This format is widely supported and is great for photographs or images with many colors. However, it may result in a loss of image quality due to compression.
- PNG: PNG format preserves image quality while also supporting transparent backgrounds. It is suitable for images with text or graphics that require a crisp look.
- GIF: GIF format is ideal for simple, animated images. It supports animation and transparency, but has a limited color palette and lower image quality.
- SVG: SVG format is perfect for scalable graphics, such as logos or icons. It can be resized without losing quality, making it suitable for various screen sizes.
Select the desired format from the dropdown menu. Once you have made your selection, the image will be saved in the chosen format when you click the “Save” button.
By choosing the format that best suits your needs, you ensure that the downloaded image maintains its desired quality and compatibility for future use.
With the format selected, you have completed the fourth step of the process. The final step will guide you through saving the image on your computer.
Step 5: Save the Image
Now that you have downloaded and chosen the format of the image from your Google Docs document, it’s time to save it on your computer. Saving the image ensures that you have a copy readily available for future use without the need to rely on the online version.
Before saving the image, it’s a good practice to give it a descriptive and meaningful file name. This will make it easier to locate and identify the image later on. To rename the image file, right-click on the downloaded image file and select “Rename” from the context menu. Type in the desired file name and press Enter or click outside of the rename box to save the changes.
Next, choose the destination folder on your computer where you want to save the image. You can select an existing folder or create a new one specifically for the downloaded images. This step is important for keeping your files organized and easily accessible.
Once you have selected the folder, click the “Save” button to save the image in the designated location. The image file will now be stored on your computer, ready for use in your projects or to be shared with others.
Remember to make a note of the folder location where you saved the image so that you can easily retrieve it when needed. Additionally, it’s a good practice to periodically back up your files to avoid any potential loss or accidental deletion.
With the image successfully saved on your computer, you have completed the final step of the process. Congratulations! You can now access and use the downloaded image offline, confident in the knowledge that you have a local copy for your convenience.
Conclusion
Downloading an image from Google Docs may initially seem like a daunting task, but with the steps outlined in this article, it becomes a straightforward process. By following these steps, you can effortlessly save an image from your Google Docs document onto your computer, giving you the freedom to use it offline or in other projects.
Opening Google Docs is the first step, whether you access it through a web browser or the mobile app. Once you have your document open, locating the image within it is the next crucial step. Whether the image is embedded in text or stands alone, using the selection tool will allow you to identify and choose the image you want to download.
After locating the image, downloading it is a simple right-click and selecting the “Save as picture” or “Save image as” option. Choose a destination folder on your computer, and the image will be saved in its original format by default. However, you also have the option to choose a different format for the image before saving it.
Finally, save the image onto your computer by giving it a descriptive file name and selecting a destination folder. This step ensures that you have easy access to the image and can use it in other projects or share it with others as needed.
With these steps, you can confidently download and save images from your Google Docs documents. Whether you are using the images for work, school, or personal purposes, having them readily available on your computer gives you the flexibility to work offline or utilize them in other applications.
Now that you are familiar with the process of downloading images from Google Docs, you can easily integrate images into your documents and make the most of the platform’s versatile features.