Virtually all businesses these days need compelling branding that catches the eye to attract customers. However, when you’re just a budding business, it can be difficult to hire a graphic designer right away. As a result, many business owners opt to learn how to use Canva to substitute for a real graphic designer. If you want to boost your business’ graphics, here’s how to start using this easy-to-use graphic design app.
Why Use Canva?
- Has a free version
- Made for beginners
- Browser-based
- Tons of templates
When you think about graphic design, the first tool that comes to mind might be something like Adobe Photoshop. It is the industry standard so it’s understandable why most people might gravitate towards the medium.
However, Photoshop and the other tools within Adobe’s suite are very expensive to procure. Their monthly fees cost as much as $69.72 monthly, depending on the apps you want. Moreover, Adobe’s tools are a bit complicated to learn, especially for complete beginners.
Thankfully, graphic design isn’t limited to the Adobe suite and there are many more alternatives. For example, many individuals opt to use the Affinity suite to create their business’ graphics. It’s compatible with some of the industry-standard file types like PSD and only demands a one-time payment.
On the other hand, there are also free alternatives available on the market like Gimp and Krita. However, these tools usually come with a bit of a learning curve and aren’t always easy to use. That is precisely where Canva comes in.
Canva is not only a free app; it’s designed to be easy to use even for beginners. It’s so easy that even non-designers with no eye for graphic design can easily create decent-looking graphics. The app has tons of templates for social media, various print sizes, and more for nearly anything you might need. Moreover, it also has lots of assets and stock images that are free to use.
In addition, Canva is also a browser-based app so you don’t need extra storage space to start. You can create an account and log into their website and jump right in! Moreover, Canva also conveniently provides a mobile app so you can work on the go.
How to Use Canva for Your Graphic Design
As you can see, Canva is a very powerful graphic design app that can easily create whatever you need. However, if you’re not familiar with the app, you might not know where to begin. Thankfully, the app is pretty simple so you can easily learn how to use Canva. Just follow these steps to create your first graphic design.
Step 1: Setting Up Your Account
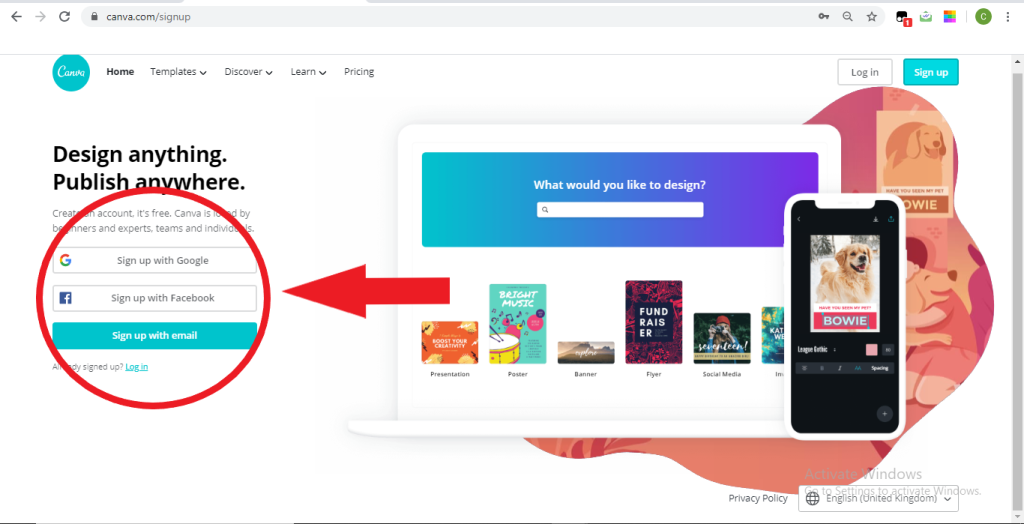
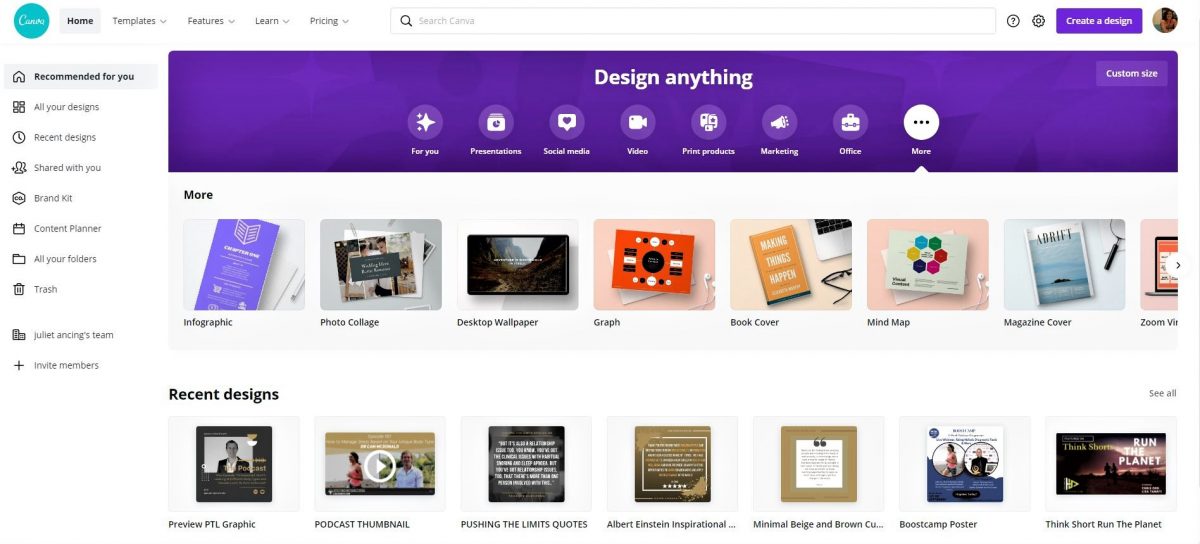
Learning how to use Canva all starts with creating an account on the website. Just go to www.Canva.com and click on Sign Up on the upper-right. Afterward, you can sign in with Google, Facebook, or a separate email address to start. Once you’ve signed up, it’s time to go back to Canva and click on “create a design” in the upper-right corner.
Step 2: Choosing Your Dimensions
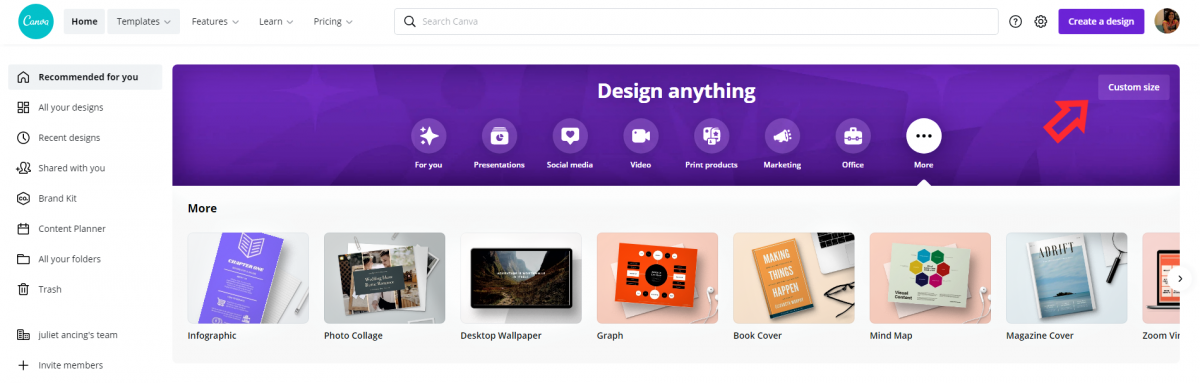
Layouting and creating a graphic design is heavily dependent on the canvas’ size and dimensions. Hence, the first thing you should do when you’re on the Canva homepage is to choose your design type. You can choose from any of the presets present, whether they’re for social media, a flyer, or others.
On the other hand, you can also dictate the dimensions you want if you need a custom size. Just search for “custom size” and then choose whether you want to input your dimensions in inches, pixels, or millimeters.
Step 3: Selecting a Background
Afterward, you can choose the background you want for the design, whether it’s a solid color or a photo. Solid colors are usually pretty easy to incorporate as you only need to use the Color Picker tool to start. You can find this tool at Canva’s toolbar at the top of the interface.
On the other hand, background photos are a little trickier to set up. Firstly, you need to add a grid to your canvas. This grid lets you edit your photos later on, whether you want to resize, crop, or flip them for effect.
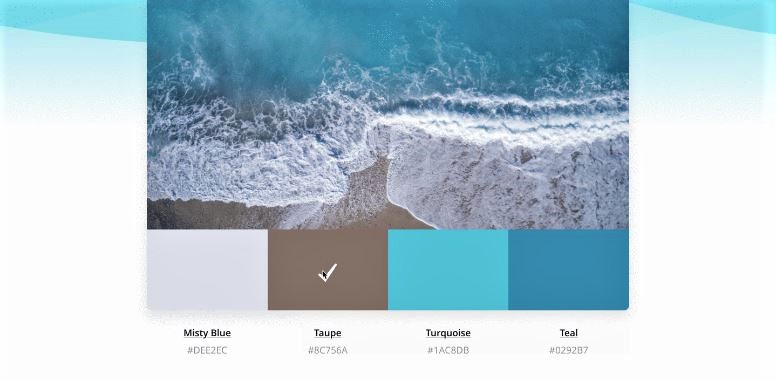
Afterward, just search the image you want and upload it onto the website. Then, drag and drop the photo to the grid to snap it in place. Once added, you should be able to add filters and change various properties. You can increase or decrease the brightness, sharpness, or saturation until you’re satisfied.
Step 4: Adding Elements
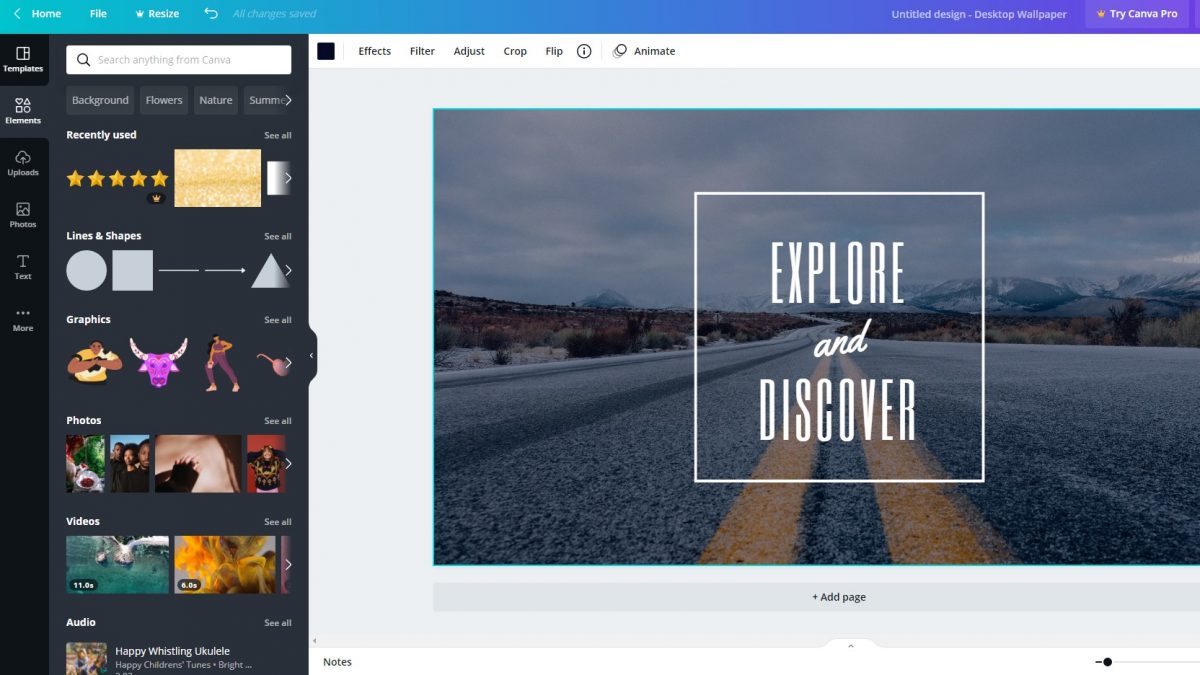
Once you have your background set up, it’s time to add the visual elements to create your design. These visual elements help communicate to the viewer the information you want to portray. They can include things like text, illustrations, other photos, or icons.
To add elements like a photo, you can opt to use Canva’s frames to get started. These elements are just under the “Elements” area on the side panel. Just pick an element you want to add and play around with to create a unique and good-looking design.
Step 5: Choosing a Font for Your Text

Text is one of the most important parts of creating graphic designs. They directly communicate what you want to the reader and impact how they receive the information. However, simply adding text with a default font isn’t always the best choice. You want to have a cohesive design that suits your brand’s aesthetic.
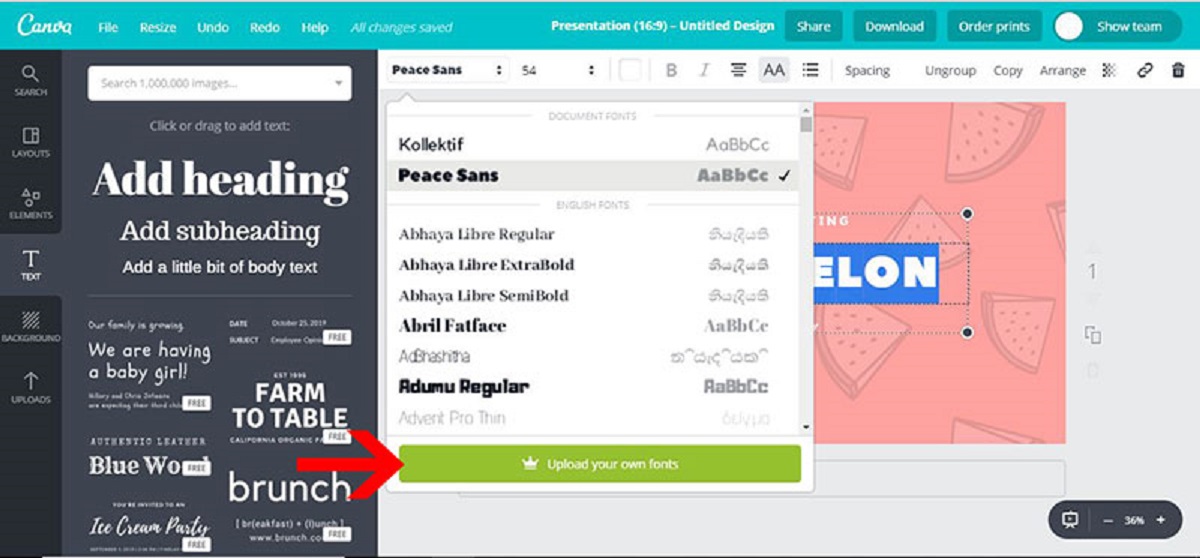
Thankfully, Canva has hundreds of fonts within its library so you can choose from the numerous ones available there. Just go to the “Text” area in the side panel and browse the various fonts Canva has to offer. On the other hand, you can search for the font you want if you have a specific one in mind.
Best Features of Canva for Graphic Design
The Canva graphic design tool is primarily a web-based platform. However, that doesn’t mean you have to tie yourself down to your computer to create good designs. That’s because Canva is also available as a mobile app with all the basic features you might need. The methods for how to use Canva on the web platform translates pretty well to the mobile app. Hence, the steps to choose a canvas size, add backgrounds, elements, and text all remain the same.
However, the main difference between the two platforms lies in navigation and how the app houses different features. To put it simply, the app is divided into three basic screens: Home, Designs, and Menu. These three tabs appear at the bottom of the app screen, each with its own icon. Let’s guide you through each section so you can learn how to use Canva on mobile.
Home
Like most apps, Canva provides a Home screen that first appears when you launch the app. Of course, you have to sign in first before this screen appears. Afterward, you should be able to see this screen and browse various templates to create a design.
Search Bar
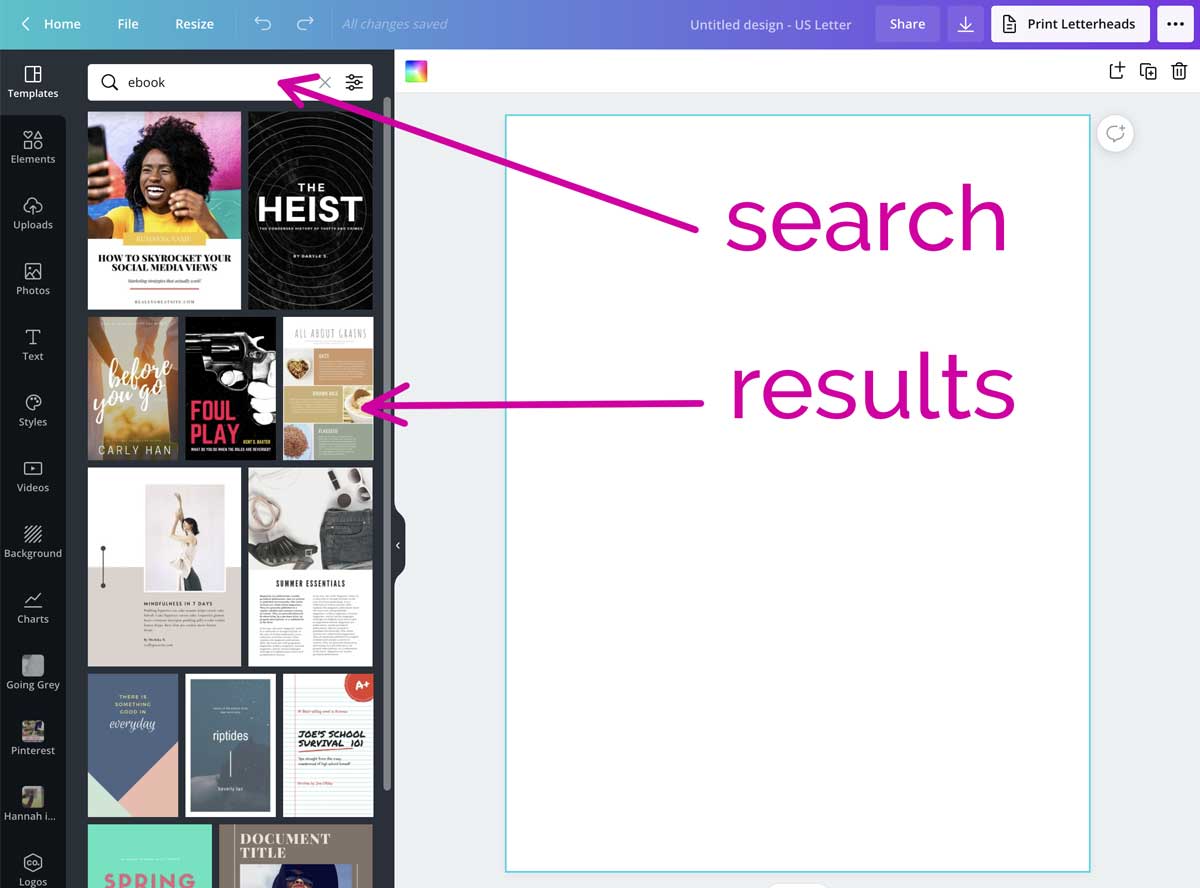
One of the most prominent features the Home screen has is the search bar at the top. You can use this area to search for various templates that you might want to use. The search bar also provides suggestions when you tap on it so you can search templates for Instagram, Facebook, etc.
Templates
If you choose any of the searches, Canva will redirect you to templates made specifically for what you searched. However, you can also choose to create a design from the ground up without using presets or templates. To do this, just choose the Blank option.
Custom Canvas
Apart from these, the Home screen also lets you create a Blank canvas with custom dimensions. Let’s say you need to create a printed design with a custom paper size. To do this, just tap on the “plus (+)” icon on the bottom-right corner of the Home screen. Then, enter the dimensions you want and Canva will redirect you to a new blank canvas with the appropriate size.
Designs
The Designs screen is located in the center of the taskbar at the bottom of Canva’s app. When you navigate to this screen, it should show you all the designs your account has created so far. This includes designs you created on the mobile app and the ones you created on the desktop.
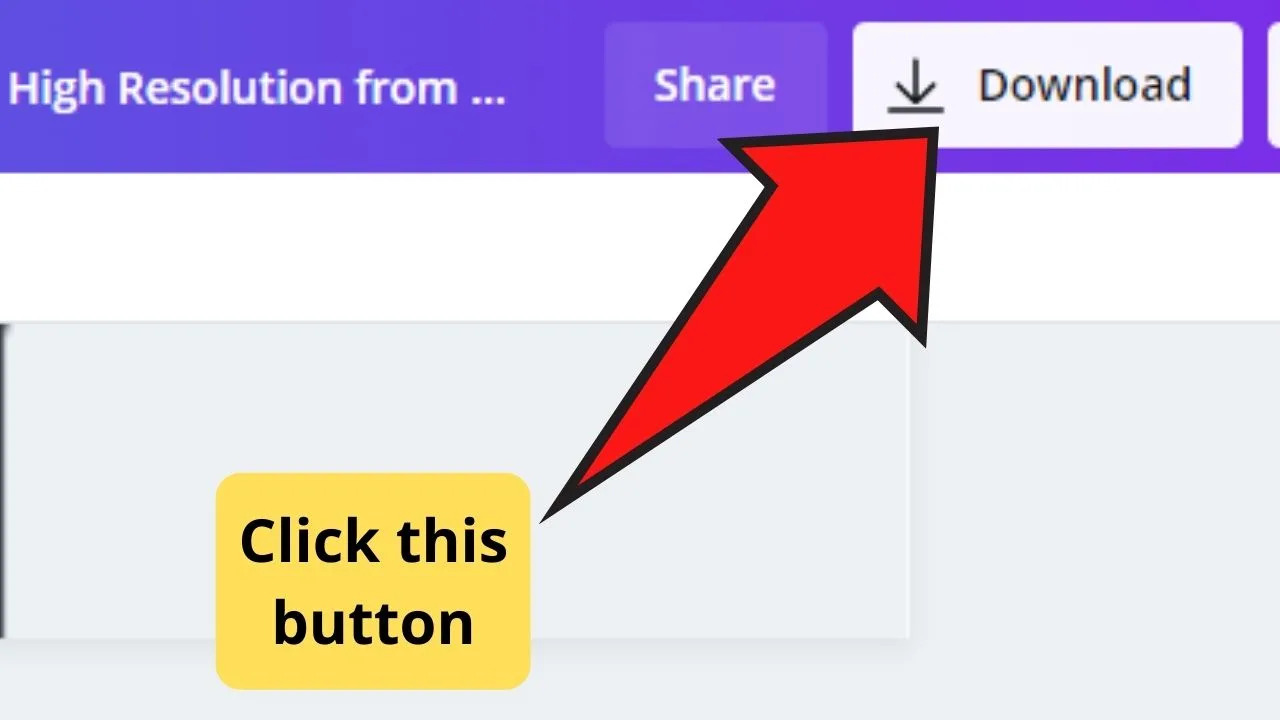
Download Design
As you work on your project, the design page will have two contextual buttons on the top-right. The downward arrow icon just allows you to download the design to your phone. This allows you to download and post an image right from your mobile phone.
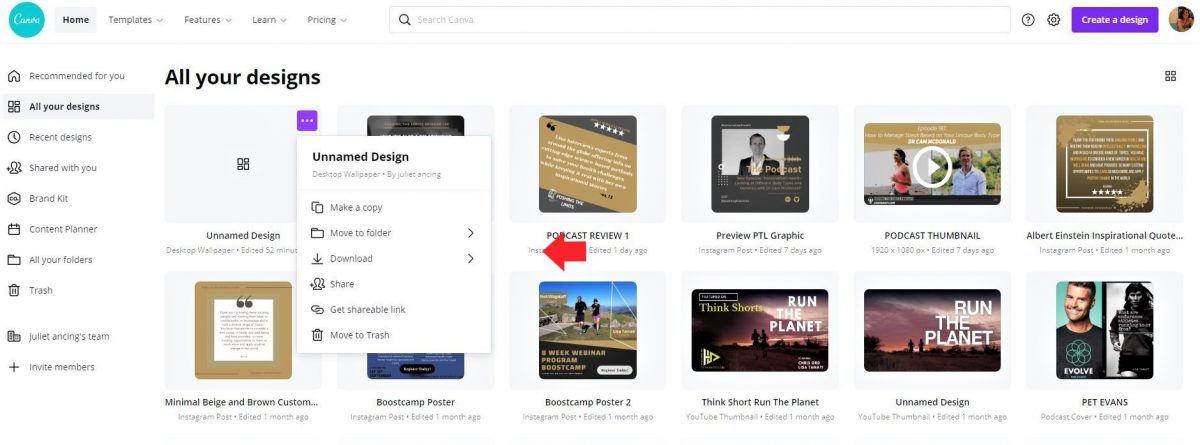
More Options
On the other hand, the ellipses icon (three-dots icon) redirects you to a pop-up menu. This just shows you various actions that you can do with your image. You can copy, edit, download, share, delete, or move the design to a different folder within this menu.
Editing your design will allow you to edit the graphic right within your smartphone. However, keep in mind that this will override your progress and save it depending on your edits. Hence, you can also choose “Make a Copy” to save the previous iteration just in case. Afterward, you can edit the copy to create variations of the original design.
Organization

Lastly, on the same homepage, you can also find additional features and settings you can access. These include tinkering with your account, looking through your folders, and more. The most important features under the Menu would be Shared with You and All Your Folders.
The “Shared with You” section shows all the designs you’ve collaborated on with your colleagues. On the other hand, the “All Your Folders” section shows all your uploads and liked designs.
Free vs. Paid: Canva Prices And Pro Features
Canva is a great, beginner-friendly app that’s web-based and free to use. However, that doesn’t mean Canva doesn’t have a pro version that has many more features. What’s the difference between the two? Here’s how they differ.
Canva Free
The free version of Canva allows you to do a lot of the basics. You can use their stock photos, fonts, and free elements to your heart’s content. Moreover, you can also import images and insert them into your designs, provided you have the necessary copyrights. Free users can also create custom dimensions without being limited to preset canvas sizes or templates.
On the other hand, you can also export your designs in various common file tiles such as PDF and JPEG. Moreover, you can also share, view, and edit the access to Canva designs with collaborators.
Canva Pro
The Pro version of Canva offers many features that the free version does not. With it, you can add brand colors, logos, and fonts using a branding kit. This allows you to create designs easier and faster according to your company’s branding. Moreover, you can also resize all of your designs with one push of a button.
In addition, Canva Pro also provides access to 60,000 free templates — much more than Canva’s free version. Moreover, it also provides access to 60 million premium assets, graphics, photos, and even videos.
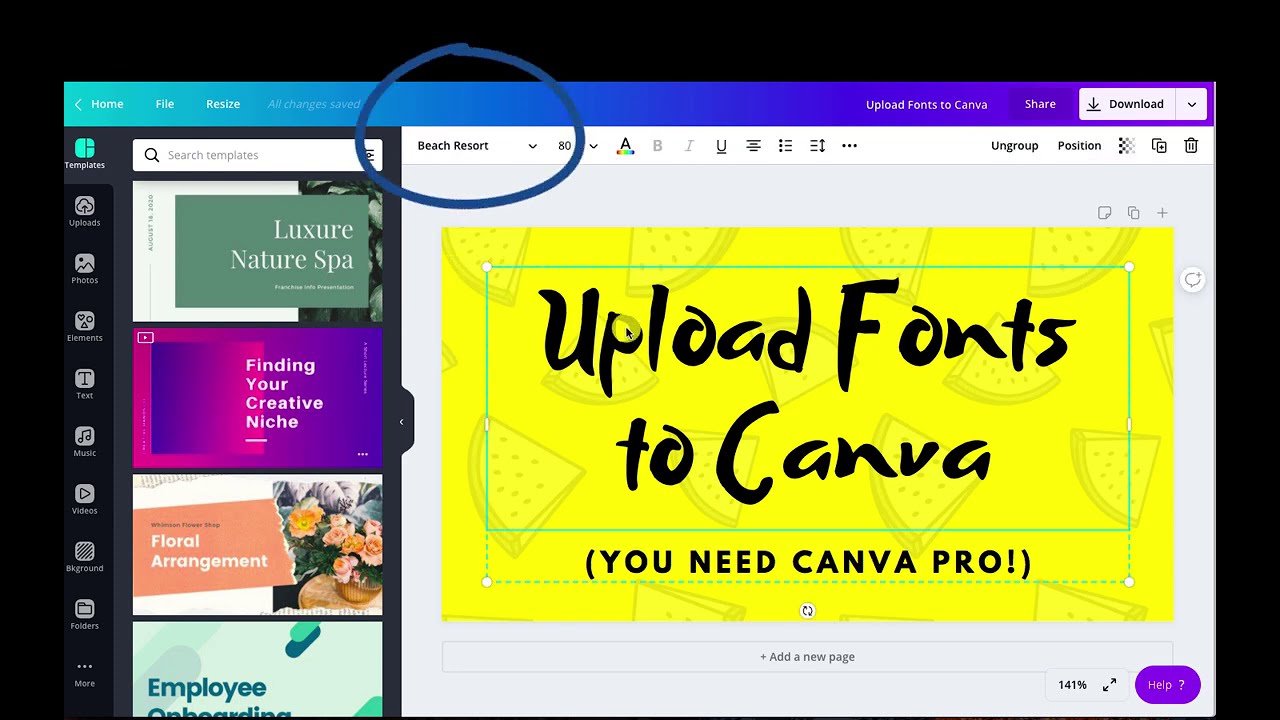
On the other hand, you’re also not limited to Canva’s font library with the Pro version. That’s because you can upload logos and fonts that you own right within the app. Moreover, there are plenty more export options like GIFs and MP4.
How much does Canva cost? The pro version costs roughly $10 monthly. However, there is a discount if you choose to pay for the subscription yearly. Unfortunately, there is no one-time payment option for Canva, so you’ll have to fork over monthly payments to use it.
Final Thoughts on Learning How to Use Canva
Learning how to use Canva is one of the best skills to have, especially for beginner graphic designers. The app provides various useful templates, both in design and in canvas size, to make creating graphics easier. It’s the best app to use for budding businesses and independent designers who want to create beautiful graphics. However, there’s also a pro version for professionals who like Canva’s plethora of templates and designs. With it, anyone can easily jumpstart and boost their venture’s graphics without spending a dime.