Introduction
So, you've decided to take the plunge and swap out the switches on your mechanical keyboard. Whether you're looking for a different typing experience, want to customize the sound and feel of your keyboard, or need to replace a faulty switch, this guide will walk you through the process step by step. With the right tools and a bit of patience, you can give your keyboard a whole new lease on life.
Mechanical keyboards have gained popularity among computer enthusiasts and typists for their tactile feedback and durability. Each key on a mechanical keyboard contains its own switch, which is responsible for registering keystrokes. These switches come in various types, offering different actuation forces, tactile feedback, and audible clicks. However, if you find that the switches on your current keyboard don't quite meet your preferences, swapping them out for a different type can make a world of difference.
Before diving into the process of replacing the switches, it's essential to gather the necessary tools and materials. This includes a keycap puller, a switch puller or tweezers, a soldering iron and solder (if the switches are soldered to the PCB), and, of course, the replacement switches themselves. Additionally, having a clean and well-lit workspace will make the task much more manageable.
As you embark on this journey to customize your keyboard, keep in mind that patience and attention to detail are key. While the process may seem daunting at first, the satisfaction of typing on a keyboard with switches tailored to your preferences will make it all worthwhile. Let's dive into the step-by-step process of swapping out switches on your mechanical keyboard.
Tools and Materials Needed
Before you begin swapping out the switches on your mechanical keyboard, it’s important to have the right tools and materials on hand. Here’s what you’ll need:
- Keycap puller: This tool is essential for safely removing the keycaps from your keyboard. It helps prevent damage to the keycaps and the keyboard itself.
- Switch puller or tweezers: If your keyboard’s switches are plate-mounted, a switch puller or a pair of tweezers will be necessary to remove the switches from the plate.
- Soldering iron and solder: If your keyboard’s switches are soldered to the PCB, you’ll need a soldering iron and solder to desolder the old switches and solder the new ones in place.
- Replacement switches: Choose the type of switches that best suit your typing preferences. There are various options available, including linear, tactile, and clicky switches, each offering a different typing experience.
- Clean workspace: Ensure you have a clean, well-lit workspace to carry out the switch replacement process. A clutter-free environment will make it easier to keep track of small components and perform the necessary tasks.
Having these tools and materials ready will streamline the switch replacement process and ensure that you can work efficiently and effectively. It’s important to gather everything you need before starting to avoid interruptions once the process is underway. With the right tools in hand, you’ll be well-prepared to tackle the task of swapping out switches on your mechanical keyboard.
Removing the Keycaps
Before you can access the switches on your mechanical keyboard, you’ll need to remove the keycaps that cover them. This process requires precision and care to avoid damaging the keycaps or the keyboard itself. Here’s a step-by-step guide to removing the keycaps:
- Prepare your workspace: Ensure you’re working on a clean, flat surface with adequate lighting. This will help you see the keycaps and avoid misplacing them during removal.
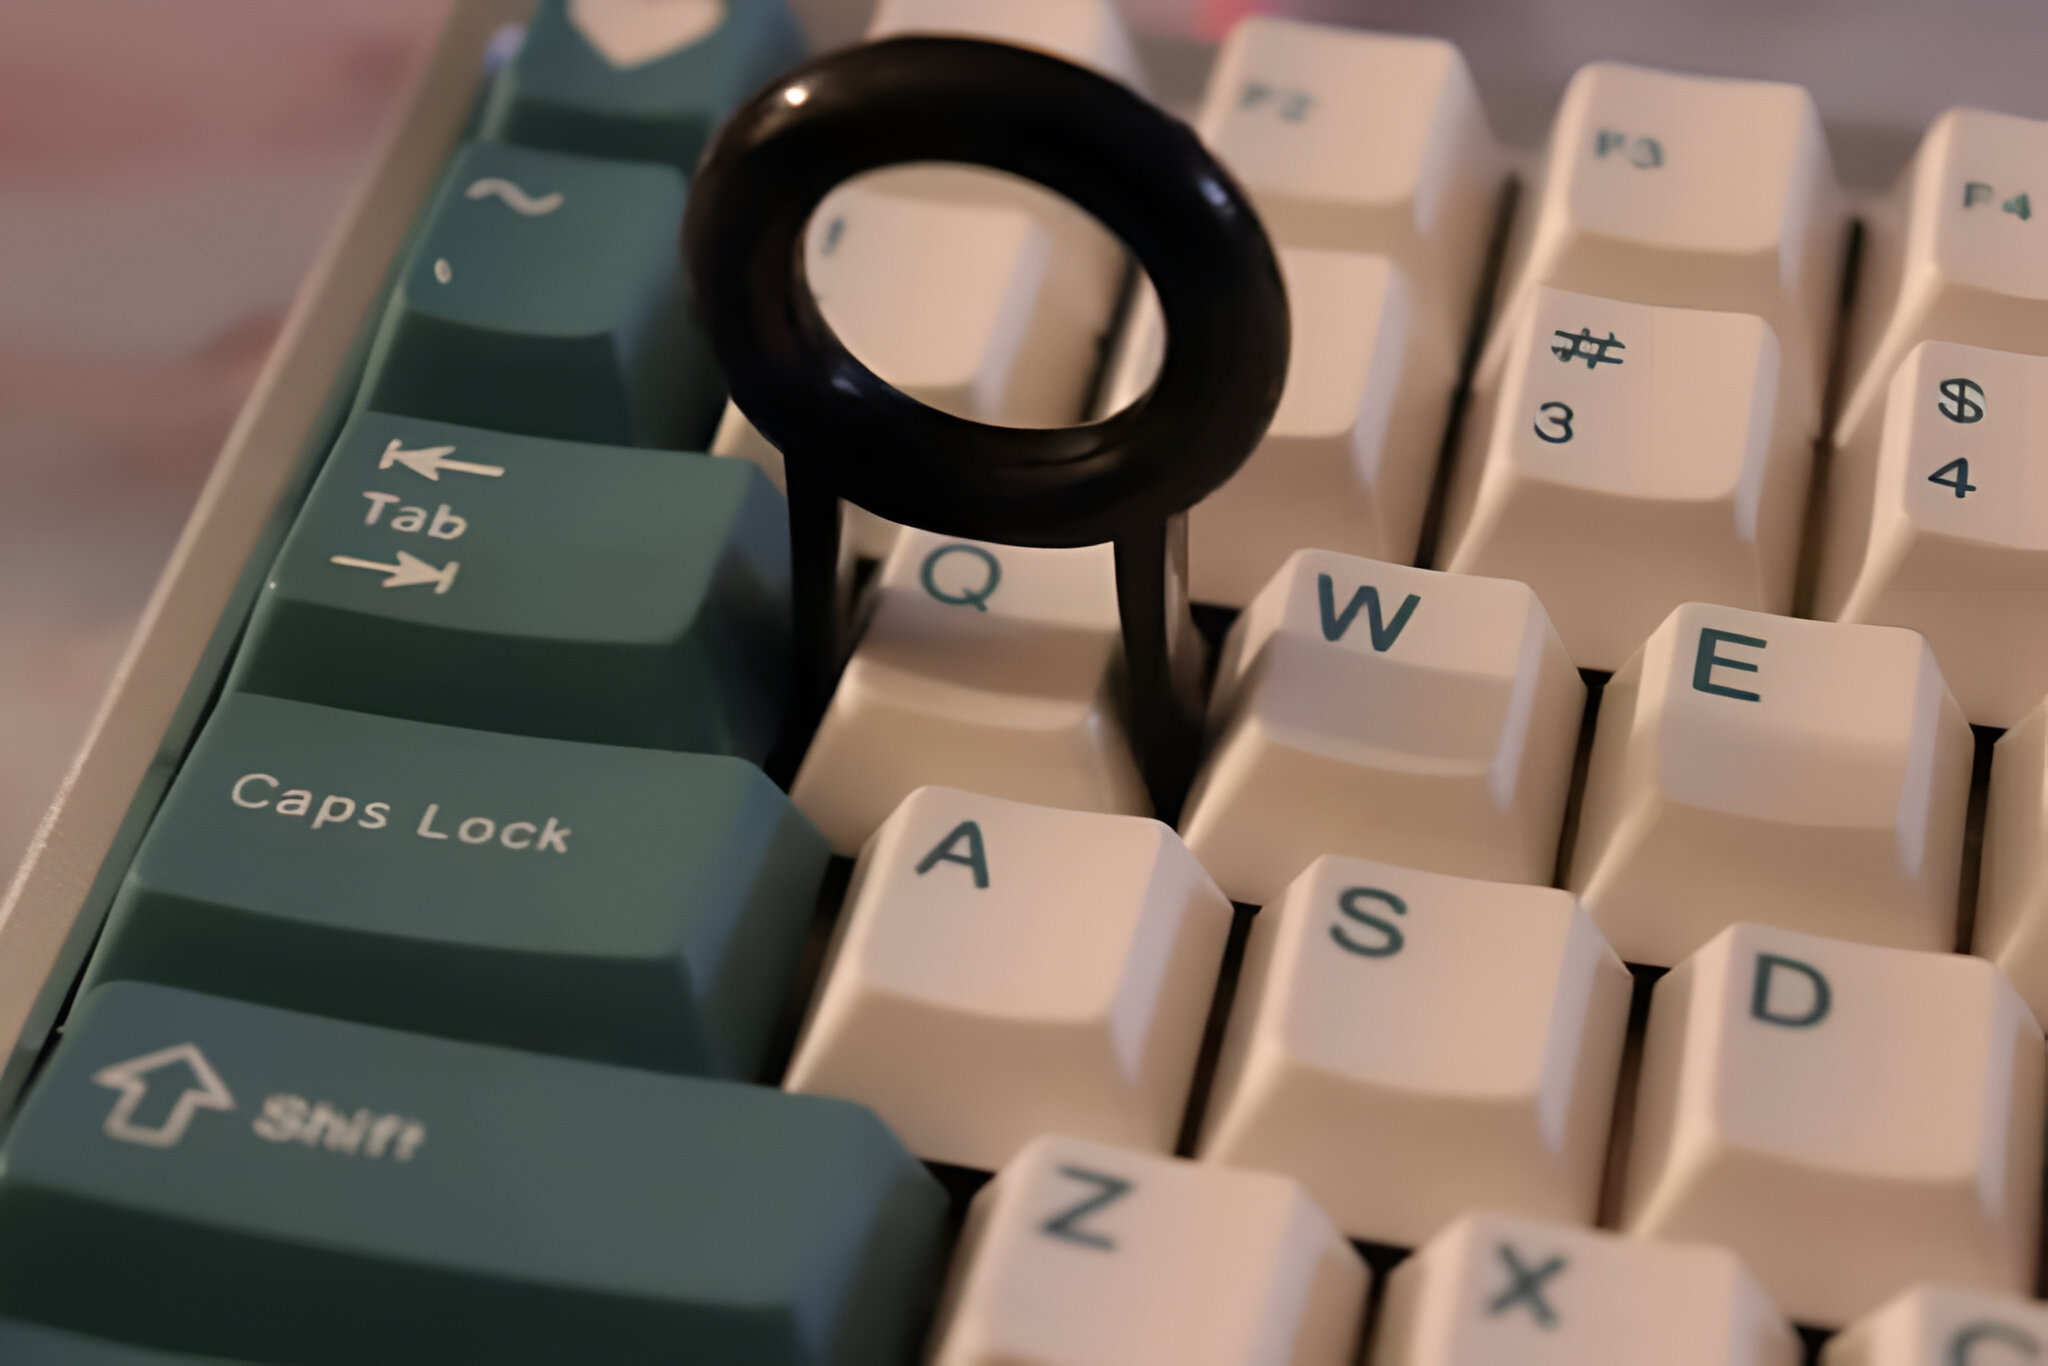
- Use a keycap puller: Position the keycap puller around the edges of a keycap, ensuring that the puller’s wires are evenly spaced on both sides. Gently but firmly pull upwards to detach the keycap from the switch stem. Repeat this process for each keycap, taking care not to exert excessive force that could damage the switches.
- Organize the keycaps: As you remove the keycaps, consider organizing them in a way that will make it easy to reassemble the keyboard later. You can use a small container or lay them out in a grid pattern to match the keyboard’s layout.
- Inspect the keyboard: With the keycaps removed, take a moment to inspect the exposed switches and the keyboard’s surface. This is a good opportunity to clean any accumulated dust or debris using a soft brush or compressed air.
By following these steps, you’ll successfully remove the keycaps from your mechanical keyboard, granting access to the switches beneath. Taking your time and handling the keycaps with care will ensure that they remain in good condition for reinstallation later. With the keycaps out of the way, you’re now ready to move on to the next phase of the switch replacement process.
Removing the Old Switches
Now that the keycaps have been successfully removed, the next step in the process of switching out the switches on your mechanical keyboard is to remove the old switches. Depending on the keyboard’s construction, the method for removing the switches may vary. Here’s a general guide to removing the old switches:
- Determine the switch mounting: Identify whether your keyboard’s switches are plate-mounted or PCB-mounted. Plate-mounted switches are attached to a metal plate inside the keyboard, while PCB-mounted switches are directly soldered to the printed circuit board (PCB).
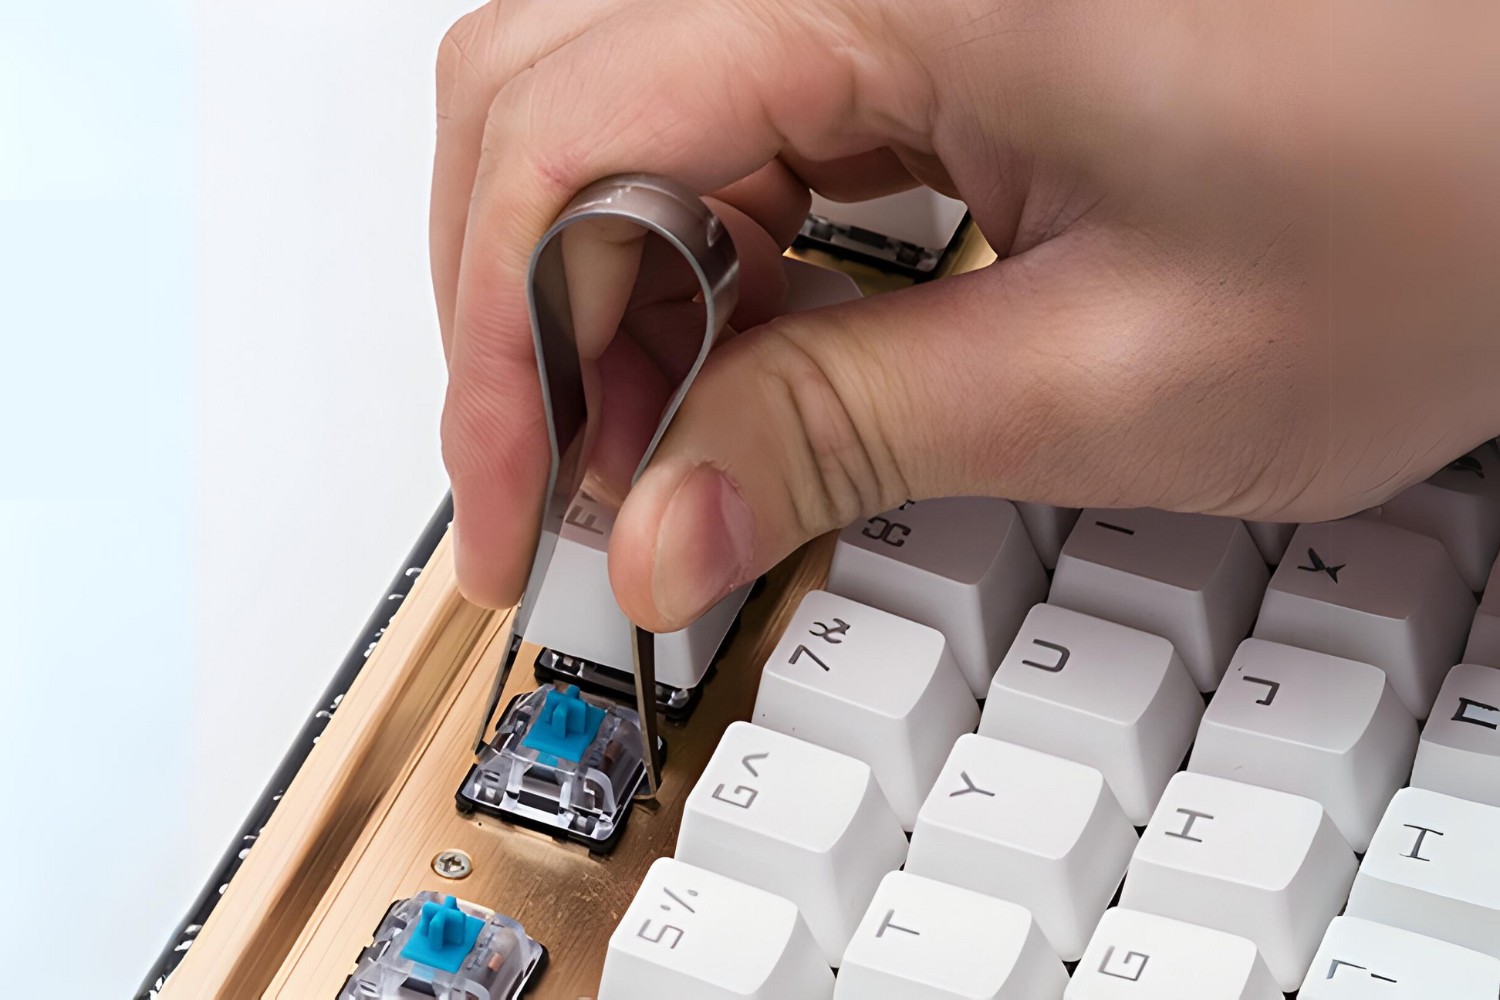
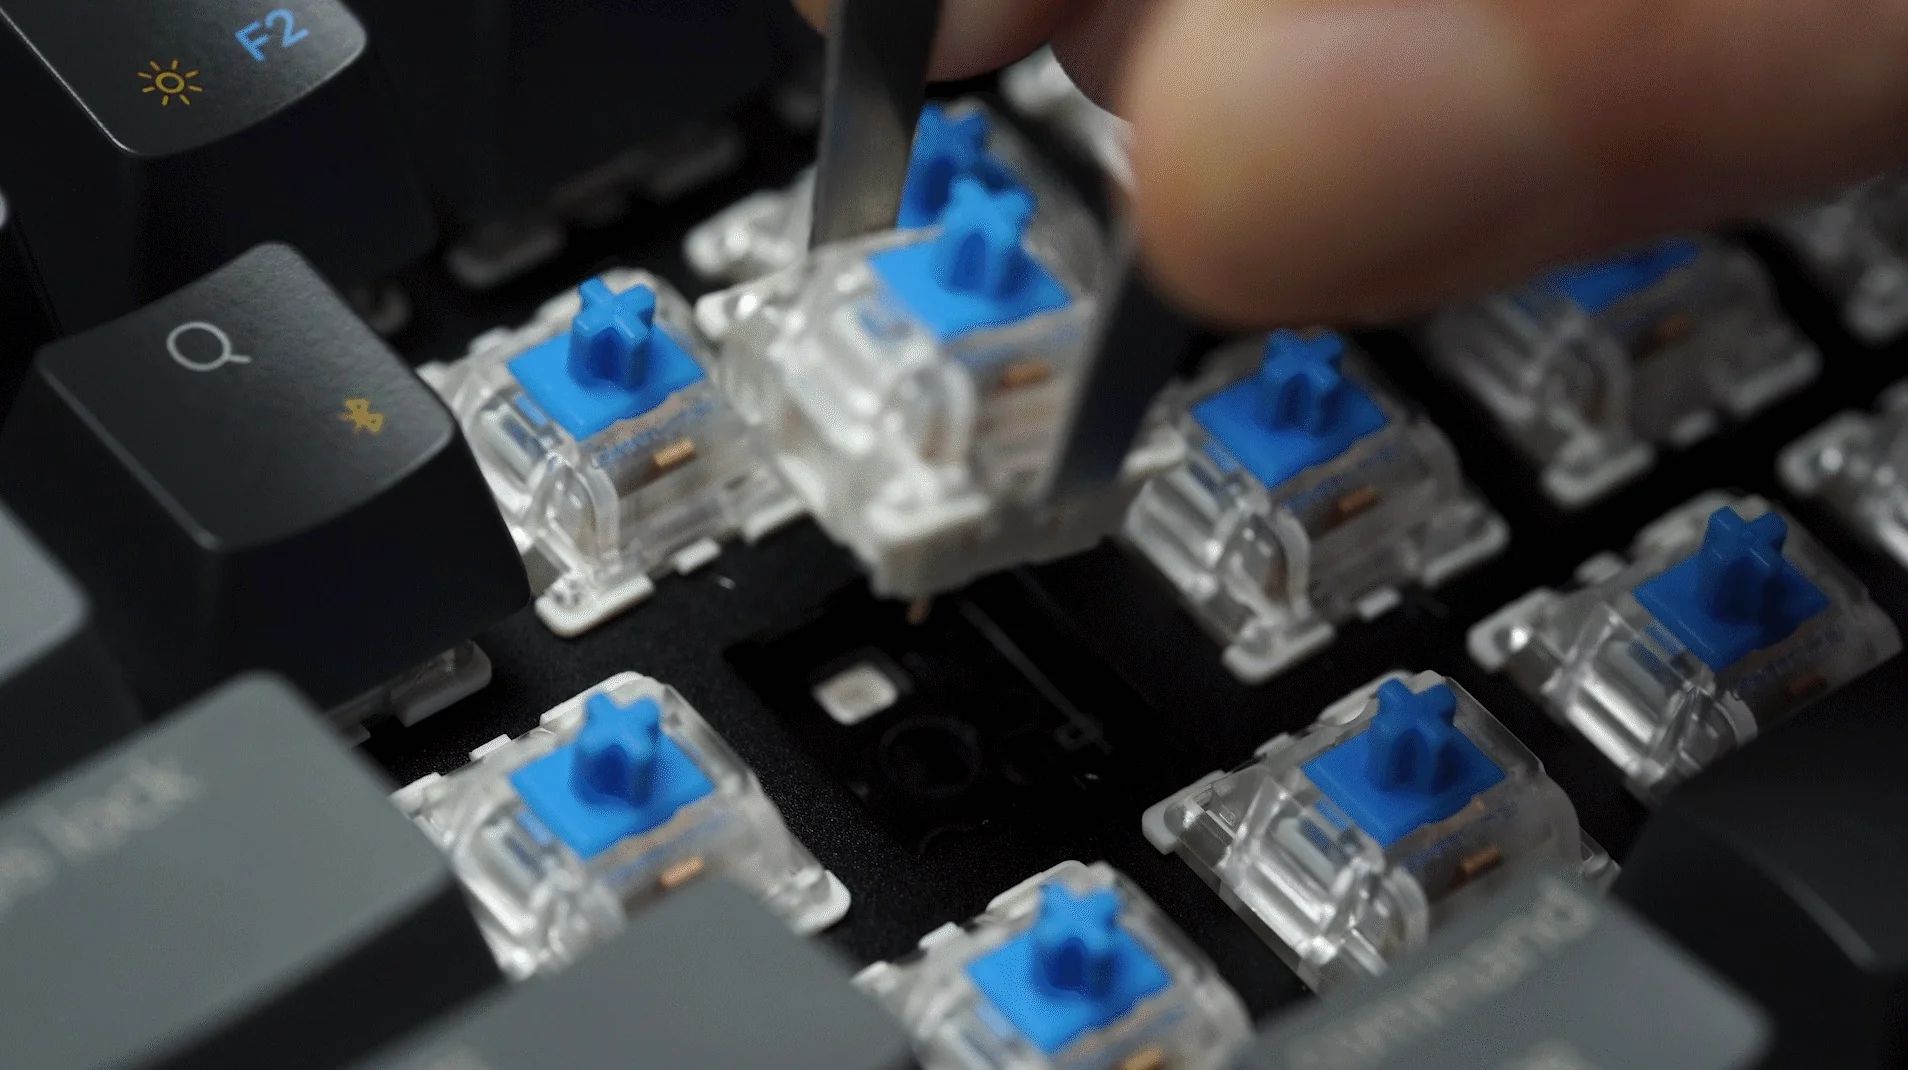
- Plate-mounted switches: If your keyboard has plate-mounted switches, you can use a switch puller or a pair of tweezers to carefully extract the switches from the plate. Gently wiggle the switch from side to side while applying upward pressure to release it from the plate’s clips.
- PCB-mounted switches: For keyboards with PCB-mounted switches, the process is more involved. You’ll need to desolder the old switches using a soldering iron and solder wick or a desoldering pump. This requires precision and caution to avoid damaging the PCB or other components.
- Dispose of old switches: Once the old switches are removed, set them aside for proper disposal or recycling. It’s important to handle electronic components responsibly and in accordance with local regulations.
By following these steps, you’ll successfully remove the old switches from your mechanical keyboard, paving the way for the installation of new switches. It’s essential to approach this process with patience and attention to detail, especially when desoldering switches from the PCB. With the old switches out of the way, you’re now ready to proceed to the exciting phase of installing the new switches.
Installing the New Switches
With the old switches removed, it’s time to install the new switches onto your mechanical keyboard. Whether you’re upgrading to a different switch type or replacing faulty switches, this phase of the process allows you to customize your typing experience to your preferences. Here’s a detailed guide to installing the new switches:
- Prepare the replacement switches: Ensure that the new switches you’ve selected are compatible with your keyboard’s layout and mounting style. Take a moment to inspect the switches and verify that they are free from any defects or damage.
- Plate-mounted switches: If your keyboard features plate-mounted switches, align the new switches with the corresponding positions on the metal plate. Apply gentle pressure and wiggle the switches as needed to seat them securely into the plate’s clips.
- PCB-mounted switches: When dealing with PCB-mounted switches, carefully align the new switches with the solder pads on the PCB. Ensure that the switch leads are correctly positioned before soldering them in place. Take care to avoid excessive heat that could damage the PCB or surrounding components.
- Soldering the switches: If you’re installing PCB-mounted switches, use a soldering iron to carefully solder each switch lead to the corresponding pad on the PCB. Apply just enough solder to create a secure connection without causing any bridging between adjacent pads.
- Test the switches: Once the new switches are installed, perform a quick test to ensure that they register keystrokes correctly. Press each key to verify that the corresponding switch functions as intended. This step helps identify any potential issues before reassembling the keyboard.
By following these steps, you’ll successfully install the new switches onto your mechanical keyboard, bringing you one step closer to enjoying a customized typing experience. It’s crucial to approach the installation process with precision and care, particularly when soldering switches to the PCB. With the new switches securely in place, you’re now ready to move on to the next phase of the switch replacement process.
Testing the New Switches
After installing the new switches on your mechanical keyboard, it’s essential to thoroughly test them to ensure they function as intended. This step is crucial for identifying any issues and making any necessary adjustments before reassembling the keyboard. Here’s a comprehensive guide to testing the new switches:
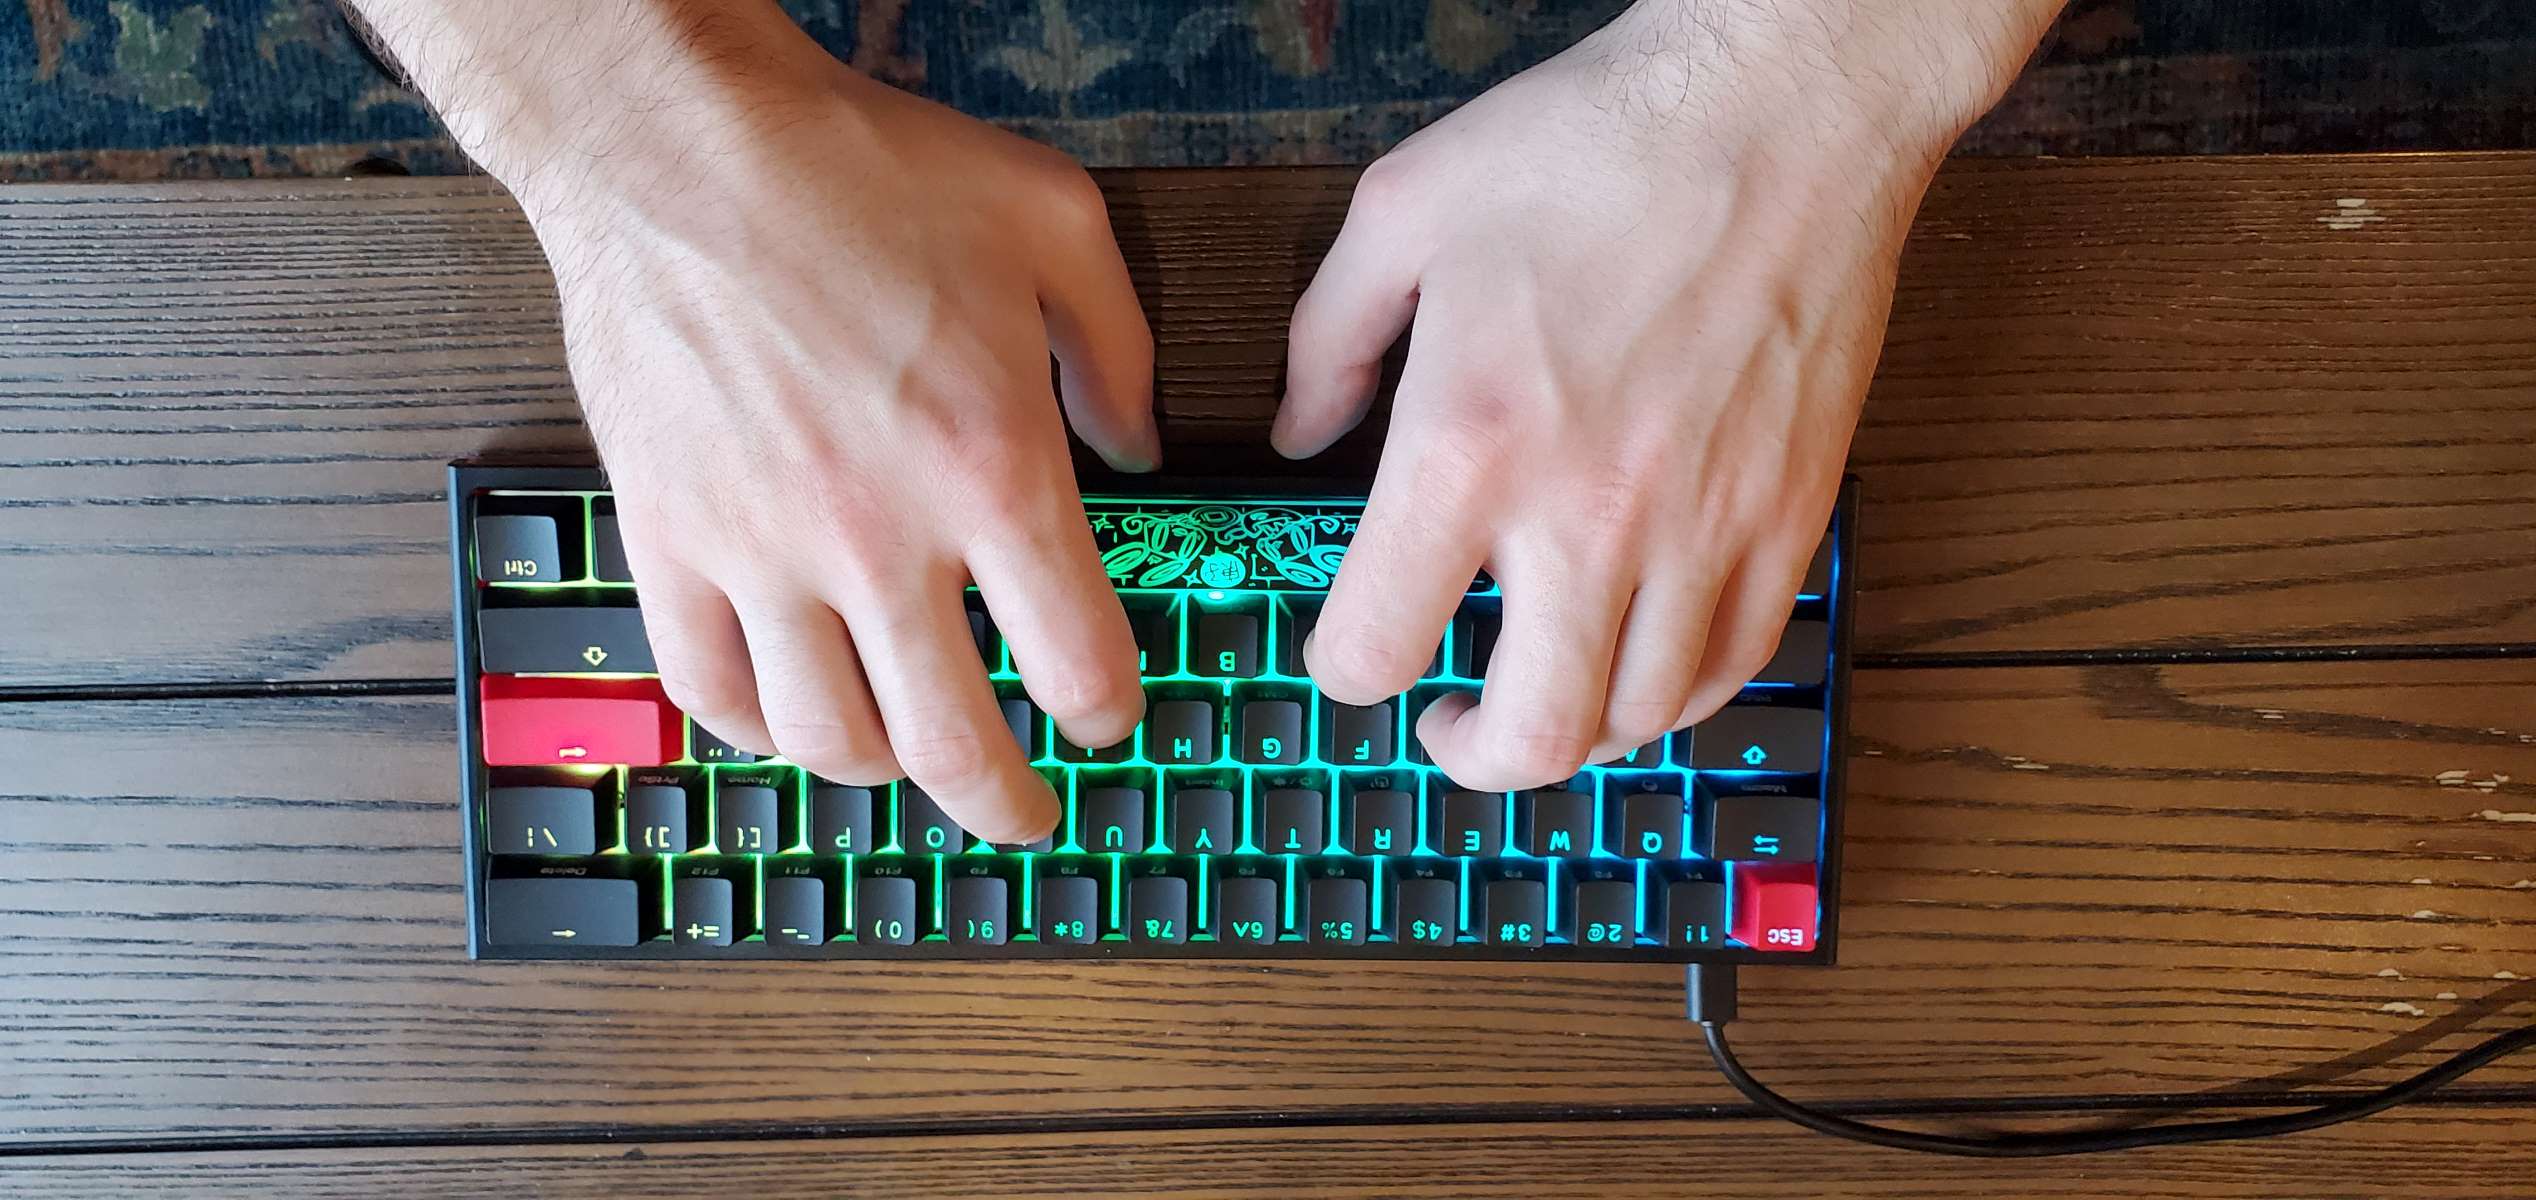
- Keystroke testing: Begin by typing on each key to verify that the corresponding new switch registers keystrokes accurately. Pay close attention to the feel and sound of each key press, ensuring that it aligns with your expectations based on the chosen switch type.
- Typing consistency: Test the new switches for typing consistency across the entire keyboard. Ensure that each key provides a uniform typing experience, with consistent actuation forces and tactile feedback if applicable to the switch type.
- Key rollover and ghosting: Verify the key rollover capabilities of the new switches by simultaneously pressing multiple keys across the keyboard. This test helps ensure that the switches can handle simultaneous keystrokes without triggering unintended ghosting or input conflicts.
- Sound and feel evaluation: Pay attention to the sound and feel of the new switches as you type. Consider whether the switch type meets your desired typing experience in terms of noise level, tactile feedback, and overall comfort during extended typing sessions.
- Reverification of soldered switches: If you desoldered and replaced switches on a PCB, double-check the solder joints to ensure they are secure and free from any cold joints or solder bridges. This step is crucial for preventing connectivity issues due to improper soldering.
By conducting thorough testing of the new switches, you can address any potential issues and fine-tune the keyboard to deliver the typing experience you desire. This step allows you to make any necessary adjustments or replacements before proceeding to reassemble the keyboard. With the new switches performing optimally, you’re now ready to move on to the final phase of the switch replacement process.
Replacing the Keycaps
With the new switches successfully installed and tested, it’s time to reassemble your mechanical keyboard by replacing the keycaps. This phase of the process allows you to restore the keyboard’s functionality and aesthetics while showcasing the new switches. Here’s a step-by-step guide to replacing the keycaps:
- Organize the keycaps: Retrieve the keycaps you removed earlier and organize them according to the keyboard’s layout. This step helps ensure that you can easily identify the correct position for each keycap during reassembly.
- Align and press the keycaps: Position each keycap over the corresponding switch stem, ensuring that the keycap aligns correctly with the switch housing. Apply gentle pressure to press the keycap firmly onto the switch stem, ensuring that it sits flush and secure.
- Check for uniformity: As you replace the keycaps, pay attention to the alignment and spacing between keys. Aim for a uniform and visually appealing layout, ensuring that each keycap sits evenly and consistently across the keyboard.
- Specialized keycaps: If your keyboard features specialized or custom keycaps, take care to match them with the corresponding switches. Pay attention to any unique profiles, legends, or designs that require specific positioning.
- Double-check the layout: Once all keycaps are replaced, double-check the keyboard’s layout to ensure that each keycap corresponds to the correct switch. This step helps prevent any keycap misplacements that could affect the keyboard’s functionality.
By following these steps, you’ll successfully replace the keycaps on your mechanical keyboard, completing the process of switching out the switches. This phase allows you to showcase the new switches while restoring the keyboard to its fully functional and visually appealing state. With the keycaps securely in place, you’ve completed the final phase of the switch replacement process, and your keyboard is now ready to deliver a customized and enjoyable typing experience.
Conclusion
Congratulations! You’ve successfully navigated the process of swapping out switches on your mechanical keyboard, customizing it to suit your typing preferences and aesthetic tastes. This hands-on journey has allowed you to gain a deeper understanding of your keyboard’s construction and provided an opportunity to tailor its performance to your liking.
Throughout this endeavor, you’ve embraced the importance of patience, precision, and attention to detail. From meticulously removing the keycaps to delicately desoldering and soldering switches, each step has contributed to the transformation of your keyboard into a personalized tool for productivity and enjoyment.
By gathering the essential tools and materials, carefully removing the old switches, installing and testing the new switches, and replacing the keycaps, you’ve not only enhanced the functionality of your keyboard but also imbued it with a touch of your own style. The tactile feedback, sound, and overall typing experience are now tailored to your preferences, reflecting the unique characteristics of the new switches you’ve chosen.
As you reconnect with your keyboard, take a moment to appreciate the effort and attention you’ve invested in this process. Your keyboard is no longer just a tool but a reflection of your individuality and the care you’ve put into crafting a workspace that suits you perfectly.
Embracing the world of mechanical keyboards and customization opens up a realm of possibilities for personalization and self-expression. Whether you’ve opted for smooth linear switches, tactile switches with a satisfying bump, or clicky switches that announce each keystroke, your keyboard now embodies the nuances of your typing style and preferences.
As you embark on your typing adventures with your newly customized keyboard, may each keystroke bring you satisfaction and productivity, and may the process of customization serve as a reminder of the joy that comes from crafting a tool that is uniquely yours.

![Is The Razer Pro Type Ultra A Gamechanger? [REVIEW]](https://robots.net/wp-content/uploads/2022/06/razer-pro-type-ultra-featured-2-300x175.jpg)