Introduction
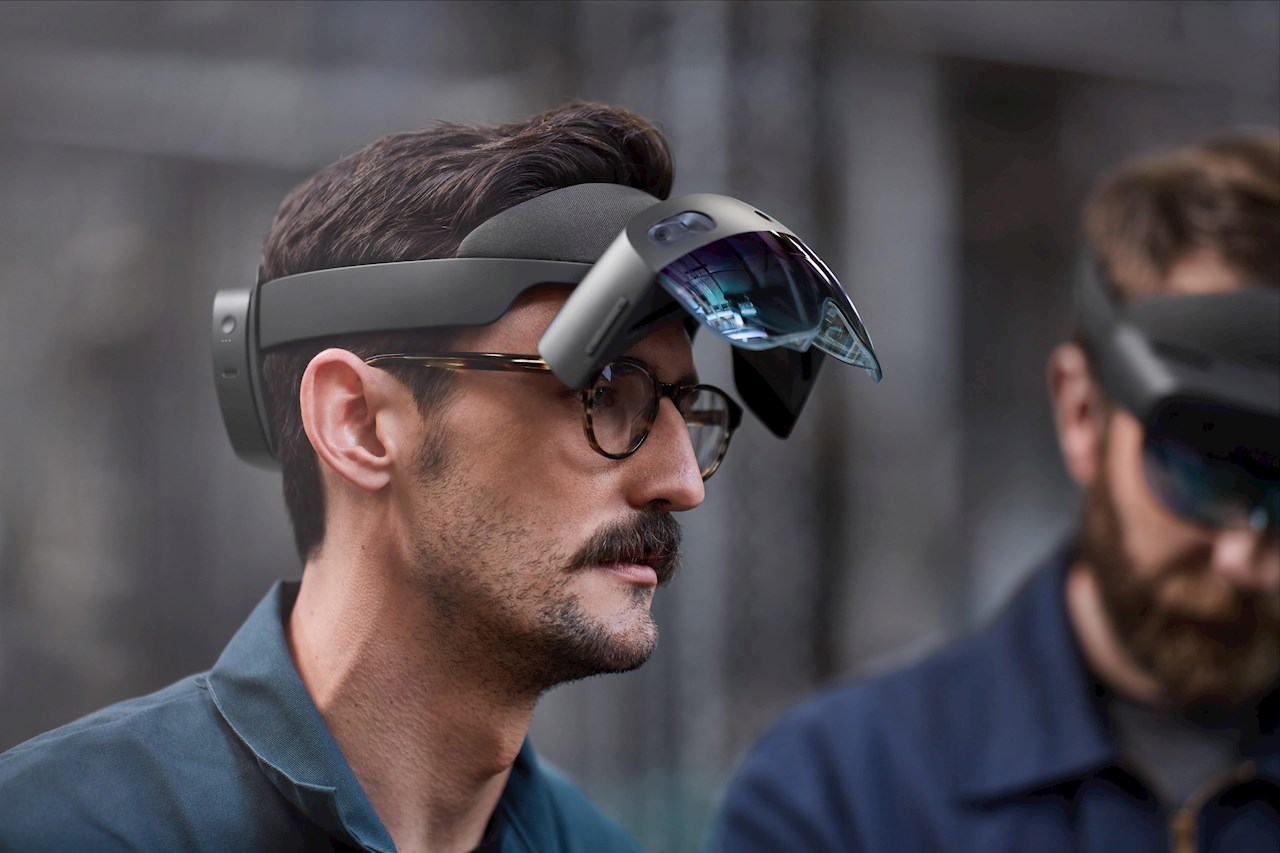
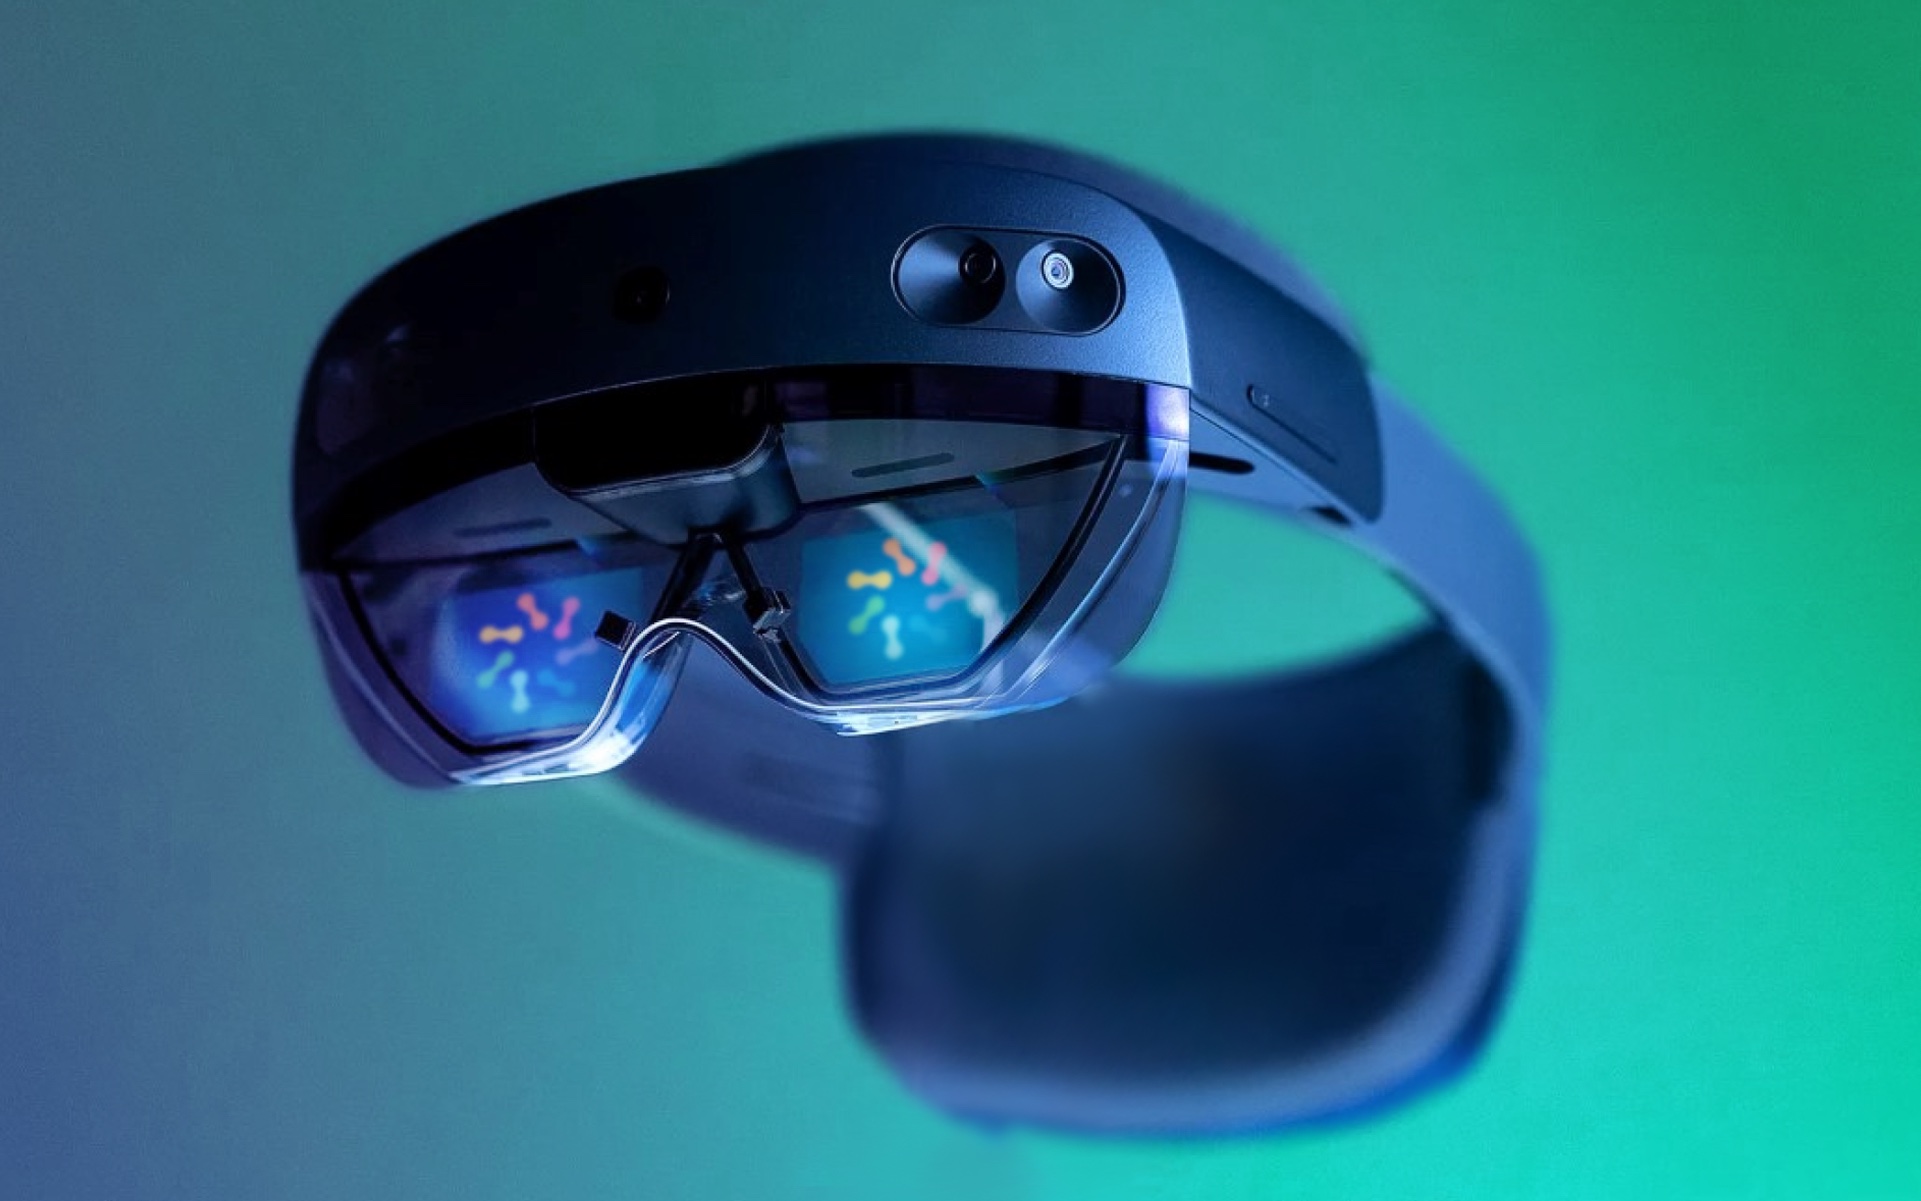
HoloLens is a revolutionary mixed reality device developed by Microsoft that combines the real world with virtual elements. It enables users to interact with digital content in a natural and immersive way. With its cutting-edge technology and advanced spatial mapping capabilities, HoloLens has opened up unlimited possibilities for developers and created a new era of augmented reality experiences.
In this article, we will explore how to utilize HoloLens on the Unity platform. Unity is a popular game engine that provides a user-friendly interface and powerful tools for creating interactive 3D applications. By combining the capabilities of HoloLens and Unity, developers can bring their ideas to life and build stunning mixed reality experiences.
Whether you’re a beginner or an experienced developer, this guide will provide you with the essential knowledge and skills needed to start developing for HoloLens using Unity. We will cover everything from setting up Unity with HoloLens to designing the user interface, implementing voice commands, tracking spatial mapping data, and adding 3D objects and interactions. We’ll also discuss optimizing performance for HoloLens, testing and debugging your application, and finally, deploying it to the HoloLens device.
Throughout this article, we will provide step-by-step instructions, tips, and best practices to ensure a smooth development process. We’ll also touch on some of the challenges and considerations specific to HoloLens development, such as optimizing performance for the limited resources of the device and designing for spatial mapping and gesture-based interactions.
By the end of this guide, you will have a solid foundation in developing HoloLens applications with Unity and be ready to unleash your creativity in the exciting world of mixed reality. So, put on your HoloLens headset, fire up Unity, and let’s dive into the amazing possibilities that await!
Getting Started
Before diving into HoloLens development with Unity, there are a few prerequisites that you’ll need to fulfill. First and foremost, you will need a HoloLens device itself to test and deploy your applications. While you can start building applications in the Unity editor without a device, it’s crucial to have one for accurate testing and a better understanding of the user experience.
Additionally, ensure that your development environment is set up properly. You will need a Windows PC running Windows 10 with the latest updates, along with Visual Studio and the Unity engine installed. Unity version 2017.4 LTS (Long-Term Support) or later is recommended for HoloLens development.
Once you have your device and development environment ready, it’s time to create a Microsoft Developer Account. This account is necessary for sideloading your applications onto the HoloLens device. Head over to the Microsoft Developer Center website and follow the instructions to create your account.
Next, enable developer mode on your HoloLens device. To do this, go to the Settings app, select the “Update & Security” option, and then choose “For developers.” From there, you can toggle the developer mode switch to turn it on.
Now, let’s establish the connection between Unity and HoloLens. Open Unity and create a new 3D project. Once the project is created, navigate to the Unity Asset Store and search for the “HoloToolkit” package. This package contains the necessary tools and libraries for HoloLens development.
Download and import the HoloToolkit package into your project. Unity will automatically handle the import process and set up the necessary folders and files. Keep in mind that this package may have additional dependencies, so make sure to review the documentation and read any README files included with the package.
With the HoloToolkit imported, you’re now ready to start developing HoloLens applications in Unity. Familiarize yourself with the Unity interface, as well as the basics of game object manipulation, scene building, and scripting in C#. Unity provides an extensive library of tutorials, documentation, and community resources to help you get up to speed.
In the next section, we’ll explore how to set up Unity with HoloLens to create a seamless development workflow and start building your first HoloLens application.
Setting Up Unity with HoloLens
Setting up Unity with HoloLens is a vital step in the HoloLens development process. This integration allows you to leverage the powerful features and tools provided by Unity to create immersive mixed reality experiences. Here’s a step-by-step guide to get started:
- Ensure you have installed Unity version 2017.4 LTS or later, along with Visual Studio, on your Windows PC.
- Create a new 3D project in Unity by selecting “File” and then “New Project.” Give your project a name and click on the “Create” button.
- In the Unity editor, go to the “Edit” menu, choose “Project Settings,” and navigate to the “Player” tab. In the “Inspector” window, under “Other Settings,” expand the “XR Settings” section.
- Enable the “Virtual Reality Supported” option by ticking the checkbox.
- In the “Virtual Reality Devices” section, click on the “+” button and select “Windows Mixed Reality” from the dropdown menu. This will add HoloLens support to your Unity project.
- Now, connect your HoloLens device to your PC using a USB cable.
- Once the device is connected, go to the “File” menu in Unity, select “Build Settings,” and choose the Universal Windows Platform (UWP) as the target platform.
- Click on the “Player Settings” button, which will open the “Player Settings” window. Here, go to the “Publishing Settings” section and click on the “Windows Store” tab.
- Under “Package Name,” enter a unique identifier for your application. This identifier will be used to distinguish your app in the Microsoft Store and must be in the format “com.companyname.appname”.
- Next, scroll down to the “Capabilities” section and ensure that the “InternetClient” capability is enabled. This capability allows your HoloLens application to access internet resources.
- Once you have configured the necessary settings, click on the “Build” button in the “Build Settings” window. Choose a location to save your build, and Unity will compile the project for the Universal Windows Platform (UWP).
- After the build process completes, locate the generated .appx file and deploy it to your HoloLens device. To do this, open the Windows Device Portal on your device, navigate to the “Apps” section, and use the “Add” button to upload the .appx file.
Congratulations! You have successfully set up Unity with HoloLens and prepared your project for development. With this integration, you can now unleash your creativity and start building captivating mixed reality experiences for the HoloLens device.
Understanding HoloLens Gestures
HoloLens incorporates a variety of gestures to enable users to interact with holograms and navigate through the mixed reality environment. Understanding these gestures is crucial for creating intuitive and user-friendly HoloLens applications. Let’s explore the primary gestures supported by HoloLens:
- Air Tap: The air tap gesture is the primary way to select and interact with holograms. Users simply raise their index finger and make a tapping motion in mid-air. This gesture is equivalent to a mouse click or touch input.
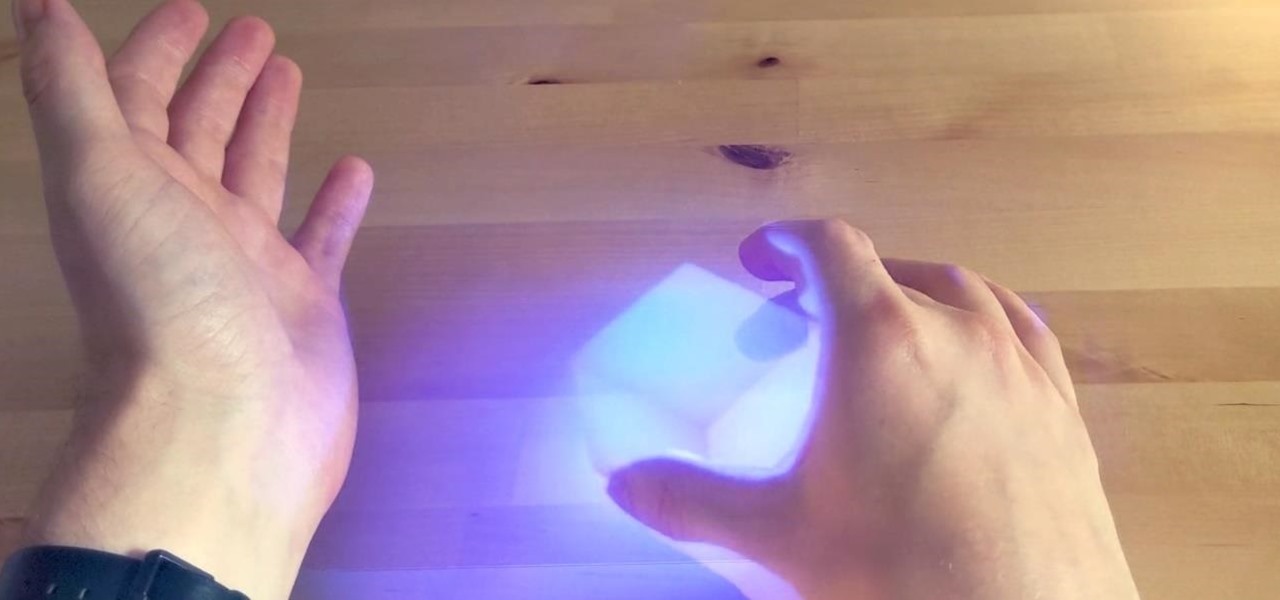
- Bloom: The bloom gesture involves opening and closing your hand like a flower blooming. By performing this gesture, users can access the Start menu and other system features of HoloLens. It serves as the device’s primary form of navigation.
- Gaze: Gaze is not technically a gesture, but it plays a significant role in HoloLens interaction. Gaze refers to the user’s head movement and the direction of their gaze, which allows them to target holograms or UI elements for selection.
- Gesture Bloom: The gesture bloom, also known as the double bloom or the double-tap gesture, involves quickly performing two consecutive bloom gestures. This gesture is recognized by HoloLens as a way to quit an application or go back to the previous state.
- Scroll Gestures: HoloLens supports two types of scroll gestures – scroll and zoom. The scroll gesture is performed by placing two fingers on any UI element and moving them up or down to scroll vertically. The zoom gesture is achieved by making a pinching motion with two fingers to zoom in or out of the holographic content.
- Tap and Hold: The tap and hold gesture involves performing an air tap gesture and holding it for a few seconds. This gesture is used to invoke context menus or access additional options related to the selected hologram or UI element.
Understanding these gestures is essential for designing user-friendly interfaces and enabling intuitive interactions within your HoloLens applications. By utilizing these gestures effectively, you can enhance the engagement and usability of your mixed reality experiences.
In the next section, we will dive into the process of creating a basic HoloLens application in Unity. We’ll explore how to set up the user interface and implement these gestures to enable users to interact with holograms and navigate the virtual environment.
Creating a Basic HoloLens Application
Now that we have a basic understanding of HoloLens gestures, it’s time to create a simple HoloLens application in Unity. This will serve as a starting point for building more complex and interactive mixed reality experiences. Follow these steps to get started:
- Create a New Scene: In the Unity editor, go to the “File” menu and select “New Scene” to create a new scene for your HoloLens application. This is where you will design the virtual environment and place holograms.
- Add Spatial Mapping: To enable spatial mapping in your application, go to the Unity Asset Store and search for the “HoloToolkit” package. Import the package into your project and add the “SpatialMapping” prefab to your scene. This will allow your application to understand the physical space and place holograms accordingly.
- Create Holograms: Now it’s time to add holograms to the scene. In Unity, you can import 3D models or use predefined holographic objects from the HoloToolkit package. Drag and drop the hologram objects onto the scene and position them as per your design requirements.
- Add Interactions: Implement the HoloLens gestures we discussed earlier to enable interactions with holograms. Attach scripts to your hologram objects to listen for gestures, such as an air tap, and perform actions accordingly. For example, you can change the color or scale of a hologram when the user performs an air tap gesture on it.
- Add UI Elements: Incorporate user interface elements, such as buttons or menus, to enhance the user experience. Unity provides a variety of UI components that you can utilize to build an intuitive interface. Attach scripts to these UI elements to handle user interactions and perform the desired actions.
- Test and Debug: To see how your application behaves on HoloLens, you can deploy it to the device for testing. Connect your HoloLens device to your PC, build the project for the Universal Windows Platform (UWP), and deploy it using Visual Studio. Test your application on the device and debug any issues that may arise.
- Refine and Iterate: As you test your application, gather feedback and analyze user interactions. Refine your design, optimize performance, and iterate on user experience to create a more compelling and engaging HoloLens application. Incorporate user feedback and continuously improve your application.
By following these steps, you can create a basic HoloLens application in Unity. Remember to leverage HoloLens gestures, spatial mapping, and UI elements to enhance user interactions and create captivating mixed reality experiences. From here, you can build upon this foundation to develop more complex and immersive applications that leverage the full capabilities of HoloLens and Unity.
Designing the User Interface
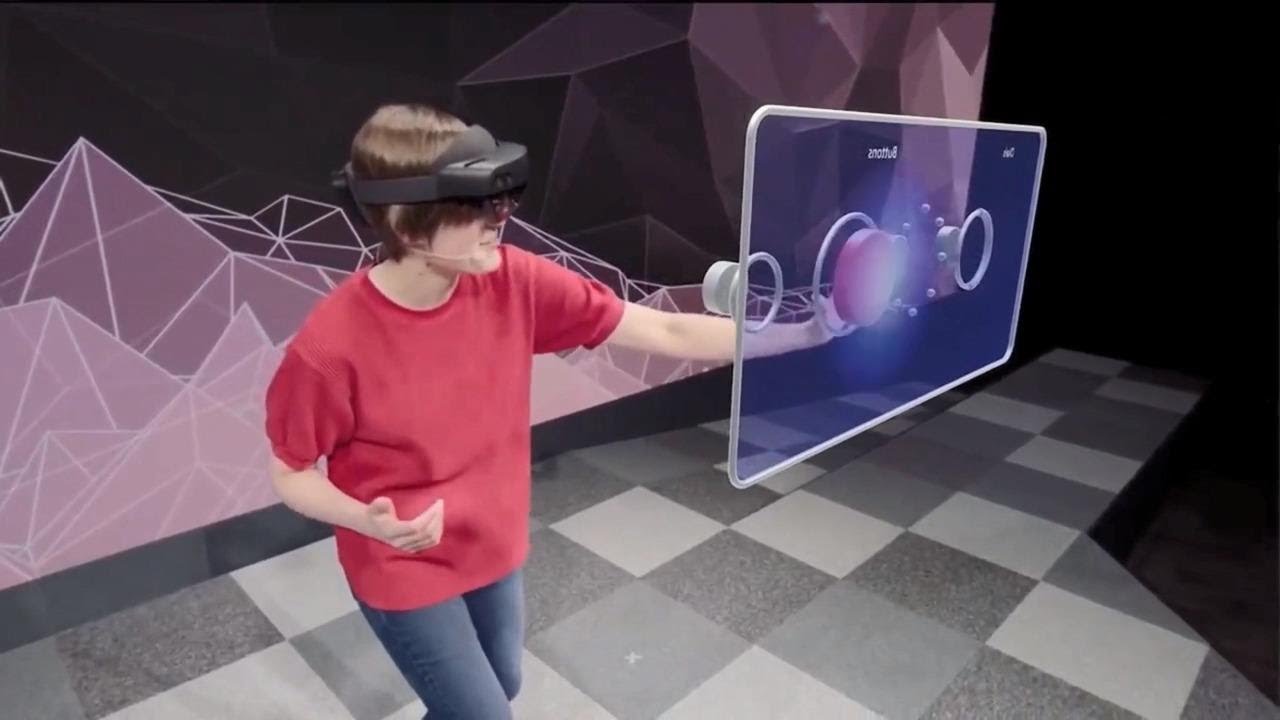
The user interface (UI) is a crucial element in creating a successful HoloLens application. Effective UI design can enhance user engagement, make the application more intuitive to use, and create a seamless mixed reality experience. Here are some key considerations when designing the UI for your HoloLens application:
- Keep it Simple: Since HoloLens applications exist in the user’s physical environment, it’s important to keep the UI as minimalistic as possible. Avoid cluttering the screen with excessive elements or complex menus. Focus on delivering the core functionality in a clean and straightforward manner.
- Use Spatial Mapping: Leverage the spatial mapping capabilities of HoloLens to design UI elements that interact with the physical environment. For example, you can position buttons on walls or tables, creating a sense of depth and immersion. This helps users understand the relation between the virtual and physical worlds.
- Consider Size and Scale: Ensure that UI elements are easily visible and accessible. Design them to be large enough for users to interact with using their fingertips or gestures. Avoid making UI elements too small, as it may be challenging for users to select them accurately.
- Design for Different Viewpoints: HoloLens allows users to move around and view holograms from different angles. Take this into consideration when designing UI elements. Make them visible and usable from various viewpoints, ensuring that users can interact with them regardless of their position in the virtual environment.
- Visual Feedback: Provide visual feedback to indicate user actions and reinforce the connection between their gestures and the application’s responses. For example, changing the color or scale of a UI element when it is selected or interacted with can help users understand the actions they are performing.
- Implement Voice Commands: HoloLens supports voice commands, which can significantly enhance the user experience. Incorporate voice interactions into your UI design to allow users to navigate through menus, select options, or perform actions using natural language. This provides an alternative, hands-free method of interaction.
- Usability Testing: Conduct usability testing to gather feedback from users and iterate on your UI design. Observe how users interact with the application and identify areas for improvement. Aim to create a UI that is intuitive, user-friendly, and aligns with the expectations of your target audience.
By considering these key principles and incorporating them into your UI design, you can create an engaging and intuitive HoloLens application. Take advantage of the unique capabilities of HoloLens, such as spatial mapping and voice commands, to create a seamless and immersive user experience. Remember to iterate on your design based on user feedback to ensure that your UI meets the needs and expectations of your users.
Implementing Voice Commands
Voice commands are a powerful feature of HoloLens that allow users to interact with applications using natural language. By implementing voice commands in your HoloLens application, you can provide an intuitive and hands-free method of control. Here are the key steps to implement voice commands:
- Set Up the Speech Recognizer: In Unity, you can utilize the HoloToolkit package to incorporate speech recognition functionality into your application. Import the HoloToolkit package and add the “KeywordManager” prefab to your scene. This prefab manages the speech recognition capabilities of your application.
- Define Keywords: Next, define keywords that your application will recognize. These keywords correspond to voice commands that trigger specific actions in your application. For example, you can define a keyword like “rotate” to rotate a hologram in response to the user’s voice command.
- Create Listeners: Attach scripts to the relevant game objects in your scene to act as listeners for voice commands. These scripts will receive and process the recognized keywords and trigger the appropriate actions. For example, a script attached to a hologram can respond to the keyword “rotate” by rotating the hologram when the user says the command.
- Implement Actions: Inside the scripts attached to your objects, define the actions that should be performed when the associated keywords are recognized. This can include manipulating holograms, navigating menus, or controlling other aspects of your application’s functionality. Use the HoloToolkit APIs to execute the desired actions.
- Testing and Refinement: Test your voice commands in a real-world HoloLens environment to ensure accurate recognition and behavior. Continuously refine and iterate on your voice command implementation based on user feedback and observations. Consider using error handling techniques, such as providing visual feedback or error prompts, to guide users when their voice commands are not recognized.
- Expand Functionality: As you gain proficiency in implementing voice commands, consider adding more complex functionality to your application. You can create command hierarchies, where specific actions are performed depending on context or additional parameters provided by the user’s voice commands. This allows for more flexible and natural interactions.
Implementing voice commands adds a new dimension of interactivity and convenience to your HoloLens application. Users can perform actions simply by speaking, making the experience more seamless and immersive. By designing a robust and intuitive voice command system and continuously refining it based on user feedback, you can create a compelling and user-friendly application.
Tracking Spatial Mapping Data
Spatial mapping is a fundamental feature of HoloLens that allows the device to understand and map the physical environment in real-time. By tracking spatial mapping data, you can create immersive mixed reality experiences that interact with the user’s surroundings. Here are the key steps to track spatial mapping data in your HoloLens application:
- Enable Spatial Mapping: Ensure that the HoloToolkit package is imported into your Unity project and the “SpatialMapping” prefab is added to your scene. This prefab provides the necessary components to enable spatial mapping functionality.
- Configure Mesh Settings: Adjust the mesh settings to control the level of detail and performance of the spatial mapping mesh. You can specify factors such as triangles per cubic meter, the time interval between mesh updates, and the level of smoothing applied to the mesh. Balancing these settings is important for achieving accurate mapping without sacrificing performance.
- Access and Visualize Mesh Data: To access the spatial mapping mesh data at runtime, you can use the HoloToolkit APIs. These APIs allow you to access information such as the positions, normals, and triangles of the spatial mapping mesh. You can visualize this data by applying materials or textures to the mesh, making it blend seamlessly with the real world.
- Interact with Spatial Mapping: Once you have access to the spatial mapping data, you can use it to enable interactions within your application. For example, you could place virtual objects on real surfaces, such as tables or walls, or create occlusion effects by having virtual objects intersect with the physical environment. By leveraging spatial mapping data, you can enhance the realism and integration of your mixed reality experiences.
- Dynamic Mesh Updates: HoloLens continuously updates the spatial mapping mesh as the user moves or new objects enter the scene. Use the HoloToolkit APIs to monitor these updates and dynamically adjust your application accordingly. This ensures that your virtual objects remain aligned with the real world and respond to changes in the environment.
- Optimize Performance: Spatial mapping can be resource-intensive, so it’s crucial to optimize your application’s performance. Consider implementing techniques such as level of detail (LOD) to reduce the polygon count of the mesh when it’s further from the user, culling occluded portions of the mesh, or using occlusion culling to improve rendering efficiency. Optimization techniques will help maintain a smooth and responsive experience for the user.
Tracking spatial mapping data enables your HoloLens application to seamlessly interact with the physical environment, creating a more immersive and believable mixed reality experience. By properly configuring and utilizing the spatial mapping features, you can leverage the real-world context to enhance the visualization and interaction of your virtual objects.
Adding 3D Objects and Interactions
One of the key aspects of creating compelling mixed reality experiences with HoloLens is the ability to add and interact with 3D objects within the virtual environment. By incorporating 3D objects and interactions, you can bring virtual content to life and engage users in exciting and interactive ways. Here are the key steps to add 3D objects and interactions in your HoloLens application:
- Import 3D Models: In Unity, you have the option to import 3D models from various file formats, such as FBX or OBJ. These models can be created using 3D modeling software or downloaded from online repositories. Import the 3D models into your Unity project to use them as virtual objects within your HoloLens application.
- Position and Scale: Place the imported 3D objects in your scene and adjust their position and scale according to your virtual environment. Ensure that objects are correctly aligned with the physical world and appropriately sized to maintain realism and proportionality.
- Interactions with Objects: Implement interactions with the 3D objects to enable intuitive and engaging experiences. This can be achieved through gestures, such as air tap or voice commands. For example, you can allow users to rotate or scale objects by performing certain gestures or speaking specific commands.
- Physics Interaction: HoloLens supports physics simulations, allowing you to apply realistic physics interactions to your 3D objects. Attach Rigidbody components to objects and define their properties, such as mass and gravity, to create natural physical behavior. Users can then interact with the objects by pushing, throwing, or stacking them within the virtual environment.
- Hologram Anchors: Use hologram anchors to ensure that 3D objects remain in place within the physical environment, even as the user moves or looks away. Anchoring objects to specific positions in the room ensures that they maintain their relative position to the real world, creating a more seamless mixed reality experience.
- Object Manipulation: Allow users to manipulate 3D objects through various interactions. This can include gestures like grabbing and moving objects, rotating them with hand movements, or scaling objects using pinch gestures. Implement the necessary logic and scripting to enable smooth and intuitive object manipulation.
- Visual Feedback: Provide visual feedback to indicate to users when they are interacting with objects or performing specific actions. This can include highlighting selected objects, animating object changes, or displaying tooltips and contextual information related to virtual objects.
By adding 3D objects and interactions to your HoloLens application, you can create immersive and engaging mixed reality experiences. Ensure that your interactions are intuitive, responsive, and provide appropriate visual feedback to enhance the user’s sense of presence and interaction within the virtual environment.
Optimizing Performance for HoloLens
Optimizing performance is crucial when developing HoloLens applications to ensure smooth and responsive user experiences. HoloLens has limited system resources compared to traditional desktop applications, so it’s essential to optimize your application for performance. Here are some key strategies for optimizing performance for HoloLens:
- Reduce Polygon Count: Consider reducing the polygon count of your 3D models and meshes to improve rendering performance. Use techniques such as level-of-detail (LOD) or decimation algorithms to simplify complex meshes when they are further away from the user to maintain visual quality while reducing computational overhead.
- Efficient Physics Simulation: Use simple and efficient collision shapes for physics simulations to reduce computational complexity. Complex and precise collision meshes can be resource-intensive, so utilizing simpler shapes, such as spheres or capsules, can improve performance while maintaining realistic physics interactions.
- Optimize Shader Complexity: Use efficient shaders and materials in your application to minimize rendering overhead. Reduce the number of shader instructions, texture size, and expensive rendering effects. Prioritize the use of physically based rendering (PBR) materials to achieve realistic lighting and shading while optimizing performance.
- Implement Occlusion Culling: Utilize occlusion culling techniques to avoid rendering objects that are not visible to the user. This technique helps to reduce the number of objects rendered, improving performance by reducing GPU load and saving processing power.
- Manage Resource Usage: Keep track of system resources, such as memory and CPU usage, and ensure that your application stays within the HoloLens device’s limitations. Use memory-efficient data structures and techniques, such as object pooling, to minimize memory allocation and deallocation during runtime.
- Minimize System Calls: Reduce unnecessary system calls and script execution by optimizing code performance. Avoid frequent updates and calculations when they are not required. Use techniques like coroutine yielding, object pooling, and efficient loops to improve code efficiency and reduce processing overhead.
- Test and Iterate: Regularly test your application on the HoloLens device to identify and address performance bottlenecks. Gather performance data, monitor frame rates, and identify areas that require optimization. Iterate on your implementation and make targeted performance improvements based on real-world testing results.
By applying these performance optimization strategies, you can ensure that your HoloLens application runs smoothly, maximizes hardware capabilities, and provides a seamless mixed reality experience to users. Strive to find the right balance between visual quality and performance to deliver engaging and responsive experiences on the HoloLens platform.
Testing and Debugging the Application
Testing and debugging are vital stages in the development process of any HoloLens application. Thorough testing ensures that your application performs as expected and provides a smooth and immersive user experience. Here are some key practices for testing and debugging your HoloLens application:
- Device Testing: Utilize the HoloLens device for testing your application directly. Test different features, interactions, and scenarios on the actual device to assess performance, spatial mapping accuracy, and user experience. This allows you to identify any device-specific issues and validate the behavior of your application in a real-world environment.
- User Testing: Conduct user testing sessions to collect feedback and evaluate the usability of your application. Observe how users interact with your application, monitor their behavior, and collect their opinions and suggestions. User testing helps identify usability issues, areas for improvement, and ensures that your application meets the expectations of your target audience.
- Functional Testing: Perform thorough functional testing to verify that all features of your application work as intended. Test all user interactions, gestures, and voice commands to ensure proper functionality. Pay attention to edge cases, handle errors gracefully, and evaluate how well your application handles various scenarios and user inputs.
- Performance Testing: Assess the performance of your application by monitoring factors such as frame rate, memory usage, and CPU load. Evaluate how well your application performs under typical usage conditions and identify performance bottlenecks. Optimize rendering, physics, and other resource-intensive aspects to ensure a smooth and responsive experience on the HoloLens device.
- Debugging Tools: Utilize debugging tools available in Unity and Visual Studio to identify and resolve any issues during development. Leverage the debugging capabilities to step through your code, inspect variables, and identify logic or runtime errors. Use breakpoints, logging, and error handling to pinpoint issues and optimize your application’s behavior.
- Error Handling and Feedback: Implement robust error handling and provide appropriate feedback to users when errors occur. Display clear error messages or visual cues to guide users and help them understand the issue at hand. Effective error handling improves the user experience and ensures that users can recover from errors without frustration.
- Iterative Development: Testing and debugging should be ongoing throughout the development process. Continuously test, evaluate, and refine your application based on feedback and testing results. Adopt an iterative approach to development, fixing bugs, optimizing performance, and enhancing user experience as you progress.
Thorough testing and effective debugging are crucial for delivering a high-quality HoloLens application. By employing a comprehensive testing strategy and addressing any issues or bugs, you can ensure that your application meets the desired standards of performance, functionality, and user experience.
Deploying the Application to HoloLens
Once you have developed and tested your HoloLens application, it’s time to deploy it to the device for others to experience. Deploying your application to HoloLens involves a series of steps to ensure smooth installation and usage. Here’s a guide on how to deploy your HoloLens application:
- Build the Application: In Unity, go to the “Build Settings” window and select the Universal Windows Platform as the target platform. Configure the necessary build settings, such as the build location, architecture, and build type. Click on the “Build” button to compile your application for the HoloLens device.
- Sideload the Application: Connect your HoloLens device to your PC using a USB cable. Enable developer mode on your device by going to the Settings app, selecting “Update & Security,” and then choosing “For developers.” Toggle the developer mode switch to turn it on. With developer mode enabled, you can sideload your application onto the HoloLens device.
- Generate App Package: In Unity, go to the “Player Settings” window and click on the “Windows Store” tab. Under “Publishing Settings,” click on the “Certificate” dropdown and select “Create Test Certificate” to generate a test certificate for the application package. This certificate is required to deploy the application to the device.
- Build the App Package: After generating the test certificate, go to the “Build Settings” window in Unity. Select the “Build” button, choose a location to save the app package, and click on the “Build” button again to create the app package (.appx) file.
- Install the App Package: Open the Windows Device Portal on your HoloLens device by launching the web browser and navigating to “https://device-ip-address”. Go to the “Apps” section on the portal and use the “Add” button to upload the app package (.appx) file that you built in the previous step. Once uploaded, the HoloLens device will install the application.
- Launch and Test the Application: After the installation is complete, you can launch your application from the HoloLens device’s app list or by using voice commands. Test the application to ensure that it functions as expected and that all features and interactions work correctly.
- Distribute the Application: If you plan to distribute your application to other users, you can submit it to the Microsoft Store. Follow the guidelines provided by Microsoft to package and submit your application for certification. Once approved, users can download your application from the store onto their HoloLens devices.
Deploying your HoloLens application to the device allows others to experience the fruits of your development efforts. Follow these steps carefully to ensure a seamless installation and start sharing your immersive mixed reality experience with the world.
Conclusion
Throughout this guide, we have explored the process of utilizing HoloLens on the Unity platform to create immersive mixed reality experiences. We started by getting familiar with the HoloLens device and setting up the development environment. We then delved into understanding HoloLens gestures and their implementation in Unity. We learned how to create a basic HoloLens application, design the user interface, and implement voice commands for intuitive interactions.
We also discussed tracking spatial mapping data to enable virtual objects to interact with the real world, adding 3D objects, and implementing various interactions within the virtual environment. Additionally, we emphasized the importance of optimizing performance for HoloLens applications to deliver smooth and responsive experiences.
Testing and debugging were highlighted as crucial stages in the development process, ensuring that the application works as intended and provides a seamless user experience. We also covered the deployment process, allowing others to experience your HoloLens application, either by sideloading onto their devices or distributing through the Microsoft Store.
By following the steps outlined in this guide and incorporating these practices into your HoloLens development workflow, you now have the knowledge and skills to create captivating mixed reality experiences. Continuously iterate on your application, gather user feedback, and refine your designs to create memorable and engaging interactions on the HoloLens platform.
With the power of HoloLens and the versatility of Unity, the possibilities for innovation and creativity in the realm of mixed reality are boundless. So, put your skills to work, unleash your imagination, and start building incredible experiences that bridge the gap between the physical and virtual worlds with HoloLens and Unity.