Introduction
Adding a GIF to your Indiegogo campaign page can be a great way to capture the attention of potential backers and make your project stand out. With the ability to convey emotions and showcase dynamic visuals, GIFs can effectively communicate your message and attract more supporters.
However, if you’re new to the platform or unsure how to upload a GIF to your Indiegogo page, the process may seem daunting. But fear not! In this guide, we’ll walk you through the steps to easily add a GIF to your Indiegogo campaign page and make it shine.
Whether you’re creating a custom GIF specifically for your campaign or finding one that already exists, we’ll cover everything you need to know. We’ll also guide you through any necessary editing and show you how to adjust the placement and size of your GIF to ensure it seamlessly blends into your campaign page.
So, if you’re ready to make your Indiegogo campaign visually engaging and captivating, let’s dive into the step-by-step process of uploading a GIF to your Indiegogo page.
Step 1: Creating or Finding the GIF You Want to Upload
The first step in adding a GIF to your Indiegogo campaign page is to create or find the GIF you want to upload. You have a couple of options here:
- Create a Custom GIF: If you want to add a personalized touch to your campaign, consider creating a custom GIF. There are various tools and software available that allow you to create animated GIFs. You can use images, videos, or even combine both to create a unique and eye-catching GIF that aligns with your campaign’s message or showcases your product.
- Find an Existing GIF: If you don’t have the resources or time to create a custom GIF, you can find existing GIFs online. There are numerous websites and libraries dedicated to GIFs, such as GIPHY and Tenor. You can search for keywords related to your campaign or desired visuals and browse through a vast collection of GIFs.
When selecting or creating a GIF, ensure that it is relevant to your campaign and aligns with your messaging and branding. It should grab attention, convey your campaign’s essence, and resonate with your target audience.
Once you’ve decided on the GIF you want to use, make sure to save it in a format that is compatible with Indiegogo’s image guidelines. Indiegogo typically accepts GIF files with a maximum file size of 15 MB and a recommended resolution of 800px in width.
Now that you have your GIF ready, let’s move on to the next step: editing the GIF (if necessary) to ensure it fits perfectly into your campaign page.
Step 2: Editing the GIF (if necessary)
Once you have selected or created a GIF for your Indiegogo campaign page, you may need to make some edits to enhance its visual appeal or ensure it aligns perfectly with your campaign’s messaging. Here are a few editing options you can consider:
- Cropping: If your GIF contains unnecessary elements or if you want to focus on a specific area, you can crop the GIF to remove unwanted parts. There are various online GIF editors or software tools available that allow you to easily crop your GIF.
- Resizing: Depending on where you want to place the GIF on your campaign page, you might need to resize it to fit the desired dimensions. Ensure that the resized GIF maintains its visual integrity and doesn’t appear distorted or pixelated.
- Add Text or Captions: To provide additional context or convey a specific message, you can consider adding text or captions to your GIF. This can be done using image editing software or online tools.
- Adjust Speed: If your GIF’s animation is too fast or too slow, you can modify the speed to create the desired effect. This can be easily accomplished using various GIF editing tools.
- Apply Filters or Effects: To add a unique touch to your GIF or match your campaign’s aesthetics, you can experiment with different filters or effects. These modifications can help your GIF stand out and grab attention.
Remember to strike a balance between editing your GIF to improve its visual impact and maintaining its authenticity. It’s essential to ensure that the edited GIF still accurately represents your campaign and the message you want to convey.
Once you are satisfied with the edits, save the GIF file with the appropriate format and size. Now that your GIF is ready, let’s move on to the next step: accessing your Indiegogo campaign page to upload the GIF.
Step 3: Accessing Your Indiegogo Campaign Page
In order to upload your GIF to your Indiegogo campaign page, you’ll need to access the campaign editor. Follow these steps to navigate to your campaign page:
- Go to the Indiegogo website and sign in to your account using your registered email address and password.
- Once signed in, click on your profile picture or name in the top-right corner of the homepage. A drop-down menu will appear.
- From the drop-down menu, select “My Campaigns”. You will be redirected to the “My Campaigns” page that lists all the campaigns associated with your account.
- Locate the campaign to which you want to add the GIF and click on its title or the “Edit” button. This will take you to the campaign editor page.
Ensure that you have the necessary permissions to edit the campaign. If you are collaborating with others, make sure you have the appropriate role assigned to you, such as the campaign owner or campaign manager.
By following these steps, you will now be on the campaign editor page, where you can make changes to various elements of your campaign, including adding media files like GIFs.
Let’s move on to the next step: navigating to the “Media” section, where you will be able to upload the GIF to your Indiegogo campaign page.
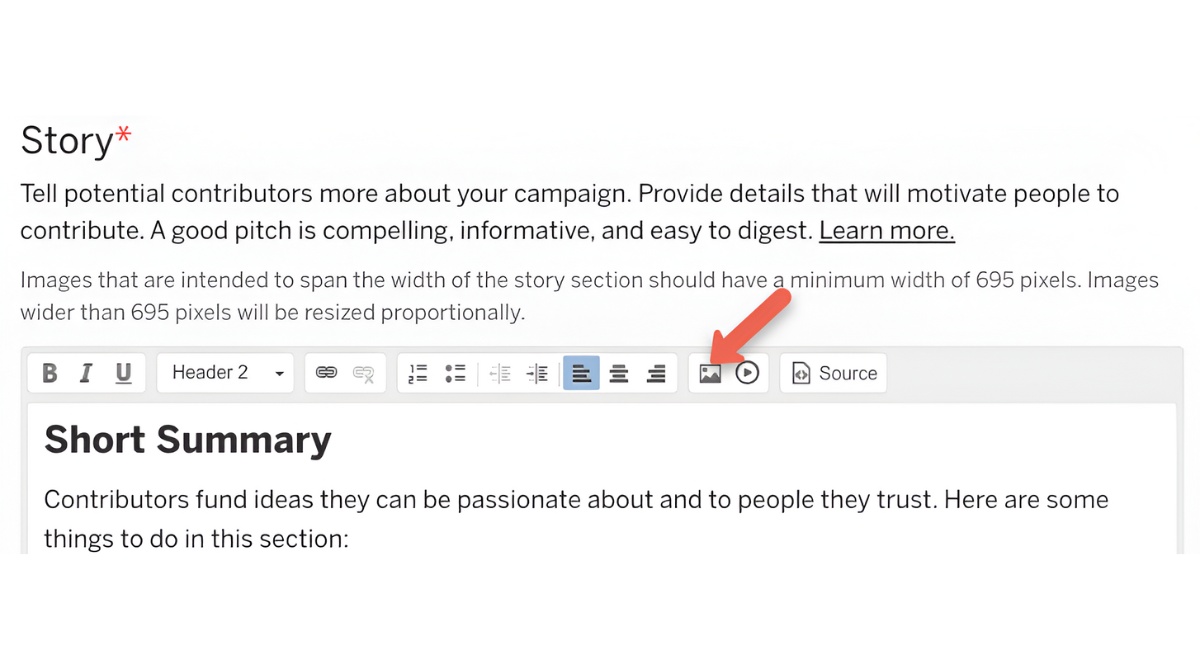
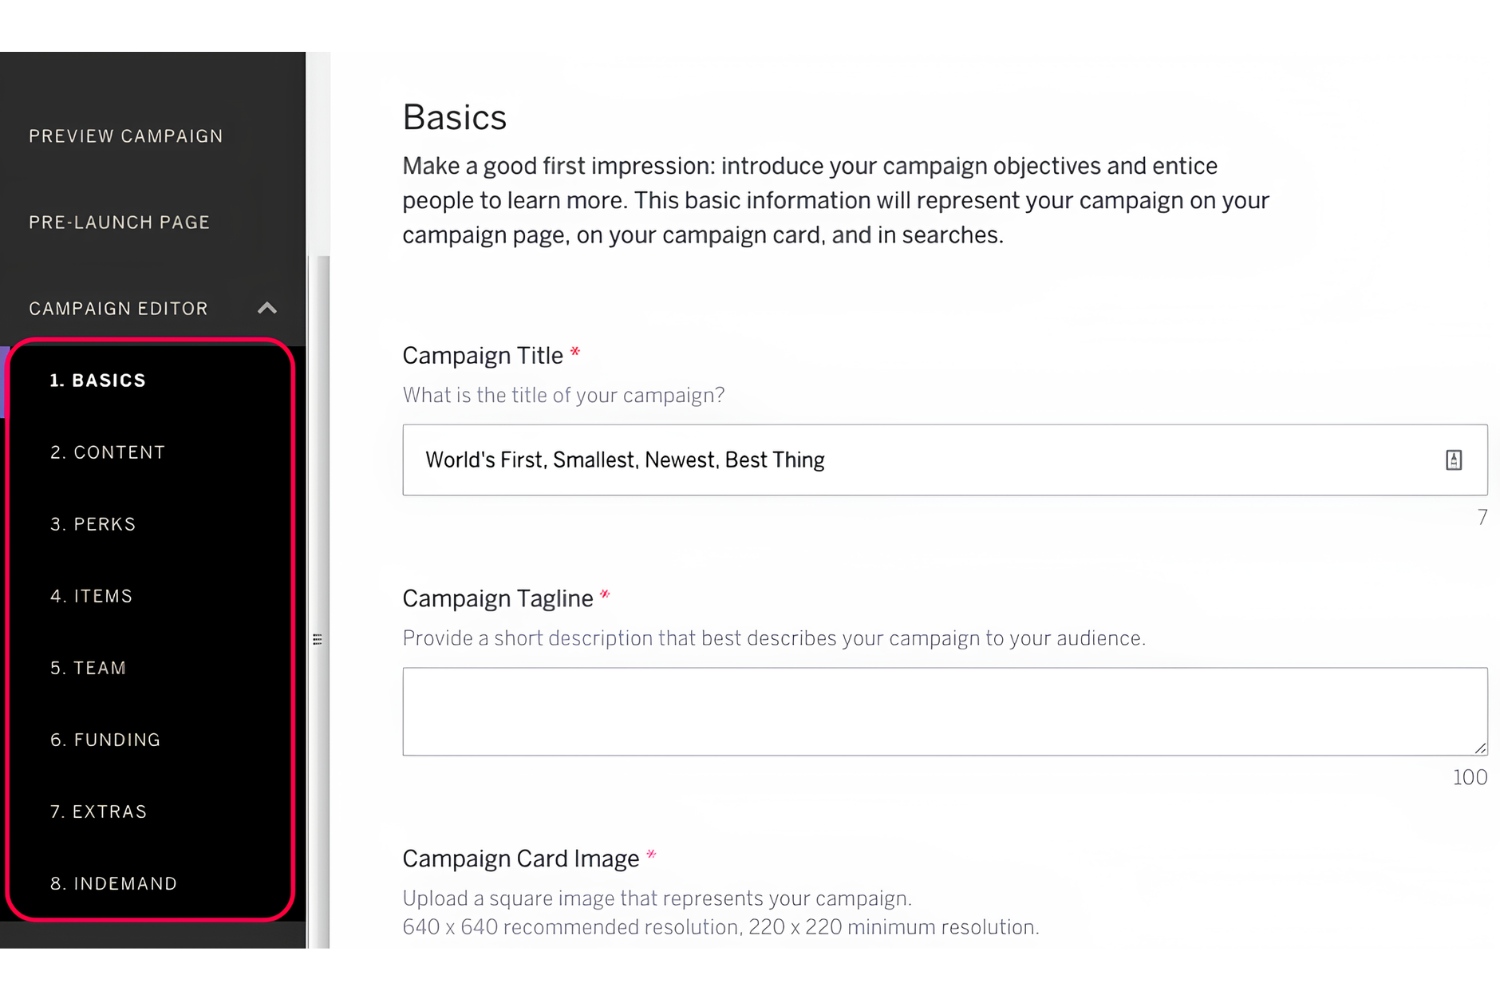
Step 4: Navigating to the “Media” Section
Now that you’re on the campaign editor page of your Indiegogo campaign, it’s time to navigate to the “Media” section where you can upload your GIF. Follow these steps:
- On the campaign editor page, you’ll find a menu on the left-hand side with various options. Look for the “Layout” or “Content” tab – the exact name may vary depending on the Indiegogo campaign editor version.
- Click on the “Layout” or “Content” tab, and a sub-menu will appear with different sections for your campaign page.
- Amongst the sections, locate and click on the option that says “Media”, “Images”, or “Files”. This will take you to the “Media” section where you can manage all the visual assets for your campaign.
At this stage, you’ve successfully reached the “Media” section, which is where you can upload and manage your GIF file.
It’s worth mentioning that the exact layout and options within the campaign editor may vary slightly over time due to updates and improvements by Indiegogo. However, the general process of finding the “Media” section should remain relatively consistent. If you encounter any difficulties, refer to Indiegogo’s documentation or support resources for more detailed guidance.
Now that you know how to access the “Media” section, let’s move on to the next step: uploading the GIF to your Indiegogo campaign page.
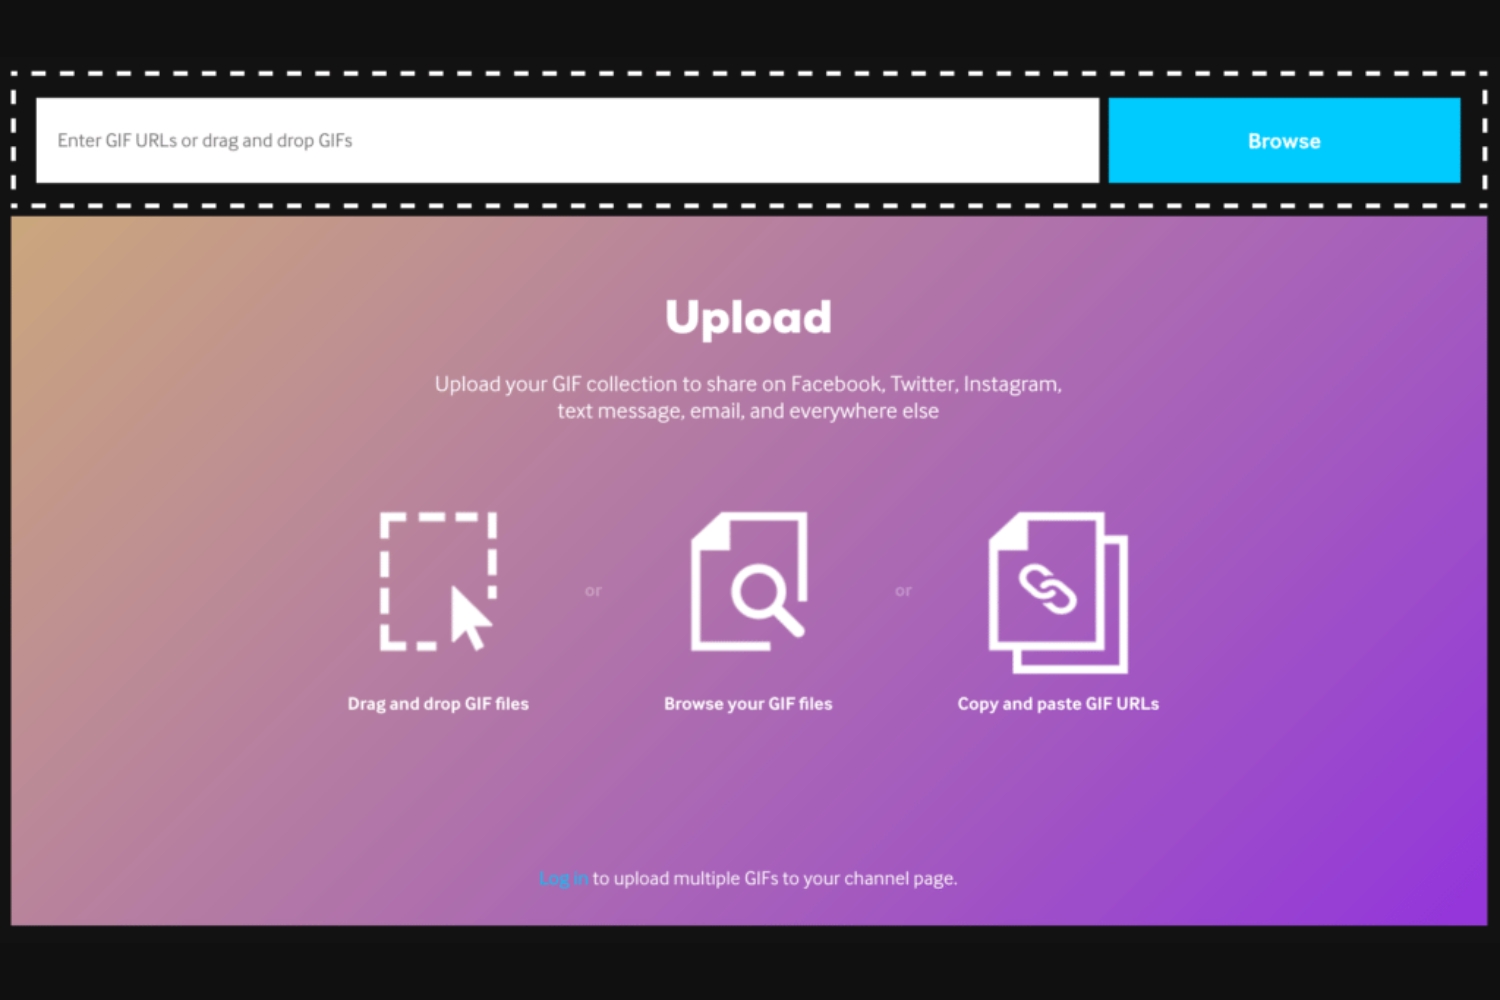
Step 5: Uploading the GIF to Your Indiegogo Page
Now that you have reached the “Media” section on your Indiegogo campaign editor page, it’s time to upload your GIF and add it to your campaign. Follow these steps to successfully upload the GIF:
- In the “Media” section, look for an option that allows you to add new files or upload media. It may be labeled as “Upload”, “Add Image”, or something similar.
- Click on the upload button, and a file selection window will appear. Navigate to the location where you have saved your GIF file.
- Select the GIF file and click “Open” or “Choose” to start the upload process.
- Depending on the file size and your internet connection speed, the upload may take a few moments. Be patient and wait until the upload is complete.
- Once the upload is finished, you will see a preview or thumbnail of your GIF in the “Media” section. The GIF is now ready to be added to your Indiegogo campaign.
It’s important to note that Indiegogo has specific guidelines for media files uploaded to campaigns, including GIFs. Ensure that your GIF complies with these guidelines, such as file size limitations and acceptable formats. If your GIF doesn’t meet the requirements, you may need to resize, compress, or convert the file before uploading.
After successfully uploading your GIF, you’re one step closer to enhancing your Indiegogo campaign page. In the next step, we’ll explore how to adjust the placement and size of the GIF to create the desired visual impact.
Step 6: Adjusting the Placement and Size of the GIF
Now that you have uploaded your GIF to the “Media” section of your Indiegogo campaign, it’s time to adjust its placement and size on your campaign page. Follow these steps to ensure the GIF is displayed exactly where and how you want it:
- Locate the preview or thumbnail of your GIF in the “Media” section of the campaign editor. Click on the GIF to select it.
- Once selected, you should see options such as “Edit”, “Adjust”, or “Properties” near the GIF. Click on the appropriate option to proceed.
- In the editing interface, you’ll have the ability to adjust various properties of the GIF, including its placement and size.
- Depending on the campaign editor layout, you may be able to drag and drop the GIF onto the desired location on your campaign page. Alternatively, you might have fields or settings where you can manually input the coordinates or alignment of the GIF.
- Additionally, you can resize the GIF to ensure it fits perfectly within your campaign page’s design. Some editors allow you to click and drag the corners of the GIF to resize it, while others provide fields where you can input specific dimensions.
- Keep in mind the overall layout and design of your campaign page while adjusting the placement and size of the GIF. It should complement the content and enhance the visual experience for your potential backers.
Make sure to preview your campaign page after making these adjustments to ensure the GIF is positioned and sized correctly. Tweak as needed until you are satisfied with the final placement and appearance of the GIF.
Now that you have adjusted the placement and size of the GIF, let’s move on to the final step: previewing and saving your changes to complete the process.
Step 7: Previewing and Saving Your Changes
After adjusting the placement and size of your GIF on your Indiegogo campaign page, it’s crucial to preview and save your changes to ensure that everything looks perfect before making it live for your potential backers. Follow these final steps to complete the process:
- Look for a “Preview” or “Preview Campaign” button in the campaign editor. This will allow you to see how your campaign page will appear to visitors and backers.
- Click on the “Preview” button, and a new window or tab will open, displaying the preview of your campaign page.
- Take the time to carefully review the placement and size of your GIF, ensuring it is exactly as you envisioned. Check for any potential issues, such as overlapping elements or distorted visuals, and make any necessary adjustments.
- If you are satisfied with the preview and are confident that the GIF looks great and enhances your campaign page, it’s time to save your changes. Look for a “Save”, “Publish”, or “Update” button within the campaign editor.
- Click on the appropriate button to save your changes and update your Indiegogo campaign page.
Once you have saved your changes, the GIF will be officially added to your Indiegogo campaign page. Congratulations!
However, it’s worth noting that even after saving, you can always go back to the campaign editor to make further adjustments or refinements as needed. Continuously monitor and evaluate your campaign page’s performance with the added GIF, and make any necessary tweaks to optimize engagement and conversions.
With the GIF successfully uploaded, adjusted, and saved, you’ve implemented a visually captivating element to your Indiegogo campaign page. This can significantly enhance your campaign’s appeal and attract more backers. Keep promoting your campaign, engaging with your audience, and watch your project thrive!
Conclusion
Congratulations on successfully uploading a GIF to your Indiegogo campaign page! By following the step-by-step process outlined in this guide, you have added a visually captivating element that can help your campaign stand out and attract more backers.
From creating or finding the perfect GIF to editing it to fit your campaign’s messaging and branding, and navigating the Indiegogo campaign editor to adjust its placement and size, you have learned how to seamlessly incorporate a GIF into your campaign page.
Remember to choose a GIF that aligns with your campaign’s message, resonates with your target audience, and grabs their attention. Editing the GIF, if necessary, allows you to customize it further and make it even more visually appealing.
Accessing the campaign editor and finding the “Media” section empowers you to easily upload and manage your GIF files. Adjusting the placement and size ensures that the GIF seamlessly integrates into your campaign page’s design, enhancing the overall user experience.
Lastly, previewing and saving your changes gives you the opportunity to review and refine the appearance of your campaign page, guaranteeing that the GIF is presented in its best form before making it live to your potential backers.
Now that you have successfully added a GIF to your Indiegogo campaign page, continue promoting your campaign, engaging with your audience, and optimizing your strategies to maximize your chances of success.
Remember, a well-placed and visually engaging GIF can effectively communicate your campaign’s essence and make a lasting impression on potential backers. So, go ahead, get creative, and make your Indiegogo campaign shine with a captivating GIF!