Introduction
Welcome to the world of Indiegogo, the crowdfunding platform where dreams become reality. If you’ve launched a campaign on Indiegogo, you’re not alone. Thousands of creators like you have turned to this platform to bring their innovative ideas to life. One of the key aspects of running a successful campaign is keeping your backers informed and engaged throughout the process. One way to do this is by posting updates on your campaign page.
Updates are a crucial tool in your campaign management arsenal. They allow you to communicate directly with your backers, providing them with important information, progress reports, and a sense of involvement in your project. Whether you’re sharing exciting news about a new product feature, announcing a stretch goal, or simply expressing your gratitude for their support, updates help you maintain a strong connection with your backers.
In this article, we’ll guide you through the process of posting an update on Indiegogo. We’ll walk you through the steps, from signing into your Indiegogo account to choosing the audience for your update, and everything in between. By the end of this guide, you’ll be well-equipped to keep your backers informed and engaged, ensuring the success of your campaign.
Step 1: Sign in to your Indiegogo account
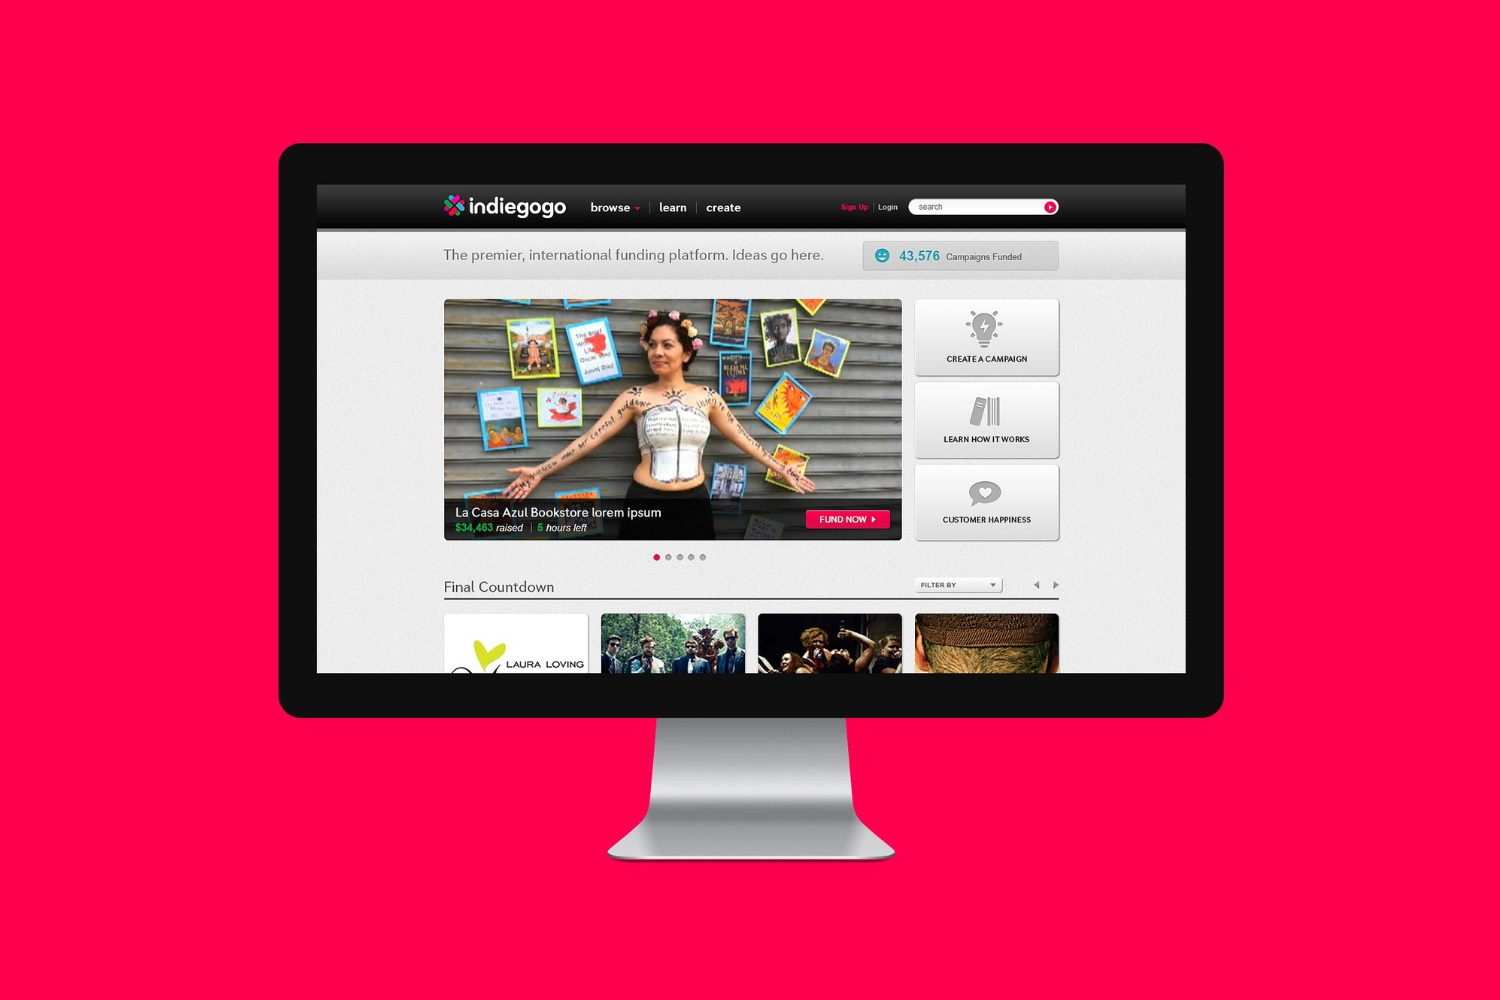
The first step to posting an update on Indiegogo is to sign in to your account. If you don’t have an account yet, you’ll need to create one. Head to the Indiegogo website and click on the “Sign In” button in the top right corner of the homepage.
If you already have an account, simply enter your login credentials – your email address and password – in the designated fields. Once you’ve entered the required information, click on the “Sign In” button to access your Indiegogo account.
In case you’ve forgotten your password, don’t worry. Indiegogo provides an option to reset it. Just click on the “Forgot Password” link and follow the instructions sent to your registered email address to regain access to your account.
Signing in to your Indiegogo account is essential because it ensures that you have the necessary permissions to manage your campaign and post updates. It also allows you to access other features and tools, such as analyzing campaign analytics, tracking contributions, and managing your campaign settings.
Note: If you’re accessing Indiegogo from a public or shared computer, it’s recommended to log out of your account once you’ve finished to protect your campaign and personal information.
Step 2: Go to your campaign dashboard
After signing in to your Indiegogo account, you’ll need to navigate to your campaign dashboard. This is where you can access all the vital information and tools related to your campaign. To reach your campaign dashboard, follow these steps:
- On the top right corner of the Indiegogo website, click on your profile icon or image. A dropdown menu will appear.
- From the dropdown menu, select “My Campaigns.” This will take you to your campaign dashboard.
Alternatively, you can also click on the user menu icon (three horizontal lines) in the top right corner of the website and choose “My Campaigns” from the options provided.
Once you’re on your campaign dashboard, you’ll find a wealth of information and tools to help you manage your campaign effectively. This includes monitoring your funding progress, accessing backer data, and, of course, posting updates.
Make sure to familiarize yourself with the campaign dashboard and explore the various features available. This will enable you to navigate the platform effortlessly and streamline your campaign management tasks.
Remember, the campaign dashboard is your control center throughout the crowdfunding journey, providing you with valuable insights and the necessary tools to make your campaign a success.
Step 3: Navigate to the “Updates” section
Once you’re on your campaign dashboard, it’s time to navigate to the “Updates” section. This is where you can create and manage the updates for your campaign. Follow these simple steps:
- On your campaign dashboard, look for the navigation menu on the left-hand side.
- Scroll down until you find the “Updates” option. Click on it.
By clicking on the “Updates” option, you’ll be taken to the dedicated section where you can view and control your campaign updates.
In this section, you can see a list of all the updates you’ve posted so far, as well as their status – whether they are currently published or scheduled for future release.
If you haven’t posted any updates yet, this section will be empty. But don’t worry, we’ll guide you through the process of creating a new update in the next steps.
The “Updates” section is crucial for maintaining effective communication with your backers. It serves as a centralized hub where backers can find the latest information about your campaign, ask questions, and engage with you. Regular updates will not only keep your backers informed but also show them that you are actively involved in the progress of your campaign.
Now that you’ve reached the “Updates” section, it’s time to move on to the next step: creating a new update for your campaign.
Step 4: Click on “Create New Update”
Now that you’re in the “Updates” section of your campaign dashboard, it’s time to create a new update. This will allow you to share important information, progress updates, or any other news with your backers. Follow these steps:
- In the “Updates” section, look for the “Create New Update” button. It should be prominently displayed on the page. Click on it.
By clicking on the “Create New Update” button, you’ll be taken to the update creation page where you can compose your message.
Creating a new update is similar to writing a blog post or a social media update. You’ll have the opportunity to craft a message that effectively communicates your thoughts, progress, and announcements to your backers.
Remember, updates are a way to engage with your backers, so make sure to provide valuable and meaningful information. Keep them updated on the progress of your campaign, share any obstacles or challenges you may be facing, and always express your gratitude for their support.
Additionally, don’t be afraid to get creative with your updates. Share photos, videos, or any other visual content that enhances the storytelling aspect of your campaign. This will grab the attention of your backers and keep them excited and invested in your project.
Once you’ve clicked on “Create New Update,” you’re ready to move on to the next step: writing your update.
Step 5: Write your update
Now that you’re on the update creation page, it’s time to write your update. This is where you can share your message, progress, or any other important information with your backers. Follow these steps to compose your update:
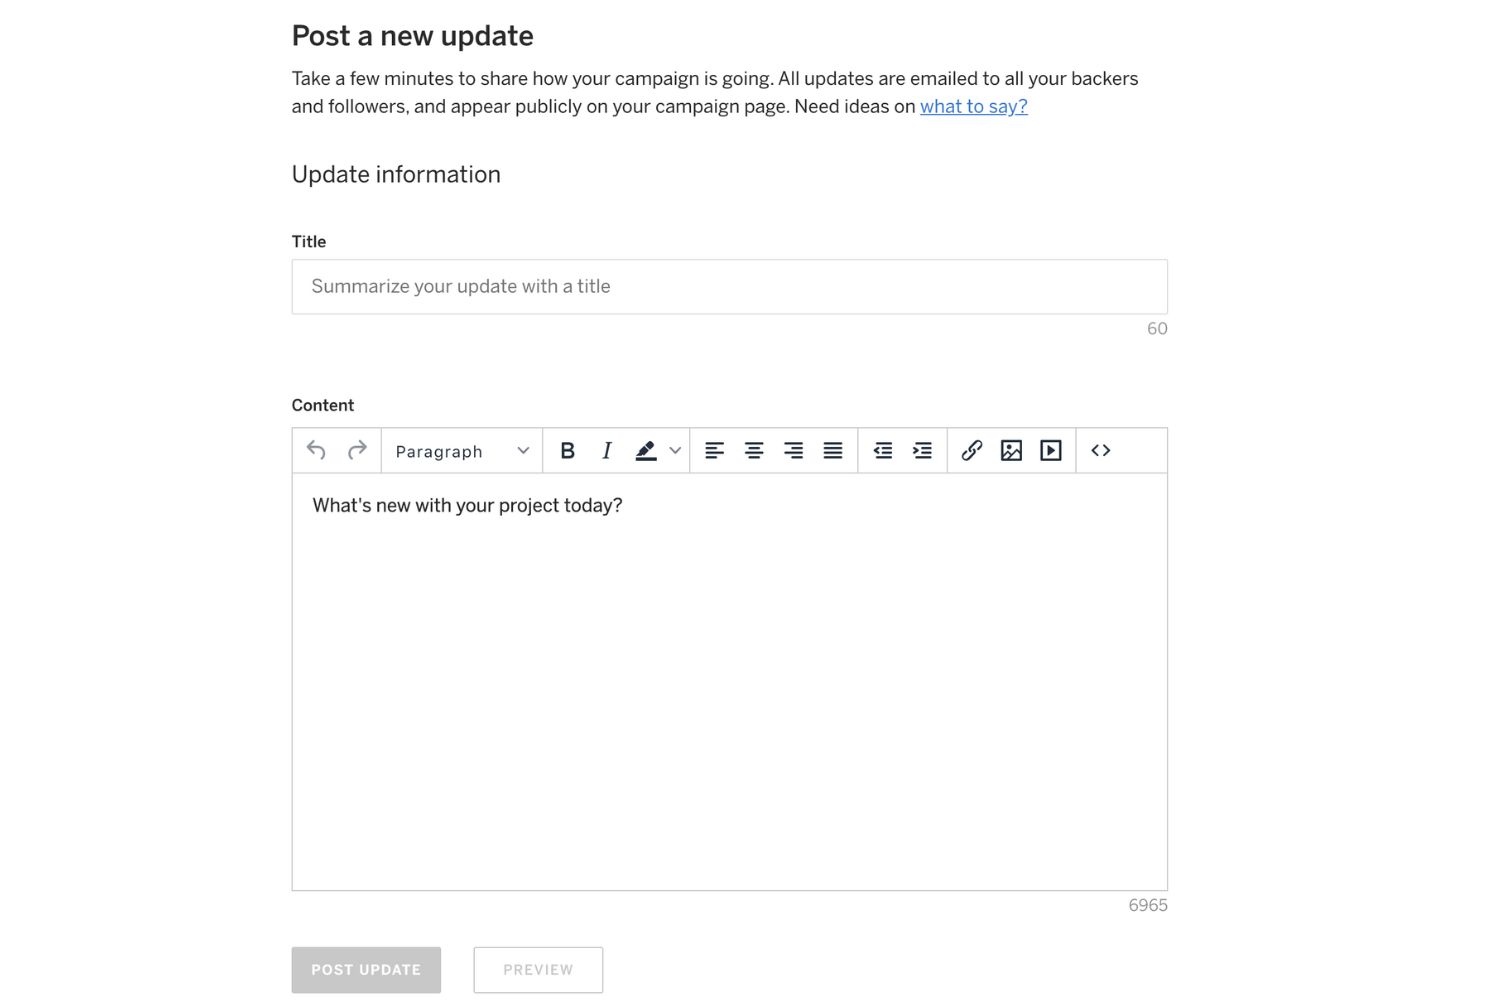
- In the update creation page, you’ll find a text editor. This is where you’ll write your update.
- Start by giving your update a compelling and informative title. This will grab the attention of your backers and give them a glimpse of what the update is about. You can use a clear and concise title, or get creative to make it more engaging.
- Next, move on to write the body of your update. You can use the text editor to format your text, add headings, bold or italicize important parts, or even add bullet points to make your update more organized and readable.
- Make sure to provide relevant and meaningful information in your update. Update your backers on the progress of your campaign, any new features or additions, upcoming milestones or events, and any challenges you may be facing along the way. Be transparent and genuine, and always express your gratitude for their support.
- Keep the tone of your update conversational and engaging. Write as if you’re having a conversation with your backers, making them feel connected and involved in your campaign.
- Before submitting your update, take a moment to proofread and edit your content. Check for any grammatical or spelling errors, make sure the information is accurate and well-structured, and ensure that your message is clear and easy to understand.
Once you’re satisfied with your update, you’re ready to move on to the next step: adding images or videos (optional).
Remember, your update is an opportunity to connect with your backers, so make it engaging, informative, and heartfelt. It’s a chance to build a stronger relationship with your supporters and keep their enthusiasm and support alive.
Step 6: Add images or videos (optional)
In addition to written content, you have the option to enhance your update by adding images or videos. Visual media can help convey your message more effectively and capture the attention of your backers. Follow these steps to add images or videos to your update:
- On the update creation page, you’ll find options to add media such as images or videos. Look for the designated buttons or icons for image or video uploads.
- If you want to add images, click on the image upload button and select the image files from your computer. You can choose multiple images if needed.
- If you prefer to include videos, click on the video upload button and provide the URL or embed code of the video. You can upload videos hosted on platforms like YouTube or Vimeo.
- Once you’ve added the images or videos, make sure to position them within your update where they are most relevant and impactful.
- Ensure that the media you add aligns with the content of your update and enhances the message you’re trying to convey. For example, if you’re announcing a new product feature, include images that showcase the feature in action.
- Preview your update to ensure that the images or videos are properly embedded and displayed. Make any necessary adjustments to their position or size to ensure a visually appealing presentation.
Adding media to your update can be a powerful way to engage your backers visually. Images or videos can provide a more immersive experience and make your update stand out. They can also help clarify your message, showcase your progress, or highlight the impact of your campaign.
Remember to use high-quality and relevant images or videos that are in line with your campaign. Visual content can make a lasting impression on your backers and create a stronger connection with your project.
Now that you’ve added images or videos to your update, it’s time to move on to the next step: previewing and editing your update.
Step 7: Preview and edit your update
After writing your update and adding any images or videos, it’s crucial to preview and edit your update before publishing it. This step ensures that your update looks and reads as intended, ensuring a professional and engaging presentation to your backers. Follow these steps to preview and edit your update:
- On the update creation page, locate the preview button or option. This will allow you to see how your update will appear to your backers.
- Click on the preview button to generate a preview of your update. Take the time to carefully review the content, formatting, and overall appearance.
- As you review the preview, pay attention to the readability and flow of your update. Check for any typos, grammatical errors, or formatting issues that may need to be corrected.
- Make adjustments as necessary. If you notice any errors or inconsistencies, go back to the editing page and modify your update accordingly.
- Once you’ve made the necessary edits, preview your update again to ensure that the changes have been implemented successfully. Repeat this process until you are satisfied with the final result.
Previewing and editing your update is essential to ensure that it is well-polished and error-free. It allows you to catch any mistakes or inconsistencies that may detract from the professionalism of your campaign. By taking the time to carefully review and edit your update, you demonstrate your commitment to delivering high-quality content to your backers.
Remember, your update is a reflection of your campaign and your dedication to its success. A well-crafted and error-free update not only communicates your message effectively but also helps build trust and credibility with your backers.
Once you are satisfied with the preview and have made all necessary edits, it’s time to move on to the next step: choosing the audience for your update.
Step 8: Choose the audience for your update
When posting an update on Indiegogo, it’s important to consider who your target audience is. Depending on the nature of your update, you may want to selectively share it with specific groups of backers. Follow these steps to choose the audience for your update:
- On the update creation page, you’ll find options to select the audience for your update. Look for the settings or audience targeting section.
- Assess the content and message of your update to determine which group of backers it is most relevant to. For example, if you have backers who have selected specific reward tiers or have shown interest in certain aspects of your campaign, you may want to target them specifically.
- Checkboxes or dropdown menus may be provided to select specific segments of your backer list or target backers based on their contribution amount or reward selection.
- Consider using the default option to send the update to all backers if the message is intended for a general audience and does not require specific segmentation.
- Ensure that you understand the options available and review your segment selection carefully to avoid excluding any backers unintentionally.
- Once you’ve chosen the audience for your update, double-check your selection to confirm that it aligns with your intended target group.
Choosing the audience for your update allows you to tailor your message to specific groups of backers who will find it most relevant. By targeting the right audience, you can provide a more personalized experience, strengthening your connection with your backers.
Remember to consider the nature of your update and the preferences of your backers when choosing the audience. This will ensure that your message reaches the right people and resonates with them in a meaningful way.
Now that you’ve chosen the audience for your update, it’s time to move on to the next step: scheduling or publishing your update.
Step 9: Schedule or publish your update
After completing the necessary preparations for your update, it’s time to decide whether to schedule it for a later release or publish it immediately. This step allows you to control the timing and distribution of your update. Follow these steps to schedule or publish your update:
- On the update creation page, look for the options to schedule or publish your update. This can typically be found in the settings or scheduling section.
- If you want to publish your update immediately, choose the “Publish Now” or similar option. This will make your update visible to your chosen audience right away.
- If you prefer to schedule your update for a specific time, select the “Schedule” or “Set a Schedule” option. This will allow you to choose a date and time for your update to be automatically posted.
- When scheduling your update, consider factors such as your backers’ time zones and any important events or milestones related to your campaign. This will help you choose the most appropriate time for maximum impact and engagement.
- Double-check your selection to ensure that you have chosen the correct option: either publishing now or scheduling for a future release.
- If you have selected the scheduling option, review the date and time chosen for your update to verify its accuracy.
Scheduling or publishing your update allows you to have full control over when and how your message reaches your backers. Whether you choose to publish it immediately or schedule it for a later time, take into consideration the impact and relevance of your update to maximize its effectiveness.
Remember, the timing of your update can play a crucial role in attracting attention and engagement from your backers. Consider the best time to post your update based on your campaign’s progress, any ongoing promotions or events, and your audience’s behavior and preferences.
Now that you’ve scheduled or published your update, it’s time to move on to the final step: monitoring and engaging with your backers’ comments.
Step 10: Monitor and engage with backers’ comments
Once you’ve posted your update, it’s important to actively monitor and engage with the comments left by your backers. Backers may have questions, suggestions, or simply want to show their support. Your interactions with them can foster a sense of community and strengthen their connection to your campaign. Follow these steps to effectively monitor and engage with backers’ comments:
- Regularly check the comments section of your update. This can usually be found below the update itself.
- Read through the comments carefully and respond promptly. Address any questions or concerns, and acknowledge any positive feedback or suggestions.
- When responding to comments, be polite, professional, and appreciative. Show genuine interest in what backers have to say and provide helpful and informative responses.
- If a comment requires a more detailed or private response, consider reaching out to the backer through direct messaging or email.
- Encourage discussion among backers by creating a welcoming and inclusive atmosphere. Foster a sense of community by engaging with their comments and facilitating conversations.
- Monitor the comments for any spam, inappropriate content, or violations of community guidelines. Take appropriate action, such as deleting or reporting such comments, to maintain a positive and respectful environment.
- Show your appreciation for the feedback and support you receive. Thank backers for their comments, suggestions, and words of encouragement. Let them know that their contribution to your campaign is valued.
- Consider using updates as an opportunity to address common questions or concerns raised in the comments. This can help provide clarity and ensure that all backers have access to important information.
Monitoring and engaging with backers’ comments is a vital part of maintaining a strong and active campaign community. By actively participating in the conversation, you demonstrate your commitment to communication, transparency, and customer satisfaction.
Remember, your backers are your supporters and advocates. Engaging with their comments not only strengthens your relationship with them but also encourages loyalty and enhances your campaign’s reputation. Embrace the opportunity to connect with your backers and foster a sense of camaraderie and shared excitement surrounding your project.
Now that you’ve learned how to monitor and engage with backers’ comments, you’re well-equipped to maintain an interactive and thriving campaign community.
Conclusion
Congratulations! You’ve successfully learned how to post an update on Indiegogo and engage with your backers throughout your crowdfunding journey. By following the step-by-step process outlined in this guide, you can effectively communicate with your backers, keep them informed, and maintain a strong connection throughout your campaign.
Remember, updates are a powerful tool for sharing progress, announcements, and expressing gratitude to your backers. Take the time to craft compelling and informative updates that resonate with your audience. Enhance your updates with visual content, such as images and videos, to make them more engaging and impactful.
Ensure you choose the appropriate audience for each update, considering the relevance and interests of your backers. By targeting specific segments of your backer list, you can provide a personalized experience and strengthen the connection between your campaign and its supporters.
Once your updates are posted, don’t forget to monitor and engage with your backers’ comments. Respond promptly, show gratitude, and foster a welcoming community where backers feel heard and valued. This will not only deepen their engagement but also encourage them to continue supporting your campaign.
With these steps in mind, you have the ability to maintain an active and engaged campaign community. Keep your backers informed, involved, and excited about your project, and you’ll be well on your way to achieving your crowdfunding goals on Indiegogo.
Now, go ahead and start sharing those updates! May your campaign thrive and your creativity flourish. Good luck!