Introduction
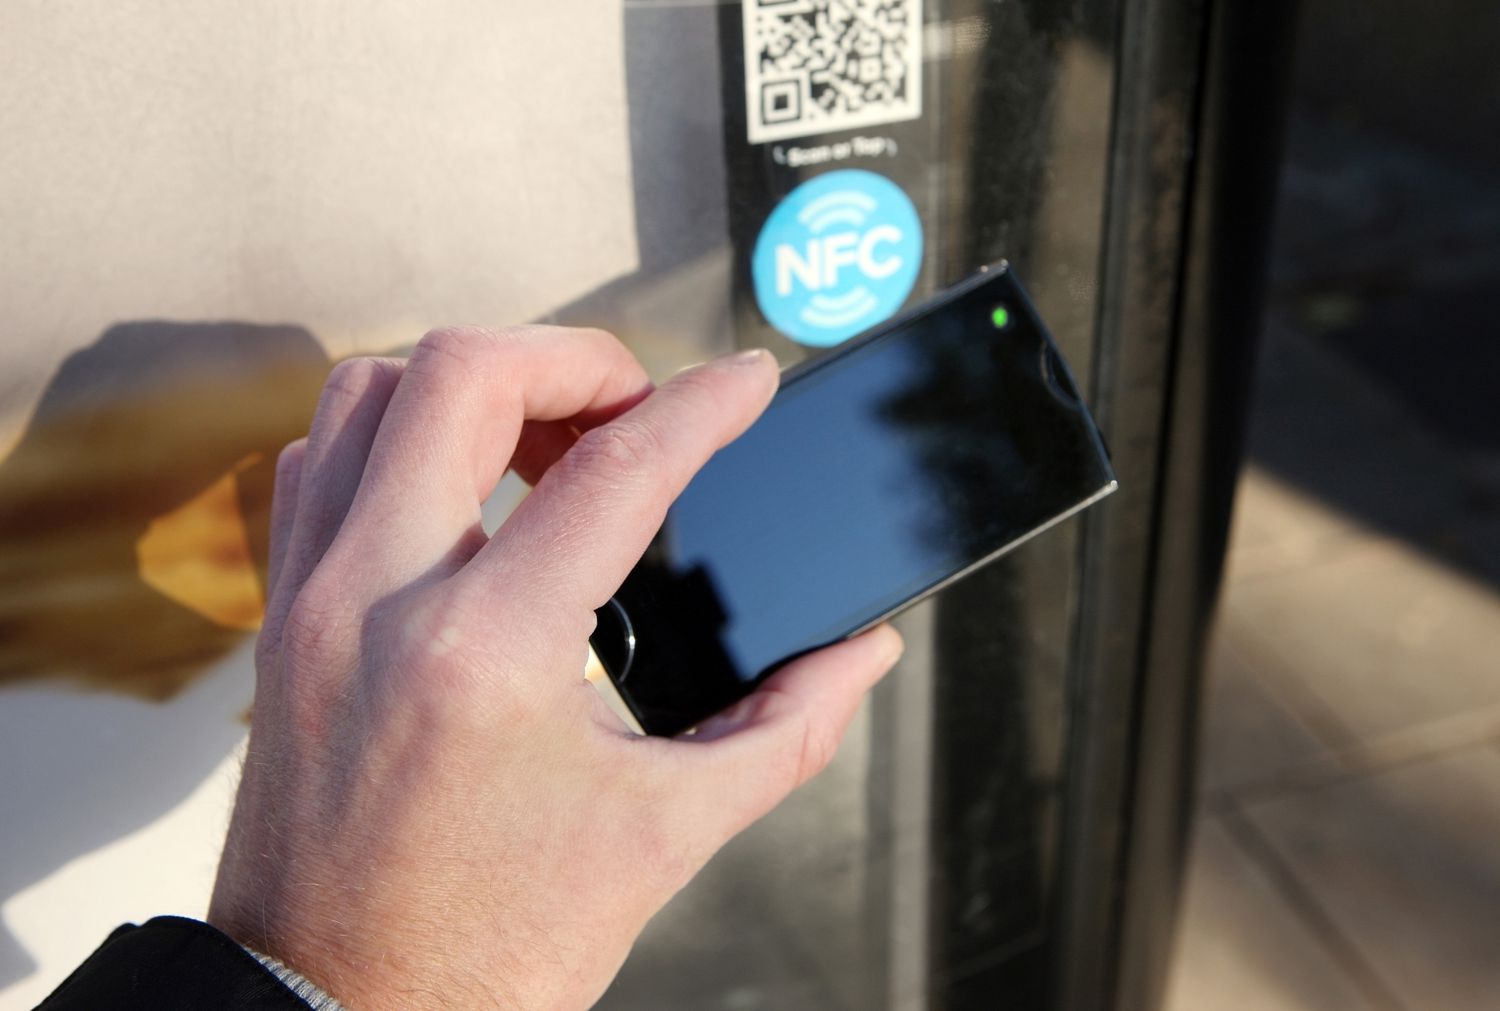
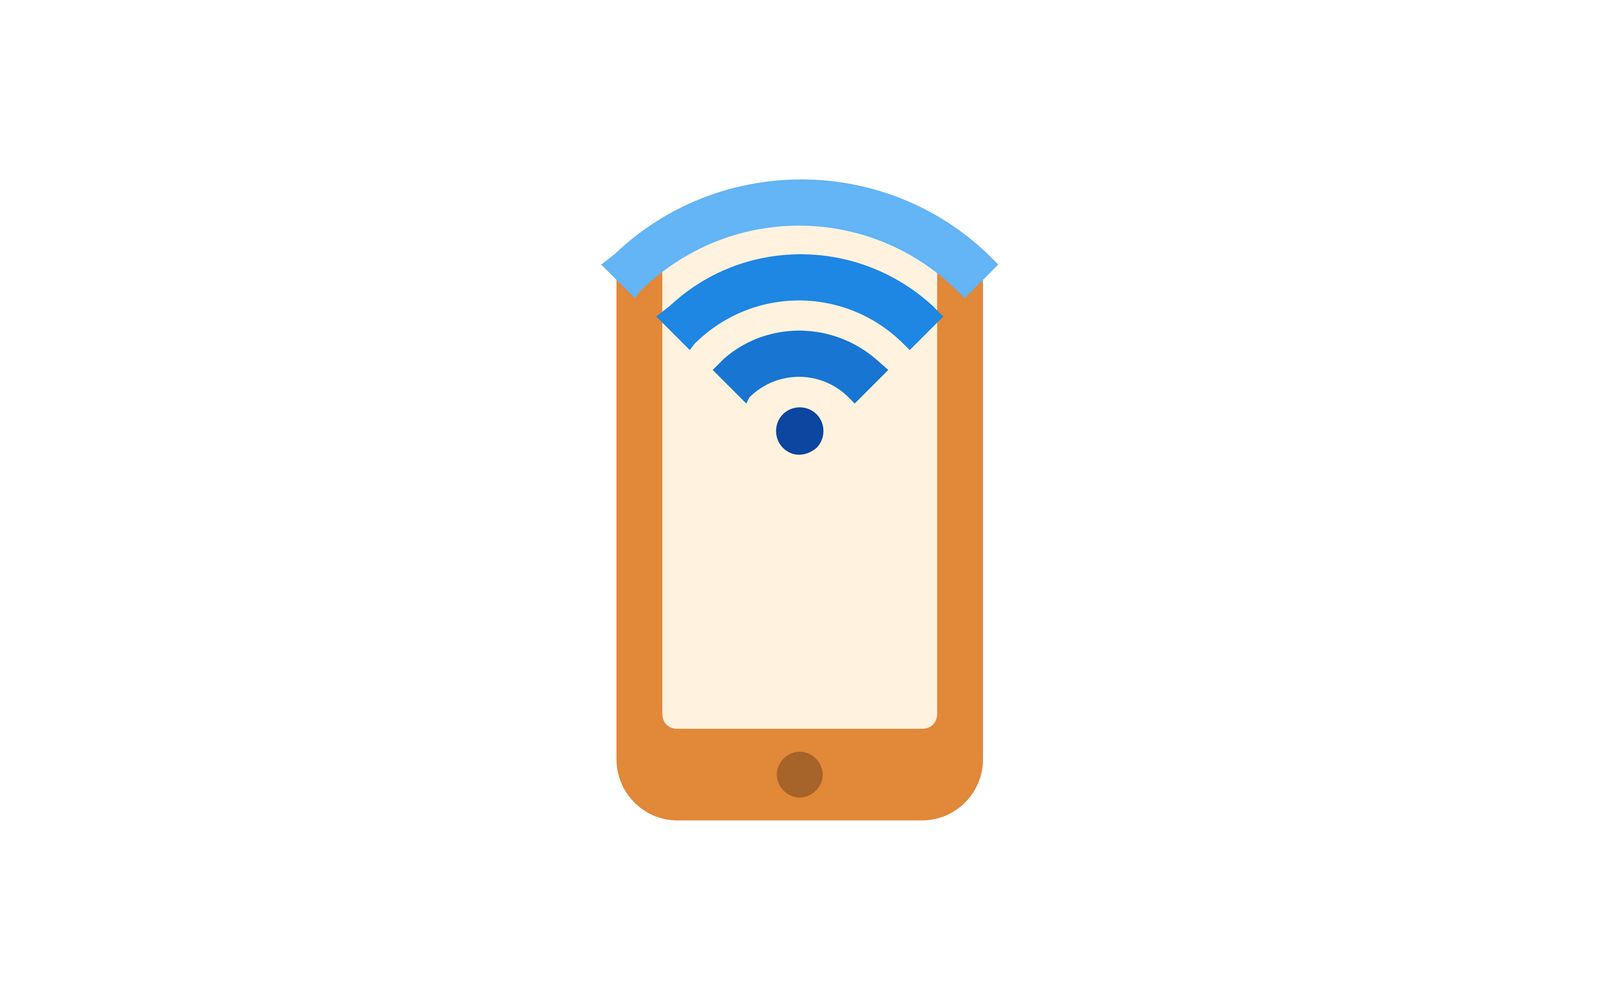
Near Field Communication, commonly known as NFC, is a wireless communication technology that allows data transfer between devices in close proximity. With NFC, users can perform various tasks by simply tapping or bringing two devices close together, eliminating the need for complex settings or physical connections. This technology has revolutionized the way we interact with our devices and has found applications in various sectors, including contactless payments, access control, data sharing, and more.
NFC tags, on the other hand, are small physical objects that contain embedded NFC chips. These tags can be programmed to store and transmit specific information when activated by an NFC-enabled device. They can be easily attached to objects or placed in strategic locations, offering a convenient and versatile way to trigger specific actions or provide information to users.
In this article, we will explore how to make NFC tags with an Android device. By creating your NFC tags, you can unlock a world of possibilities and tailor them to your specific needs. Whether you want to automate tasks, share contact information, launch applications, or anything else you can imagine, NFC tags provide an efficient and intuitive solution.
To get started, you’ll need an NFC-enabled Android device, NFC tags, and an NFC writer app. These can be easily obtained, and the process of creating NFC tags is simple and straightforward. So, let’s dive into the steps required to make NFC tags with your Android device.
What is NFC?
NFC, which stands for Near Field Communication, is a wireless communication technology that allows data transfer between devices in close proximity. It operates on radio frequency identification (RFID) principles and enables devices to establish a connection simply by bringing them close together or by tapping them against each other.
NFC technology is built upon the principles of RFID and works on the 13.56 MHz frequency band. It enables two-way communication between devices, allowing them to send and receive information quickly and securely. NFC is a feature found in many modern smartphones, tablets, and other devices, making it widely accessible for use.
One of the key features of NFC is its ability to enable contactless transactions. With an NFC-enabled device, users can make payments, access digital content, and perform various tasks by simply tapping their device against an NFC reader or another compatible device. This convenience has revolutionized the way we interact with technology, making transactions faster, more secure, and more streamlined.
In addition to contactless payments, NFC technology can be used for other purposes such as data sharing, access control, ticketing, and more. For example, NFC tags can be embedded in posters, business cards, or products to provide additional information or trigger specific actions when tapped with an NFC-enabled device.
NFC technology also supports peer-to-peer communication, allowing devices to exchange data effortlessly. This makes tasks like sharing files, photos, or contact information between devices a simple and seamless process.
Overall, NFC technology offers a convenient and efficient way to communicate and interact with devices in close proximity. Its versatility and ease of use make it an ideal solution for a wide range of applications in various industries. Now that we understand what NFC is, let’s delve into the world of NFC tags and their benefits.
What are NFC tags?
NFC tags are small physical objects that contain embedded NFC chips. These tags are equipped with a microchip and an antenna and can store and transmit information when activated by an NFC-enabled device. NFC tags come in various forms, such as stickers, keychains, cards, or even embedded in products.
Each NFC tag has a unique identifier and a specific memory capacity, which determines the amount of data that can be stored on it. The memory capacity can vary from a few kilobytes to several megabytes, depending on the type of NFC tag. Additionally, NFC tags can be read-only, where the information is pre-programmed and cannot be modified, or they can be read-write, allowing for dynamic content updates.
One of the key advantages of NFC tags is their versatility and programmability. Users can easily encode NFC tags with specific information, tasks, or commands that will be triggered when an NFC-enabled device interacts with the tag. For example, an NFC tag on a business card can be programmed to automatically save contact information to a device, eliminating the need to manually input the details.
The possibilities of what you can do with NFC tags are virtually endless. You can program NFC tags to perform tasks such as opening specific apps, toggling device settings, setting alarms, sending text messages, connecting to Wi-Fi networks, and much more. This versatility makes NFC tags a powerful tool for automating tasks and creating personalized experiences.
Moreover, NFC tags can be used in various industries and sectors. In retail, NFC tags can provide product information, facilitate mobile payments, or offer loyalty rewards. In events and conferences, NFC tags can be used for attendee registration, access control, or sharing information between participants. In healthcare, NFC tags can be used for patient identification, medication tracking, or asset management.
Overall, NFC tags offer a convenient and flexible way to interact with technology and trigger specific actions or provide information. Their small size, programmability, and compatibility with a wide range of NFC-enabled devices make them a valuable tool in enhancing user experiences and simplifying everyday tasks.
Benefits of using NFC tags
NFC technology offers various benefits that make it a valuable tool for interacting with devices and simplifying everyday tasks. Here are some key benefits of using NFC tags:
- Convenience: NFC tags provide a hassle-free way to interact with devices. With a simple tap, users can trigger actions or access information, eliminating the need for complex settings or physical connections.
- Automation: NFC tags allow for the automation of tasks and routines. By programming specific actions to NFC tags, users can automate tasks such as toggling device settings, launching apps, or initiating predefined actions.
- Personalization: NFC tags can be personalized to suit individual needs and preferences. Users can program NFC tags to perform actions specific to their requirements, creating a personalized and efficient user experience.
- Enhanced user experiences: NFC tags can enhance user experiences by providing additional information or simplifying processes. For example, an NFC tag on a museum exhibit can provide detailed descriptions or multimedia content to enrich the visitor experience.
- Improved efficiency: NFC tags can streamline processes and improve efficiency in various industries. By using NFC tags for tasks like access control or information sharing, businesses can save time, reduce manual efforts, and increase productivity.
- Secure transactions: NFC technology ensures secure transactions by utilizing encryption and authentication protocols. This makes NFC tags a reliable option for contactless payments, access control, and other secure applications.
- Cost-effective: NFC tags are cost-effective compared to other technologies, such as Bluetooth or QR codes. NFC tags are durable, reusable, and require minimal maintenance, making them a cost-effective choice for implementing smart solutions.
- Compatibility: NFC technology is widely supported by modern smartphones and other devices. This compatibility ensures that NFC tags can be easily read and interacted with by a wide range of devices, offering a seamless user experience.
These benefits highlight the versatility and value that NFC tags bring to various industries and everyday tasks. By leveraging the power of NFC tags, users can automate tasks, personalize experiences, and enhance overall efficiency and convenience.
Prerequisites
Before you can start making NFC tags with your Android device, there are a few prerequisites that you need to fulfill. Here are the key requirements:
- An NFC-enabled Android device: Ensure that your Android device has NFC capabilities. Most modern Android devices, including smartphones and tablets, come equipped with NFC functionality. You can check your device’s specifications or settings to confirm if it supports NFC.
- An NFC writer app: You will need an NFC writer app to encode data onto the NFC tags. There are several NFC writer apps available on the Google Play Store, both free and paid. Popular options include NFC Tools, Trigger, and NXP TagWriter. Choose an app that suits your needs and install it on your Android device.
- NFC tags: You will need NFC tags to program and use with your Android device. NFC tags come in various forms, such as stickers, keychains, cards, or even embedded in products. Ensure that the NFC tags you purchase are compatible with your Android device and have sufficient memory capacity for your intended use.
- Understanding of NFC technology: While you don’t need to be an expert, having a basic understanding of NFC technology will be helpful. Familiarize yourself with the concepts of NFC communication, read and write operations, and the capabilities of NFC tags. This knowledge will assist you in effectively utilizing NFC tags for your specific requirements.
Once you have ensured that you have an NFC-enabled Android device, an NFC writer app installed, and NFC tags at your disposal, you are ready to proceed with the steps to make NFC tags. These prerequisites are essential in ensuring a smooth and successful NFC tag creation process.
Step 1: Download and install an NFC writer app
To create NFC tags with your Android device, you need to download and install an NFC writer app from the Google Play Store. There are several NFC writer apps available, each with its own set of features and capabilities. Here’s how you can get started:
- Open the Google Play Store: On your Android device, locate and open the Google Play Store app. This is the official app store for Android applications.
- Search for NFC writer apps: In the search bar at the top of the Google Play Store, type in “NFC writer” or “NFC writer app” and press the enter key. The search results will display a list of NFC writer apps available for download.
- Choose an NFC writer app: Browse through the list of NFC writer apps and read the descriptions, reviews, and ratings to help you make an informed decision. Consider the features and functionalities that are important to you.
- Install the NFC writer app: Once you have selected an NFC writer app, tap on the “Install” button to begin the installation process. The app will be downloaded and installed onto your Android device.
- Launch the NFC writer app: After the installation is complete, locate the NFC writer app on your device and open it. You might need to grant certain permissions, such as access to NFC, for the app to function correctly.
Congratulations! You have successfully downloaded and installed an NFC writer app on your Android device. The NFC writer app will provide you with the necessary tools and interface to encode your desired data onto NFC tags. In the next step, we will discuss how to obtain NFC tags to use with your app.
Step 2: Get NFC tags
Now that you have an NFC writer app installed on your Android device, the next step is to acquire NFC tags. These tags will be programmed with specific data and actions that will be triggered when your device interacts with them. Here’s how you can obtain NFC tags:
- Determine your requirements: Before purchasing NFC tags, it’s important to determine your specific needs and use cases. Consider factors such as the quantity of tags needed, the memory capacity required, and the form factor that suits your purposes (e.g., stickers, keychains, cards).
- Research and select a reputable supplier: Look for reliable suppliers that offer quality NFC tags. You can find NFC tags from various online marketplaces, specialized NFC product retailers, or even local electronics stores. Read customer reviews, check ratings, and verify the reputation of the supplier before making a purchase.
- Choose the appropriate NFC tag type: NFC tags come in different types and memory capacities. Consider your specific use cases when selecting the type of NFC tags. For example, if you need to store a large amount of data, ensure that you choose NFC tags with sufficient memory capacity.
- Place your order: Once you have identified a reputable supplier and selected the type of NFC tags you require, proceed to place your order. Follow the supplier’s instructions, provide necessary details, and make the payment as per their ordering process.
- Wait for delivery: After placing your order, patiently wait for the delivery of your NFC tags. Shipping times may vary depending on your location and the supplier’s policies. Stay in touch with the supplier to track the status of your order, if applicable.
- Check the NFC tag specifications: Once you receive the NFC tags, check the specifications to ensure they align with your requirements. Verify the memory capacity, type, and any other relevant details that are crucial for your intended use.
By following these steps, you can obtain NFC tags that are suitable for your needs. The availability of NFC tags in different forms and memory capacities ensures that you can find the right tags to fit your use cases. In the next step, we will prepare your Android device for writing data to the NFC tags.
Step 3: Prepare your Android device
Before you start writing data to NFC tags, it’s important to ensure that your Android device is properly prepared. Taking the time to prepare your device will help ensure a smooth and successful NFC tag creation process. Here are the steps to prepare your Android device:
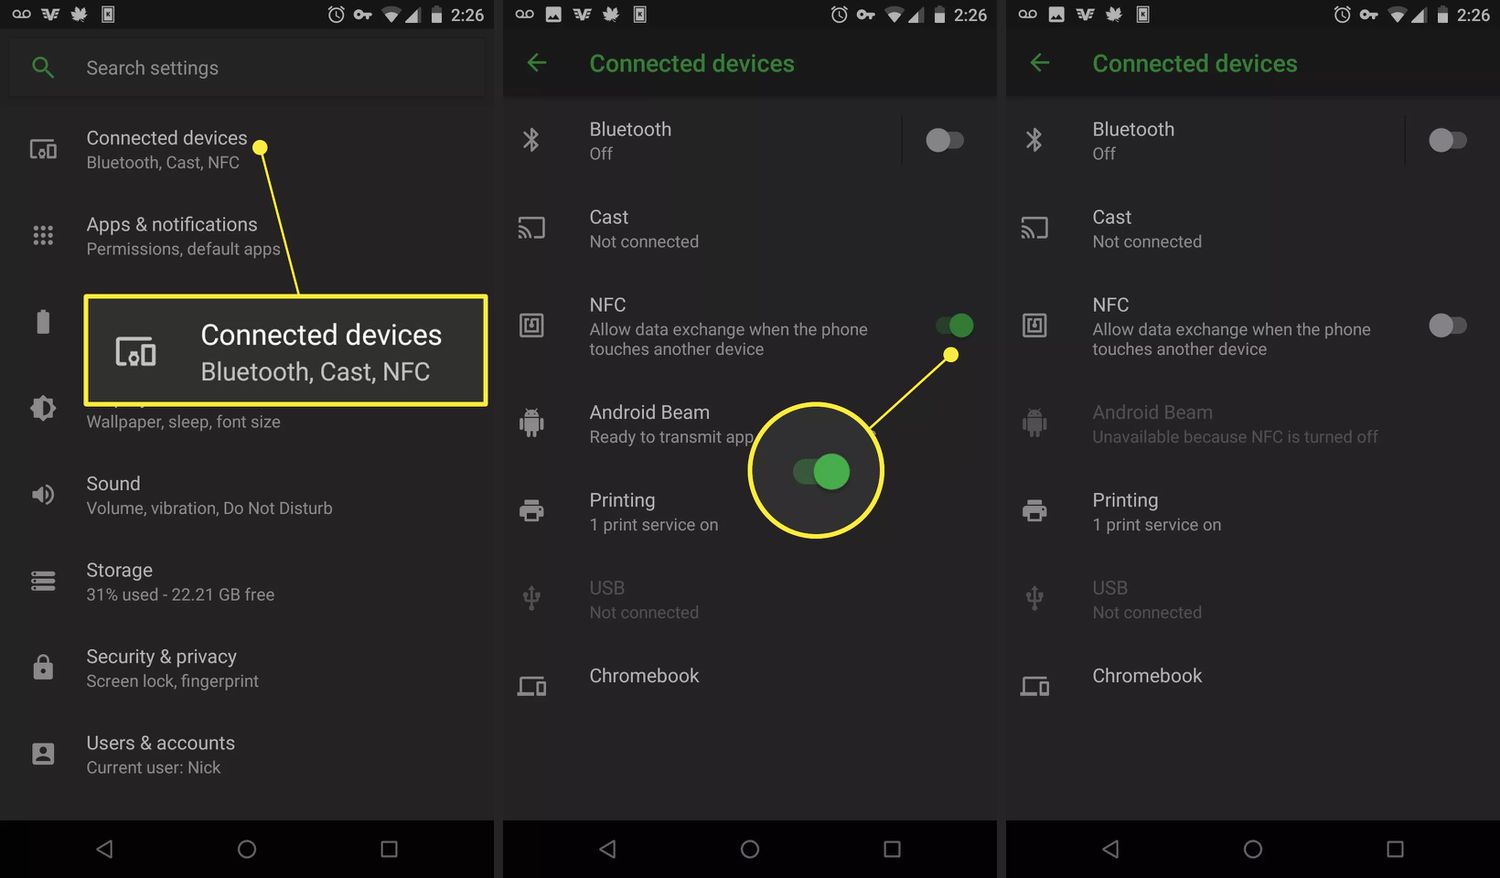
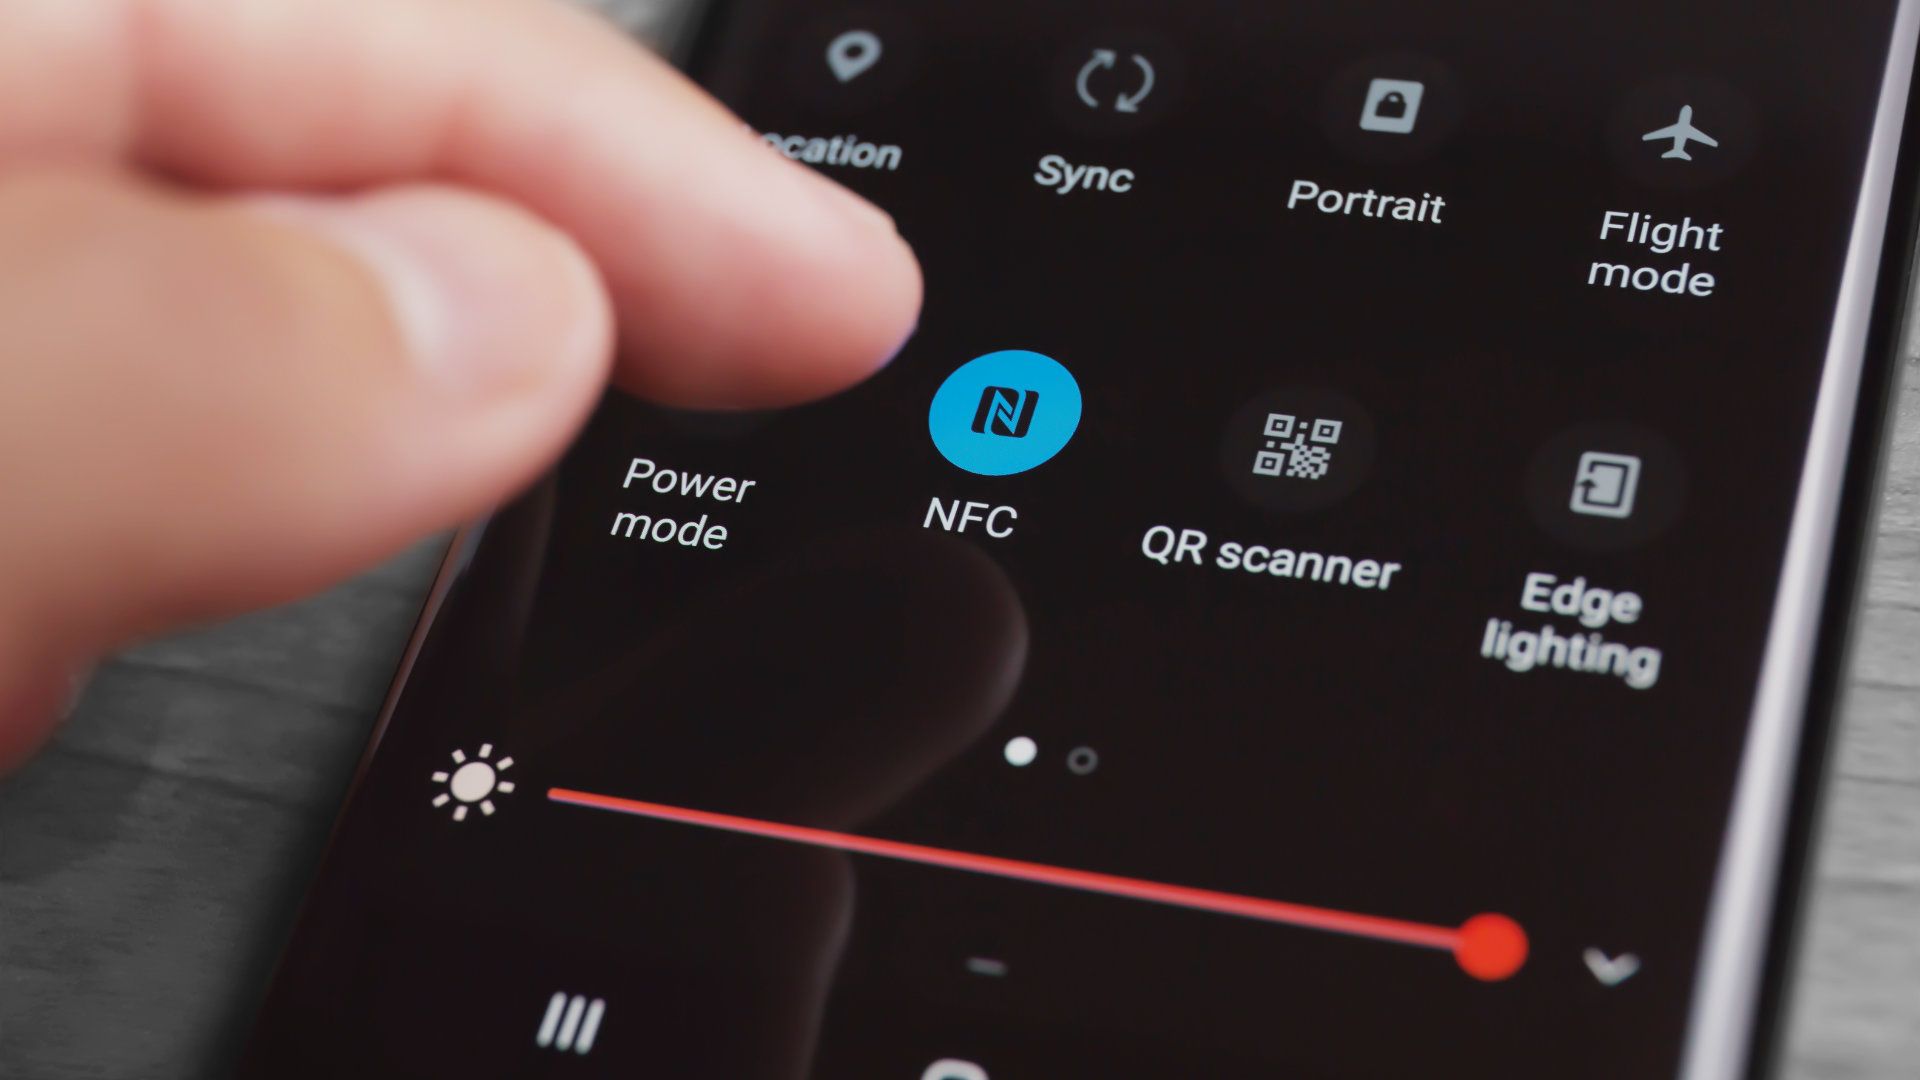
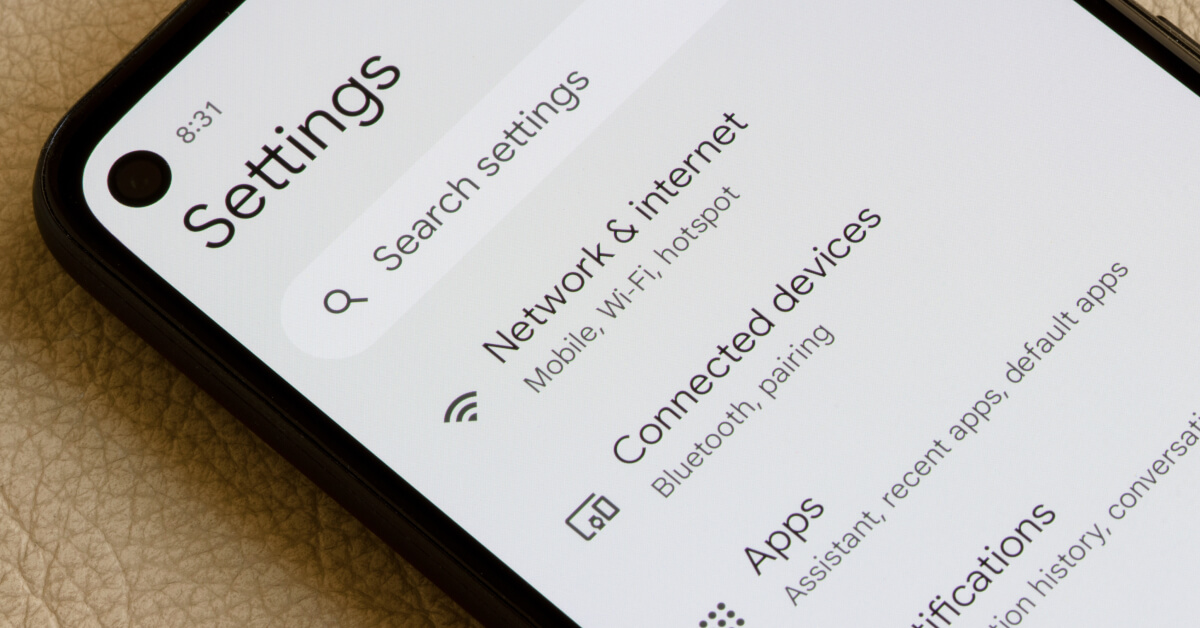
- Ensure NFC is enabled: Go to the Settings menu on your Android device and look for the “NFC” or “Connections” section. From there, enable NFC if it is not already turned on. This will allow your device to communicate with NFC tags.
- Grant necessary permissions: Some NFC writer apps may require specific permissions to access NFC capabilities on your device. Make sure to grant the necessary permissions when prompted by the app.
- Clear any obstacles: NFC communication requires close proximity between devices. Remove any obstacles or interference, such as protective cases or metal objects, that may hinder the communication between your Android device and the NFC tags.
- Ensure a stable power source: To prevent interruptions during the NFC tag writing process, ensure that your device is adequately charged or connected to a stable power source to avoid any power-related issues.
- Keep your device up to date: Ensure that your Android device’s operating system and NFC-related apps are up to date. Updates often include bug fixes and improvements that can enhance the performance and compatibility of NFC functionalities.
- Read the instructions: Familiarize yourself with the user guide or instructions provided by the NFC writer app. Understanding the app’s features and functionality will help you navigate through the writing process more effectively.
By following these steps, you can ensure that your Android device is properly prepared and optimized for writing data to NFC tags. Once your device is ready, you can proceed to the next step, where you will learn how to write data to NFC tags using the NFC writer app.
Step 4: Write data to NFC tags
After preparing your Android device, you are now ready to write data to the NFC tags using the NFC writer app. The process may vary slightly depending on the app you have installed, but the general steps are as follows:
- Open the NFC writer app: Locate and open the NFC writer app on your Android device. The app’s interface will provide you with options and settings to customize the data you want to write onto the NFC tags.
- Select the type of data: Choose the type of data you want to write to the NFC tags. This can include text, URLs, contact information, or even specific app actions. The NFC writer app will have different options for each data type.
- Enter or select the data: Depending on the type of data, you will either enter the information manually or select it from your device’s stored data. For example, if you want to write contact information, you can manually enter the details or select a contact from your device’s address book.
- Customize the data: Some NFC writer apps offer customization options, allowing you to add additional settings or actions to the data. This can include setting an automatic action when the tag is tapped, specifying the language for text data, or configuring advanced functionality.
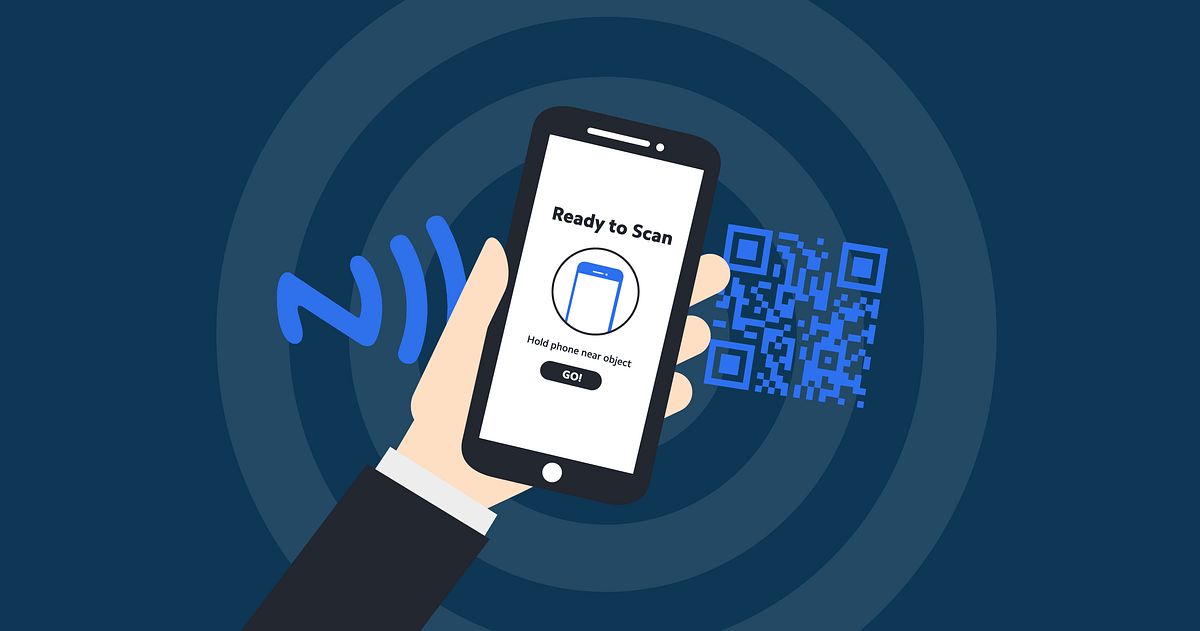
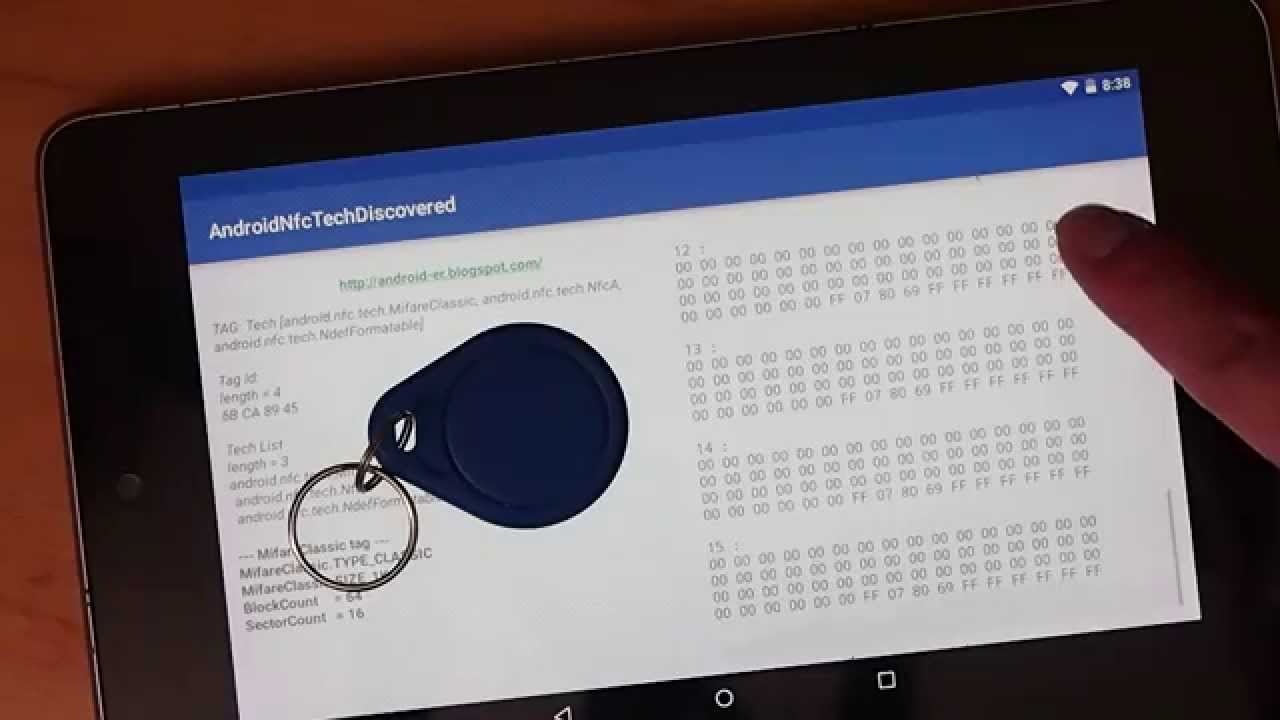
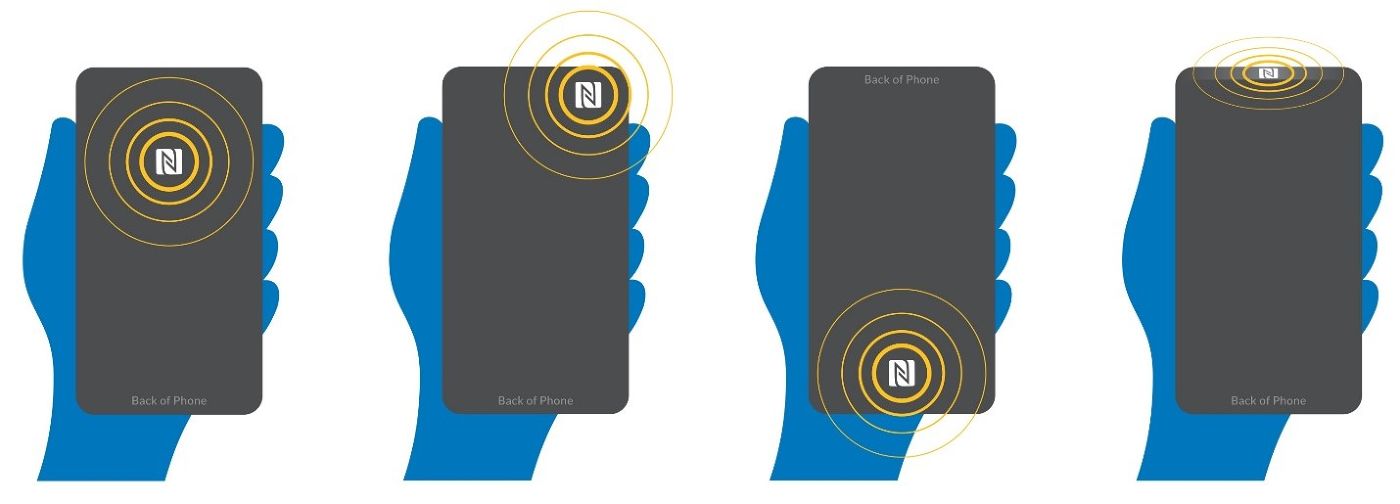
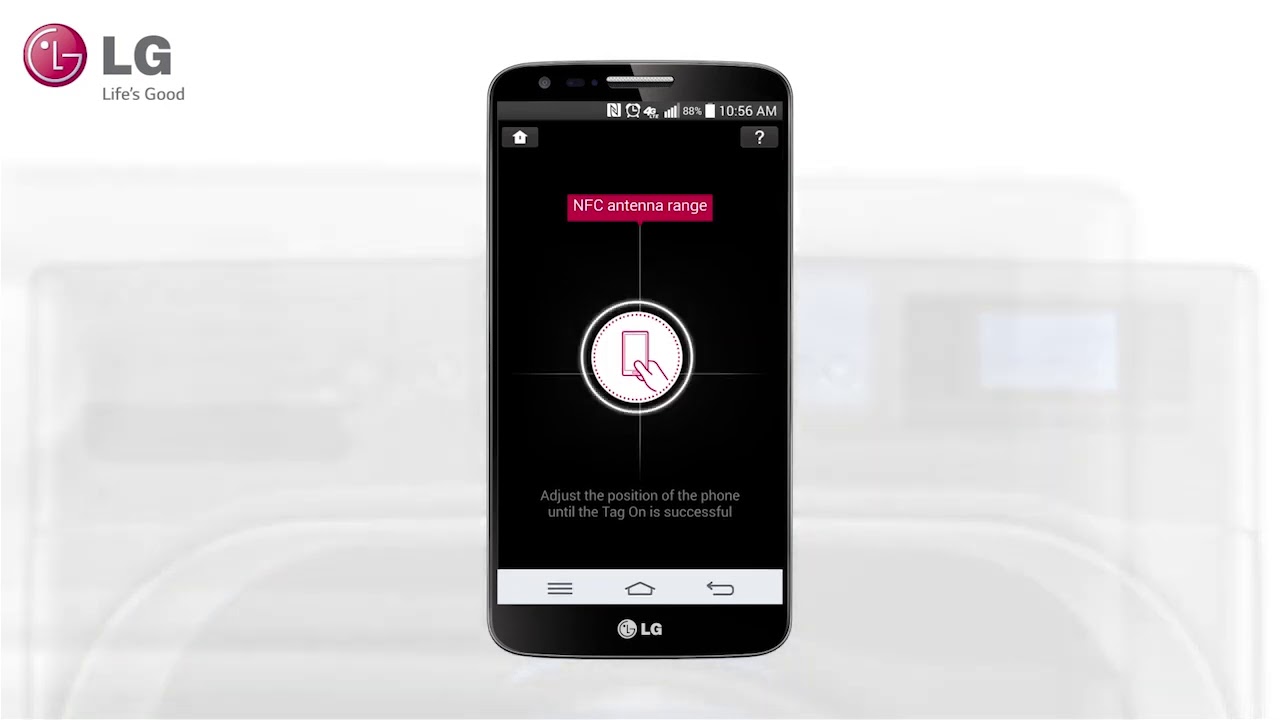
- Position the NFC tag: Hold the NFC tag against the back of your Android device, preferably near the NFC antenna area. The app may provide guidance on the correct positioning for optimal communication between your device and the NFC tag.
- Initiate the writing process: Once the NFC tag is in position, initiate the writing process through the app’s interface. The app will send the specified data to the NFC tag using NFC communication.
- Verify the writing success: After the writing process is complete, the app may provide a notification or indication of successful data transfer. You can also check the NFC tag to visually confirm that the data has been written.
By following these steps, you can write data to the NFC tags using your Android device and the NFC writer app. Repeat this process for each NFC tag you want to program with specific information and actions. Once the data is written to the NFC tags, you can move on to the final step to test and use your NFC tags.
Step 5: Test and use your NFC tags
After successfully writing data to your NFC tags, it’s time to test and use them with your Android device. This step allows you to verify that the programmed actions and information are working as intended. Here’s how you can test and use your NFC tags:
- Ensure NFC is enabled: Double-check that NFC is still enabled on your Android device. This will ensure that your device can detect and interact with the NFC tags.
- Position the NFC tag: Hold the NFC tag against the back of your Android device near the NFC antenna area. Ensure that there are no obstacles or interference between the tag and your device.
- Wait for the action to trigger: Once the NFC tag is in position, wait for the programmed action to trigger. This can be opening a specific app, displaying a message, connecting to a Wi-Fi network, or any other action you programmed the NFC tag to perform.
- Test different NFC tags: If you have programmed multiple NFC tags with different actions or information, try using each tag individually and verify that the corresponding action is triggered correctly.
- Make adjustments if necessary: If the programmed actions or information are not working as expected, go back to the NFC writer app and make any necessary adjustments. Check that the data is correctly entered, and ensure that the desired actions are properly configured.
- Experiment and explore: Once you have tested the basic functionality of your NFC tags, don’t be afraid to experiment and explore further possibilities. You can program additional actions, modify the data stored on the tags, or explore advanced features offered by the NFC writer app.
By following these steps, you can test and use your NFC tags to ensure they are functioning as intended. NFC tags provide a convenient and customizable way to automate tasks, access information, and streamline interactions with your Android device. Use your NFC tags in various scenarios, such as home automation, personal productivity, or even sharing information with others.
Conclusion
Creating and using NFC tags with your Android device opens up a world of possibilities for simplifying tasks, automating actions, and enhancing user experiences. By following the steps outlined in this guide, you can easily make NFC tags and customize them to suit your specific needs.
NFC technology allows for convenient communication between devices in close proximity, providing a seamless and efficient way to transfer data and trigger actions. NFC tags serve as physical markers that store information and can be programmed to perform specific tasks when tapped or brought into contact with an NFC-enabled device.
Throughout this guide, we covered the necessary prerequisites, such as having an NFC-enabled Android device, installing an NFC writer app, and acquiring NFC tags. We also discussed how to prepare your device, write data to NFC tags, and test their functionality. Each step is essential in ensuring a successful NFC tag creation process.
With NFC tags, you can automate tasks, access information instantly, share data effortlessly, and create personalized experiences. Whether it’s automating your home, simplifying your daily routine, or enhancing customer interactions in a business setting, NFC tags offer a convenient and versatile solution.
Remember to explore the various applications and possibilities of NFC tags, experiment with different actions and data types, and make adjustments as needed to suit your preferences. The ability to tailor NFC tags to your specific requirements allows for endless creativity and customization.
So, go ahead and start utilizing the power of NFC tags with your Android device. Unlock a world of convenience, efficiency, and personalized interactions by creating your NFC tags.