Introduction
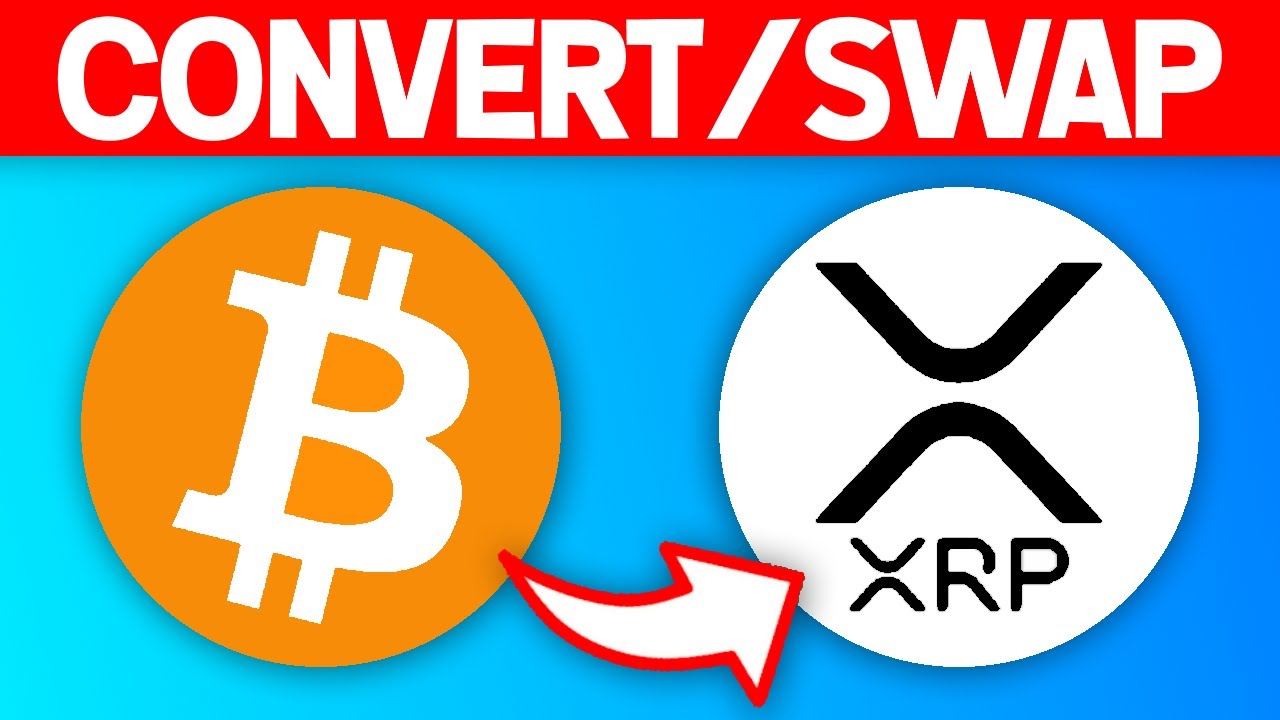
Are you looking to exchange your Bitcoin (BTC) for Ripple (XRP), one of the top cryptocurrencies in the market? You’ve come to the right place! In this guide, we will take you through a step-by-step process on how to exchange BTC to XRP.
Cryptocurrency exchanges provide a platform where you can seamlessly trade one type of digital currency for another. By following the steps outlined in this guide, you’ll be able to convert your BTC holdings into XRP, allowing you to diversify your cryptocurrency portfolio or take advantage of specific opportunities in the Ripple market.
Exchanging BTC to XRP can be a straightforward process when you know what to do and where to do it. However, it’s important to note that the cryptocurrency market can be volatile, and prices can change rapidly. Therefore, it’s crucial to choose a reputable exchange and keep an eye on the market to make informed decisions.
Before we proceed, it’s worth mentioning that this guide assumes you already have a basic understanding of cryptocurrencies and have obtained some BTC. If you’re new to the world of digital currencies, it might be helpful to familiarize yourself with the fundamentals before diving into the exchange process.
Alright, let’s get started with the step-by-step instructions on how to exchange BTC to XRP. Strap in, and let’s embark on this exciting journey together!
Step 1: Choose a reputable cryptocurrency exchange
The first step in exchanging your BTC to XRP is selecting a reputable cryptocurrency exchange. With numerous exchanges available in the market, it’s important to choose one that meets your specific requirements in terms of security, fees, supported countries, and available trading pairs.
When selecting an exchange, there are a few key factors to consider:
- Reputation: Look for well-established exchanges with a solid reputation and positive user reviews. Conduct thorough research to ensure the exchange has a track record of securely handling customer funds.
- Security Measures: Security should be a top priority when choosing an exchange. Look for exchanges that implement strong security protocols, such as two-factor authentication (2FA), cold storage for user funds, and regular security audits.
- Supported Countries: Ensure that the exchange you choose operates in your country. Some exchanges have geo-restrictions and may not be available to users in certain regions.
- Liquidity: It’s important to choose an exchange with sufficient liquidity for the BTC to XRP trading pair. Higher liquidity allows for easier trading and better price discovery.
- Transaction Fees: Consider the fees charged by the exchange for trading and withdrawals. Compare the fees across different exchanges and choose one that offers competitive rates.
Popular and trustworthy exchanges that support BTC to XRP trading include Binance, Coinbase Pro, Kraken, and Bitstamp. These exchanges have established themselves as reputable platforms with a wide range of trading options and excellent security features.
Before committing to an exchange, take the time to read through the exchange’s terms of service and understand their policies regarding account security, data protection, and customer support. Moreover, it’s advisable to check if the exchange is regulated by a recognized financial authority, which can add an extra layer of confidence in trading on the platform.
Once you’ve chosen a suitable exchange that meets your criteria, proceed to the next step: creating an account on the platform.
Step 2: Create an account
Now that you’ve chosen a reputable cryptocurrency exchange, the next step is to create an account. The account creation process may vary slightly depending on the exchange you’ve chosen, but the general steps remain similar across platforms.
Follow these guidelines to create your account:
- Visit the exchange’s website: Open your web browser and navigate to the official website of the chosen exchange.
- Click on “Sign Up” or “Register”: Look for the “Sign Up” or “Register” button on the exchange’s homepage and click on it to initiate the registration process.
- Fill in the required information: You’ll be asked to provide some personal information to create your account. This typically includes your full name, email address, and sometimes a contact number. Make sure to use a valid email address as you’ll receive a verification email.
- Create a strong password: Choose a password that is unique and secure, containing a combination of letters, numbers, and special characters. Avoid using easily guessable passwords to protect your account.
- Complete the verification process: Depending on the exchange, you may need to verify your email address by clicking on a verification link sent to your inbox. Some exchanges may also require additional identity verification (KYC) to comply with regulatory requirements.
- Set up two-factor authentication (2FA): Enable two-factor authentication for an extra layer of security. This usually involves linking your account to an authenticator app on your mobile device, which generates a unique code for each login attempt.
- Read and accept the terms of service: Take the time to read the exchange’s terms of service and ensure you understand and agree to the platform’s policies.
- Click on “Create Account” or “Sign Up”: Once you’ve filled in all the required information and accepted the terms of service, click on the “Create Account” or “Sign Up” button to create your account.
After completing these steps, you should have successfully created an account on the cryptocurrency exchange. It’s essential to keep your login credentials and any other security measures, such as 2FA, confidential to safeguard your account from unauthorized access.
With your account now set up, you’re one step closer to exchanging your BTC for XRP. In the next step, we’ll discuss the verification process (KYC) that some exchanges require.
Step 3: Verify your identity (KYC)
Once you’ve created an account on the cryptocurrency exchange, you may be required to verify your identity through a process known as Know Your Customer (KYC) verification. KYC is a standard procedure implemented by reputable exchanges to comply with regulatory requirements and ensure a secure trading environment.
The KYC verification process usually involves submitting certain documents to confirm your identity. While the specific requirements may vary depending on the exchange, here’s a general outline of what you can expect:
- Access the verification page: Log in to your exchange account and navigate to the verification or account settings page.
- Provide personal information: Fill in the required details, including your full name, date of birth, residential address, and sometimes your nationality.
- Submit identification documents: Most exchanges will ask for a copy of a government-issued identification document, such as a passport or driver’s license. You may need to upload clear and legible scans or photos of the front and back of your identification document.
- Proof of address: Some exchanges may require verification of your residential address. This can be done by submitting a utility bill, bank statement, or any other official document that displays your name and address.
- Selfie verification: In some cases, exchanges may ask you to take a selfie or provide a photo of yourself holding your identification document. This helps ensure that the person submitting the documents is the same as the account holder.
- Wait for verification: After submitting your documents, the exchange will review and verify them. This process may take a few hours to a few days, depending on the exchange’s workload.
It’s important to note that KYC requirements are in place to prevent fraudulent activities, money laundering, and other illegal practices. By following the KYC process and providing the necessary documentation, you help ensure the integrity of the exchange and create a safer trading environment.
Once your identity verification is approved, you’ll receive a notification from the exchange. At this stage, you’ll be able to access the full functionality of the exchange, including the ability to deposit, trade, and withdraw funds.
With your account fully verified, you’re ready to move on to the next step: depositing BTC into your exchange account.
Step 4: Deposit BTC into your exchange account
Now that your cryptocurrency exchange account is set up and verified, it’s time to deposit BTC into your account. This will provide you with the funds necessary to make the exchange for XRP.
The process of depositing BTC into your exchange account may vary depending on the platform you’re using, but the general steps are as follows:
- Log in to your exchange account: Visit the exchange’s website and log in using your credentials, including your username and password. If you’ve enabled two-factor authentication (2FA), you may need to enter the code generated by your authenticator app.
- Navigate to the deposit page: Once you’re logged in, find the “Deposit” or “Funds” section on your exchange account. This page will allow you to choose the cryptocurrency you wish to deposit, which in this case is BTC.
- Generate a deposit address: On the BTC deposit page, you’ll usually find a unique cryptocurrency address designated for your account. This address is a long string of alphanumeric characters that serves as your deposit destination. Make sure to copy the address exactly as it appears.
- Initiate the transfer: Now, go to your personal BTC wallet or any other exchange or platform where you hold your BTC. Initiate a transfer of the desired amount of BTC to the address provided by the exchange. Ensure that you’re sending BTC to the correct address to avoid any irreversible mistakes.
- Confirm the transaction: Depending on the platform you’re sending BTC from, you may need to review and confirm the transaction details before sending. This is done to ensure the accuracy of the transaction and prevent any errors.
- Wait for confirmation: After submitting the BTC transfer, you’ll need to wait for the transaction to be confirmed on the Bitcoin network. This typically takes a few minutes to an hour, depending on network congestion. Once the transaction receives sufficient confirmations, the funds will appear in your exchange account.
It’s important to double-check the deposit address and transaction details to avoid any potential loss of funds. The use of copy-paste and verifying the first and last few characters of the address can help ensure accuracy.
Remember that transaction times and confirmation requirements can vary, so it’s normal to experience slight delays. If you encounter any issues or delays in the deposit process, most exchanges provide customer support to assist you.
With your BTC deposited and confirmed, you’re now ready to proceed to the next step: finding the BTC to XRP trading pair.
Step 5: Find the BTC to XRP trading pair
After successfully depositing BTC into your exchange account, the next step is to find the BTC to XRP trading pair. This will allow you to exchange your BTC for XRP at the current market rate.
Finding the trading pair may vary slightly depending on the exchange platform, but the following steps generally apply:
- Navigate to the trading section: Once you’re logged in to your exchange account, look for the “Trade” or “Markets” section. This is where you’ll find the available trading pairs.
- Select BTC as the base currency: In the trading pairs section, locate BTC and ensure it is selected as the base currency. This means you’ll be selling BTC to acquire XRP.
- Search for XRP: Within the trading pair section, search for XRP or Ripple. This will show you all available XRP trading pairs.
- Choose the BTC/XRP trading pair: Among the listed XRP trading pairs, specifically look for BTC/XRP. This indicates that you can trade BTC for XRP directly.
- Review the trading pair details: By clicking on the BTC/XRP trading pair, you’ll be directed to a page displaying the current market price, trading charts, and order book. Take some time to review this information before proceeding with the transaction.
It’s worth noting that different exchanges may have varying user interfaces and trading platforms, but the general concept of finding and selecting a trading pair remains the same.
As you explore the trading pair page, you’ll likely encounter different order types such as market orders, limit orders, or stop orders. Market orders allow you to buy or sell at the current market price, while limit orders allow you to set a specific price at which you want to execute the trade. Make sure to understand the implications of each order type and choose the one that best suits your trading strategy.
Once you’re familiar with the trading pair details and order options, you’re ready to proceed to the next step: placing a limit or market order to exchange your BTC for XRP.
Step 6: Place a limit or market order
With the BTC to XRP trading pair identified, it’s time to place an order to exchange your BTC for XRP. There are two common types of orders you can consider: limit orders and market orders. Each has its advantages and implications, so let’s explore them:
- Market Order: A market order allows you to buy or sell a cryptocurrency at the current market price. With a market order, you’ll execute the trade almost instantly at the best available price in the order book. This is a convenient option if you want to complete the transaction quickly without waiting for a specific price.
- Limit Order: A limit order allows you to set a specific price at which you want to buy or sell your cryptocurrencies. With a limit order, you can specify the maximum price at which you are willing to buy XRP or the minimum price at which you are willing to sell it. The trade will only execute if the market reaches your specified price.
To place a limit or market order, follow these general steps:
- Navigate to the trading page: Return to the trading page where you identified the BTC/XRP trading pair.
- Select the order type: Choose whether you want to place a market order or a limit order, depending on your trading preferences.
- Specify the order details: For a market order, simply enter the amount of BTC you want to sell or the equivalent amount of XRP you want to buy. The exchange platform will automatically calculate the corresponding amount based on the current market price. For a limit order, enter your desired price and the amount of BTC or XRP you want to trade.
- Review the order details: Double-check the order details, including the amount and price, before submitting the order. Pay attention to any trading fees or additional information provided by the exchange.
- Place the order: Once you’re satisfied with the order details, click on the “Place Order” or “Buy/Sell” button to execute the trade. Confirm the order if prompted by the exchange.
- Wait for the order execution: Depending on the market conditions and the type of order you placed, the trade may execute instantly (in the case of a market order) or when the market reaches your specified price (in the case of a limit order).
It’s important to note that market conditions can change rapidly, and the execution price of your order may differ slightly from the displayed market price. This is known as slippage, which occurs when the market price moves between the time you place the order and when it gets executed. Slippage can happen, especially during periods of high market volatility.
Always review and confirm your order details before placing the trade to ensure accuracy. By understanding the different order types and their implications, you can make informed decisions and execute trades that align with your trading strategy.
With your order placed and executed, it’s time to move on to the next step: confirming the transaction details.
Step 7: Confirm the transaction
After placing your order to exchange BTC for XRP, it’s essential to carefully review and confirm the transaction details before finalizing the exchange. Confirming the transaction ensures that you’re trading your BTC for the intended amount of XRP at the agreed-upon price.
Follow these steps to confirm your transaction:
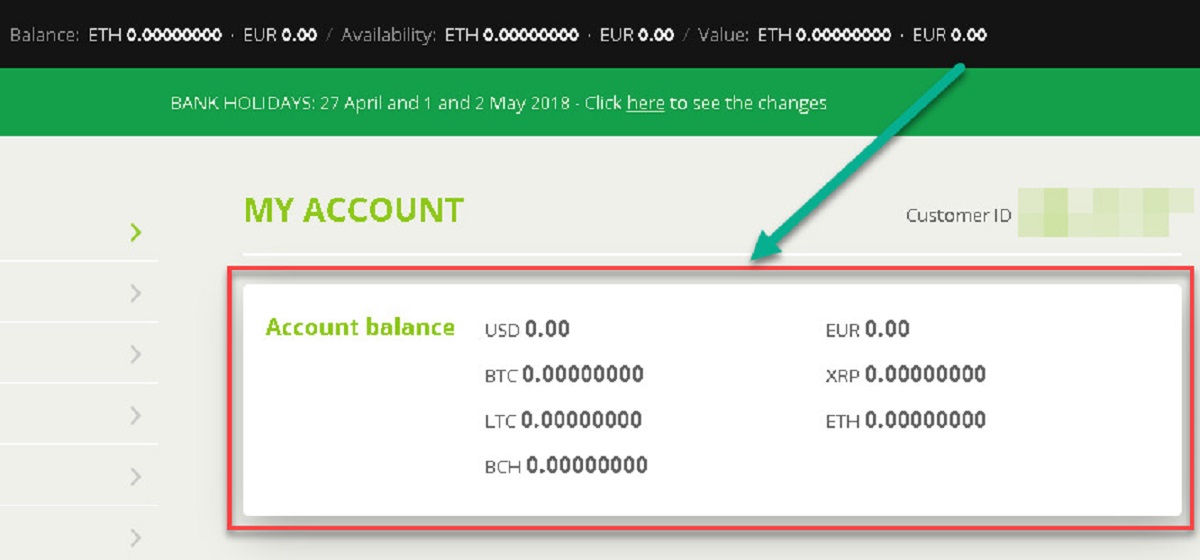
- Access your order history: Log in to your exchange account and navigate to the order history or transaction tab. This section will display all your recent trades and their details.
- Locate the completed order: Find the completed order that involves the exchange of BTC for XRP. This should match the order you placed in the previous step.
- Confirm the BTC amount sold: Verify that the amount of BTC sold matches the amount you intended to exchange. Check both the transaction quantity and the associated fees, if any.
- Verify the received XRP amount: Ensure that the amount of XRP received in the transaction aligns with the current exchange rate and the value you expected to receive.
- Review the transaction fee: Take note of the transaction fee charged by the exchange for facilitating the trade. This fee may vary depending on the platform you’re using.
- Double-check the total transaction value: Confirm that the total value of the transaction aligns with your expectations and reflects the prevailing market conditions at the time of the trade.
- Check the transaction status: Verify that the status of the trade is marked as “completed” or “successful” in the order history. This indicates that your BTC has been exchanged for XRP.
By thoroughly reviewing the transaction details, you can ensure accuracy and identify any discrepancies or abnormalities. If you notice any issues or inconsistencies, promptly reach out to the customer support of the exchange for assistance.
Remember that blockchain transactions, including cryptocurrency exchanges, are typically irreversible. Once the transaction is confirmed, the trade is final, and the BTC is exchanged for XRP in your account. Take the time to confirm the details to avoid any unintended consequences.
With the transaction confirmed, you’re almost at the final step: withdrawing the XRP to your personal wallet.
Step 8: Withdraw XRP to your personal wallet
Once you have successfully exchanged your BTC for XRP and the XRP is in your exchange account, it’s advisable to withdraw it to your personal wallet for maximum security and control over your funds. By transferring the XRP to your personal wallet, you can securely store and manage your digital assets without relying on the exchange.
Follow these steps to withdraw XRP to your personal wallet:
- Access the withdrawal page: Log in to your exchange account and navigate to the withdrawal or funds page. This is where you can initiate the process of transferring your XRP to your personal wallet.
- Specify the withdrawal details: Provide the necessary information to complete the XRP transfer. This typically includes your XRP wallet address and the amount of XRP you wish to withdraw. Ensure the wallet address is accurate to avoid any loss of funds.
- Configure the withdrawal settings: Depending on the exchange, you may have additional options to configure, such as the destination tag or memo field. Some wallets or exchanges require this additional information to properly credit your XRP deposit.
- Verify the withdrawal details: Double-check the withdrawal details, including the XRP wallet address and amount, before confirming the transaction. Confirm that the withdrawal fee, if any, is reasonable and acceptable.
- Initiate the withdrawal: Once you’re satisfied with the withdrawal details, click on the “Withdraw” or “Send” button to initiate the transfer. Confirm the withdrawal if prompted by the exchange.
- Wait for confirmation: After initiating the withdrawal, the exchange will process the transaction. Depending on the blockchain network’s current activity level, it may take some time for the XRP withdrawal to be confirmed and reflected in your personal wallet.
It’s worth noting that blockchain transactions require network confirmations to ensure their validity. The number of confirmations required may vary depending on the exchange and the network, but once the transactions receive the necessary confirmations, the XRP will be transferred to your personal wallet.
Upon receiving the XRP in your personal wallet, you can now safely store and manage your digital assets. It’s important to ensure that your personal wallet is secure, using measures such as strong passwords, two-factor authentication (2FA), and keeping your private keys or recovery phrases safe.
Remember, withdrawing your XRP to your personal wallet gives you full control over your funds and reduces the risk associated with keeping them on an exchange. It’s advisable to consider storing your digital assets in hardware wallets or other cold storage options for enhanced security.
Congratulations! You have successfully completed the process of exchanging BTC to XRP and withdrawing the XRP to your personal wallet. You can now manage your XRP holdings as per your preferences and take advantage of the opportunities presented by the Ripple network.
Conclusion
Congratulations on successfully navigating the process of exchanging BTC to XRP! By following the step-by-step instructions in this guide, you have gained the knowledge and confidence to make informed decisions in the cryptocurrency market. Let’s recap the essential steps:
1. Choose a reputable cryptocurrency exchange: Take the time to research and select an exchange that meets your security, liquidity, and fee requirements.
2. Create an account: Sign up and complete the necessary account setup, including the verification process (KYC), to gain full access to the exchange’s features.
3. Verify your identity (KYC): Submit the required documents to verify your identity, which helps ensure a secure and compliant trading environment.
4. Deposit BTC into your exchange account: Send BTC from your personal wallet to your exchange account to fund your trading activities.
5. Find the BTC to XRP trading pair: Locate and select the BTC/XRP trading pair in the exchange’s trading section.
6. Place a limit or market order: Choose between a limit or market order to define the desired price and execute the exchange. Understand the implications of each order type.
7. Confirm the transaction: Review and verify all the transaction details, including the amount of BTC sold and the received amount of XRP.
8. Withdraw XRP to your personal wallet: Transfer the XRP from your exchange account to a personal wallet for enhanced security and control over your digital assets.
Remember that the cryptocurrency market can be volatile, and prices can fluctuate rapidly. Stay informed about market trends, conduct your own research, and consider consulting with financial professionals when necessary.
Lastly, it’s important to stay vigilant and protect your personal information, login credentials, and private keys. Regularly update your passwords, enable two-factor authentication (2FA), and store your recovery phrases securely.
By following these steps and implementing best practices, you are well on your way to successfully navigating the world of cryptocurrency trading. Enjoy the opportunities and possibilities that arise from holding XRP, and continue to expand your knowledge in this exciting and evolving industry.