Introduction
Indiegogo is a popular crowdfunding platform that allows individuals and organizations to raise funds for their creative projects, entrepreneurial ventures, and social causes. However, there may come a time when you need to delete a campaign on Indiegogo for various reasons. Whether your campaign didn’t reach its funding goal, you want to start fresh with a new campaign, or you have achieved your objectives, knowing how to delete a campaign is essential.
In this guide, we will walk you through the step-by-step process of deleting a campaign on Indiegogo. We will provide detailed instructions and tips to ensure that you can navigate the platform effortlessly and delete your campaign successfully.
Before we begin, it’s important to note that once you delete a campaign on Indiegogo, it cannot be undone. All associated content, including contributors’ information, updates, comments, and images, will be permanently removed. Therefore, we recommend carefully assessing your decision and considering alternative options, such as editing or pausing your campaign, before proceeding with deletion.
Now, let’s dive into the step-by-step process of deleting a campaign on Indiegogo. Remember to follow the instructions carefully to avoid any unintended consequences and to make appropriate backups of any campaign-related data that you may wish to preserve for future reference.
Step 1: Log in to your Indiegogo account
The first step in deleting a campaign on Indiegogo is to log in to your account. On your preferred web browser, navigate to the Indiegogo website (www.indiegogo.com) and click on the “Log in” button located at the top-right corner of the page. If you don’t have an account yet, you will need to create one before proceeding.
Once you click on “Log in,” a login form will appear. Enter your registered email address and password in the respective fields, then click on the “Log in” button to proceed. If you have forgotten your password, you can click on the “Forgot password?” link to initiate the password recovery process.
After successfully logging in, you will be redirected to your Indiegogo dashboard. Here, you will have access to various features and settings related to your campaigns. Ensure that you are logged in to the account associated with the campaign you intend to delete.
If you have multiple Indiegogo accounts, make sure you are using the correct login credentials for the account where the campaign is hosted. This will ensure that you have the necessary permissions to delete the campaign.
Once you have logged in and confirmed that you are using the correct account, you are ready to proceed to the next step: accessing your campaign page.
Step 2: Go to your campaign page
After logging in to your Indiegogo account, the next step in deleting a campaign is to navigate to your campaign page. To do this, locate the “Profile” icon at the top-right corner of the page and click on it. A drop-down menu will appear, displaying various options.
From the drop-down menu, select “My Campaigns.” This will direct you to a page that lists all the campaigns associated with your Indiegogo account.
Scroll through the list of campaigns until you find the one you wish to delete. You can use the search bar or filter options to locate the campaign more easily.
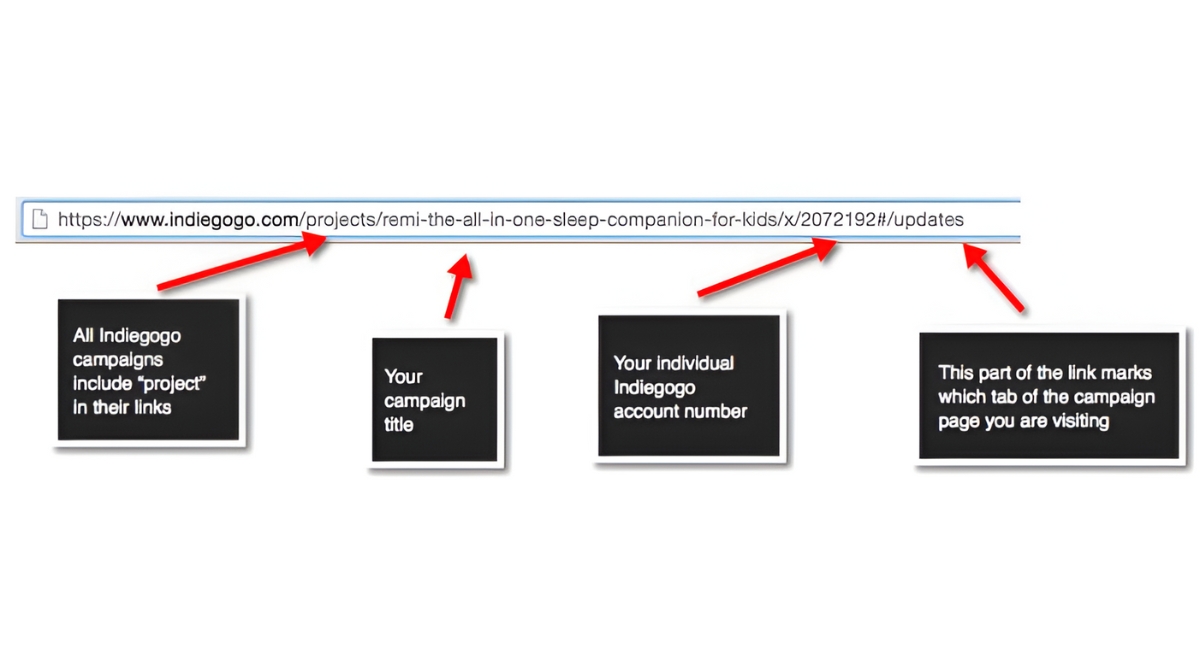
Once you have found the campaign on the “My Campaigns” page, click on its title or thumbnail image to access the campaign’s main page.
On the campaign page, you will see a preview of your campaign, including a brief description, project updates, perks, and funding progress. This is the main hub where you can manage your campaign’s settings, content, and interactions with your contributors.
Before proceeding to the next step, take a moment to review the campaign details to ensure that you have selected the correct campaign for deletion. It’s crucial to double-check this to avoid accidentally deleting the wrong campaign.
Once you have confirmed that you are on the correct campaign page, you can proceed to the next step: accessing the Campaign Editor.
Step 3: Access the Campaign Editor
To delete a campaign on Indiegogo, you need to access the Campaign Editor. This is where you can make changes to your campaign settings, content, and other important details.
On your campaign page, look for the “Edit Campaign” button. It is usually located towards the top-right corner of the page, next to the campaign title.
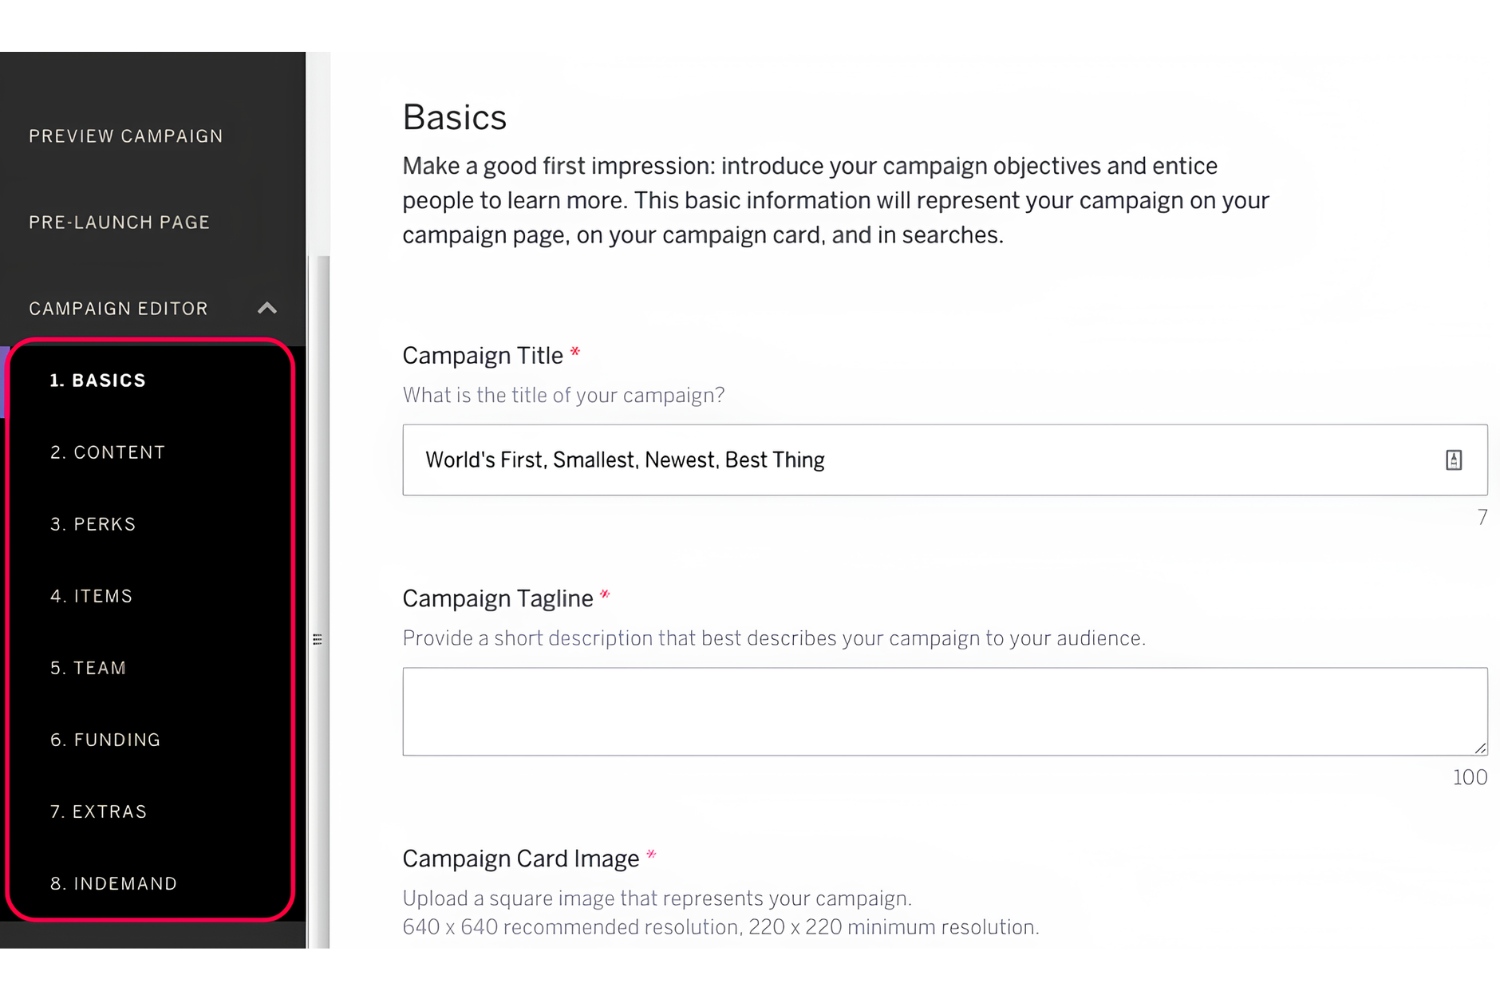
Clicking on the “Edit Campaign” button will redirect you to the Campaign Editor, which provides a comprehensive overview of your campaign’s settings and customization options.
Once you are in the Campaign Editor, you will have access to different sections, such as “Story,” “Perks,” “Updates,” and “Contributions.” These sections allow you to modify various aspects of your campaign, including the campaign description, perk details, project updates, and funding information.
Before proceeding with the campaign deletion, you may want to review the campaign details one more time. Ensure that you have considered all alternatives and understand the implications of deleting your campaign, as this action is irreversible.
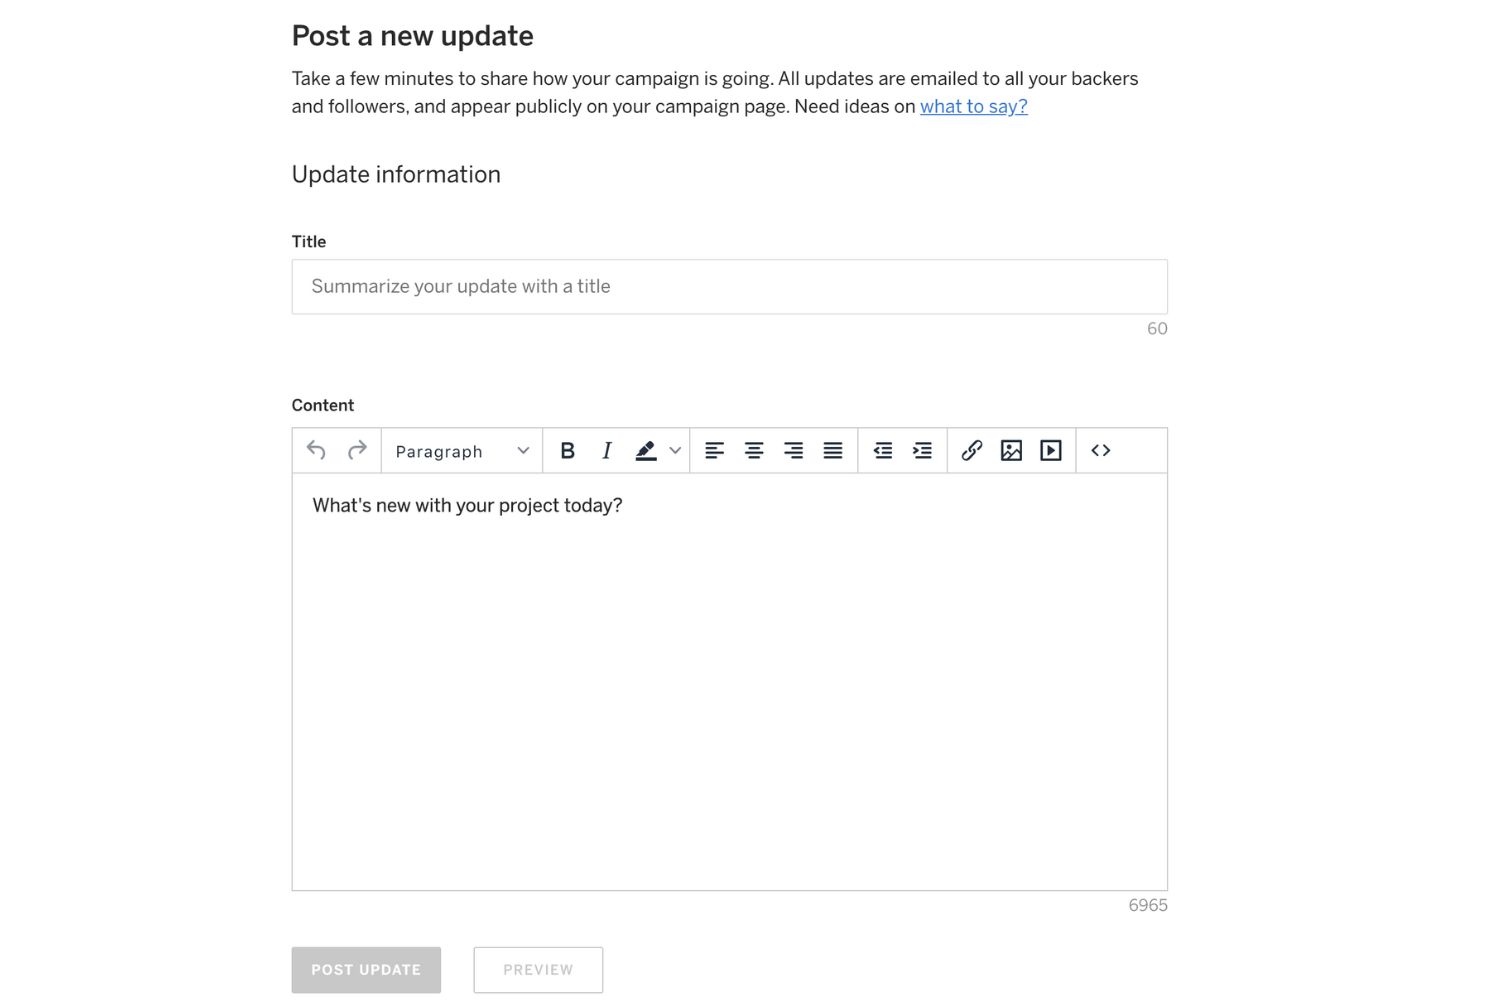
Take your time to explore the different sections within the Campaign Editor and make any necessary adjustments to your campaign’s content. If you have any final updates or messages for your contributors, it is recommended to include them before proceeding with the deletion process.
Now that you have accessed the Campaign Editor and made any required changes, let’s move on to the next step: selecting the option to permanently delete your campaign.
Step 4: Select “Permanently Delete Campaign”
Once you are in the Campaign Editor on Indiegogo, the next step in the campaign deletion process is to select the option to permanently delete your campaign. This action will remove all associated content and data, so it’s essential to proceed with caution.
In the Campaign Editor, look for the “Campaign Action” button or a similar option that allows you to perform actions related to your campaign. The exact placement of this button may vary depending on the layout updates made by Indiegogo, but it is typically located within the top navigation bar or near the campaign information area.
Click on the “Campaign Action” button to reveal the dropdown menu that contains various actions you can take with your campaign.
From the dropdown menu, select the option that says “Delete Campaign” or “Permanently Delete Campaign.” By selecting this option, you signal your intention to delete the campaign from the platform.
It’s important to note that once you proceed with the deletion, the campaign and all its associated content will be permanently erased. This includes any updates, comments, contributor information, and campaign images. Therefore, ensure that you have made any necessary backups or saved any important data before proceeding further.
Before confirming the deletion, it is recommended to carefully review your decision and consider any available alternatives. Deleting a campaign is an irreversible action, and it may have implications for your project or organization.
Once you have selected the “Permanently Delete Campaign” option, you are ready to move on to the next step: confirming the campaign deletion.
Step 5: Confirm the campaign deletion
After selecting the option to permanently delete your campaign on Indiegogo, the next step is to confirm the campaign deletion. This confirmation step ensures that you are fully aware of the consequences and that the deletion is intentional.
Once you have chosen to delete your campaign, a confirmation prompt will appear on your screen. This prompt will typically ask you to confirm your decision by clicking on a button that says “Delete Campaign” or a similar variation.
Take a moment to re-evaluate your decision at this stage. Consider any last-minute changes, alternative options, or potential impacts of deleting the campaign. Review the prompt and make sure that you fully understand the implications of your choice.
If you are confident in your decision and ready to proceed with the deletion, click on the “Delete Campaign” button or the specified confirmation option. This action will initiate the campaign deletion process, removing it from the Indiegogo platform permanently.
Once you have clicked on the confirmation button, the system will start removing your campaign and all its associated content. Depending on the complexity of your campaign and the amount of data that needs to be deleted, this process may take a few moments to complete.
It is important to note that once the campaign deletion process is initiated, it cannot be undone. All campaign updates, comments, contributor information, and media files will be permanently erased from the platform. Therefore, it is crucial to double-check your decision and ensure that you have saved any important data or made necessary backups before confirming the deletion.
Now that you have confirmed the campaign deletion, we can proceed to the next step, which involves considering additional actions, such as deleting associated funds and perks (optional).
Step 6: Delete associated funds and perks (optional)
After confirming the deletion of your campaign on Indiegogo, you have the option to delete associated funds and perks. This step is optional and depends on your specific circumstances and preferences.
If you choose to delete associated funds, it means that any funds contributed to your campaign will be refunded to the respective backers. Deleting associated perks, on the other hand, means that any rewards or incentives promised to contributors will be canceled.
To delete associated funds and perks, you will need to navigate to the corresponding sections within the Campaign Editor.
First, access the “Contributions” or “Funds” section. Here, you will find a list of all contributions made to your campaign, along with the corresponding backer information and payment details.
If you wish to delete associated funds, you may need to initiate refund processes for each contribution. This typically involves clicking on a “Refund” or similar button next to each contribution. It’s important to note that once funds are refunded, they cannot be restored, and you will not have access to the backer’s information or communication channels.
Next, access the “Perks” or “Rewards” section within the Campaign Editor. Here, you will find a list of all perks associated with your campaign, along with the details and quantities available.
If you choose to delete associated perks, you can remove them from the list by clicking on a “Delete” or similar button next to each perk. Removing perks will cancel the rewards or incentives promised to contributors, and they will no longer be available for selection on your campaign page.
It’s important to carefully consider the impact of deleting associated funds and perks. Deleting funds may result in backers receiving refunds, which could affect the progress or outcome of your project. Deleting perks may lead to disappointment or confusion among contributors who were expecting rewards.
Once you have decided whether to delete associated funds and perks or not, you can proceed to the next step: reviewing and finalizing the campaign deletion.
Step 7: Review and finalize campaign deletion
As you approach the final step of deleting your campaign on Indiegogo, it is crucial to review and finalize the deletion process. This step allows you to ensure that all necessary actions have been taken and that you are ready to proceed with the permanent removal of your campaign.
Start by reviewing the changes you have made throughout the deletion process. Take a moment to verify that you have selected the correct campaign, confirmed the deletion, and, if applicable, deleted associated funds and perks.
Double-check the campaign page and the Campaign Editor to make sure that all the campaign-related content, updates, comments, images, and other associated data have been appropriately removed or modified. Pay attention to any remaining traces of the campaign and ensure that they are consistent with your intended deletion.
If you have any concerns or questions about the campaign deletion, you can reach out to the Indiegogo support team for assistance. They will be able to provide guidance and clarify any additional steps or processes that may be involved in the deletion of your campaign.
Once you have reviewed and confirmed that all necessary actions have been taken, it’s time to finalize the campaign deletion. To do this, click on the designated button or option that confirms your intention to delete the campaign. The specific wording and placement of this button may vary depending on the Indiegogo platform’s current design and layout.
By finalizing the campaign deletion, you acknowledge that all associated content, data, and activity will be permanently removed from the Indiegogo platform. This action cannot be undone, so it is vital to ensure that you have considered all the implications and are certain of your decision.
After clicking on the final confirmation button, the system will process your request and remove the campaign and its associated content from the Indiegogo platform. The time it takes to complete the deletion process may vary depending on the complexity of the campaign and the amount of data to be removed.
Once the campaign deletion process is complete, you will receive confirmation that your campaign has been successfully deleted. It’s essential to retain any backups or saved data that you may need for future reference or documentation.
Congratulations! You have successfully completed the process of deleting your campaign on Indiegogo.
Conclusion
Deleting a campaign on Indiegogo may seem like a significant decision, but sometimes it becomes necessary for various reasons. Whether your campaign did not meet its funding goal, you want to start afresh, or you have achieved your objectives, knowing how to delete a campaign is essential.
In this guide, we have provided you with a step-by-step process to delete a campaign on Indiegogo. We began by logging in to your Indiegogo account, navigating to the campaign page, and accessing the Campaign Editor. From there, we guided you through selecting the “Permanently Delete Campaign” option and confirming the deletion.
Depending on your specific circumstances, we also discussed the optional step of deleting associated funds and perks. This step allows you to refund contributions and cancel promised rewards or incentives.
It is essential to remember that once you delete a campaign on Indiegogo, it cannot be undone. Therefore, it is crucial to carefully assess your decision, review all the necessary steps, and consider alternatives before proceeding with the campaign deletion.
We hope this guide has provided you with the necessary information and guidance to delete a campaign on Indiegogo successfully. Remember to be diligent and thoughtful throughout the process, ensuring that you have made any required backups or saved data before finalizing the deletion.
Should you have any questions or concerns, don’t hesitate to reach out to the Indiegogo support team for additional assistance. They are there to help you navigate the platform and address any issues that may arise during the campaign deletion process.
Thank you for choosing Indiegogo for your crowdfunding journey, and best of luck with your future endeavors!