Introduction
So, you’re thinking about deleting your Indiegogo campaign page? Sometimes, circumstances change, and you may need to remove a campaign that is no longer relevant or achievable. Whether you’ve reached your fundraising goal, pivoted your project, or simply decided to pursue a different avenue, deleting your campaign page is a straightforward process.
In this article, we’ll guide you through the step-by-step process to delete your Indiegogo campaign page. This will ensure that your project is no longer visible to potential backers and allows you to move on to your next endeavor with a clean slate.
Before we dive into the steps, it’s important to note that deleting your campaign page is permanent. Once you delete your campaign, you won’t be able to recover any of the information or pledges associated with it. Therefore, it’s crucial to consider your decision carefully and ensure that it aligns with your project’s needs.
Now, let’s get started on deleting your Indiegogo campaign page so you can move forward with confidence and clarity on your crowdfunding journey.
Step 1: Sign in to your Indiegogo account
The first step in deleting your Indiegogo campaign page is to sign in to your Indiegogo account. Open a web browser and visit the Indiegogo website (www.indiegogo.com). Click on the “Sign In” button located at the top right corner of the homepage.
If you already have an Indiegogo account, enter your login credentials – your registered email address or username, and password. Then, click on the “Sign In” button.
If you don’t have an Indiegogo account, you’ll need to create one before proceeding. Click on the “Sign Up” button and follow the prompts to create your account. Once you’ve successfully signed in or signed up, you’ll have access to your Indiegogo dashboard, where you can manage all aspects of your campaigns.
It’s important to ensure that you’re signed in with the account that corresponds to the campaign you want to delete. If you have multiple campaigns or accounts, double-check that you’re working with the correct one. This will help avoid any confusion or unintentionally deleting the wrong campaign page.
Once you’ve signed in and confirmed that you’re on the right account, you’re ready to move on to the next step.
Step 2: Go to your campaign page
After signing in to your Indiegogo account, the next step is to navigate to your campaign page. Click on your profile picture or username at the top right corner of the Indiegogo homepage. A drop-down menu will appear; select “My Campaigns” from the options.
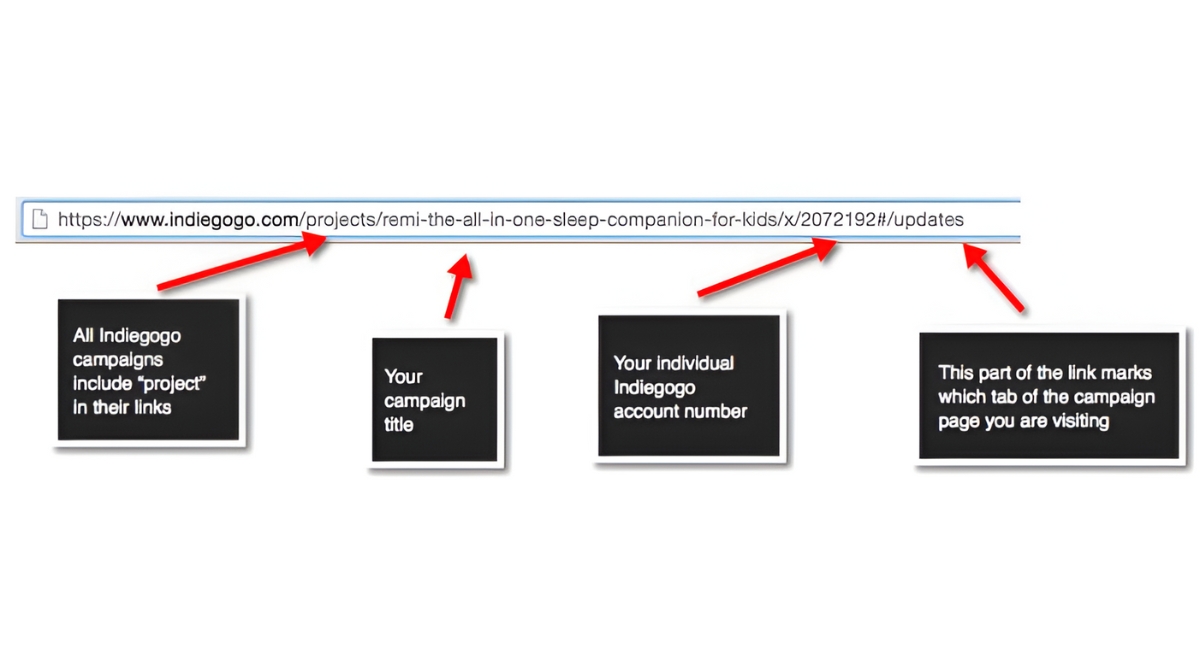
You will be directed to your campaign dashboard, where you can see all the campaigns associated with your account. Find the campaign you wish to delete and click on its title or thumbnail image to access its campaign page.
Once you’re on the campaign page, take a moment to review the campaign details and ensure that you’re on the correct page. Confirm that it’s the campaign you want to delete and that all the information displayed is accurate.
If you have trouble finding your campaign on the dashboard, use the search bar located at the top of the page. Enter your campaign’s title, keywords, or any other relevant information to quickly locate it.
Being on the campaign page is crucial for the deletion process, as it allows you to access the specific settings and options related to your campaign. Once you’ve reached your campaign page, you’re ready to proceed to the next step.
Step 3: Click on the “Edit” button
Once you’re on your Indiegogo campaign page, the next step is to click on the “Edit” button. This button allows you to make changes to your campaign, including the option to delete it.
Locate the “Edit” button on the campaign page. It is usually positioned near the top or in a prominent location, depending on the layout and design of your campaign page. The button is typically labeled with the word “Edit” or represented by an icon that resembles a pencil or a gear.
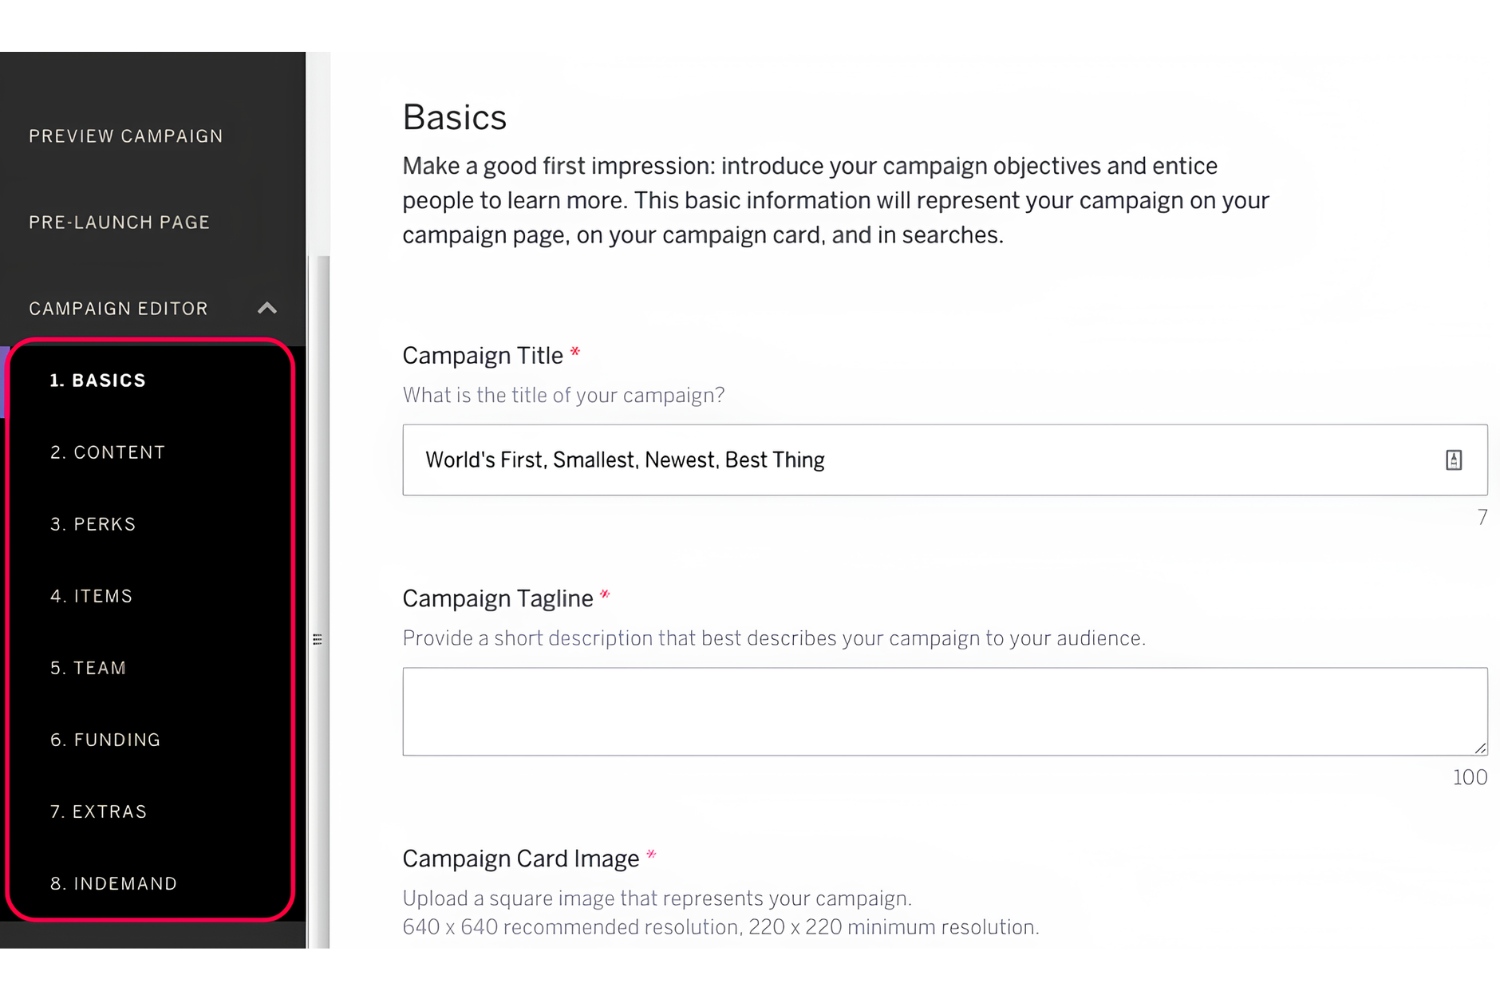
Clicking on the “Edit” button will open the campaign editor, where you have the ability to modify various aspects of your campaign, such as the campaign title, description, perks, and more.
It’s important to note that clicking on the “Edit” button does not instantly delete your campaign. Instead, it grants you access to the campaign editor, which allows you to make changes to your campaign’s settings. Deleting your campaign is done through a specific option within the editor, which we’ll cover in the next steps.
Once you’ve located and clicked on the “Edit” button, you’ll be directed to the campaign editor, where you can proceed to the next steps to delete your Indiegogo campaign page.
Step 4: Scroll down to the “Campaign Options” section
After accessing the campaign editor by clicking on the “Edit” button, the next step is to scroll down to the “Campaign Options” section. This section contains the settings and features related to your campaign, including the option to delete it.
Keep scrolling down on the campaign editor page until you reach the “Campaign Options” section. This section is typically located below the campaign description and above the perks and updates sections.
In some cases, the “Campaign Options” section may be collapsed or hidden initially to declutter the editor interface. Look for a small arrow or a clickable area that allows you to expand or reveal the section. Click on it to reveal the options within the “Campaign Options” section.
Once you’ve successfully located and expanded the “Campaign Options” section, take a moment to review the available options and settings. This section allows you to modify various campaign preferences, including the campaign duration, fundraising goal, and visibility settings.
For the purpose of deleting your campaign, pay attention to the specific options related to deletion, which we’ll cover in the next steps. These options will grant you the ability to permanently remove your campaign from the Indiegogo platform.
When you’re ready, proceed to the next step to learn how to access the “Delete Campaign” option within the “Campaign Options” section.
Step 5: Click on the “Delete Campaign” button
Now that you have reached the “Campaign Options” section in the campaign editor, you can proceed to the next step: clicking on the “Delete Campaign” button. This button is specifically designed for removing your campaign from the Indiegogo platform.
Within the “Campaign Options” section, carefully look for the “Delete Campaign” button. It is usually located towards the bottom of the section or placed in a visible area that stands out from other options.
Once you have located the “Delete Campaign” button, click on it to initiate the deletion process. As a precaution, Indiegogo may prompt you to confirm your decision before proceeding with the deletion. This confirmation step is crucial to prevent accidental deletions.
After clicking on the “Delete Campaign” button, a dialogue box or pop-up window may appear, asking you to confirm your choice. Read the message carefully and ensure that you really want to delete your campaign.
It’s essential to note that once you delete your campaign, all associated information, including donations, comments, updates, and perks, will be permanently removed. This step cannot be undone, so make sure you are certain before proceeding.
If you have decided to go ahead with the deletion of your campaign, click on the confirmation button to finalize the process. Indiegogo will then proceed to remove your campaign from their platform.
By clicking the “Delete Campaign” button and confirming your decision, you are taking the final step towards permanently removing your campaign from the Indiegogo platform.
Step 6: Confirm the deletion
After clicking the “Delete Campaign” button, you must confirm the deletion to ensure that you want to proceed with permanently removing your Indiegogo campaign. This step provides an additional layer of precaution to prevent accidental deletions.
Once you have clicked on the “Delete Campaign” button, Indiegogo will typically prompt you with a confirmation message or a pop-up window to reconfirm your decision.
Carefully review the confirmation message and make sure that you are certain about deleting your campaign. It’s important to understand that once your campaign is deleted, you will lose access to all campaign data, including pledges, comments, updates, and perks. This action cannot be undone.
If you are confident in your decision to delete the campaign, click on the confirmation button to finalize the deletion process. This will initiate the removal of your campaign from the Indiegogo platform.
On the other hand, if you have changed your mind or have any doubts, you can choose to cancel or close the confirmation message without taking any further action. This will preserve your campaign and prevent it from being deleted.
Take a moment to reflect on your decision and ensure that deleting your campaign is the appropriate course of action for your project’s needs. Once you are certain and have confirmed the deletion, Indiegogo will proceed to permanently remove your campaign from their platform.
It’s worth noting that once the deletion is complete, you won’t be able to recover any of the campaign details or associated data. Make sure to keep any relevant information or records before initiating the deletion process.
Conclusion
Deleting your Indiegogo campaign page is a straightforward process that involves a few simple steps. It’s important to remember that once you delete your campaign, it cannot be recovered, and all associated data will be permanently removed.
In this article, we have outlined the step-by-step process for deleting your Indiegogo campaign page:
- Sign in to your Indiegogo account.
- Go to your campaign page.
- Click on the “Edit” button
- Scroll down to the “Campaign Options” section.
- Click on the “Delete Campaign” button.
- Confirm the deletion.
By following these steps, you can confidently and securely remove your campaign from the Indiegogo platform.
Before deleting your campaign, take the time to consider your decision carefully. Review the reasons behind your choice and ensure that deleting your campaign aligns with your project’s needs and goals.
Remember, deleting your campaign is a permanent action, and once completed, cannot be reversed. It’s crucial to preserve any relevant information or data before proceeding.
If you have any concerns or questions during the deletion process, don’t hesitate to reach out to Indiegogo’s customer support for assistance. They can provide guidance and help you navigate the deletion process.
Once your campaign is deleted, you can move forward with your crowdfunding journey, whether it’s starting a new campaign, exploring alternative fundraising options, or pursuing a different path for your project.
By understanding the steps involved in deleting your Indiegogo campaign page, you can confidently make the necessary decisions for your crowdfunding endeavor.