Introduction
PayPal has become one of the most popular online payment platforms, allowing individuals and businesses to securely send and receive money across the globe. When creating a PayPal account, you provide your personal information, including your name. However, circumstances may arise where you need to change your PayPal name. Whether you’ve recently changed your legal name, want to update your business name, or simply made a typo during the registration process, PayPal offers a simple process to modify your name.
In this article, we will guide you through the step-by-step process of changing your PayPal name. We will cover everything from logging into your PayPal account to verifying your name change. Additionally, we’ll provide some pro tips to ensure a smooth and successful name change.
So, whether you’re looking to correct a misspelling, update your married name, or rebrand your business, read on to learn how to change your PayPal name effectively.
What is PayPal?
PayPal is an online payment platform that enables individuals and businesses to send and receive money securely over the internet. Founded in 1998, PayPal has grown to become one of the most trusted and widely used digital payment services worldwide.
One of the key advantages of PayPal is that it allows users to make transactions without sharing their financial information directly with the recipient. Users can link their PayPal accounts to their credit or debit cards, as well as to their bank accounts. This provides an extra layer of security and privacy, as PayPal acts as an intermediary between the buyer and seller.
In addition to its primary function as a payment service, PayPal also offers various other features and services. Users can create personalized accounts for personal use, business use, or even non-profit organizations. PayPal provides tools for merchants to accept payments on their websites, set up recurring billing, and manage inventory. They also offer a range of financial services, including international money transfers, loans, and credit lines.
PayPal operates in over 200 markets and supports transactions in multiple currencies. This makes it convenient for users worldwide to send and receive money globally, without the need to worry about currency conversions. PayPal has also expanded its reach through partnerships with major e-commerce platforms, allowing seamless integration for online sellers.
With its user-friendly interface, robust security measures, and extensive array of features, PayPal has revolutionized the way people and businesses engage in online transactions. It has become a trusted and widely recognized name in the world of digital payments, providing a convenient and secure means of conducting financial transactions on the internet.
Why would you need to change your PayPal name?
There are various reasons why you might need to change your PayPal name. It is essential to ensure that your PayPal account reflects accurate and up-to-date information. Here are some common scenarios where you may need to make changes:
- Change in legal name: If you have legally changed your name due to marriage, divorce, or any other reason, it is important to update your PayPal account to reflect your new name. This helps maintain consistency across your financial records.
- Correction of errors: During the registration process, it is possible to make a typo or error in your name. If you notice any mistakes, it is advisable to correct them to avoid any confusion or potential issues with transactions.
- Business rebranding: If you own a business and decide to rebrand or change the name, updating your PayPal account to reflect the new business name is crucial. This ensures that your customers can easily recognize and trust your brand during transactions.
- Alignment with official documents: In some cases, you may need to update your PayPal name to align with your official identification documents, such as a passport or driver’s license. This can help prevent any discrepancies when verifying your identity.
- Separate personal and business accounts: If you have been using a personal PayPal account for business purposes and decide to establish a separate business account, changing your PayPal name to match your business name is recommended. This helps clarify the purpose of the account and enhances professionalism.
Regardless of the reason, it is important to ensure that the name on your PayPal account accurately reflects your identity or the purpose of the account. This helps maintain transparency and credibility when sending or receiving payments through the platform.
Step-by-step guide to changing your PayPal name
If you need to change your PayPal name, follow these step-by-step instructions:
- Step 1: Logging in to your PayPal account
Start by visiting the PayPal website and logging in to your account using your email address and password. Ensure that you are on the official PayPal website to protect your account security. - Step 2: Navigating to your Profile settings
Once logged in, locate the navigation menu and click on the “Profile” tab. This will take you to your PayPal profile page where you can manage your account settings. - Step 3: Editing your name
On your profile page, you will see an option to edit your personal information. Look for the section that displays your name and click on the “Edit” button or link next to it. - Step 4: Verifying your changes
After making the necessary changes to your name, carefully review the modifications to ensure accuracy. Keep in mind that PayPal may have specific guidelines for name changes, such as capitalization or character limits. Once you are satisfied with the changes, click on the “Save” or “Update” button to confirm your new name.
It’s important to note that changing your PayPal name does not automatically update your associated email address. If you also need to change your email address, you can do so by editing your account settings or contacting PayPal customer support for assistance.
Remember, it may take some time for your new name to be fully reflected across all areas of your PayPal account, including emails and transaction histories. Additionally, depending on your location and the specific circumstances of your name change, you may be required to provide supporting documentation to verify your new name.
By following these step-by-step instructions, you can easily update your PayPal name to ensure that it accurately reflects your identity or business.
Step 1: Logging in to your PayPal account
The first step to changing your PayPal name is to log in to your PayPal account. Follow these instructions to access your account:
- Open a web browser on your device and go to the PayPal website.
- On the homepage, locate the “Log In” button at the top right corner of the screen and click on it. If you’re already logged in, skip to the next step.
- You will be directed to the PayPal login page. Enter the email address associated with your PayPal account in the provided field.
- Next, enter your PayPal account password in the corresponding field. Make sure to input the correct password to avoid any login errors.
- Once you’ve filled in the necessary details, click on the “Log In” button to proceed.
After successfully logging in, you will be directed to your PayPal account dashboard, where you can manage your account settings and perform various actions.
It’s important to note that if you have forgotten your PayPal password, you can click on the “Having trouble logging in?” link on the login page. PayPal will guide you through the necessary steps to reset your password and regain access to your account.
Additionally, make sure that you are accessing the official PayPal website and that your connection is secure. Look for the padlock icon in the browser’s address bar to indicate a secure connection. This helps protect your personal information and prevents unauthorized access to your account.
By following these instructions, you will be able to log in to your PayPal account and proceed to the next step in the process of changing your name.
Step 2: Navigating to your Profile settings
After logging in to your PayPal account, the next step in changing your PayPal name is to navigate to your Profile settings. Follow these instructions to access the profile settings:
- Once you are logged in, you will be on your PayPal account dashboard. Look for the navigation menu at the top of the screen.
- In the navigation menu, locate and click on the “Profile” tab. This tab is usually located towards the top of the menu.
- Clicking on the “Profile” tab will take you to your PayPal profile page, where you can manage your account settings and personal information.
It’s important to note that depending on the version of PayPal or your account settings, the name of the tab may vary. For example, it may be labeled as “Settings” or “Account Settings” instead of “Profile.” However, the concept remains the same – you are looking for the area where you can manage your account information.
Once you click on the appropriate tab, you will be redirected to the profile settings page. This is where you can make changes to your personal information, including your name.
Ensure that you are on the official PayPal website and that you are accessing your account from a secure and trusted device. This helps protect your account from unauthorized access and safeguards your personal information.
By following these instructions, you will be able to navigate to your PayPal profile settings and proceed to the next step in the process of changing your PayPal name.
Step 3: Editing your name
Once you have accessed your PayPal profile settings, you can proceed to edit your name. Follow these instructions to make the necessary changes:
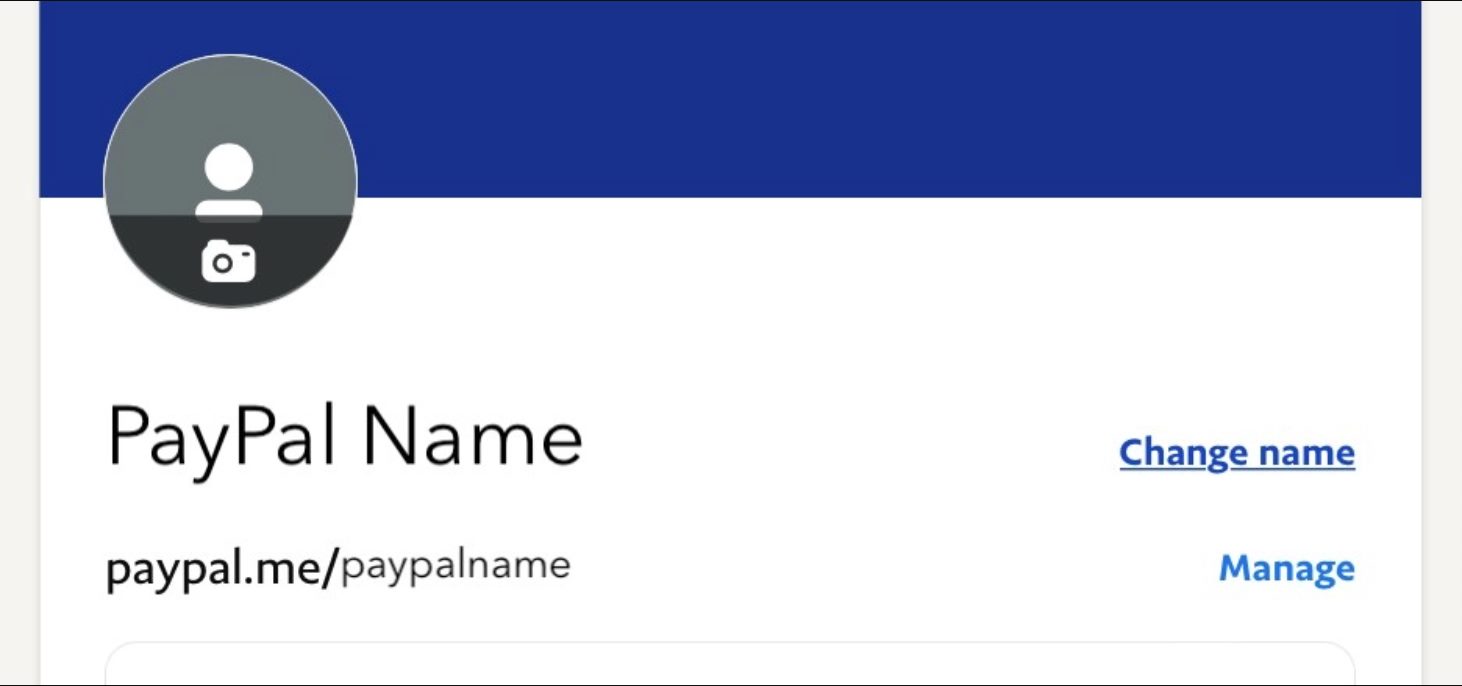
- On your PayPal profile page, look for the section that displays your name. This section is typically labeled as “Name” or “Personal Information.”
- Next to your name, you should see an “Edit” button or link. Click on it to initiate the name editing process.
- A popup or new page will appear where you can enter your new name. Carefully type in your revised name, ensuring that it is accurately spelled and reflects the desired changes.
- Pay attention to any specific guidelines provided by PayPal regarding name changes. For example, they may have restrictions on the number of characters, capitalization rules, or symbols that can be used.
- Double-check the new name before proceeding to ensure that it aligns with your intentions.
It’s important to note that PayPal may review and verify the changes you make to your name. They may require supporting documentation, such as a legal name change certificate or identification documents, to authenticate the change.
Additionally, be aware that some changes may not be allowed if they are in violation of PayPal’s policies or terms of service. It’s essential to adhere to their guidelines and provide accurate information when making any modifications to your PayPal account.
By following these instructions, you will be able to edit your PayPal name and move forward with the name change process.
Step 4: Verifying your changes
After editing your name, the final step in changing your PayPal name is to verify the changes. Follow these instructions to ensure your new name is successfully updated:
- Review the updated name on the screen to confirm that it accurately reflects your intended changes. Take a moment to double-check for any typos or errors.
- PayPal may require you to verify the name change through a confirmation process. This often involves a verification email or other forms of verification.
- Check your email inbox associated with your PayPal account for any verification messages from PayPal. Open the email and follow the instructions provided to confirm your new name.
- In some cases, PayPal may request additional documentation to verify the name change. This could include legal documents, such as a marriage certificate or court order, to support the change.
- Provide any requested documentation promptly and accurately to expedite the verification process.
It’s important to note that the verification process may vary depending on PayPal’s policies, your location, and individual circumstances. If you encounter any difficulties or have specific questions about the verification process, it is recommended to reach out to PayPal’s customer support for assistance.
Once you have successfully completed the verification process, PayPal will update your name in their system. It may take some time for the changes to be reflected across all areas of your PayPal account.
By following these instructions and completing the necessary verification steps, your new PayPal name will be officially updated, ensuring that your account reflects accurate and up-to-date information.
Pro tips for changing your PayPal name
Changing your PayPal name can be a straightforward process if you follow the steps outlined above. However, here are some additional pro tips to ensure a smooth and successful name change:
- Double-check your changes: Before saving or confirming your new name, carefully review the spelling, capitalization, and any special characters. Making sure everything is accurate will help prevent any issues or confusion down the line.
- Prepare supporting documentation: If PayPal requires additional documentation to verify your name change, gather the necessary documents in advance. This will save you time and ensure a quicker verification process.
- Be aware of PayPal’s policies: Familiarize yourself with PayPal’s guidelines and policies regarding name changes. Adhering to their rules will help avoid any complications or delays during the process.
- Update your name on associated accounts: If you use your PayPal account for business purposes or have it linked to other platforms or services, remember to update your name on those accounts as well. This will maintain consistency and prevent confusion when conducting transactions.
- Contact customer support if needed: If you encounter any difficulties or have specific questions during the name change process, don’t hesitate to reach out to PayPal’s customer support. They can provide guidance and assistance tailored to your situation.
- Allow time for changes to take effect: After completing the name change, be patient as it may take some time for your new name to be fully updated across all areas of your PayPal account.
- Maintain accurate information: Regularly review and update your PayPal account details, including your name, to ensure that it accurately reflects your current information. This will help maintain transparency and avoid any potential issues with transactions.
By following these pro tips, you can navigate the process of changing your PayPal name with confidence and ensure a successful update.
Conclusion
Changing your PayPal name is a simple process that allows you to update your personal or business information to reflect your current identity. Whether you need to correct an error, rebrand your business, or align with a legal name change, following the step-by-step instructions provided in this guide will help you navigate the process smoothly.
Remember to log in to your PayPal account, navigate to your profile settings, edit your name accurately, and verify the changes according to PayPal’s guidelines. It’s essential to review and double-check your new name before confirming and provide any necessary documentation for verification purposes.
Pro tips, such as preparing supporting documentation in advance and communicating with PayPal’s customer support if needed, can further assist you in successfully completing the name change process. Additionally, keeping your account information accurate and up to date, both within PayPal and associated accounts, will help maintain transparency during transactions.
Whether you’re an individual or a business, ensuring that your PayPal account reflects the correct and updated name is crucial for maintaining trust and professionalism. By following the steps and pro tips outlined in this guide, you can easily change your PayPal name and enjoy a seamless payment experience.
So, take the necessary steps today to update your PayPal name and enjoy the benefits of a well-aligned digital identity in the world of online payments.