Introduction
Welcome to our comprehensive guide on how to change the business name on PayPal. Whether you’ve recently rebranded, expanded your business, or simply decided to go by a different name, PayPal provides a straightforward process to update your business name on their platform. In this article, we will walk you through the step-by-step process to ensure a smooth transition of your business name on your PayPal account.
PayPal has become one of the most popular online payment platforms, trusted by millions of businesses worldwide. It allows businesses and individuals to send and receive payments securely, making it an integral part of the e-commerce landscape. As your business evolves, it’s important to keep your PayPal account up-to-date with accurate information, including your business name.
Changing your business name on PayPal is essential to maintain a consistent brand identity across all platforms. This ensures that customers can easily recognize and trust your business when making transactions. In addition, updating your business name on PayPal helps prevent any confusion or disputes that may arise due to mismatched names.
However, before diving into the steps of changing your business name on PayPal, it’s important to understand the eligibility criteria and considerations that come with this process. Not all PayPal accounts are eligible for a name change, and there are certain limitations to keep in mind. In the next section, we will explore how to check if you’re eligible for a business name change on PayPal.
Why you may need to change your business name on PayPal
There are several reasons why you may find it necessary to change your business name on PayPal. Here are some common situations that may require a name change:
- Rebranding: If you’ve recently decided to rebrand your business with a new name, it’s important to reflect this change on your PayPal account. A consistent brand identity across all platforms helps establish trust and recognition among your customers.
- Expanding your business: As your business expands into new markets or offers new products or services, you may want to update your business name on PayPal to accurately reflect these changes. This ensures that customers are aware of the full range of offerings from your business.
- Legal reasons: In some cases, you may be legally required to change your business name. This could be due to a merger, acquisition, or any other legal reasons that necessitate a name change. It’s important to keep your PayPal account updated to align with the legal name of your business.
- Consistency across platforms: If you’ve already changed your business name on other platforms such as your website, social media accounts, or other payment processors, it’s important to ensure consistency by updating your PayPal business name as well. This keeps your brand consistent and avoids confusion among customers.
- Mismatched names: Sometimes, businesses may create multiple PayPal accounts over time, leading to the use of different business names. If you want to consolidate your accounts or ensure that payments are made to the correct business name, it’s essential to align all your PayPal accounts with the same business name.
By updating your business name on PayPal, you can effectively communicate any changes or updates to your customers and partners. It allows for seamless transactions and helps in maintaining a professional and trustworthy image for your business. Next, let’s dive into how to check if you’re eligible for a business name change on PayPal.
How to check if you’re eligible for a business name change on PayPal
Before proceeding with the process of changing your business name on PayPal, it’s important to check if your account is eligible for a name change. PayPal has certain criteria and limitations in place for this process. Here’s how you can determine if you’re eligible:
- Login to your PayPal account: Visit the PayPal website and login to your account using your credentials.
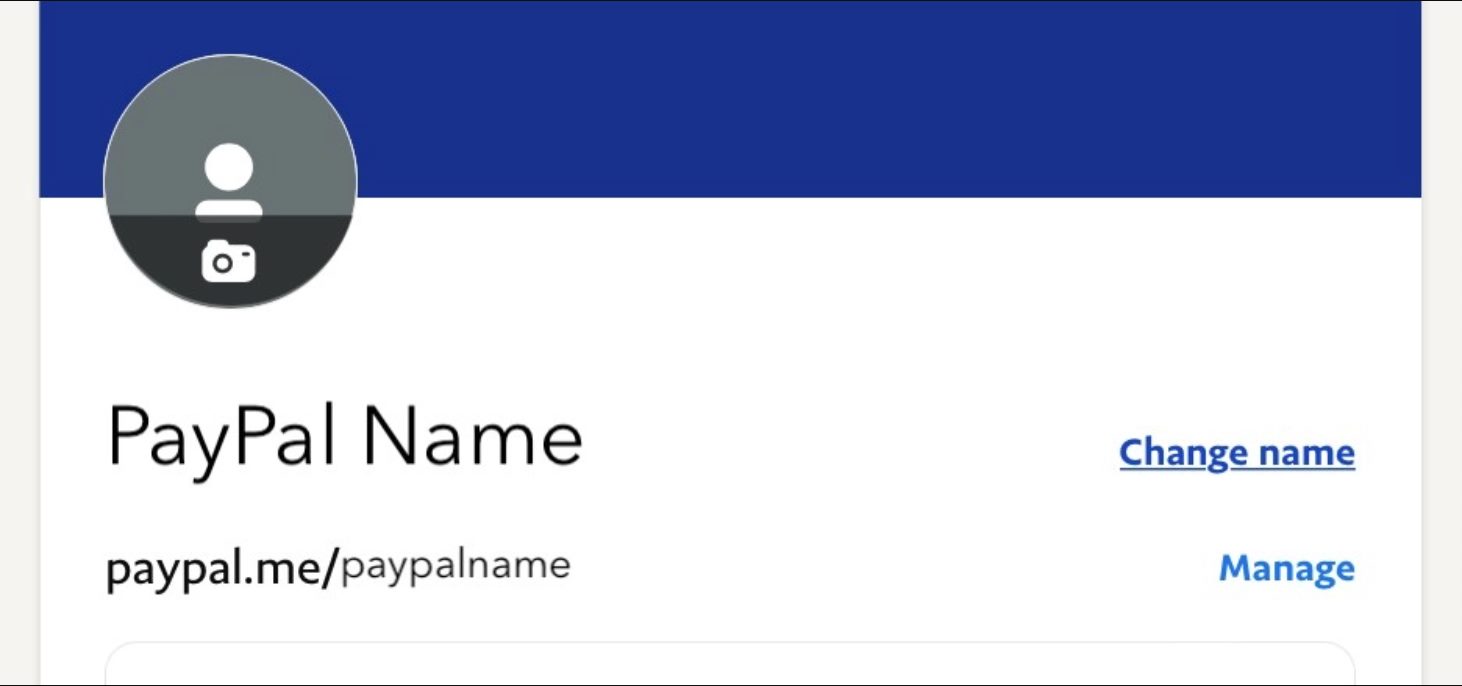
- Navigate to the Profile Settings: Once logged in, click on the gear icon in the upper right-hand corner to access the profile settings.
- Select “Business Information”: In the profile settings menu, locate and click on the “Business Information” option. This will allow you to view and modify your business details.
- Look for the “Name Change” option: In the “Business Information” section, check if there is an option for “Name Change.” If this option is available, it means your account is eligible for a business name change.
- Follow the instructions: If the “Name Change” option is present, click on it to begin the process. PayPal will guide you through the necessary steps to update your business name.
If the “Name Change” option is not available in your PayPal account, it means that your account is not currently eligible for a business name change. In this case, you may need to contact PayPal customer support for further assistance or explore other alternatives to update your business name.
It’s important to note that even if your account is eligible for a name change, PayPal may have certain restrictions or limitations in place. This could include requirements for providing documentation, such as legal name change documents or business registration certificates, to verify the legitimacy of the name change request.
Once you have determined your eligibility and gathered any required documentation, you can proceed with changing your business name on PayPal. In the next section, we will guide you through the step-by-step process to ensure a smooth transition.
Steps to change your business name on PayPal
Changing your business name on PayPal involves a series of steps that are easy to follow. Here’s a step-by-step guide to help you update your business name:
- Login to your PayPal account: Visit the PayPal website and log in to your account using your credentials.
- Access the profile settings: Once logged in, click on the gear icon in the upper right-hand corner of the screen. This will open the profile settings menu.
- Select “Business Information”: In the profile settings menu, navigate to the “Business Information” section and click on it to proceed.
- Click on the “Name Change” option: If your account is eligible for a business name change, you will find the “Name Change” option in the “Business Information” section. Click on it to begin the process.
- Verify your identity: PayPal may require you to verify your identity through additional documentation or security measures. Follow the instructions provided and provide any necessary information to confirm your identity.
- Enter your new business name: Once your identity is verified, you will be prompted to enter your new business name. Carefully enter the new name and ensure it matches your legal business name or the rebranded name you wish to use.
- Review and submit: Take a moment to review the information you’ve entered, ensuring its accuracy. If everything looks correct, click on the “Submit” or “Save” button to proceed.
- Wait for confirmation: After submitting your request, PayPal will process the name change. You will receive a confirmation email once the change has been approved and implemented. This may take a few business days, so be patient during this waiting period.
- Update your business information: Once your business name is successfully changed on PayPal, make sure to update your business information on any associated accounts or platforms. This includes your website, social media profiles, business listings, and any other platforms where your business name is displayed.
By following these steps, you can easily change your business name on PayPal and ensure that your account reflects the most up-to-date information. However, it’s important to note that changing your business name may impact certain aspects, such as contracts or agreements linked to the previous name. Therefore, it’s advisable to review any legal obligations and consult with legal professionals if necessary.
Next, we will discuss the process of verifying your new business name on PayPal to establish authenticity and build trust with your customers and partners.
Verifying your new business name on PayPal
Once you have successfully changed your business name on PayPal, it’s important to go through the process of verifying your new name. Verifying your business name adds an extra layer of authenticity and trust to your PayPal account. Here’s how you can verify your new business name:
- Confirm the name change: After changing your business name on PayPal, you will receive a confirmation email stating that the name change has been implemented. Take note of this email as proof of the name change.
- Review your account information: Log in to your PayPal account and navigate to the profile settings. Double-check that your new business name is accurately reflected in your account information. This includes your business name, contact details, and any other relevant information.
- Update your verification documents (if required): PayPal may request additional documentation to verify your new business name. This could include legal name change documents, business registration certificates, or any other supporting documents. Ensure that you have the necessary paperwork ready, and follow the instructions provided by PayPal to submit the documents for verification.
- Wait for verification: After submitting your verification documents, PayPal will review them to ensure the legitimacy of your new business name. This process may take a few business days, so be patient during this waiting period.
- Check your account status: Once your new business name is successfully verified, PayPal will update your account status accordingly. You may receive another confirmation email stating that your new name has been verified.
- Review your business information on associated platforms: After verifying your new business name on PayPal, it’s important to review and update your business information on any associated platforms. This includes your website, social media profiles, business directories, or any other platforms where your business name is displayed.
Verifying your new business name on PayPal not only helps establish trust among customers and partners but also ensures compliance with PayPal’s policies and guidelines. It’s crucial to follow the verification process diligently and provide any requested documents promptly to avoid any disruptions to your PayPal account.
Now that you have successfully changed your business name on PayPal and verified it, it’s time to update your business name on any other accounts or platforms associated with your business. In the next section, we will explore the necessary steps to update your business name effectively.
Updating your business name on associated accounts and platforms
Now that you’ve changed your business name on PayPal, it’s important to ensure consistency by updating your business name on all associated accounts and platforms. This will help avoid any confusion among customers and maintain a cohesive brand identity across various channels. Here are the steps to update your business name on associated accounts and platforms:
- Review your accounts: Make a list of all the accounts and platforms where your business name is displayed. This may include your website, social media profiles, business listings, email signatures, and any other platforms relevant to your business.
- Update your website: Log in to your website’s content management system (CMS) or website builder platform. Locate and update any instances of your old business name with the new one. This may include your website’s header, footer, about page, contact page, and any other sections where your business name is mentioned.
- Update social media profiles: Access your social media accounts (e.g., Facebook, Twitter, Instagram, LinkedIn) and navigate to the profile settings. Update your business name in the appropriate fields, such as the profile name, username, bio, and any other sections where your business name appears.
- Update business listings: If your business is listed on directories, review and update your information to reflect the new business name. This includes popular directories like Google My Business, Yelp, Yellow Pages, and industry-specific directories.
- Update email signatures: Modify your email signature to incorporate your new business name. Update the signature on your email client or email service provider to reflect the changes. This ensures that all outgoing emails clearly display your updated business name.
- Inform business partners and clients: Reach out to your business partners, clients, and suppliers to inform them of the name change. This helps avoid any confusion and ensures that they update their records accordingly.
- Consider marketing materials and branding: Evaluate your marketing materials, such as brochures, business cards, flyers, and advertisements. Determine if they need to be updated to reflect your new business name. If necessary, work with a graphic designer or printing service to make the necessary changes.
It’s important to thoroughly review each associated account and platform to ensure that your new business name is updated uniformly across all channels. Consistency in your business name promotes brand recognition and helps build trust with your audience.
Keep in mind that updating your business name on associated accounts and platforms may take some time and coordination. Plan ahead and allocate resources accordingly to ensure a seamless transition. Remember to update all communication materials, both online and offline, to reflect your new business name and maintain a cohesive brand identity.
In the next section, we will discuss some important considerations and precautions to keep in mind when changing your business name on PayPal.
Considerations and precautions when changing your business name on PayPal
Changing your business name on PayPal is a significant decision that requires careful consideration and attention to detail. While the process may seem straightforward, there are some important considerations and precautions to keep in mind to ensure a smooth transition. Here are a few key points to consider:
- Verify your eligibility: Before initiating the name change process, ensure that your PayPal account is eligible for a business name change. Check the account settings and consult PayPal’s guidelines to determine if you meet the necessary criteria.
- Legal obligations and contracts: Review any legal obligations or contracts linked to your previous business name. Changing your business name may have implications for existing agreements, such as contracts, licenses, or permits. Consult legal professionals if needed to ensure compliance with legal requirements.
- Communicate with customers and partners: Inform your customers, partners, and suppliers about the name change to avoid confusion. Send out notifications through email, social media, or other communication channels to ensure they are aware of the updated business name.
- Update billing and payment processes: Ensure that your billing and payment processes are updated with the new business name. This may include updating invoices, payment gateways, and any other payment-related systems to reflect the change.
- Brand consistency: Maintain a consistent brand identity across all platforms. Update your website, social media profiles, and other marketing materials to reflect the new business name. Consider how the name change may impact your brand image and take steps to ensure a seamless transition.
- Update domain name and email addresses: If your business name is part of your website’s domain or email addresses, you may need to make changes. Assess the impact of changing these addresses on your online presence and consider redirecting old addresses to the new ones to avoid losing traffic or communication.
- Plan for downtime (if applicable): If changing your business name requires temporarily taking your website or online services offline, inform your customers in advance and plan for the necessary downtime. Minimize any disruptions by providing clear instructions and alternative means of communication if needed.
- Keep track of notifications and updates: Monitor your email for official communications from PayPal regarding the name change process. Be prompt in responding to any requests for verification or additional information. This will help ensure a smooth transition and minimize any potential disruptions to your PayPal account.
By considering these factors and taking the necessary precautions, you can navigate the process of changing your business name on PayPal efficiently. Remember to double-check all the changes you make and keep records of communications and updates for future reference.
Once you have successfully completed these steps and addressed all considerations, you can enjoy the benefits of having a PayPal account that accurately reflects your business’s new name. In the next section, we will wrap up this guide and provide a summary of the key points covered.
Conclusion
Changing your business name on PayPal is an important process that helps maintain brand consistency and ensures accurate information across all platforms. By following the steps outlined in this guide, you can effectively update your business name on PayPal and associated accounts. Here’s a recap of the key points covered:
- Understanding the reasons you may need to change your business name on PayPal, such as rebranding, expansion, or legal requirements.
- Checking your eligibility for a business name change by navigating to the profile settings in your PayPal account.
- Following the step-by-step instructions to change your business name on PayPal, including verifying your new name and updating associated accounts and platforms.
- Verifying your new business name on PayPal by confirming the change, reviewing your account information, and providing any necessary verification documents.
- Updating your business name on associated accounts and platforms, such as your website, social media profiles, and business listings.
- Taking into consideration important factors, including legal obligations, brand consistency, and communication with customers and partners.
Remember, changing your business name on PayPal requires careful planning, communication, and attention to detail. It’s crucial to comply with any legal requirements and ensure a seamless transition for your customers and partners. By following the guidelines provided in this guide, you can successfully navigate the process and update your business name on PayPal with confidence.
If you have any specific questions or encounter any issues during the name change process, don’t hesitate to reach out to PayPal’s customer support for further assistance. They will be able to provide you with the necessary guidance and support.
Thank you for following this comprehensive guide on how to change your business name on PayPal. We hope this information has been helpful in assisting you with your business name change, and we wish you continued success in your business endeavors.