Introduction
Welcome to our guide on how to add checks to Cash App! In this digital age, Cash App provides a convenient way to send and receive money instantly. But did you know that you can now also add checks to your Cash App account? This feature allows you to deposit physical checks directly into your Cash App balance, eliminating the need to visit a bank or an ATM.
Adding checks to Cash App is a simple process that can be done right from the comfort of your own home. In just a few easy steps, you can turn your paper checks into digital funds that can be used to send money to friends, pay bills, or make online purchases.
Why bother with the hassle of going to a bank and waiting in line to deposit a check when you can do it all with just a few taps on your smartphone? Additionally, by adding checks to Cash App, you can have faster access to your funds, as the processing time is typically quicker compared to traditional banking methods.
Whether you received a paycheck, a refund, or a birthday check, adding it to your Cash App balance is a convenient way to manage your finances. In this guide, we will walk you through the step-by-step process of adding checks to Cash App, so you can take full advantage of this feature and make the most out of your digital wallet.
So, let’s dive in and learn how to add checks to Cash App to simplify your financial transactions and enjoy the benefits of a seamless digital banking experience!
Why Should You Add Checks to Cash App?
Adding checks to Cash App offers several benefits that make it a worthwhile addition to your digital banking routine. Here are a few reasons why you should consider adding checks to Cash App:
- Convenience: Adding checks to Cash App eliminates the need to physically visit a bank or ATM to deposit your checks. You can do it all from the comfort of your own home or anywhere with an internet connection.
- Time-Saving: With Cash App, you can deposit your checks quickly and efficiently, avoiding the long wait times often associated with traditional banking methods. This gives you faster access to your funds and allows you to manage your finances more efficiently.
- Easy Access to Funds: By adding checks to Cash App, you can instantly turn your paper checks into digital funds in your Cash App balance. This means you can use the funds to make payments, send money to friends, or withdraw it to your linked bank account.
- Record-Keeping: Cash App automatically keeps a record of your deposited checks, allowing you to easily track your financial transactions. This can be beneficial for budgeting purposes, tax documentation, or simply to have a clear overview of your financial history.
- Security: Cash App ensures the security of your financial information by using encryption technology to protect your data. When you add a check to Cash App, you can have peace of mind that your personal and financial details are secure.
Whether you receive checks on a regular basis or occasionally, adding them to Cash App streamlines the deposit process and enhances your overall banking experience. It provides a convenient and efficient way to manage your finances, allowing you to focus on the things that matter most to you.
Now that you understand the benefits of adding checks to Cash App, let’s move on to the step-by-step process of how to do it. By following these simple instructions, you’ll be able to deposit your checks into your Cash App balance quickly and effortlessly.
Step 1: Verify Your Identity
Before you can start adding checks to your Cash App account, you need to verify your identity. Cash App takes this step to ensure the security and legitimacy of all transactions carried out on the platform. Here’s how you can verify your identity:
- Open Cash App: Launch the Cash App on your mobile device. If you don’t have the app, you can download it from the App Store or Google Play Store and create an account.
- Access Account Settings: Tap on the profile icon at the top left corner of the screen to access your account settings.
- Select “Personal: From the account settings menu, select the “Personal” option. This allows you to verify your personal identity.
- Provide Required Information: Cash App will ask you to enter personal information such as your full name, date of birth, and the last four digits of your social security number. Make sure to enter accurate information for a successful identity verification process.
- Submit Documentation: Cash App may request additional documentation to verify your identity. This may include a photo of your government-issued ID, such as a driver’s license or passport. Take clear photos of the front and back of your ID and submit them through the app.
- Wait for Verification: Cash App will review the information and documentation you provided to verify your identity. The verification process may take a few hours or up to a couple of days. You will receive a notification once your identity is successfully verified.
Verifying your identity is an important step to ensure the security and legitimacy of your transactions on Cash App. Once your identity is verified, you can proceed to the next steps to add checks to your Cash App balance and enjoy the convenience of digital check deposits.
Now that you have successfully verified your identity, it’s time to move on to step 2: linking your bank account to Cash App. This will allow you to easily transfer funds between your Cash App balance and your bank account. Stay tuned!
Step 2: Link Your Bank Account
Once you have verified your identity on Cash App, the next step is to link your bank account. Linking your bank account is essential for seamless transfers and withdrawals between your Cash App balance and your bank. Follow these simple steps to link your bank account:
- Open Cash App: Launch the Cash App on your mobile device and log in to your account.
- Access Account Settings: Tap on the profile icon at the top left corner of the screen to access your account settings.
- Select “Linked Accounts”: From the account settings menu, choose the “Linked Accounts” option. This will allow you to manage your connected bank accounts.
- Select “Add a Bank”: Tap on the “Add a Bank” option to begin the linking process.
- Choose Your Bank: Cash App will provide a list of popular banks to choose from. Select your bank from the list. If your bank is not listed, you can search for it by entering the bank name in the search bar.
- Enter Your Bank Login Information: Cash App will prompt you to enter your bank’s login information. This information is securely encrypted and used solely for the purpose of linking your bank account.
- Follow the Verification Process: Cash App will verify your bank account by sending a verification code or by linking your bank account through a secondary login portal. Follow the instructions provided by Cash App to complete the verification process.
- Confirm Linked Bank Account: Once your bank account is successfully linked, Cash App will display a confirmation message. You can now view and manage your linked bank account from the “Linked Accounts” section in your Cash App settings.
Linking your bank account to Cash App enables you to easily transfer funds between your Cash App balance and your bank account. It also allows you to withdraw funds from your Cash App balance directly to your bank account whenever needed.
Now that your bank account is linked, you’re one step closer to adding checks to your Cash App balance. In the next step, we will guide you through enabling the “Add Checks” feature on Cash App. Stay tuned!
Step 3: Enable the “Add Checks” Feature
After verifying your identity and linking your bank account on Cash App, the next step is to enable the “Add Checks” feature. Enabling this feature allows you to digitally deposit paper checks into your Cash App balance. Follow these steps to enable the “Add Checks” feature:
- Open Cash App: Launch the Cash App on your mobile device and log in to your account.
- Access Account Settings: Tap on the profile icon at the top left corner of the screen to access your account settings.
- Select “Cash & BTC”: From the account settings menu, choose the “Cash & BTC” option. This is where you can manage your Cash App balance and related features.
- Scroll Down and Find “Add Checks”: Scroll down the options within the “Cash & BTC” section until you find the “Add Checks” feature. It may be listed under the “Other” section.
- Tap on “Add Checks”: Once you locate the “Add Checks” feature, tap on it to enable it.
- Read and Agree to the Terms: Cash App will provide you with the terms and conditions for using the “Add Checks” feature. Take a moment to read through the information and then agree to the terms to proceed.
- Verify Your Mailing Address: Cash App will ask you to verify your mailing address. This is necessary to ensure that any physical checks you deposit are securely sent to the correct address.
- Confirm “Add Checks” Activation: Once you have completed the necessary steps and agreed to the terms, Cash App will display a confirmation message notifying you that the “Add Checks” feature has been successfully activated.
Enabling the “Add Checks” feature on Cash App is a crucial step in being able to deposit physical checks digitally. By following these steps, you have now enabled this feature and can proceed to the next step of the check deposit process.
In the next step, we will guide you through taking photos of your check using Cash App to prepare it for digital deposit. Stay tuned!
Step 4: Take Photos of Your Check
Once you have enabled the “Add Checks” feature on Cash App, it’s time to take photos of your check. This process allows Cash App to capture the necessary information from the check and initiate the deposit. Follow these steps to take photos of your check:
- Open Cash App: Launch the Cash App on your mobile device and log in to your account.
- Tap the “Balance” Tab: From the Cash App home screen, tap on the “Balance” tab at the bottom-center of the screen. This is where you can view your Cash App balance and access related features.
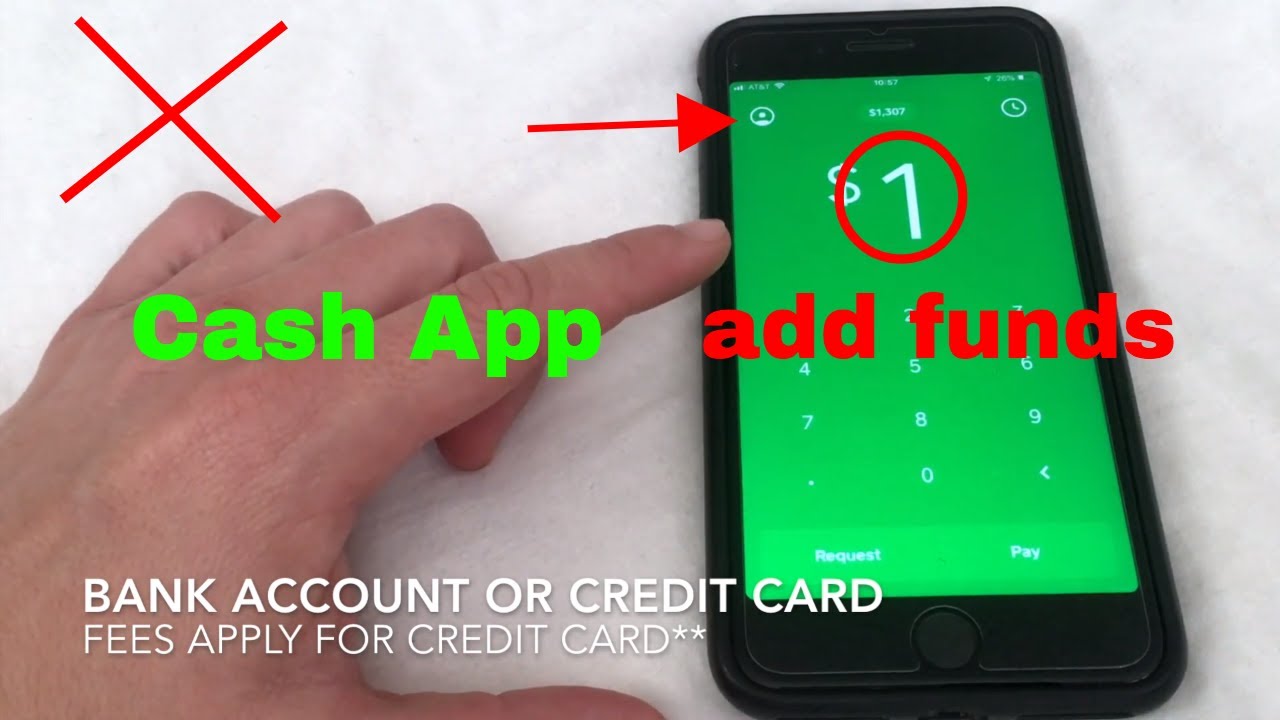
- Tap “Add Cash”: On the Balance screen, tap on the “Add Cash” button. This will initiate the process of adding funds to your Cash App balance using a check.
- Select “Front of Check”: Cash App will prompt you to position the front side of your check within the designated frame on the screen. Make sure the entire check is visible and aligned within the frame.
- Take a Photo: Once the check is positioned correctly, tap on the camera icon on the screen to take a photo of the front side of the check. Make sure the image is clear and all the text is readable.
- Select “Back of Check”: After capturing the front side of the check, Cash App will prompt you to flip the check over and position the back side within the frame on the screen.
- Take a Photo: Similar to the front side, tap on the camera icon to take a photo of the back side of the check. Ensure the image is clear and all the necessary information is visible.
- Confirm Check Details: Cash App will display the captured images of your check. Review the details and ensure they match the information on the physical check. If everything looks correct, tap on the “Next” button to proceed.
Taking clear and legible photos of your check is essential for a successful deposit. Make sure there are no shadows, glare, or obstructions on the check that could affect the readability of the images.
Now that you have successfully taken photos of your check, it’s time to move on to the next step: submitting the check for approval. In the next section, we will guide you through the process of submitting your check for review and initiating the deposit. Stay tuned!
Step 5: Submit the Check for Approval
After taking photos of your check using Cash App, the next step is to submit the check for approval. Cash App will review the images you captured and verify the information on the check before initiating the deposit. Follow these steps to submit your check for approval:
- Review Check Details: Cash App will display the images of your check on the screen. Take a moment to carefully review the details and ensure that everything is accurate and readable.
- Enter Check Amount: If Cash App does not automatically detect the amount of the check, you will need to enter it manually. Use the keypad on the screen to enter the correct amount. Double-check that you have entered the amount correctly before proceeding.
- Provide Additional Information (if required): Cash App may prompt you to provide additional information, such as the reason for the payment or any specific instructions. Follow the instructions on the screen and provide the necessary details accurately.
- Confirm Submission: Once you have reviewed the check details and entered any required information, tap on the “Submit” or “Next” button to submit the check for approval.
- Wait for Approval: Cash App will now review the check images and the provided information. This process may take a few moments, so be patient and wait for the approval notification.
- Notification of Approval: Once your check is approved, Cash App will notify you through a push notification or an email. This confirms that the deposit process has been initiated.
It’s important to note that Cash App may require additional information or documentation for certain checks or transactions. If this is the case, follow the instructions provided by Cash App to provide the necessary details or additional verification.
Now that you have submitted your check for approval, the final step is to wait for the check to be added to your Cash App balance. In the next section, we will discuss some tips for a successful check addition. Stay tuned!
Step 6: Wait for the Check to be Added to Your Cash App Balance
After submitting your check for approval on Cash App, the final step is to patiently wait for the check to be added to your Cash App balance. The duration for the check to be processed and deposited may vary depending on various factors, including the verification process and the time it takes for the check to be cleared. Here’s what you can expect during this waiting period:
- Check Status Updates: Cash App will provide you with status updates on the progress of your check’s processing. You may receive notifications or updates within the app regarding the status of your deposited check.
- Processing Time: The processing time for check deposits on Cash App can range from a few minutes to a few business days. Factors such as the accuracy of the check images, verification processes, and any additional information required can affect the processing time.
- Communication from Cash App: Cash App may reach out to you during the processing period if any additional information or documentation is required. Make sure to check your notifications or emails regularly for any updates or requests from Cash App.
- Availability of Funds: Once the check is successfully deposited and added to your Cash App balance, the funds will be available for you to use within the app. You can make payments, send money to friends, or even withdraw the funds to your linked bank account.
- Further Assistance: If you encounter any issues or have questions regarding the deposited check, Cash App’s customer support is available to assist you. You can reach out to their support team through the app or their official customer support channels.
It’s important to remain patient during the waiting period for your check to be added to your Cash App balance. While Cash App strives to process check deposits as quickly as possible, factors such as banking hours, weekends, or holidays may affect the overall processing time.
Now that you have completed the six steps of adding a check to Cash App, you can enjoy the benefits and convenience of digital check deposits. By following these steps, you have simplified the process of depositing checks and have embraced the seamless digital banking experience offered by Cash App.
In the next section, we will discuss some tips for a successful check addition, ensuring a smooth process and maximizing the benefits of using Cash App for check deposits. Stay tuned!
Tips for a Successful Check Addition
When it comes to adding checks to Cash App, following a few tips can help ensure a smooth and successful process. Here are some key tips to keep in mind for a seamless check addition:
- Ensure Clear Check Images: When capturing photos of your check, make sure the images are clear and readable. Avoid shadows, glares, or any obstructions that may hinder the clarity of the images. This ensures that Cash App can accurately process the information on the check.
- Enter Correct Check Amount: If Cash App does not automatically detect the amount of the check, manually enter the correct amount. Double-check to ensure the accuracy of the entered amount before proceeding. This helps minimize any discrepancies during the deposit process.
- Provide Accurate Additional Information: If Cash App requires any additional details or instructions for the check deposit, ensure that you provide accurate and relevant information. This helps facilitate the processing and verification of the check.
- Keep Track of Check Status: Stay updated on the status of your deposited check within the Cash App. Check for any notifications or updates regarding the progress of your check’s processing. This enables you to stay informed and address any potential issues promptly.
- Regularly Check for Communication: Check your Cash App notifications or emails regularly for any further communication from Cash App. If any additional information or documentation is required, promptly respond to ensure a smooth processing experience.
- Patience during Processing: Understand that the processing time for check deposits can vary based on various factors. Exercise patience as Cash App verifies the check and completes the necessary processing. Check deposits can take anywhere from a few minutes to a few business days.
- Contact Customer Support for Assistance: If you encounter any issues or have questions regarding your deposited check, don’t hesitate to reach out to Cash App’s customer support. They are available to provide assistance and address any concerns you may have.
Following these tips enhances the likelihood of a successful check addition on Cash App. By ensuring clear images, providing accurate information, and staying updated on the processing status, you can experience a seamless and efficient deposit process.
By utilizing Cash App’s digital check deposit feature, you can save time, avoid going to the bank, and have faster access to your funds. Enjoy the convenience and benefits of adding checks to your Cash App balance, simplifying your financial transactions in the digital age.
Now that you have learned the tips for a successful check addition, you are ready to leverage the full potential of Cash App for managing your financial transactions. Happy banking!
Conclusion
Adding checks to Cash App provides a convenient and efficient way to manage your finances in the digital age. By following the step-by-step process outlined in this guide, you can easily deposit your paper checks into your Cash App balance, eliminating the need to visit a bank or ATM.
We discussed the importance of verifying your identity and linking your bank account to Cash App as the initial steps in the check addition process. The subsequent steps involved enabling the “Add Checks” feature, taking clear photos of your check, submitting the check for approval, and finally waiting for the check to be added to your Cash App balance.
Throughout the process, we provided valuable tips to ensure a successful check addition, such as capturing clear check images, entering accurate check amounts, and staying informed on the check status. Additionally, we highlighted the significance of providing accurate information, exercising patience during processing, and reaching out to Cash App’s customer support for assistance when needed.
By taking advantage of Cash App’s digital check deposit feature, you can enjoy benefits such as convenience, time-saving, easy access to funds, record-keeping, and enhanced security. Say goodbye to the hassle of physically depositing checks and embrace the seamless digital banking experience offered by Cash App.
We hope this guide has provided you with a comprehensive understanding of how to add checks to Cash App. Put this knowledge into action and simplify your financial transactions with ease.
Now it’s time to leverage the power of Cash App and experience the convenience of depositing checks digitally. Start adding checks to your Cash App balance and streamline your financial management today!