Introduction
Welcome to the world of digital payments with Cash App! If you’ve recently received your Cash App card and are excited to start using it, you’re in the right place. Activating your Cash App card is a quick and effortless process that will have you ready to make transactions in no time.
Cash App, developed by Square Inc., is a mobile payment service that allows you to send and receive money from friends, family, and even businesses. With the Cash App card, you can access your funds instantly and use them to shop online or make purchases in physical stores that accept Visa debit cards.
By activating your Cash App card, you’ll have a versatile payment solution compatible with various merchants and online platforms. Whether you’re shopping for essentials or treating yourself to something special, the Cash App card offers flexibility and convenience.
In this article, we will guide you through the step-by-step process of activating your Cash App card. Whether you’re a beginner or already an experienced Cash App user, these instructions will ensure that you can start utilizing your card as soon as possible.
So, let’s dive in and get your Cash App card activated!
Step 1: Download the Cash App
The first step in activating your Cash App card is to download the Cash App mobile application. The Cash App is available for both iOS and Android devices and can be easily downloaded from the respective app stores.
To get started, open the App Store on your iOS device or the Google Play Store on your Android device. Search for “Cash App” in the search bar and look for the app with the recognizable green icon featuring a dollar sign.
Tap the “Install” or “Get” button to download and install the Cash App on your device. Depending on your internet connection, the process may take a few seconds or minutes.
Once the app is successfully installed, locate the Cash App icon on your device’s home screen or app drawer and tap on it to open the application.
If you haven’t already created a Cash App account, you will need to sign up by providing your email address or phone number. Follow the prompts to create a unique username, password, and secure your account with a verification code.
If you already have a Cash App account, simply log in using your existing credentials, and you’re ready to proceed to the next step.
Downloading the Cash App is the first step towards unlocking the full potential of your Cash App card. Whether you’re sending money to loved ones or making purchases, the Cash App provides a seamless and secure digital payment experience.
Now that you have the Cash App installed on your device and are logged in to your account, let’s move on to the next step: activating your Cash App card!
Step 2: Open the App and Login
After successfully downloading and installing the Cash App on your mobile device, it’s time to open the app and log in to your account. This step is essential to access the features and functionalities of the Cash App, including activating your Cash App card.
Locate the Cash App icon on your device’s home screen or app drawer and tap on it to open the application. Once you open the app, you will be greeted with the Cash App login screen. Enter the username or email address and password associated with your Cash App account.
If you have forgotten your login credentials, don’t worry. Cash App provides a simple password recovery process. Tap on the “Forgot Password?” option and follow the prompts to reset your password and gain access to your account.
Once you’ve entered your login credentials, tap on the “Sign In” or “Log In” button. The Cash App will verify your account information and grant you access to your account dashboard.
It’s important to ensure that you have a stable internet connection while logging in to prevent any delays or connectivity issues. If you encounter any difficulties during the login process, double-check your username and password for accuracy or try restarting your device.
Once you have successfully logged in to your Cash App account, you’re one step closer to activating your Cash App card and enjoying the convenient payment options it provides.
Now that you’re logged in to your Cash App account, let’s proceed to the next step: navigating to the “Cash Card” section to activate your Cash App card.
Step 3: Tap on the Profile Icon
Once you have successfully logged in to your Cash App account, the next step in activating your Cash App card is to tap on the profile icon. The profile icon is located in the upper-left corner of the Cash App home screen and is represented by a small person-shaped icon.
Tapping on the profile icon will open a menu that contains various options and settings for your Cash App account. It’s the central hub for managing your Cash App transactions, settings, and, most importantly, activating your Cash App card.
When you tap on the profile icon, you will see a list of different options such as “$Cashtag,” “Invite Friends,” “Cash Support,” and more. To activate your Cash App card, you need to select the “Cash Card” option from this menu.
Find and tap on the “Cash Card” option to proceed to the next step. This will take you to the dedicated section of the Cash App where you can manage and activate your Cash App card.
It’s worth noting that the profile icon is easily recognizable with its distinct shape and placement on the screen. However, if you’re having trouble locating it, take a moment to familiarize yourself with the Cash App home screen. Look for a small person-shaped icon in the upper-left corner, and you’ll be on the right track.
Once you’ve tapped on the profile icon and accessed the “Cash Card” section, you’re ready to move on to the next step: activating your Cash App card and unlocking its full potential.
Step 4: Choose “Cash Card”
After tapping on the profile icon and accessing the menu, the next step in activating your Cash App card is to choose the “Cash Card” option. This option is specifically designed to manage and customize your Cash App card, including the activation process.
Upon selecting the “Cash Card” option from the menu, you will be directed to a new screen that displays relevant information and settings related to your Cash App card.
In this section, you have access to various options such as ordering a new card, viewing transaction history, customizing your card, and, of course, activating your Cash App card.
Look for the “Activate Cash Card” option and tap on it to proceed with the card activation process. This option is easily identifiable with its clear label and is usually positioned prominently within the “Cash Card” section.
It’s important to note that the “Cash Card” section is specifically designed for managing and activating your Cash App card. If you accidentally select any other option or get redirected to a different screen, simply navigate back to the “Cash Card” section by tapping on the profile icon again.
By choosing the “Cash Card” option, you’re taking a significant step towards unlocking the functionality of your Cash App card. This section provides you with everything you need to activate and personalize your card to suit your preferences.
Now that you’ve successfully chosen the “Cash Card” option, let’s move on to the next step: the actual activation of your Cash App card.
Step 5: Select “Activate Cash Card”
After accessing the “Cash Card” section, the next step in activating your Cash App card is to select the “Activate Cash Card” option. This option will initiate the process of activating your physical Cash App card and linking it to your account.
Once you’re in the “Cash Card” section, take a moment to familiarize yourself with the available options and settings. Look for the “Activate Cash Card” button or option, which is usually displayed prominently on the screen.
Once you’ve located the “Activate Cash Card” option, tap on it to begin the card activation process. By selecting this option, you’re confirming your intention to activate your Cash App card and moving one step closer to enjoying its benefits.
After selecting “Activate Cash Card,” you may be prompted to provide additional information such as your card’s unique verification code (CVV), expiration date, or other necessary details. Be sure to have your Cash App card handy to input these details accurately and efficiently.
The “Activate Cash Card” option is specifically designed to streamline the card activation process and make it as simple as possible. Through this step, Cash App aims to ensure that your card is securely linked to your account and ready for use.
Once you’ve successfully selected “Activate Cash Card” and provided any required details, you’re ready to move forward and activate your Cash App card.
Keep in mind that the specific steps and screens you encounter may vary slightly based on your device and the version of the Cash App you’re using. However, Cash App is designed to be intuitive and user-friendly, so you should have no trouble navigating through the activation process.
Now that you’ve selected “Activate Cash Card,” let’s proceed to the next step: scanning the QR code on your Cash App card to complete the activation.
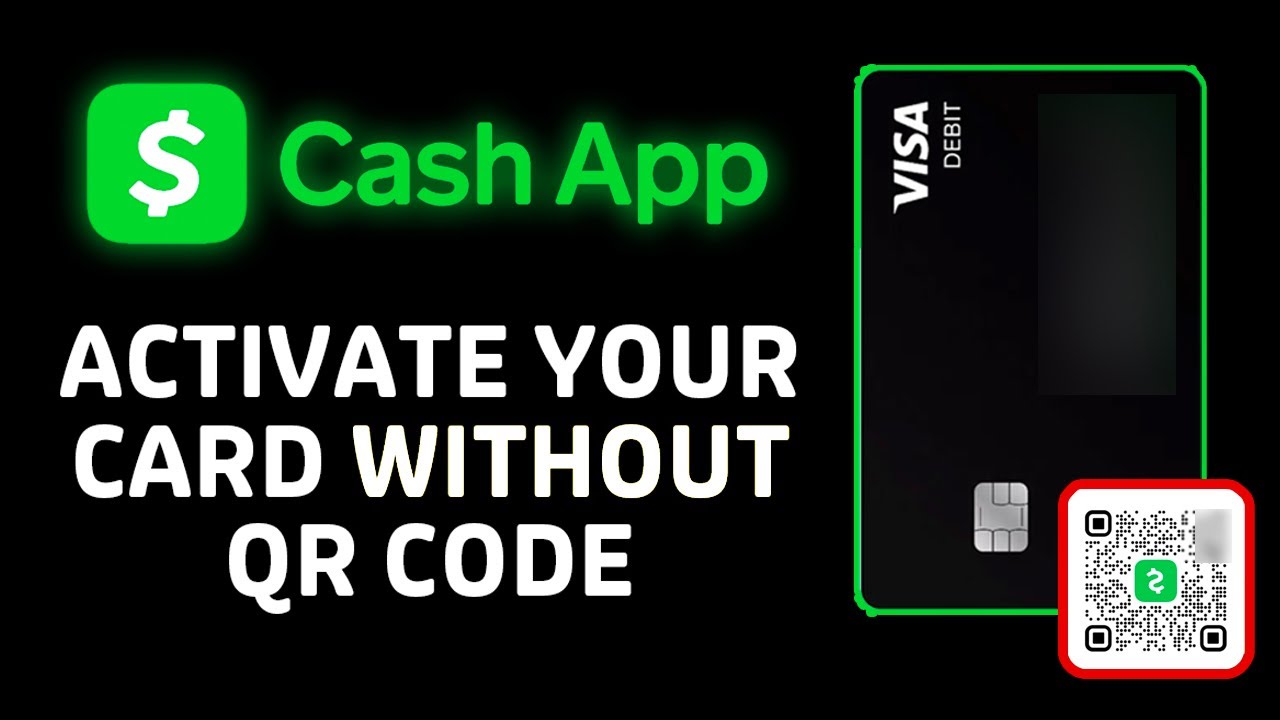
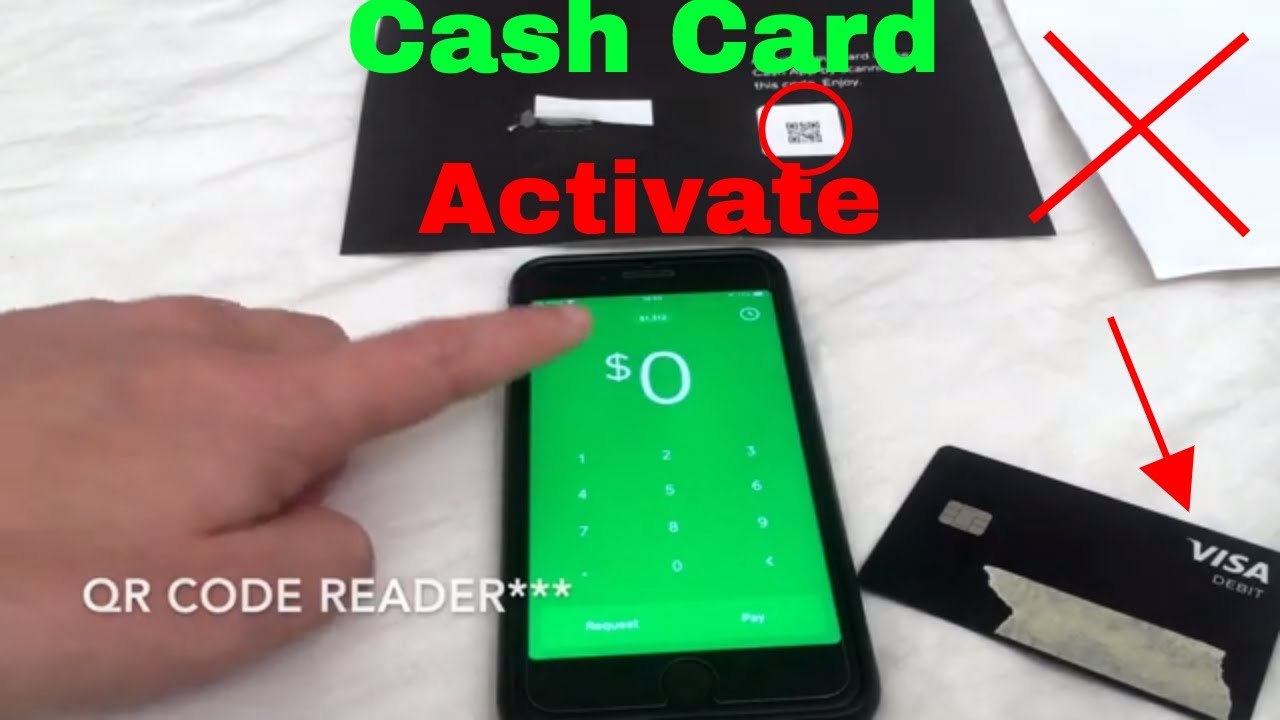
Step 6: Scan the QR Code
After selecting the “Activate Cash Card” option, the next step in activating your Cash App card is to scan the QR code. The QR code is a unique pattern of black squares arranged on your Cash App card, which contains essential information about your card and account.
To scan the QR code, you will need to grant the Cash App permission to access your device’s camera. This allows the app to capture and read the QR code accurately for verification purposes.
Once you’ve selected the “Activate Cash Card” option, the Cash App will prompt you to align the QR code within the provided frame on your device’s screen. Simply position your Cash App card in a well-lit area to ensure a clear and accurate scan.
When your card is properly aligned within the frame, the Cash App will automatically detect the QR code and capture it. The app will then process the information contained in the QR code to link your Cash App card to your account successfully.
It’s important to note that scanning the QR code is a crucial step in the activation process. It allows Cash App to verify the authenticity of your card and associate it with your account securely.
If, for any reason, you encounter difficulties in scanning the QR code, ensure that your camera is working correctly and that you have enabled camera permissions for the Cash App. Additionally, make sure that the QR code is well-lit and free of any obstructions or damage that could hinder the scanning process.
Once the Cash App successfully scans the QR code on your Cash App card, it will validate the information and proceed to the next step of the activation process. You’re now one step closer to completing the activation and enjoying the benefits of your Cash App card.
Now that you’ve successfully scanned the QR code, let’s move on to the next step: entering the CVV to verify your Cash App card.
Step 7: Enter the CVV
After scanning the QR code on your Cash App card, the next step in activating your card is to enter the CVV (Card Verification Value) number. The CVV is a three-digit number located on the back of your Cash App card, typically printed near the signature strip.
Once you’ve completed the QR code scan, the Cash App will prompt you to enter the CVV to verify your card. This additional layer of security ensures that you are the rightful owner of the card and helps prevent unauthorized use.
Take your Cash App card and turn it over to locate the CVV. You should see a three-digit number printed in a small font. Carefully enter this CVV number into the designated field within the Cash App application.
Double-check the CVV entry to ensure accuracy, as any incorrect input may lead to issues with the card activation process. Pay close attention to the numbers and make sure they match the CVV printed on your card.
If you are having difficulty locating the CVV or it is not visible on your Cash App card, contact Cash App customer support for assistance. They will guide you on how to proceed with your card activation process.
Entering the correct CVV is an essential step in the activation process, as it provides an extra layer of security for your Cash App card. Once you’ve successfully entered the CVV, you’re on your way to completing the activation and enjoying the features of your Cash App card.
Now that you’ve entered the CVV number, let’s proceed to the next step: personalizing your Cash App card.
Step 8: Personalize Your Card
After entering the CVV and verifying your Cash App card, the next step in the activation process is to personalize your card. Cash App allows you to add a touch of personalization to your card by customizing the design and adding your signature.
Once the verification process is complete, you will be given the option to choose from a selection of card designs. These designs may include various colors, patterns, or even custom images, allowing you to create a unique card that reflects your style and personality.
Select a design that resonates with you the most by tapping on the corresponding option. Take your time to explore the available designs and find one that you love.
In addition to choosing a card design, Cash App also provides the option to add your signature to the card. You can either draw your signature directly on your device’s screen or upload a pre-existing image of your signature.
Adding your signature not only adds a personal touch to your card but also helps verify your identity in case you need to present your card for in-person transactions. It’s an important step in enhancing the security and legitimacy of your Cash App card.
Remember, the personalization options are entirely optional. If you prefer a simple, classic design without adding a signature, you can choose to proceed without personalizing your card.
By personalizing your Cash App card, you can enjoy a card design that represents your unique style, making your card not only functional but also visually appealing.
After personalizing your Cash App card, you’re almost there! Let’s move on to the next step: accepting the terms and conditions to complete the activation process.
Step 9: Accept the Terms and Conditions
After personalizing your Cash App card, the next step in the activation process is to accept the terms and conditions. This important step ensures that you understand and agree to the terms set forth by Cash App for using their services and your Cash App card.
When activating your card, Cash App will present you with the terms and conditions that outline the rights, responsibilities, and limitations associated with your Cash App account and card. These terms may include important information on fees, transaction limits, liability, and other relevant policies.
It is essential to carefully read through the terms and conditions presented to you. Take the time to review and understand the various clauses and regulations that govern the usage of your Cash App card and the services offered by Cash App.
After you have read the terms and conditions, you will typically be required to accept them to proceed with the card activation process. This is usually done by checking a box or tapping on a button that indicates your consent and agreement to the terms.
By accepting the terms and conditions, you acknowledge that you understand and agree to the guidelines set by Cash App. It is crucial to ensure that you are comfortable with the terms presented before proceeding with the activation process.
If you have any questions or concerns regarding the terms and conditions, you can reach out to Cash App customer support for assistance. They will be able to provide clarification and address any inquiries you may have.
Once you have accepted the terms and conditions, you have completed an essential step in activating your Cash App card. Now, let’s move on to the final step: confirming the successful activation of your Cash App card.
Step 10: Card Activation Successful!
Congratulations! You have successfully activated your Cash App card. After going through the previous steps, your Cash App card is now linked to your account, ready to be used for various transactions and purchases.
By completing the card activation process, you have unlocked the full potential of your Cash App card. With it, you can now send and receive money with ease, make online purchases, and shop at physical stores that accept Visa debit cards.
Take a moment to appreciate your newly activated Cash App card. You now have a convenient, secure, and versatile payment solution at your fingertips.
Remember to keep your Cash App card in a safe place and ensure it is protected. Treat it as you would with any other payment card to prevent loss, theft, or unauthorized use.
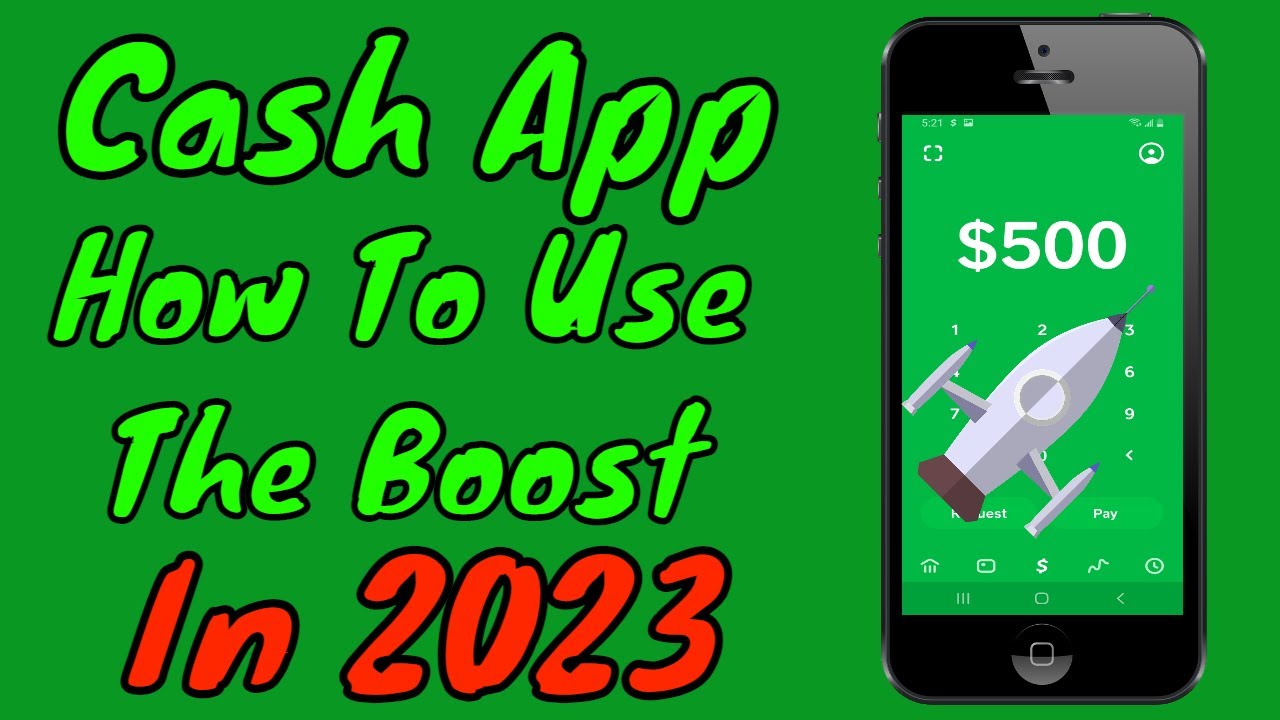
Now that your card is activated, you can explore the various features and functionalities of the Cash App, such as instant transfers, Cash Boost to earn rewards, and the ability to request a virtual card for online purchases.
Keep in mind that Cash App may introduce updates and new features periodically. Stay informed and update your app regularly to ensure you have access to the latest enhancements and security measures.
If you encounter any issues or have questions regarding your activated Cash App card, don’t hesitate to reach out to Cash App customer support. They are available to assist you and provide guidance on any concerns you may have.
Enjoy the convenience and simplicity that comes with using your Cash App card. From splitting bills with friends to making everyday purchases, your Cash App card is your new go-to payment method.
With your card successfully activated, you’re ready to embrace the digital payment revolution and enjoy the benefits of seamless transactions with Cash App.
Conclusion
Activating your Cash App card is a straightforward process that allows you to unlock the full potential of this convenient and versatile digital payment solution. By following the step-by-step instructions provided in this guide, you can seamlessly activate your card and start enjoying the benefits it offers.
Cash App empowers you with the ability to send and receive money, make purchases online and in stores, and enjoy the advantages of instant transfers and Cash Boost rewards. With your Cash App card, you have a secure and efficient payment method at your disposal.
Remember to download the Cash App and log in to your account, tap on the profile icon to access the “Cash Card” section, select “Activate Cash Card,” scan the QR code, enter the CVV, personalize your card, accept the terms and conditions, and confirm the successful activation.
Once your Cash App card is activated, make sure to keep it in a safe place and protect it as you would any other payment card. Be mindful of keeping your account credentials secure and regularly update the app to stay up-to-date with the latest features and security enhancements.
If you have any questions or encounter any difficulties during the card activation process or while using your Cash App card, do not hesitate to reach out to Cash App customer support. They are there to assist you and provide the necessary guidance.
Now that you have successfully activated your Cash App card, you can embrace the convenience and simplicity of digital payments. Enjoy sending money to friends and family, making purchases with ease, and experiencing the flexibility of your Cash App card.
So, what are you waiting for? Explore the features and benefits of your activated Cash App card and experience the seamless financial transactions it offers. Welcome to the world of Cash App!