Introduction
Welcome to the world of JVC Compact Camcorder Model No. GR-AXM231U! If you're a proud owner of this nifty device or are considering adding it to your collection, you've come to the right place. This article will guide you through the process of locating the charger port on your JVC Compact Camcorder and provide tips for properly plugging in the charger. Whether you're a tech enthusiast, a videography aficionado, or simply looking to capture life's precious moments, understanding the ins and outs of your camcorder is crucial for a seamless user experience.
The JVC Compact Camcorder Model No. GR-AXM231U is a versatile and user-friendly device designed to capture high-quality videos with ease. However, like any electronic gadget, it requires periodic charging to keep it powered up and ready for action. Understanding the location of the charger port and the proper method for plugging in the charger is essential for maintaining the functionality of your camcorder.
In the following sections, we will delve into the specifics of this process, providing clear and concise instructions to ensure that you can effortlessly power up your JVC Compact Camcorder whenever the need arises. So, let's embark on this enlightening journey and unravel the mysteries of the charger port on the JVC Compact Camcorder Model No. GR-AXM231U. By the end of this guide, you'll be equipped with the knowledge and confidence to keep your camcorder charged and ready to capture life's most memorable moments.
Understanding the JVC Compact Camcorder Model No. GR-AXM231U
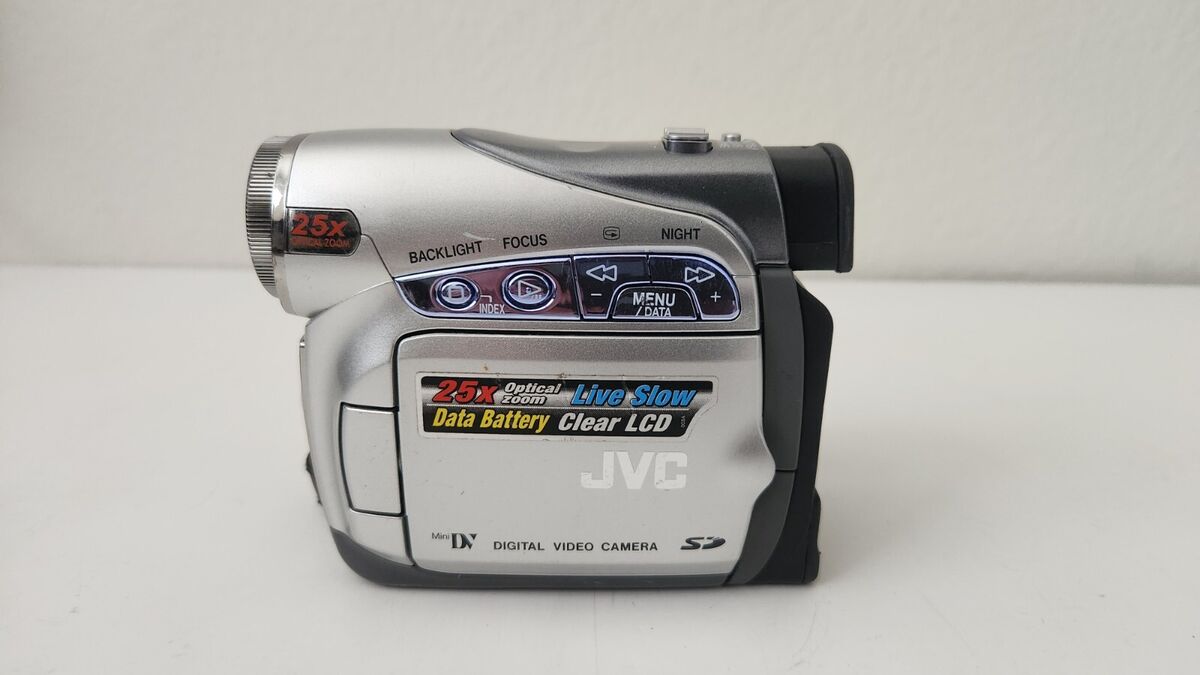
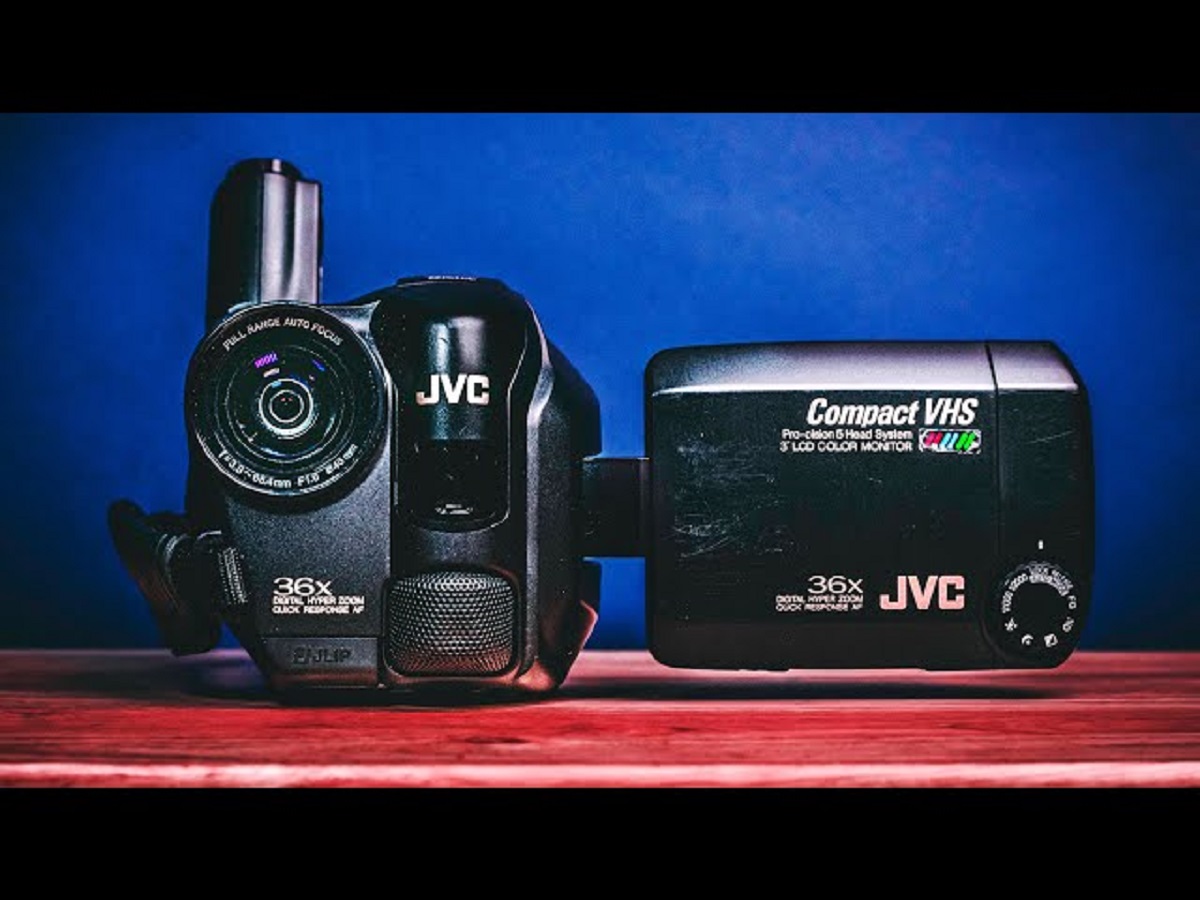
The JVC Compact Camcorder Model No. GR-AXM231U is a compact yet powerful device that offers users the ability to record high-quality videos in various settings. Boasting a user-friendly design and advanced features, this camcorder is a popular choice for both amateur videographers and seasoned professionals.
Equipped with a durable and ergonomic build, the GR-AXM231U is designed for portability and ease of use. Its compact size makes it convenient to carry and handle, while its intuitive controls and menu options ensure a seamless recording experience. The camcorder is equipped with a high-performance lens and image sensor, allowing users to capture crisp, clear footage in diverse lighting conditions.
One of the standout features of the GR-AXM231U is its versatile recording capabilities. Whether you’re documenting a family vacation, capturing live events, or creating video content for online platforms, this camcorder delivers impressive results. With adjustable settings for resolution, frame rate, and exposure, users have the flexibility to tailor their recordings to suit their specific needs.
Furthermore, the GR-AXM231U incorporates a range of connectivity options, enabling seamless transfer of footage to other devices for editing and sharing. Its compatibility with various video formats ensures that users can easily integrate their recordings into their preferred editing software or online platforms.
Overall, the JVC Compact Camcorder Model No. GR-AXM231U embodies the perfect balance of performance, portability, and user-friendly design. Its robust features and intuitive operation make it a valuable tool for capturing life’s memorable moments with exceptional clarity and detail.
Locating the Charger Port on the JVC Compact Camcorder
Before embarking on the exciting journey of capturing life’s precious moments with your JVC Compact Camcorder Model No. GR-AXM231U, it’s essential to familiarize yourself with the location of the charger port. The charger port is the gateway to keeping your camcorder powered up and ready for action, ensuring that you never miss a single memorable moment.
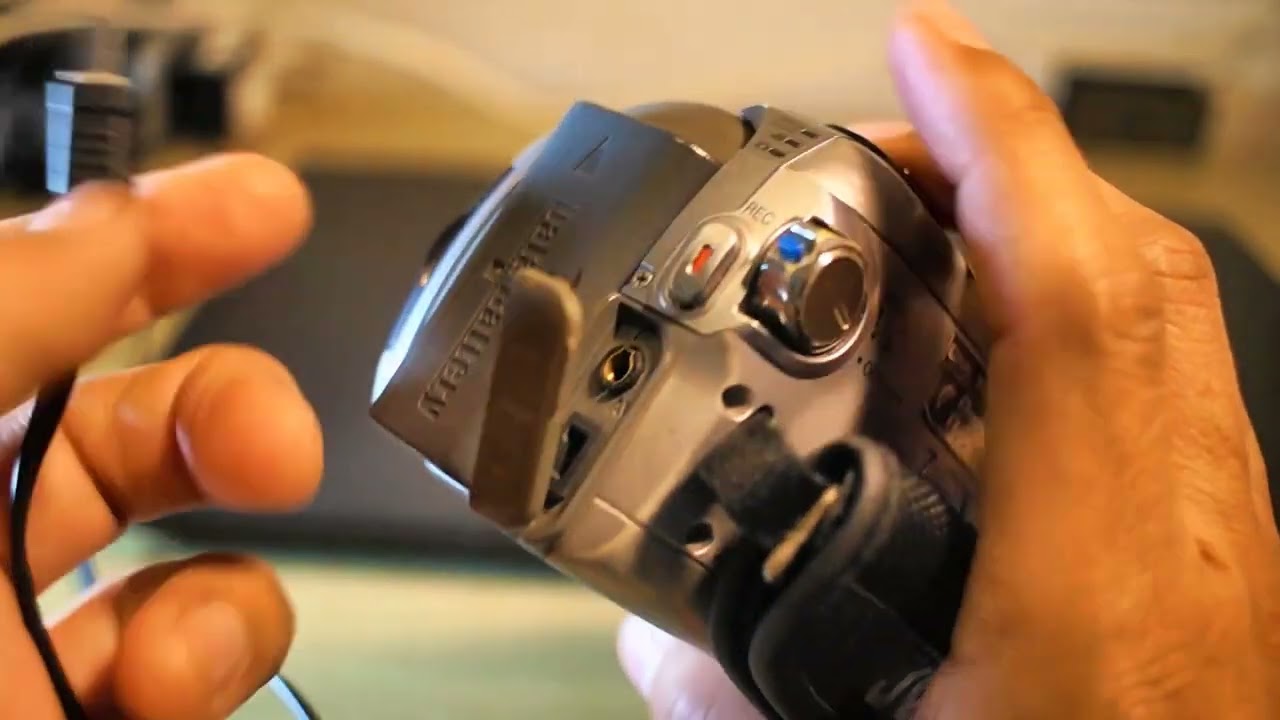
On the GR-AXM231U, the charger port is conveniently located on the rear or side panel of the camcorder, depending on the specific model variant. Typically, it is identified by a small, recessed opening that accommodates the charger plug. The placement of the charger port is designed for accessibility and ease of use, allowing users to connect the charger without any hassle.
When locating the charger port, it’s important to handle the camcorder with care, ensuring that you have a clear view of the rear and side panels. The charger port is often positioned alongside other input/output ports, such as the AV-out or HDMI ports, providing a centralized area for all external connections.
Additionally, the charger port may be accompanied by indicator lights or markings that help identify its precise location. These visual cues serve as helpful guides, especially in low-light conditions, ensuring that you can effortlessly plug in the charger without any guesswork.
Once you’ve located the charger port, take a moment to inspect its surroundings, ensuring that there are no obstructions that may hinder the insertion of the charger plug. Maintaining a clear and unobstructed access to the charger port is crucial for seamless charging and prevents any potential damage to the camcorder’s charging mechanism.
By familiarizing yourself with the precise location of the charger port on your JVC Compact Camcorder Model No. GR-AXM231U, you’ll be well-prepared to keep your device powered up and ready to capture life’s most memorable moments. Understanding the physical layout of the charger port sets the stage for the next crucial step: properly plugging in the charger.
Tips for Properly Plugging in the Charger
Now that you’ve located the charger port on your JVC Compact Camcorder Model No. GR-AXM231U, it’s time to delve into the essential tips for properly plugging in the charger. Ensuring a secure and correct connection is vital for the effective charging of your camcorder, so let’s explore the best practices for this crucial step.
- Align the Charger Plug: Before inserting the charger plug into the port, take a moment to align it correctly. The plug is designed to fit snugly into the charger port, and aligning it properly ensures a smooth and secure connection. Avoid applying excessive force when inserting the plug, as this may cause damage to the port or the plug itself.
- Gentle Insertion: When plugging in the charger, apply gentle and steady pressure to insert the plug into the port. It’s essential to avoid any sudden or jerky movements that may result in misalignment or damage. A smooth and controlled insertion process minimizes the risk of wear and tear on the charger port and plug.
- Visual Confirmation: Once the charger plug is inserted, visually confirm that it is seated securely in the port. Ensure that the plug is fully inserted and that there are no gaps between the plug and the port. This visual inspection provides assurance that the connection is established correctly.
- Stable Charging Surface: While the camcorder is being charged, place it on a stable and level surface to prevent any strain on the charger port. Avoid placing unnecessary pressure on the charger plug or port, as this can lead to potential damage over time. A stable charging surface ensures the longevity of the charging mechanism.
By adhering to these tips, you can confidently and effectively plug in the charger, ensuring that your JVC Compact Camcorder Model No. GR-AXM231U receives the power it needs to capture stunning videos and memories. Proper charging practices not only maintain the functionality of your camcorder but also contribute to its long-term durability, allowing you to enjoy countless recording opportunities without interruptions.
Conclusion
Congratulations! You’ve now gained valuable insights into the world of the JVC Compact Camcorder Model No. GR-AXM231U, from understanding its features to locating the charger port and mastering the art of properly plugging in the charger. Armed with this knowledge, you’re well-equipped to embark on your videography endeavors with confidence and proficiency.
By familiarizing yourself with the physical layout and functionality of the charger port, you’ve taken a crucial step towards ensuring that your camcorder remains powered up and ready to capture life’s most memorable moments. The seamless integration of the charger port into the camcorder’s design reflects JVC’s commitment to user-friendly functionality, allowing you to focus on your creative pursuits without the hassle of complicated charging procedures.
Remember, the proper care and maintenance of your JVC Compact Camcorder Model No. GR-AXM231U, including its charging mechanism, are essential for maximizing its longevity and performance. By adhering to the tips provided in this guide, you can ensure that your camcorder remains a reliable companion for all your videography endeavors, delivering exceptional results with every recording.
As you continue to explore the capabilities of your camcorder and unleash your creativity through video, the knowledge gained from this guide will serve as a valuable resource, empowering you to make the most of your recording experiences. Whether you’re documenting cherished family moments, capturing breathtaking landscapes, or pursuing professional videography projects, your JVC Compact Camcorder Model No. GR-AXM231U is poised to be your faithful companion, ready to bring your vision to life.
So, go ahead, charge up your camcorder, and let your creativity flow. With the charger port at your fingertips and the power of the GR-AXM231U at your command, the world of captivating videography awaits. Embrace the possibilities, capture the extraordinary, and cherish the moments—your JVC Compact Camcorder is ready to be your trusted partner in every frame.