Introduction
Introduction
Are you eager to share your stunning DSLR photos on social media or with friends, but find the process of transferring them to your iPhone a bit perplexing? Fear not, as this guide will walk you through the seamless process of transferring photos from your DSLR camera to your iPhone on a Mac. With just a few simple steps, you'll be able to effortlessly showcase your photography skills on your iPhone in no time.
Capturing breathtaking moments with a DSLR camera is a delightful experience, but the convenience of having these photos readily available on your iPhone cannot be overstated. Whether you want to edit them using your favorite apps, share them on social media, or simply have them at your fingertips, the ability to transfer DSLR photos to your iPhone opens up a world of possibilities.
In this guide, we will delve into the step-by-step process of connecting your DSLR camera to your Mac, importing the photos, and seamlessly transferring them to your iPhone. By the end of this tutorial, you'll be equipped with the knowledge and skills to effortlessly transfer your DSLR photos to your iPhone, allowing you to enjoy and showcase your stunning captures with ease.
Let's embark on this journey to simplify the process of transferring your cherished DSLR photos to your iPhone, and unlock the full potential of your photography prowess.
Step 1: Connect your DSLR camera to your Mac
Before you can begin transferring photos from your DSLR camera to your iPhone, the first step is to establish a connection between your DSLR camera and your Mac. This process typically involves using a USB cable to link the two devices. Follow these steps to ensure a successful connection:
- Turn off your DSLR camera: Before connecting your camera to your Mac, ensure that your camera is turned off. This precautionary step helps prevent any potential issues during the connection process.
- Locate the USB port on your DSLR: Depending on the model of your camera, the USB port may be located on the side or back of the camera. Once located, gently insert one end of the USB cable into the port on your DSLR camera.
- Connect the USB cable to your Mac: With the USB end of the cable securely inserted into your camera, take the other end and connect it to an available USB port on your Mac.
- Turn on your DSLR camera: Once the USB cable is connected to both your camera and Mac, turn on your DSLR camera. This action prompts your Mac to recognize the connected device and prepares it for the next steps in the transfer process.
Upon successfully completing these steps, your DSLR camera should now be connected to your Mac, establishing the essential link required to begin the photo transfer process. With this connection established, you are now ready to proceed to the next step of importing the photos from your camera to your Mac.
Step 2: Import photos to your Mac
After establishing the connection between your DSLR camera and Mac, the next vital step is to import the photos from your camera to your Mac. This process allows you to store and organize your cherished images on your computer before transferring them to your iPhone. Follow these steps to seamlessly import your photos:
- Open the Photos app: Launch the Photos app on your Mac. This application serves as the central hub for managing and organizing your photos on your computer.
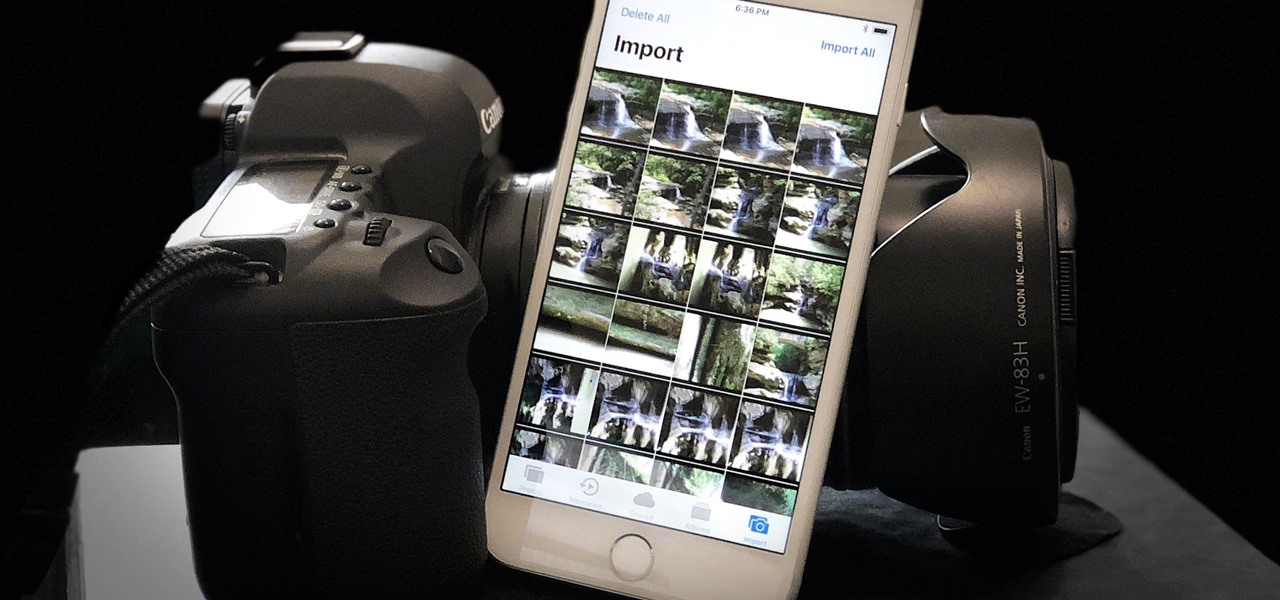
- Locate your connected DSLR camera: Within the Photos app, navigate to the “Import” tab, where you should see your connected DSLR camera listed. Click on the camera to access the photos stored on the device.
- Select the photos for import: Once you have accessed the photos on your DSLR camera, choose the specific images you wish to import to your Mac. You can select individual photos or opt to import all the photos at once.
- Initiate the import process: After selecting the desired photos, click on the “Import Selected” button to commence the transfer. Alternatively, you can choose “Import All New Photos” to import all the new photos from your camera to your Mac.
- Monitor the import progress: The Photos app will display the progress of the import process, allowing you to track the transfer of your photos to your Mac. Once the import is complete, the photos will be readily accessible within the Photos app on your computer.
By following these straightforward steps, you can effortlessly import your DSLR photos to your Mac, where they can be conveniently organized and prepared for the final step of transferring them to your iPhone. With your photos now safely stored on your Mac, you are ready to proceed to the next and final step of transferring them to your iPhone.
Step 3: Transfer photos to your iPhone
With your DSLR photos successfully imported to your Mac, the final step involves transferring these captivating images to your iPhone. This seamless process ensures that your photos are readily accessible on your iPhone, allowing you to share, edit, and enjoy them on-the-go. Follow these steps to effortlessly transfer your DSLR photos to your iPhone:
- Connect your iPhone to your Mac: Use a compatible Lightning cable to connect your iPhone to your Mac. This establishes a secure connection between the two devices, enabling the transfer of photos.
- Open the Photos app on your Mac: Launch the Photos app on your Mac to access the imported DSLR photos. This is where you will initiate the transfer process to your iPhone.
- Select the photos for transfer: Within the Photos app, choose the photos that you wish to transfer to your iPhone. You can select individual photos or opt to transfer entire albums, depending on your preferences.
- Drag and drop the photos to your iPhone: Once you have selected the photos, simply drag them over to your connected iPhone, which should be visible in the Photos app. Release the photos onto your iPhone to initiate the transfer process.
- Monitor the transfer progress: As the photos are being transferred, you can monitor the progress within the Photos app. Once the transfer is complete, the photos will be seamlessly available in the Photos app on your iPhone.
By following these uncomplicated steps, you can effortlessly transfer your DSLR photos from your Mac to your iPhone, ensuring that your captivating images are conveniently accessible on your mobile device. Whether you intend to share them with friends, edit them using your favorite apps, or simply admire your photography skills, having your DSLR photos on your iPhone opens up a world of possibilities for showcasing and enjoying your cherished images.
Conclusion
Embarking on the journey to transfer your cherished DSLR photos to your iPhone on a Mac has equipped you with the knowledge and skills to seamlessly bridge the gap between your professional photography and the convenience of your iPhone. By following the step-by-step process outlined in this guide, you have gained the ability to effortlessly transfer your captivating images, unlocking a world of possibilities for sharing, editing, and admiring your photography prowess.
Connecting your DSLR camera to your Mac, importing the photos, and seamlessly transferring them to your iPhone has now become a streamlined process, empowering you to showcase your stunning captures with ease. The convenience of having your DSLR photos readily accessible on your iPhone opens up a myriad of opportunities, whether you aim to share them with friends and family, edit them using your favorite apps, or simply marvel at your photography skills on-the-go.
As you continue to explore the realm of photography, the ability to effortlessly transfer your DSLR photos to your iPhone serves as a gateway to seamlessly integrating your professional captures into your digital lifestyle. This newfound skill not only simplifies the process but also enhances your ability to share and enjoy your photography in a manner that seamlessly aligns with your mobile-centric world.
Armed with this knowledge, you are now poised to embark on a seamless journey of transferring your DSLR photos to your iPhone on a Mac, unlocking the full potential of your photography and seamlessly integrating it into your digital endeavors.