Introduction
Welcome to the comprehensive guide on fixing a broken action camera LCD. If you've found yourself in the unfortunate situation of having a damaged LCD on your action camera, don't worry – this guide will walk you through the step-by-step process of replacing it. Whether your action camera is used for extreme sports, travel adventures, or capturing everyday moments, a broken LCD can be a major inconvenience. However, with a few tools and the right guidance, you can restore your action camera to its full functionality.
In the following sections, we will cover everything you need to know about assessing the damage, ordering the replacement LCD, and the tools required for the repair. We will then delve into the process of disassembling the action camera, removing the broken LCD, and installing the new one. Finally, we will guide you through testing the replacement and reassembling the action camera to ensure it's fully operational once again.
Whether you're an action camera enthusiast, a professional videographer, or simply a casual user, this guide is designed to help you navigate the repair process with ease. By following these instructions, you can save both time and money by performing the repair yourself, instead of seeking professional assistance or replacing the entire camera. Let's get started on restoring your action camera's LCD to its pristine condition.
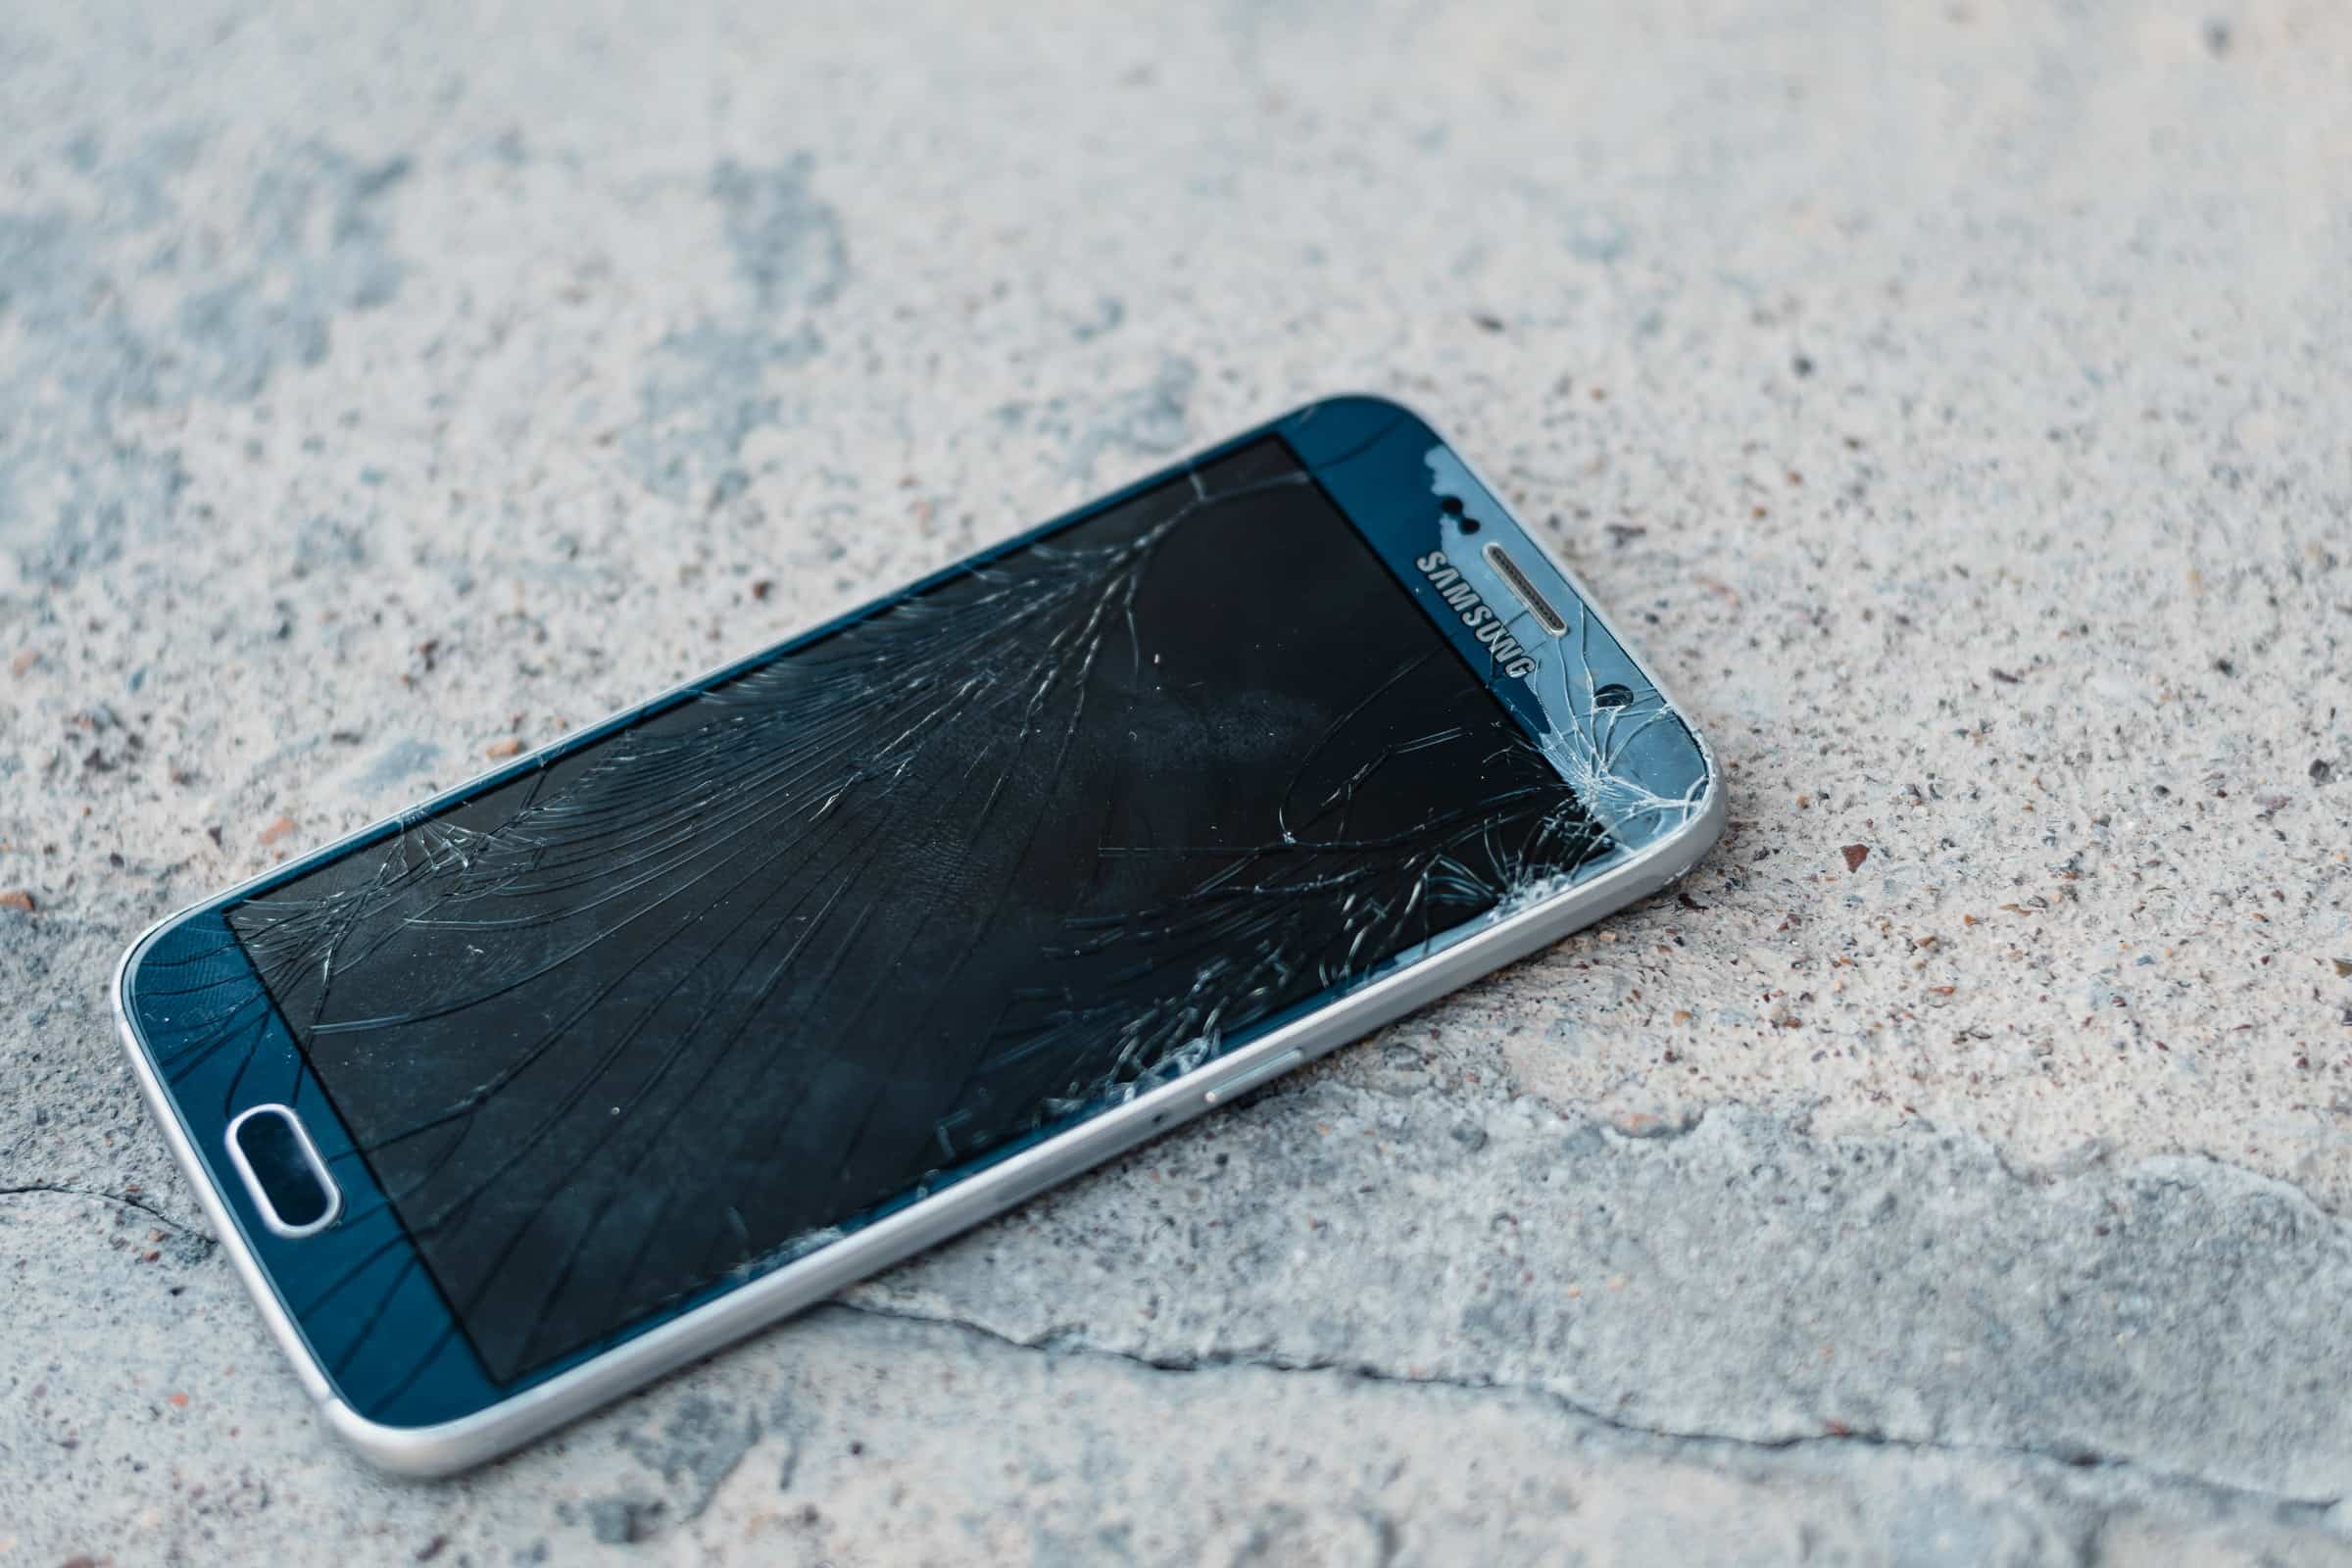
Assessing the Damage
Before embarking on the repair process, it’s crucial to assess the extent of the damage to your action camera’s LCD. Start by carefully examining the screen for any visible cracks, shattered glass, or areas of discoloration. Additionally, test the camera to determine if the LCD is responsive or if there are any display anomalies, such as flickering or dead pixels. By thoroughly evaluating the damage, you can accurately determine the necessary steps for the repair.
If the LCD is visibly cracked or shattered, it’s likely that the internal display components have been compromised, necessitating a full replacement. In cases of discoloration or display anomalies, the issue may be related to the LCD itself or the underlying circuitry. Understanding the specific nature of the damage will guide your subsequent actions and ensure that the repair process is tailored to address the identified issues.
Furthermore, consider the impact of the damage on the camera’s functionality. If the LCD is unresponsive or displays distorted images, it can significantly hinder your ability to capture and review footage effectively. This evaluation will underscore the importance of resolving the issue promptly and underscore the value of restoring the LCD to optimal working condition.
By thoroughly assessing the damage, you’ll gain a clear understanding of the repair requirements and be better equipped to proceed with confidence. This preparatory step sets the stage for the subsequent phases of ordering the replacement LCD, acquiring the necessary tools, and executing the repair process with precision.
Ordering the Replacement LCD
Once you have assessed the damage to your action camera’s LCD, the next crucial step is to order a suitable replacement LCD. To ensure a seamless repair process, it’s essential to obtain a high-quality replacement that is compatible with your specific camera model. Begin by identifying the make and model of your action camera, as well as the exact specifications of the damaged LCD. This information will serve as the basis for sourcing the correct replacement part.
When searching for a replacement LCD, consider reputable suppliers and manufacturers that specialize in action camera components. Online marketplaces, dedicated electronics retailers, and official brand websites are valuable resources for sourcing authentic replacement parts. It’s important to prioritize the authenticity and compatibility of the replacement LCD to guarantee optimal performance and seamless integration with your action camera.
Before making a purchase, carefully review the product specifications and compatibility details provided by the supplier. Verify that the replacement LCD is designed for your specific action camera model and that it meets the required technical standards. Additionally, consider customer reviews and ratings to gauge the reliability and performance of the replacement LCD before finalizing your purchase.
When ordering the replacement LCD, take note of the warranty, return policy, and after-sales support offered by the supplier. A reputable supplier will provide assurances regarding the quality and functionality of the replacement part, offering peace of mind and recourse in the event of any issues or discrepancies. Prioritizing these aspects will contribute to a positive and satisfactory experience when procuring the replacement LCD for your action camera.
By diligently researching and ordering the appropriate replacement LCD, you are laying the groundwork for a successful repair process. The acquisition of a high-quality replacement part is fundamental to restoring your action camera’s functionality and ensuring that the repair yields lasting results.
Tools Needed for the Repair
Before initiating the repair of your action camera’s LCD, it’s essential to gather the requisite tools to facilitate a smooth and efficient repair process. Equipping yourself with the right tools will not only streamline the repair but also contribute to the overall safety and precision of the procedure. Here’s a comprehensive list of the essential tools you’ll need:
- Small Screwdriver Set: A precision screwdriver set with various interchangeable heads is indispensable for accessing and disassembling the internal components of the action camera.
- Plastic Opening Tools: Non-conductive and non-marring plastic tools are ideal for prying open the camera’s casing without causing damage or scratches.
- Tweezers: Fine-pointed tweezers aid in handling small components and delicate connectors within the camera housing.
- Anti-Static Wrist Strap: To prevent electrostatic discharge that could potentially damage sensitive electronic components, an anti-static wrist strap is recommended to ground yourself during the repair process.
- Cleaning Cloth: A soft, lint-free cloth is essential for wiping down components and surfaces as well as maintaining cleanliness throughout the repair.
- Replacement Adhesive Strips: Depending on the camera model, adhesive strips or adhesive-backed foam may be required to secure the new LCD in place within the housing.
- Heat Gun or Hair Dryer (Optional): In some cases, gentle heat may be necessary to soften adhesive for the safe removal of the old LCD.
It’s important to ensure that the workspace is well-lit, clean, and organized to prevent misplacement of small components and facilitate a methodical approach to the repair. Additionally, having a container or tray to organize and store the removed screws and components can prevent loss and confusion during the disassembly process.
By assembling the necessary tools and preparing the work environment, you’ll be poised to approach the repair with confidence and precision. These tools are instrumental in executing a successful LCD replacement, allowing you to restore your action camera to optimal working condition with efficiency and care.
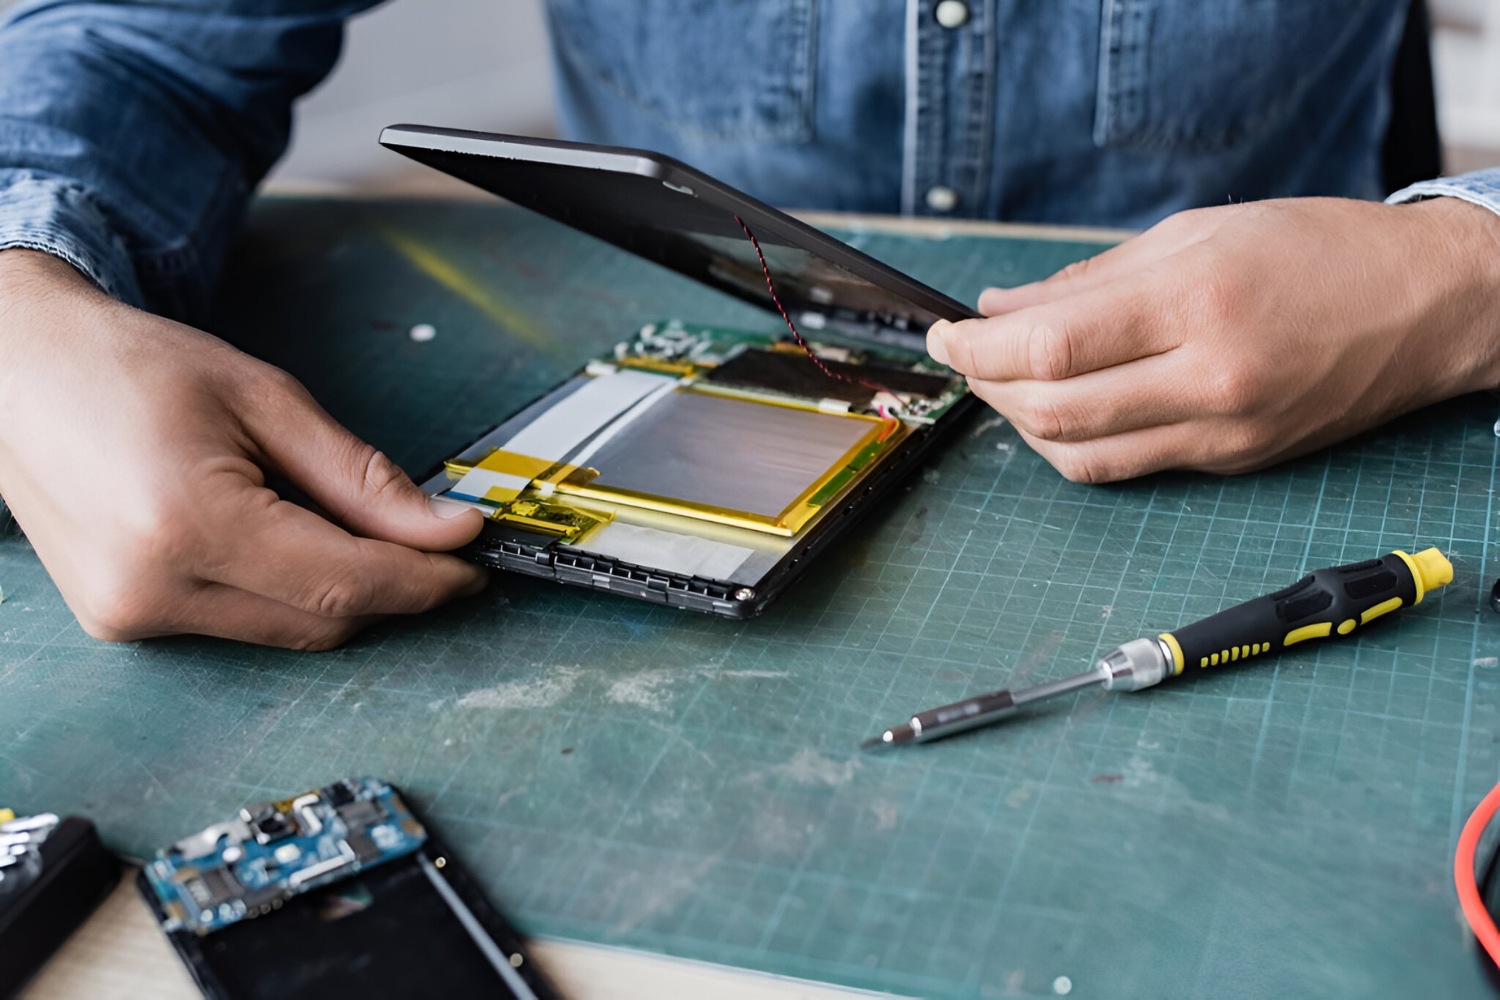
Disassembling the Action Camera
Disassembling an action camera to access the LCD for replacement requires a methodical approach and careful attention to detail. Before initiating the disassembly process, it’s crucial to ensure that the camera’s battery is removed to prevent any electrical mishaps. Here’s a step-by-step guide to disassembling the action camera:
- Prepare the Workspace: Find a clean, well-lit workspace and lay down a soft cloth to prevent scratches on the camera’s exterior. Organize the necessary tools and have a container ready to store removed screws and components.
- Remove the Outer Casing: Using the appropriate screwdriver from your set, carefully remove the screws securing the outer casing of the action camera. Keep the screws organized and set them aside for reassembly.
- Separate the Casing: Gently pry open the camera’s casing using non-conductive plastic opening tools, taking care not to force or damage the casing. Work your way around the edges, releasing the clips or adhesive holding the casing together.
- Locate the LCD Housing: Once the casing is removed, locate the housing that encases the LCD within the camera. Take note of any additional screws or fasteners securing the housing in place.
- Disconnect Internal Components: As you access the interior of the camera, carefully disconnect any ribbon cables, flex connectors, or other components that obstruct access to the LCD housing. Use tweezers or your fingers, ensuring gentle and deliberate handling to avoid damage.
- Access the LCD: With the internal components and connectors detached, you can now access the LCD housing. Depending on the camera model, additional steps may be required to fully expose the LCD for replacement.
Throughout the disassembly process, it’s essential to maintain a patient and methodical approach, taking care to document the sequence of removed components and fasteners. This documentation will aid in the reassembly phase and prevent confusion or misplacement of parts. Additionally, be mindful of the camera’s internal circuitry and delicate components, handling them with the utmost care and caution.
By following these steps, you can effectively disassemble your action camera and gain access to the LCD for replacement. This preparatory phase sets the stage for the subsequent removal of the broken LCD and the installation of the new replacement, advancing you further toward the successful repair of your action camera.
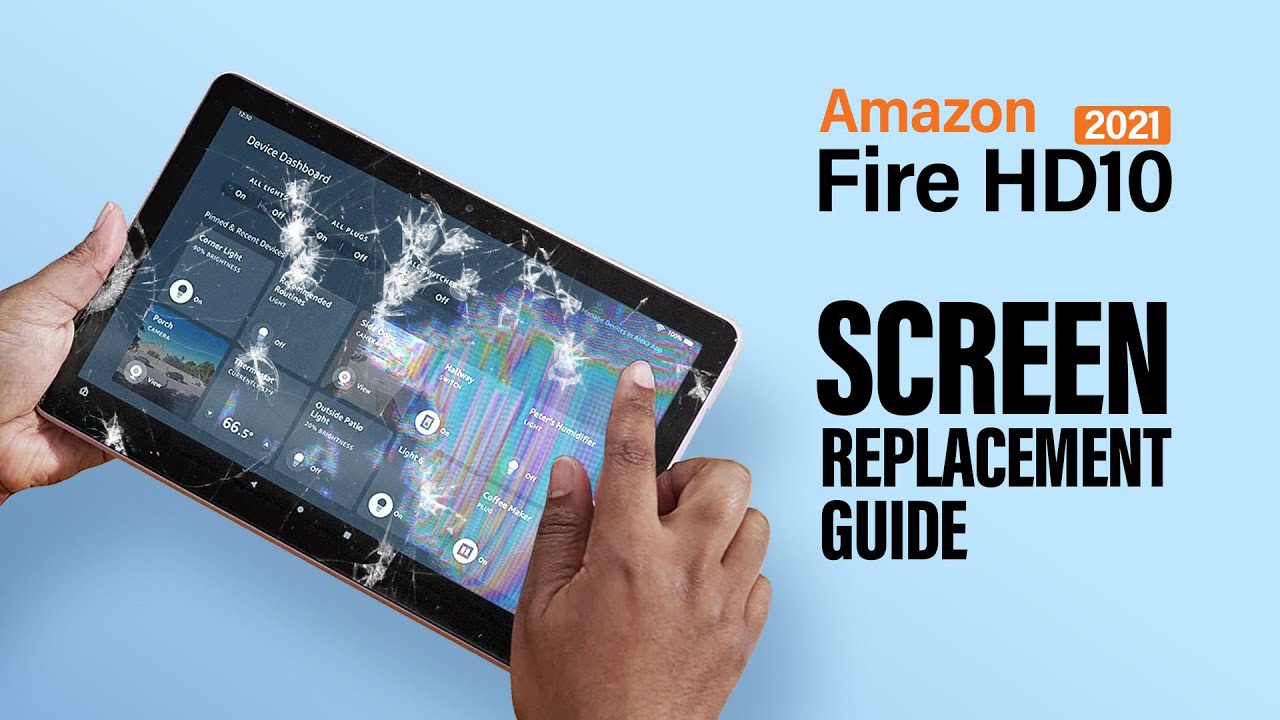
Removing the Broken LCD
With the action camera disassembled and the LCD housing accessible, the next critical step in the repair process is the careful removal of the broken LCD. This phase requires precision and attentiveness to avoid causing damage to the surrounding components and ensure a smooth transition to installing the replacement LCD. Here’s a detailed guide to removing the broken LCD from your action camera:
- Assess the Mounting Mechanism: Examine the method by which the broken LCD is secured within the housing. Depending on the camera model, the LCD may be held in place by screws, adhesive, or a combination of both.
- Unfasten Mounting Hardware: If the LCD is secured by screws, carefully remove them using the appropriate screwdriver. Keep the screws organized and set them aside for later reassembly.
- Release Adhesive Bond (If Applicable): In cases where adhesive secures the LCD, gently warm the adhesive using a heat gun or hair dryer set to a low, controlled temperature. This softens the adhesive, making it easier to detach the LCD without causing damage to the housing or surrounding components.
- Detach the Broken LCD: Once the mounting hardware or adhesive is addressed, carefully lift the broken LCD from its housing, taking care to avoid applying excessive force or causing undue strain on the surrounding components and connectors.
- Handle with Care: Throughout the removal process, handle the broken LCD with caution to prevent injury and avoid spreading broken glass or damaged components. Utilize tweezers or carefully support the LCD from the edges to minimize direct contact.
- Clean the Housing: After removing the broken LCD, take a moment to clean the housing and surrounding areas, removing any residual adhesive or debris that may impede the installation of the replacement LCD.
It’s crucial to exercise patience and precision during the removal of the broken LCD, as mishandling or oversight can lead to further damage and complicate the installation of the replacement part. By following these steps, you can safely and effectively remove the broken LCD, setting the stage for seamlessly integrating the new replacement LCD into your action camera.
Installing the New LCD
With the broken LCD successfully removed, the installation of the new LCD is a pivotal phase in the repair process. This step demands precision, care, and attention to detail to ensure that the replacement LCD is seamlessly integrated into the action camera, restoring its functionality and visual display. Here’s a comprehensive guide to installing the new LCD:
- Prepare the Replacement LCD: Prior to installation, carefully inspect the new LCD to ensure that it is free from defects and damage. Verify that the dimensions and connector layout match the original LCD, confirming its compatibility with your action camera model.
- Clean the Housing: Before installing the new LCD, ensure that the housing and surrounding areas are clean and free from debris or adhesive residue. A lint-free cloth can be used to gently wipe down the interior of the housing, promoting a secure and pristine environment for the replacement LCD.
- Position the Replacement LCD: Align the replacement LCD with the corresponding connectors and mounting points within the housing. Exercise caution to avoid applying excessive pressure or misaligning the LCD during positioning.
- Secure the Replacement LCD: If the replacement LCD utilizes mounting screws, carefully fasten them to secure the LCD within the housing. Ensure that the screws are tightened to the appropriate level, maintaining a secure yet non-restrictive hold on the LCD.
- Adhere the Replacement LCD (If Applicable): In cases where adhesive strips or adhesive-backed foam are used to secure the LCD, carefully apply them to the designated areas within the housing, following any provided guidelines or alignment markers to ensure proper positioning.
- Reconnect Internal Components: With the replacement LCD securely in place, re-establish any disconnected ribbon cables or flex connectors, ensuring that they are aligned and seated correctly to facilitate the proper function of the new LCD.
Throughout the installation process, it’s essential to maintain a gentle touch and deliberate movements, avoiding abrupt actions that could potentially damage the replacement LCD or the internal components of the action camera. By following these steps with precision and care, you can effectively install the new LCD, bringing your action camera one step closer to full functionality and visual clarity.
Testing the Replacement
Following the installation of the new LCD, it’s imperative to conduct thorough testing to ensure that the replacement has been successfully integrated and that the action camera’s display functions optimally. This phase serves as a critical validation of the repair, providing the opportunity to identify and address any potential issues before reassembling the camera. Here’s a comprehensive guide to testing the replacement LCD:
- Power On the Camera: Reinsert the camera’s battery and power on the device to initiate the display. Observe the new LCD for any signs of responsiveness, including the appearance of the camera’s interface, icons, and visual elements.
- Verify Display Quality: Assess the clarity, brightness, and color accuracy of the replacement LCD. Look for any irregularities such as dead pixels, flickering, or aberrations that may indicate underlying issues with the replacement or its integration.
- Test Functionality: Navigate through the camera’s menu and settings to evaluate the responsiveness and functionality of the new LCD. Verify that touch functionality (if applicable) operates as expected and that all display elements are fully functional.
- Check for Artifacts: Examine the display for any artifacts, anomalies, or artifacts that may indicate improper installation or compatibility issues. Pay close attention to the entire visual area of the LCD to detect any irregularities.
- Assess Viewing Angles: Evaluate the visibility and clarity of the LCD from various viewing angles to ensure that the display maintains consistent quality and legibility across different perspectives.
- Test Under Different Conditions: Assess the performance of the replacement LCD under varied lighting conditions, including bright sunlight and low-light environments, to gauge its visibility and adaptability to different scenarios.
During the testing phase, it’s essential to document any observed issues, anomalies, or irregularities for further assessment and potential resolution. This documentation will inform any necessary adjustments or additional steps required to ensure the optimal performance of the replacement LCD.
By meticulously testing the replacement LCD, you can verify its functionality and quality, paving the way for the successful reassembly of the action camera. This thorough evaluation serves as a crucial checkpoint in the repair process, confirming the effectiveness of the replacement and setting the stage for the camera’s restoration to full operational capacity.
Reassembling the Action Camera
With the successful testing of the replacement LCD, the final phase of the repair process involves reassembling the action camera to restore its complete functionality and structural integrity. Reassembly demands meticulous attention to detail and a methodical approach to ensure that all components are securely and correctly integrated. Here’s a detailed guide to reassembling your action camera:
- Refer to Documentation: If you documented the disassembly process, refer to your notes or images to guide the reassembly, ensuring that each component is returned to its original position.
- Reconnect Internal Components: Carefully reattach any ribbon cables, flex connectors, or internal components that were disconnected during the disassembly, ensuring that they are aligned and seated securely.
- Position the Replacement LCD: Place the replacement LCD within the housing, aligning it with the corresponding connectors and mounting points. Ensure that the LCD is seated evenly and securely without applying excessive force.
- Secure the Housing: If the housing utilizes clips or fasteners, carefully reassemble and secure the housing, ensuring that it is aligned and seated flush with the camera’s body. If screws were removed, use the appropriate screwdriver to reinsert and tighten them securely.
- Replace the Outer Casing: Align the outer casing with the camera’s body and carefully press it into position, ensuring that any clips or fasteners engage securely. If screws were removed, reinsert and tighten them to secure the outer casing.
- Test Functionality: Once the camera is reassembled, power it on and verify that the replacement LCD functions as expected, displaying the camera’s interface clearly and responsively.
Throughout the reassembly process, it’s essential to maintain a patient and deliberate approach, avoiding rushed actions that could lead to misalignments or overlooked components. Carefully review each step to ensure that the reassembly is executed with precision and attention to detail.
By methodically reassembling the action camera, you can conclude the repair process with confidence, knowing that the replacement LCD has been seamlessly integrated and that the camera is fully operational once again. This meticulous reassembly sets the stage for the continued enjoyment and reliable performance of your action camera.