Introduction
So, you've got your Yi 4K Action Camera and you're ready to capture some incredible footage. But if you want to take your videos to the next level, you might want to consider adding an external microphone to improve the audio quality. Whether you're vlogging, recording interviews, or capturing the sounds of nature on your outdoor adventures, an external mic can make a world of difference in the audio clarity of your recordings.
In this guide, we'll walk you through the process of adding an external mic to your Yi 4K Action Camera. We'll cover everything from checking compatibility to adjusting camera settings, so you can start capturing high-quality audio to complement your stunning visuals. With the right external mic and proper setup, you can elevate the overall production value of your videos and provide your audience with a more immersive viewing experience.
Adding an external mic to your Yi 4K Action Camera may seem daunting at first, but with the right guidance, you'll be up and running in no time. Let's dive into the steps and explore how you can seamlessly integrate an external microphone to enhance the audio quality of your Yi 4K Action Camera recordings.
Step 1: Check Compatibility
Before you rush out to purchase an external microphone for your Yi 4K Action Camera, it’s crucial to ensure that the microphone you choose is compatible with your device. Not all external mics are designed to work seamlessly with every camera, so taking the time to verify compatibility is essential to avoid any potential issues down the line.
Start by consulting the user manual or the official website of the Yi 4K Action Camera to identify the types of external microphones that are supported. Some cameras may have specific requirements for the type of microphone input they can accommodate, such as a 3.5mm TRS or TRRS jack. Understanding these specifications will help you narrow down your options and select a microphone that is tailored to work with your camera.
If you’re unsure about the compatibility of a particular microphone, consider reaching out to the manufacturer or a knowledgeable retailer for assistance. Additionally, online forums and community groups can be valuable resources for gathering insights from other users who have successfully integrated external microphones with their Yi 4K Action Cameras.
Keep in mind that some external microphones may require additional adapters or cables to connect to your camera effectively. Take note of any supplementary accessories that may be necessary for the microphone to function optimally with your Yi 4K Action Camera, and ensure that you have all the required components before proceeding to the next steps.
By verifying compatibility and understanding the specific requirements of your Yi 4K Action Camera, you’ll be well-equipped to make an informed decision when selecting an external microphone that seamlessly integrates with your device, setting the stage for a smoother and more successful setup process.
Step 2: Choose the Right External Mic
When it comes to selecting an external microphone for your Yi 4K Action Camera, the market offers a wide array of options, each tailored to different recording scenarios and preferences. To make an informed decision, consider the specific use cases for which you intend to use the microphone, as well as the environmental conditions in which you’ll be filming.
If you’re primarily capturing interviews or vlogs in controlled indoor settings, a lavalier microphone, also known as a lapel mic, may be a suitable choice. These compact microphones can be discreetly clipped to clothing and are designed to capture clear and focused audio, making them ideal for capturing dialogue in quiet environments.
For outdoor adventures and action-packed footage, a shotgun microphone could be the perfect fit. Shotgun mics are known for their directional pickup pattern, which helps isolate the sound source in front of the camera while minimizing background noise. This makes them well-suited for recording in noisy or windy conditions, allowing you to capture crisp audio even in challenging environments.
If you’re looking for versatility and mobility, a handheld or clip-on microphone may be the way to go. These types of microphones offer flexibility in how they can be used, allowing you to adapt to different recording situations with ease. Additionally, some handheld microphones feature built-in wind protection, which can be advantageous when filming in outdoor settings.
Consider the microphone’s connectivity as well. Ensure that it is compatible with the input requirements of your Yi 4K Action Camera, whether it utilizes a 3.5mm TRS or TRRS jack. Some microphones may also offer wireless connectivity options, providing freedom of movement and reducing cable clutter during filming.
Lastly, take into account the microphone’s build quality, durability, and any additional features that may enhance its performance, such as adjustable gain controls, low-cut filters, or built-in shock mounts to minimize handling noise. By carefully evaluating these factors, you can choose an external microphone that aligns with your specific recording needs and complements the capabilities of your Yi 4K Action Camera.
Step 3: Connect the External Mic to Yi 4K Action Camera
Once you’ve chosen the right external microphone for your Yi 4K Action Camera, the next step is to connect it to your device. The process may vary depending on the type of microphone you’ve selected, but the general principles remain consistent.
Begin by locating the microphone input port on your Yi 4K Action Camera. Typically, this port is a 3.5mm TRS or TRRS jack located either on the camera body or within an external housing, depending on the specific model of the camera. Carefully inspect the port to ensure it is free from any debris or obstructions that could interfere with the connection.
If your chosen microphone requires any adapters or cables to interface with the camera, ensure that these components are readily available and compatible with both the microphone and the camera. Some microphones may come with specialized cables or connectors designed to facilitate seamless integration with specific camera models, so refer to the microphone’s documentation for guidance on the connection process.
Once you have the necessary components, gently insert the microphone’s connector into the designated input port on your Yi 4K Action Camera. Exercise caution to avoid applying excessive force or causing any damage to the camera’s input jack. A secure and snug connection is essential to ensure reliable audio transmission during filming.
After connecting the external microphone, perform a brief physical inspection to confirm that the connection is secure and that the microphone is properly aligned with the camera. If the microphone features any adjustable settings, such as gain levels or directional controls, take a moment to configure these settings according to your recording environment and audio requirements.
Before proceeding to the next steps, it’s advisable to conduct a brief test to verify that the Yi 4K Action Camera recognizes the external microphone and that audio is being captured as intended. This can be accomplished by initiating a test recording and monitoring the audio input levels to ensure that the microphone is functioning correctly and delivering the desired audio quality.
By successfully connecting the external microphone to your Yi 4K Action Camera, you’ve taken a significant stride toward enhancing the audio capabilities of your device, setting the stage for improved sound capture and enriched storytelling in your video productions.
Step 4: Adjust Settings on Yi 4K Action Camera
With the external microphone successfully connected to your Yi 4K Action Camera, it’s essential to configure the camera settings to optimize the audio recording process. By fine-tuning the camera’s audio settings, you can ensure that the external microphone is leveraged to its full potential, resulting in high-quality audio that complements your video footage.
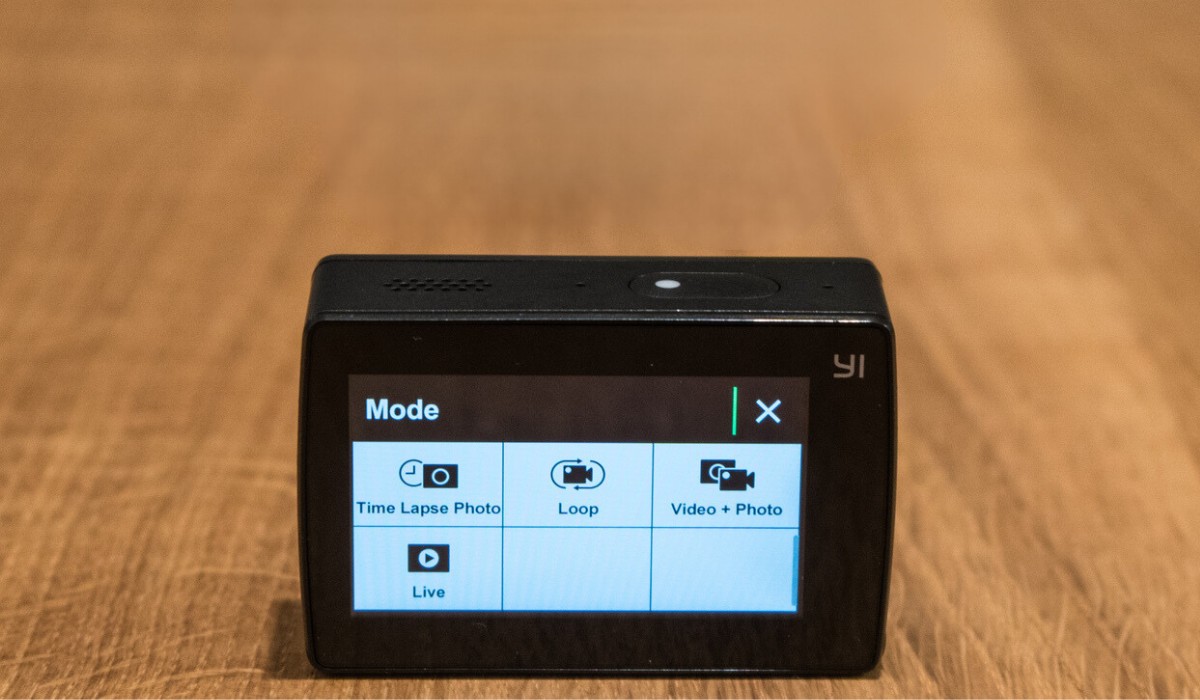
Access the camera’s settings menu, typically accessible through the camera’s interface or a dedicated mobile app, and navigate to the audio or microphone settings section. Depending on the model of the Yi 4K Action Camera, you may find a range of adjustable parameters that can influence the audio recording process.
Begin by checking the microphone input settings to confirm that the camera is set to receive audio input from the external microphone rather than the built-in microphone. This step is crucial to ensure that the camera prioritizes the audio captured by the external microphone, thereby avoiding unintentional reliance on the internal microphone.
Adjust the microphone gain or sensitivity settings to optimize the audio input levels based on your recording environment. If the camera offers manual control over the microphone gain, take advantage of this feature to fine-tune the audio input levels according to the volume of the sound source and the desired signal-to-noise ratio. This can help prevent audio clipping or excessive background noise from compromising the recording quality.
Explore any additional audio processing features that may be available on your Yi 4K Action Camera, such as wind noise reduction, equalization presets, or audio monitoring capabilities. These settings can significantly enhance the overall audio recording experience and contribute to capturing clear, balanced, and immersive sound.
Consider the camera’s video recording settings as well, as they can indirectly impact the audio recording process. For instance, if you plan to shoot in a high-frame-rate mode for slow-motion footage, be mindful of the potential impact on the camera’s audio processing capabilities and adjust the settings accordingly to maintain optimal audio performance.
After making the necessary adjustments, conduct a brief test recording to evaluate the impact of the settings on the audio quality. Monitor the audio input levels, listen for any potential distortions or anomalies, and ensure that the external microphone is effectively capturing the desired audio with clarity and fidelity.
By fine-tuning the settings on your Yi 4K Action Camera to accommodate the external microphone, you’re taking proactive steps to optimize the audio recording process and harness the full potential of your equipment, paving the way for professional-quality audio to complement your captivating visuals.
Step 5: Test the External Mic
Before embarking on your filming endeavors with the Yi 4K Action Camera and the newly integrated external microphone, it’s imperative to conduct thorough testing to ensure that the audio recording setup meets your expectations and delivers the desired results. Testing the external microphone allows you to identify any potential issues, fine-tune the audio settings, and familiarize yourself with the microphone’s performance characteristics.
Choose a controlled environment for the initial testing phase, preferably a quiet and acoustically neutral space that allows you to focus on the nuances of the audio captured by the external microphone. This controlled setting provides a baseline for evaluating the microphone’s performance without the influence of external factors that could obscure the assessment.
Initiate a test recording with your Yi 4K Action Camera, paying close attention to the audio input levels and the clarity of the captured sound. Speak into the microphone at varying distances and angles to gauge its sensitivity and directional characteristics, ensuring that it accurately captures your voice without distortion or excessive background noise.
Experiment with different audio settings on the camera, such as microphone gain levels, wind noise reduction, and equalization presets, to assess their impact on the recorded audio. Take note of any adjustments that yield noticeable improvements in audio quality and make note of the settings that best align with your recording preferences.
If your filming activities often involve movement or dynamic scenarios, consider conducting a mobility test to evaluate the microphone’s ability to maintain consistent audio quality while the camera is in motion. This test can help you gauge the microphone’s resilience to handling noise and its capacity to capture clear audio during active filming situations.
Following the initial testing phase, review the recorded audio footage on a suitable playback device to critically assess the audio quality and identify any areas that may require further refinement. Listen for any unwanted artifacts, background noise, or inconsistencies in the audio, and take note of any specific recording conditions that may have influenced the microphone’s performance.
Engage in real-world testing by simulating the typical filming scenarios in which you intend to use the Yi 4K Action Camera and the external microphone. This may involve capturing footage in outdoor settings, noisy environments, or scenarios that reflect your primary filming objectives, allowing you to evaluate how the microphone performs in practical filming conditions.
By thoroughly testing the external microphone in various scenarios and settings, you can gain valuable insights into its capabilities, limitations, and optimal operating parameters, empowering you to leverage the microphone effectively in your video productions and achieve exceptional audio quality that enhances the overall impact of your visual storytelling.
Conclusion
Adding an external microphone to your Yi 4K Action Camera can significantly elevate the quality of your video productions by enhancing the audio clarity and immersiveness of your recordings. Through the careful selection of a compatible external microphone and the seamless integration process, you’ve taken a crucial step toward enriching the audiovisual experience for your audience.
By checking the compatibility of the microphone with your Yi 4K Action Camera and choosing a microphone tailored to your recording needs, you’ve ensured that the audio setup aligns with your specific filming objectives. Connecting the external microphone to the camera and adjusting the audio settings have equipped you with the tools to optimize the audio recording process and capture high-quality sound that complements your visuals.
Thoroughly testing the external microphone in controlled and real-world scenarios has provided valuable insights into its performance characteristics, allowing you to fine-tune the setup and familiarize yourself with the microphone’s capabilities. This comprehensive testing phase has empowered you to leverage the external microphone effectively and achieve exceptional audio quality in your video productions.
As you venture into your filming endeavors with the enhanced audio capabilities of your Yi 4K Action Camera, remember that the integration of an external microphone opens up new creative possibilities and enables you to capture captivating audiovisual content that resonates with your audience. Whether you’re documenting your adventures, conducting interviews, or crafting compelling vlogs, the addition of an external microphone enriches the storytelling experience and elevates the overall production value of your videos.
With the right external microphone seamlessly integrated with your Yi 4K Action Camera, you’re poised to embark on a journey of creating immersive, high-fidelity audiovisual content that captivates and engages your viewers, setting the stage for a dynamic and compelling storytelling experience.


